It was 4:30 PM on Labor Day, and my brain was already on the couch. I’d spent the morning grilling burgers and managing a chaotic group of teenagers who thought “helping” meant hovering near the cooler. Now, the sun was still out, the guests were arriving in an hour, and I realized with a sinking feeling that I had absolutely nothing planned for dessert. No pie crust chilling in the fridge, no custard simmering on the stove, no time to bake anything that required actual oven heat (which would turn my kitchen into a sauna).
I ran to the pantry, grabbing whatever was sitting on the top shelf. I had vanilla wafers, a tub of cool whip, a box of banana pudding mix, and a handful of overripe bananas that were basically brown mush. I threw them together in a 9×13 dish, shoved it in the fridge, and went back to pretending I was hosting a sophisticated event.
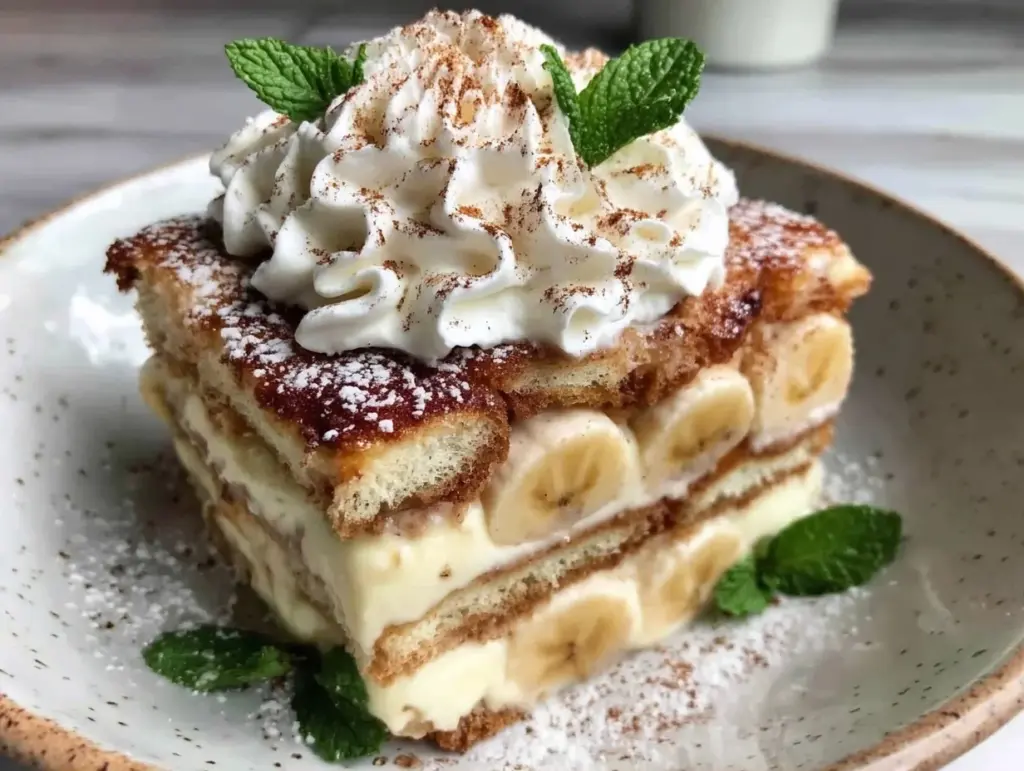
When I pulled it out an hour later, the layers had softened into something magical. It wasn’t just “good for a quick fix.” It was creamy, cool, and tasted like summer in a bowl. My aunt actually asked for the recipe before we finished the first slice. That’s the thing about this no-bake banana pudding icebox cake—it tricks you into thinking you put in way more effort than you actually did. It’s the ultimate 5pm panic saver, but it’s also elegant enough to serve at a Labor Day barbecue without looking like you grabbed it from the grocery store bakery.
I’ve made this cake probably twenty times since that first desperate Labor Day. Sometimes I use Nilla Wafers, sometimes I use vanilla wafers from the generic brand (they’re cheaper and just as good). Sometimes I add a layer of whipped cream. But the core method stays the same: layer, chill, eat. It’s stupid simple, requires zero baking skills, and uses ingredients you probably already have. If you’re looking for a dessert that’s cool, creamy, and completely stress-free, this is it.
Why You’ll Love This No-Bake Banana Pudding Icebox Cake
There are about ten reasons I keep making this, but here are the big ones. This isn’t just a lazy recipe; it’s a smart one.
- Zero Oven Heat — Seriously, this is huge for summer. Labor Day is often still hot as hell. You don’t need to fire up the oven, which keeps your kitchen cool and your house from smelling like baked goods for three days. It’s all assembly in the fridge.
- Five Ingredients Max — You don’t need a trip to the store. Just pudding mix, milk, bananas, wafers, and whipped topping. If you have those, you’re good. It’s the definition of pantry-friendly.
- Make-Ahead Friendly — This actually *needs* to be made ahead. The longer it sits, the better it gets. You can make it the night before and just pull it out when guests arrive. It’s the only dessert that gets better with age (unlike most things in life).
- Comfort Food Vibes — It tastes like childhood. It’s nostalgic, sweet, and creamy. It’s the kind of dessert that makes people close their eyes and smile. Perfect for a casual summer gathering.
- Minimal Cleanup — You’re basically just mixing a bowl and layering a dish. No baking sheets to scrub, no pans to soak. Just one bowl and one casserole dish. Easy.
This is my go-to when I need a dessert that feels special but requires zero actual work. It’s reliable, delicious, and always a crowd-pleaser.
Ingredients You’ll Need
Here’s the best part: you probably have most of this already. This no-bake banana pudding icebox cake relies on simple, accessible ingredients. I’m not particular about brands, except for one thing (which I’ll get to).
For the Pudding Layer
Instant vanilla pudding mix (2 boxes / 5.1 oz each) — I use Jell-O or a generic store brand. Don’t get the “fast cook” or “stovetop” version. It has to be the instant kind that you just whisk with cold milk. The instant kind sets up faster and has that specific nostalgic texture we want.
Cold whole milk (4 cups / 960ml) — Use cold milk. I know it sounds obvious, but if the milk is warm, the pudding will get lumpy and won’t set right. Whole milk gives the best richness, but 2% works if that’s all you have.
Overripe bananas (4-5 medium) — Look for bananas with brown spots. They’re sweeter and mash easier, which means better flavor distribution. If they’re green, they’ll be tart and hard. If they’re black mush, they’ll turn the pudding brown and weird. Aim for yellow with brown speckles.
Lemon juice (1 tablespoon) — This is the secret weapon. Bananas oxidize (turn brown) fast. A little lemon juice keeps them bright and adds a tiny hint of acidity that cuts through the sweetness. Don’t skip it.
For the Assembly
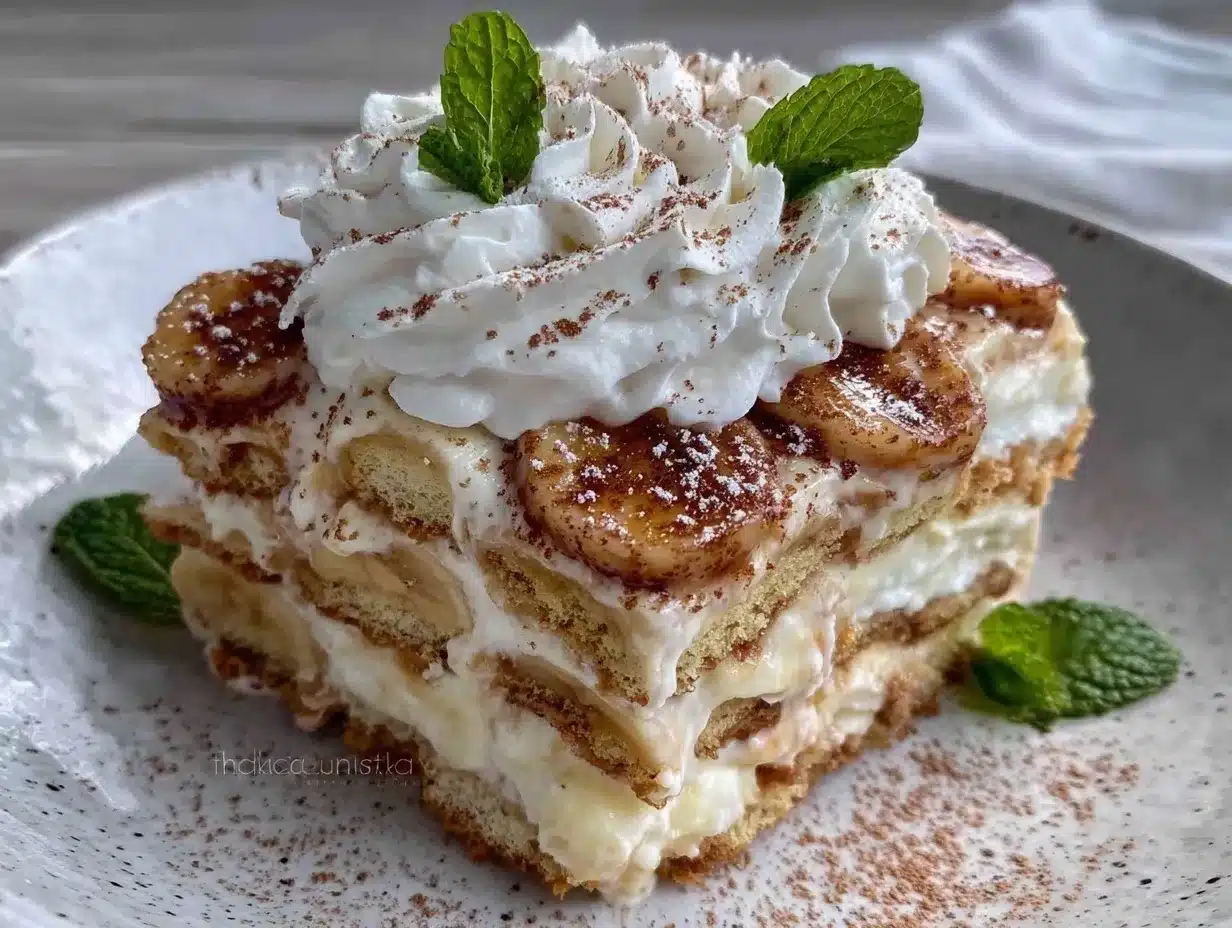
Vanilla wafers (1 package / 14.7 oz) — Nilla Wafers are the classic choice. They’re crisp, sweet, and hold up well to moisture. Some people use vanilla icebox cookies (the thin, crisp kind), which work too, but Nilla Wafers are what I grew up with. Just make sure they’re fresh and crisp. If they’re stale, the cake will be mushy.
Cool Whip or whipped topping (1 container / 8 oz, thawed) — I use Cool Whip because it’s consistent. You can use homemade whipped cream if you want to be fancy, but Cool Whip is lighter and holds up better in the fridge without weeping. Thaw it according to the package instructions. Do not use frozen topping straight from the freezer; it’ll be icy.
Optional: Mini chocolate chips (½ cup) — I sometimes sprinkle these in for a little crunch and contrast. It’s not traditional, but my kids love it. If you’re serving food snobs, maybe skip this.
Substitutions
- Gluten-Free? Use gluten-free vanilla wafers. Most major brands have a version now. The rest of the recipe is naturally GF.
- Dairy-Free? Use dairy-free milk and dairy-free whipped topping (like CocoWhip). It’s not quite the same texture, but it works.
- From Scratch Pudding? You can make instant pudding from scratch, but it takes longer and might be too thick. Stick to the mix for that light, airy texture.
Equipment Needed
You don’t need fancy equipment for this. Here’s what I actually use.
- 9×13 inch baking dish — Glass is nice because you can see the layers, but ceramic or metal works fine. Just make sure it’s deep enough so the pudding doesn’t spill over.
- Large mixing bowl — Big enough to whisk the pudding without splashing everywhere. I use a 4-quart bowl.
- Whisk — For the pudding. A fork works in a pinch, but a whisk is faster.
- Spatula — For spreading the whipped topping evenly. A rubber spatula is best.
- Knife — For slicing the bananas. A serrated knife works well to avoid squashing them.
- Measuring cups — Standard stuff. Dollar store versions work fine.
That’s it. No mixer, no blender, no fancy gadgets. Just basic kitchen tools.
How to Make It: Step-by-Step
Alright, let’s make this! I’m walking you through exactly how I do it. It’s so simple you might think I’m missing a step, but I’m not.
Step 1: Make the Pudding (5 minutes)
In your large mixing bowl, combine the two boxes of instant vanilla pudding mix with the 4 cups of cold milk. Whisk vigorously for about 2 minutes. You want it smooth and thick. It will look like a lot of liquid at first, but it’ll thicken up fast. Don’t over-whisk or it might get gummy. Just mix until it’s uniform and creamy.
Step 2: Prep the Bananas (2 minutes)
Peel the bananas and slice them into ¼-inch rounds. Toss them in the bowl with the lemon juice. This coats them evenly and prevents browning. Set them aside. If you’re using mini chocolate chips, toss them in here too so they’re ready to go.
Step 3: Start the First Layer (2 minutes)
Take your 9×13 dish. Arrange a layer of vanilla wafers on the bottom. You’ll probably need to break some wafers in half to fill the gaps. You want a solid, even layer. Don’t worry if it’s not perfect; it’ll be covered up. Pour about one-third of the pudding over the wafers. Spread it out gently with your spatula, making sure to get it into the corners.
Step 4: Add Bananas and Repeat (5 minutes)
Place a layer of banana slices over the pudding. Try to lay them flat so they’re evenly distributed. Then, add another layer of vanilla wafers. Spread another third of the pudding on top. Add another layer of bananas. If you’re using chocolate chips, sprinkle them here.
Step 5: The Final Layers (3 minutes)
Finish with a final layer of wafers. You want to cover all the pudding so the wafers can soften properly. Spread the remaining pudding over the top. It’s okay if it’s not perfectly smooth; it’s going to be covered up.
Step 6: Top with Whipped Topping (2 minutes)
Spread the thawed Cool Whip over the very top. Make it as thick or thin as you like. I usually go for a generous layer because it adds that light, airy finish. Smooth it out with your spatula. If you want, you can pipe it for a fancy look, but honestly, a messy top looks more homemade and rustic.
Step 7: Chill (4 hours minimum)
Cover the dish tightly with plastic wrap or foil. Put it in the fridge. This is the hard part: waiting. The cake needs at least 4 hours to set, but overnight is best. The wafers need time to absorb the moisture and turn soft and cake-like. If you cut it too soon, it’ll be soggy and messy. Trust the wait.
Total Time: About 15 minutes active prep, plus 4+ hours chilling.
Expert Tips & Tricks
Here’s everything I’ve learned from making this dozens of times. These tips will save you from my mistakes.
Don’t Skimp on the Chill Time
I know you want to eat it now. I do too. But if you cut it after 2 hours, the wafers will still be crunchy and the pudding will be runny. You want that soft, cake-like texture. Plan ahead. Make it the night before if you can.
Use Ripe Bananas
Green bananas taste sour and hard. Brown bananas are sweet and soft. If your bananas are too green, they won’t blend well with the sweet pudding. If they’re too brown, they might disintegrate. Aim for yellow with brown spots.
Keep the Whipped Topping Cold
If your Cool Whip gets warm while you’re spreading it, it’ll turn into soup. Keep it in the fridge until the last minute. If you’re making homemade whipped cream, keep the bowl and whisk cold too.
Don’t Overload the Wafers
It’s tempting to pile on extra wafers, but if the layer is too thick, the center won’t soften properly. Stick to one even layer. You want the ratio of wafer to pudding to be balanced.
Common Mistakes (and how to avoid them)
- Mistake: The cake is too runny. Fix: You didn’t chill it long enough, or you used too much milk. Follow the package instructions for the pudding mix.
- Mistake: The bananas turned brown. Fix: You didn’t use enough lemon juice, or you waited too long to assemble. Slice and toss them right before layering.
- Mistake: The wafers are hard. Fix: Not enough chill time. Or you used stale wafers that couldn’t absorb moisture. Use fresh wafers.
Variations & Substitutions
Once you’ve nailed the basic version, here’s how you can mix it up. I’ve tried all of these.
Chocolate Banana Icebox Cake
Swap the vanilla pudding mix for chocolate pudding mix. Use chocolate wafers instead of vanilla. It’s like a banana split in a dish. My kids prefer this version.
Strawberry Banana Icebox Cake
Add a layer of sliced strawberries between the banana and wafer layers. It adds a tart contrast to the sweet pudding. Use fresh strawberries, not frozen.
Cookie Butter Version
Drizzle a little Biscoff cookie butter between the layers. It adds a spiced, caramel-like flavor that’s amazing with bananas.
From Scratch Whipped Cream
Replace the Cool Whip with homemade whipped cream. Whip 1 cup heavy cream with 2 tablespoons sugar and 1 teaspoon vanilla extract until stiff peaks form. It’s richer but heavier.
Dietary Modifications
- Gluten-Free: Use GF vanilla wafers. Check the pudding mix label (most are GF, but some contain wheat starch).
- Dairy-Free: Use almond milk or oat milk for the pudding, and CocoWhip for the topping. The texture will be slightly different, but still tasty.
- Lower Sugar: Use sugar-free pudding mix and unsweetened whipped topping. It’s not as sweet, but it works.
Serving & Storage
How to Serve
I usually serve this straight from the dish with a big spoon. It looks rustic and stays cool. But here are other ways I’ve enjoyed it:
- Sides: Serve with a side of fresh berries or a simple green salad to balance the sweetness. Garlic bread (obviously) is too much, but a light fruit salad works.
- Toppings: Extra whipped cream, crushed Nilla Wafers, or a drizzle of caramel sauce. I like to keep it simple.
- Drinks: This pairs well with iced tea, lemonade, or a glass of cold milk. I also like it with a sparkling blackberry sage lemonade for a fancy touch.
Storage Instructions
- Refrigerator: Store in an airtight container or covered with plastic wrap for up to 3 days. It gets firmer in the fridge, which is normal.
- Reheating: Do not reheat this. It’s meant to be served cold. If you warm it, the wafers will turn to mush.
- Freezing: I don’t recommend freezing this. The whipped topping and bananas don’t freeze well. They’ll become icy and watery when thawed. Make it fresh.
Pro tip: If the top dries out in the fridge, add a fresh layer of whipped cream before serving.
Nutrition Information
I’m not a nutritionist, but here’s the breakdown if you’re tracking. This is a sweet, indulgent dessert, so keep portions in mind.
Per Serving (based on 12 servings):
| Nutrient | Amount |
|---|---|
| Calories | 280 |
| Protein | 4g |
| Carbs | 42g |
| Fiber | 2g |
| Sugar | 28g |
| Fat | 10g |
| Saturated Fat | 4g |
| Sodium | 220mg |
What’s Good: It’s a quick treat. The bananas add some potassium.
What to Know: It’s high in sugar and carbs from the pudding mix, wafers, and bananas. It’s not a health food, but it’s a fun occasional dessert.
Final Thoughts
So that’s my go-to no-bake banana pudding icebox cake! I’ve probably talked your ear off at this point, but when you make a recipe this often, you have a lot to say about it. This has saved my butt more times than I can count. It’s my answer to “what’s for dessert” when I’m tired, don’t want to bake, and still want something that tastes really good. My family is happy, my guests are happy, and I’m happy because I’m not stressed about cooking.
Make it yours! Try different add-ins, swap in your favorite cookies, or adjust the sweetness. The best recipes are the ones you adapt to your family’s tastes. If you make this, drop a comment and let me know what you think! I love hearing how recipes turn out in your kitchen. And if something doesn’t work, tell me that too—I’m here to help troubleshoot.
Happy cooking! And I hope your Labor Day is as sweet as this cake.
Frequently Asked Questions
Can I use fresh whipped cream instead of Cool Whip?
You can, but it will be heavier and might weep (release liquid) if it sits too long. Cool Whip is more stable in the fridge. If you use fresh whipped cream, make sure it’s very stiff and add a little cornstarch to help it hold up. But honestly, Cool Whip is easier and just as good for this recipe.
Why did my pudding turn out lumpy?
Usually means the milk wasn’t cold enough, or you didn’t whisk it fast enough. Instant pudding needs cold milk and vigorous whisking to dissolve the starch properly. If it’s already lumpy, you can try blending it with an immersion blender for a few seconds, but it might make it too thin.
Can I make this ahead for a party?
Yes! This is actually *better* made ahead. Make it the night before. The flavors meld together, and the wafers soften perfectly. Just keep it covered in the fridge until you’re ready to serve.
Can I use frozen bananas?
No. Frozen bananas are mushy and watery when thawed. They’ll make the cake soggy. Always use fresh bananas. If you’re worried about ripeness, buy them yellow with brown spots.
How long does this last in the fridge?
Up to 3 days. After that, the wafers will get too soft and the bananas might brown. It’s best eaten within the first two days.
Can I double this recipe?
Absolutely! Double everything and use a 9×13 dish. If you want to make a huge batch, use two 9×13 dishes. The cooking times stay the same.
Is this recipe gluten-free?
Not traditionally, because vanilla wafers contain wheat. But you can easily make it gluten-free by using gluten-free vanilla wafers and checking the pudding mix label. Most instant pudding mixes are gluten-free, but always double-check.
Pin This Recipe!
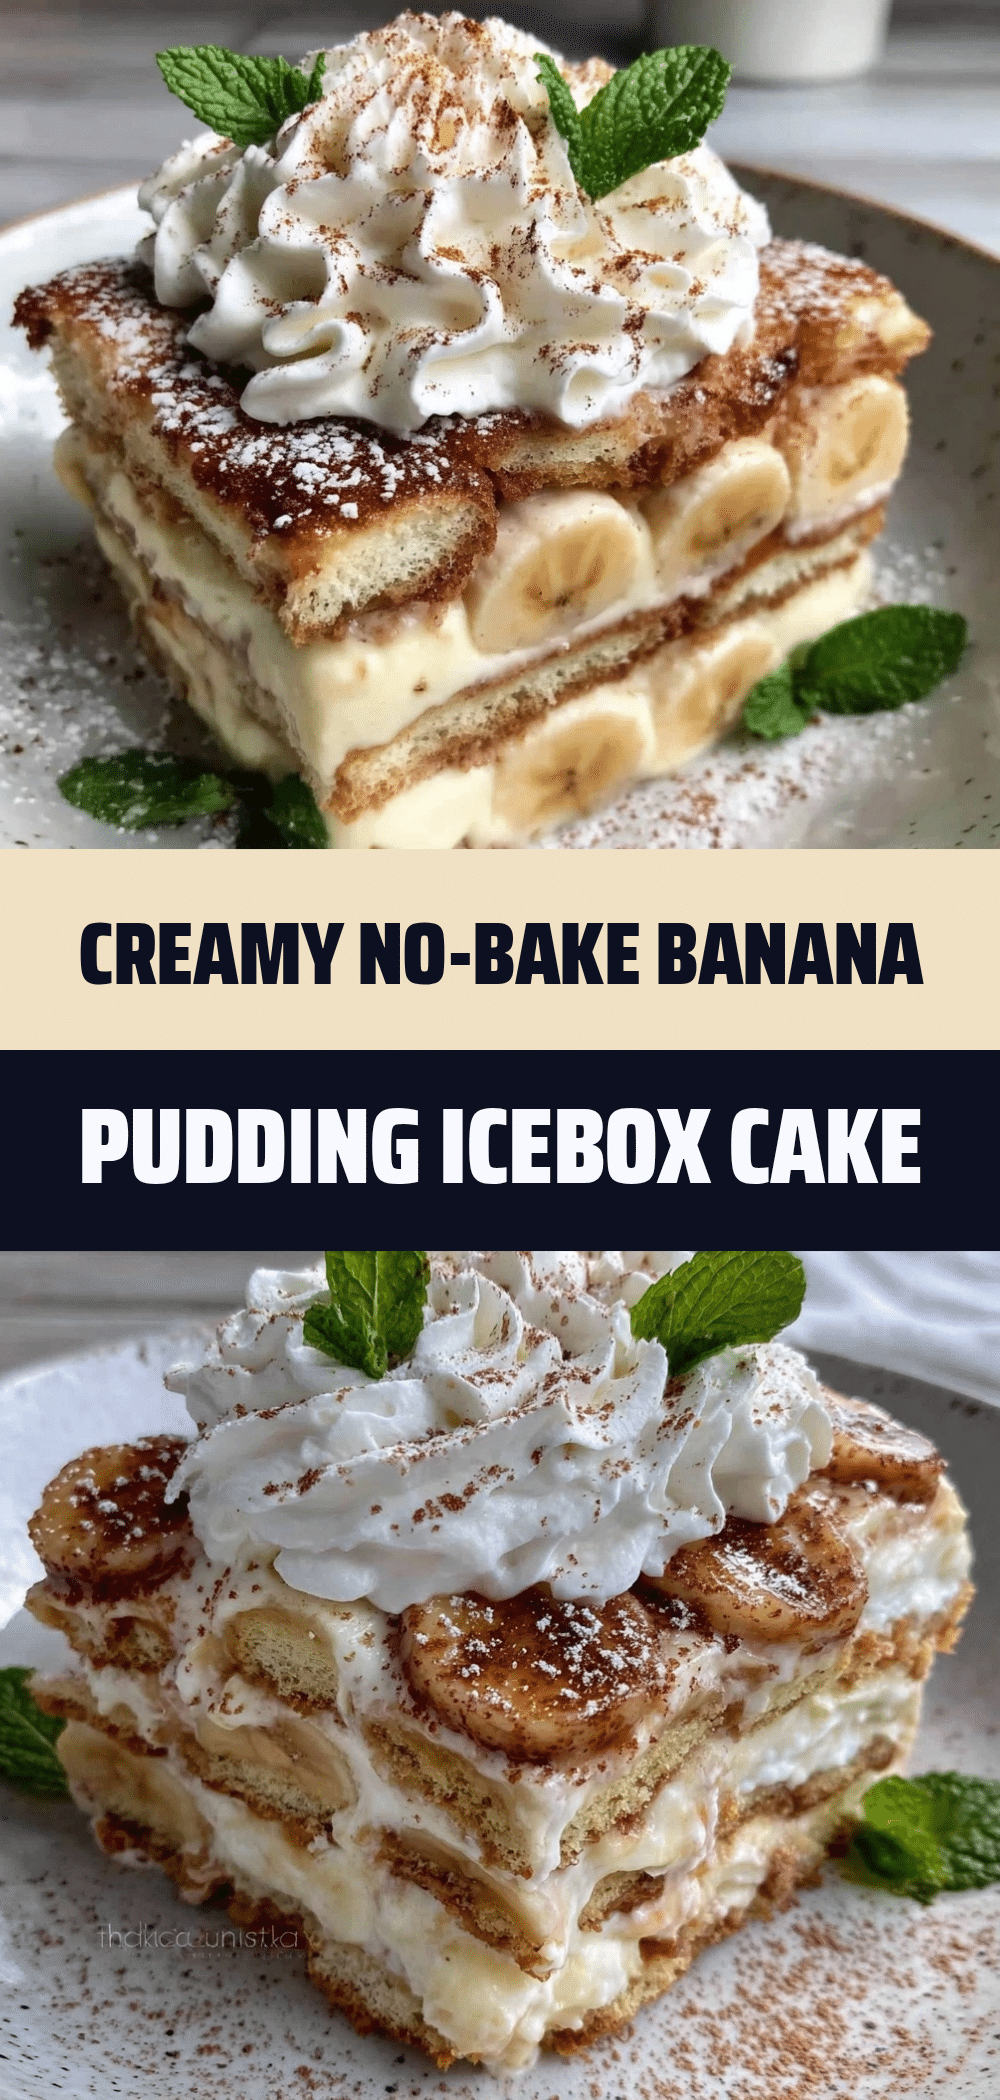
No-Bake Banana Pudding Icebox Cake
- Total Time: 4 hours 15 minutes
- Yield: 12 servings 1x
Description
A quick, no-bake dessert perfect for summer gatherings, featuring layers of vanilla wafers, banana pudding, fresh bananas, and whipped topping that softens into a cake-like texture after chilling.
Ingredients
- 2 boxes (5.1 oz each) instant vanilla pudding mix
- 4 cups cold whole milk
- 4–5 medium overripe bananas, sliced
- 1 tablespoon lemon juice
- 1 package (14.7 oz) vanilla wafers (Nilla Wafers)
- 1 container (8 oz) Cool Whip or whipped topping, thawed
- Optional: ½ cup mini chocolate chips
Instructions
- In a large mixing bowl, combine the instant vanilla pudding mix with the cold milk. Whisk vigorously for about 2 minutes until smooth and thick.
- Peel and slice the bananas into ¼-inch rounds. Toss them with lemon juice to prevent browning.
- Arrange a layer of vanilla wafers on the bottom of a 9×13 inch baking dish, breaking pieces to fit gaps.
- Pour one-third of the pudding over the wafers and spread evenly.
- Add a layer of banana slices over the pudding.
- Add another layer of vanilla wafers, followed by another third of the pudding.
- Add another layer of bananas and sprinkle with chocolate chips if using.
- Finish with a final layer of wafers and spread the remaining pudding on top.
- Spread the thawed Cool Whip over the very top of the cake.
- Cover tightly with plastic wrap or foil and refrigerate for at least 4 hours, preferably overnight, until the wafers are soft.
- Serve chilled.
Notes
Ensure milk is cold to prevent lumps. Use ripe bananas for best flavor. Do not freeze as texture will suffer. Can be made gluten-free by using GF wafers and checking pudding mix label. Can be made dairy-free with almond milk and CocoWhip.
- Prep Time: 15 minutes
- Cook Time: 0 minutes
- Category: Dessert
- Cuisine: American
Nutrition
- Serving Size: 1 slice
- Calories: 280
- Sugar: 28
- Sodium: 220
- Fat: 10
- Saturated Fat: 4
- Carbohydrates: 42
- Fiber: 2
- Protein: 4
Keywords: no-bake, banana pudding, icebox cake, labor day dessert, summer dessert, quick dessert, easy dessert, crowd pleaser