There is a specific kind of panic that sets in when you realize your Rosh Hashanah guests have arrived, and the only dessert you have ready is a box of store-bought cookies. I’ve been there. More than once. It’s that moment where you’re standing in the kitchen, staring at a half-empty pantry, trying to remember if you bought cream for whipped cream or if you’re just going to have to serve fruit slices with a sad dollop of yogurt.
But last year, I decided to stop playing it safe. I wanted something that felt celebratory, something that screamed “new beginning” without requiring me to be a professional pastry chef. I stumbled upon the idea of a honey pomegranate pavlova. At first, I thought, “Pavlova? That’s delicate. That’s finicky. That’s going to collapse.” And you know what? It did. Twice.
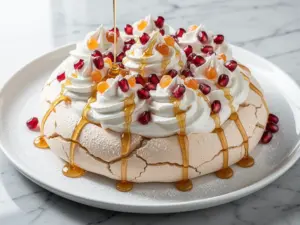
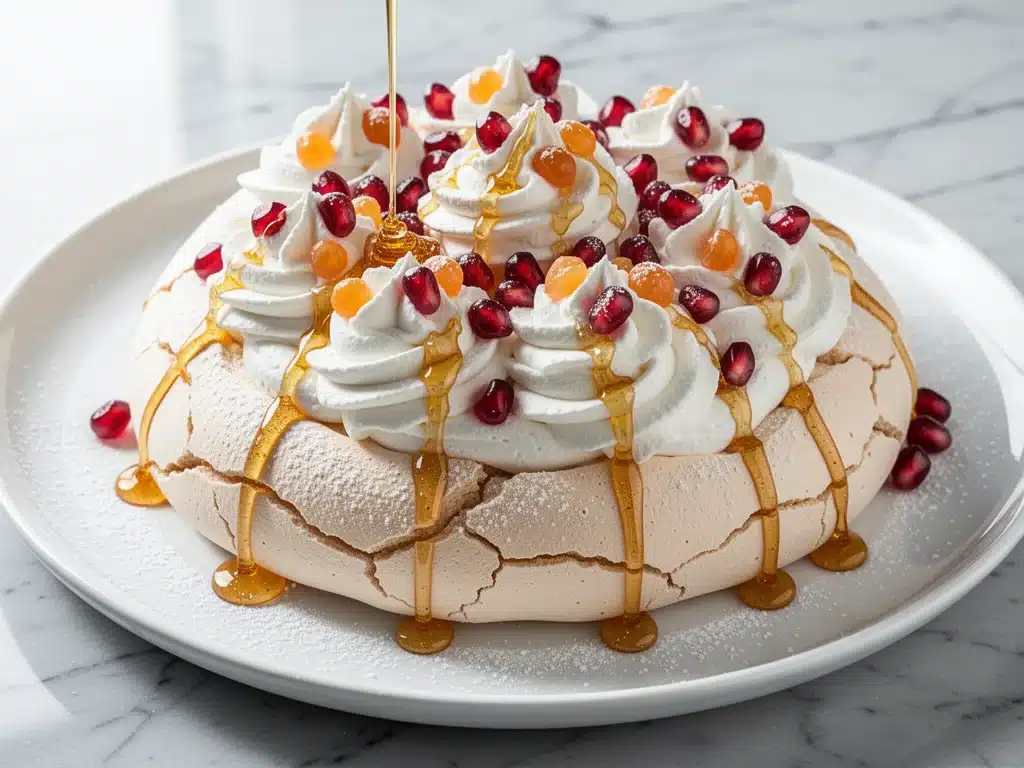
But on the third try, I cracked the code. The result was this stunning Rosh Hashanah Honey Pomegranate Pavlova, a dessert that looks like it came from a high-end French patisserie but is actually surprisingly forgiving to make. It’s crisp on the outside, marshmallow-soft on the inside, and topped with a honey-infused cream that tastes like autumn itself. The pomegranate seeds add this jewel-toned pop of tartness that cuts through the sweetness perfectly.
My family couldn’t stop talking about it. My mother-in-law, who usually sticks to traditional rugelach, asked for the recipe. My kids, who typically shy away from anything “fancy,” scraped their plates clean. This isn’t just a dessert; it’s a conversation starter. It’s the kind of dish that makes people ask, “Did you make this yourself?” (Yes. Yes, I did. And you can too.)
If you’re looking to impress your guests this High Holiday season without spending hours in the kitchen, this honey pomegranate pavlova is your answer. It’s elegant, it’s seasonal, and it’s genuinely delicious. Let’s get into why this dessert has become my new tradition.
Why You’ll Love This Recipe
I’ve made this honey pomegranate pavlova for three different gatherings now, and the compliments never stop. Here’s why it’s become my go-to for Rosh Hashanah and other special occasions:
It Looks Impossible but Isn’t — Seriously. The meringue shell looks like a work of art, but the technique is basically just whipping egg whites and sugar. If you can whisk, you can make this. I’ve walked my teenage daughter through it over the phone while she was at college. She nailed it.
It’s a Flavor Powerhouse — Most meringues are just sweet and airy. This one has depth. The honey adds a floral richness that pairs beautifully with the tart, juicy pomegranate seeds. It’s not one-note sweet; it’s complex and balanced. My husband said it tasted like “dessert from a dream.”
It’s Make-Ahead Friendly — This is the big one. You can bake the meringue shells up to two days in advance. Just store them in an airtight container. Then, on the day of your party, you just whip the cream and assemble. No last-minute stress. I usually make the shells on Friday afternoon, so I’m free to enjoy the holiday.
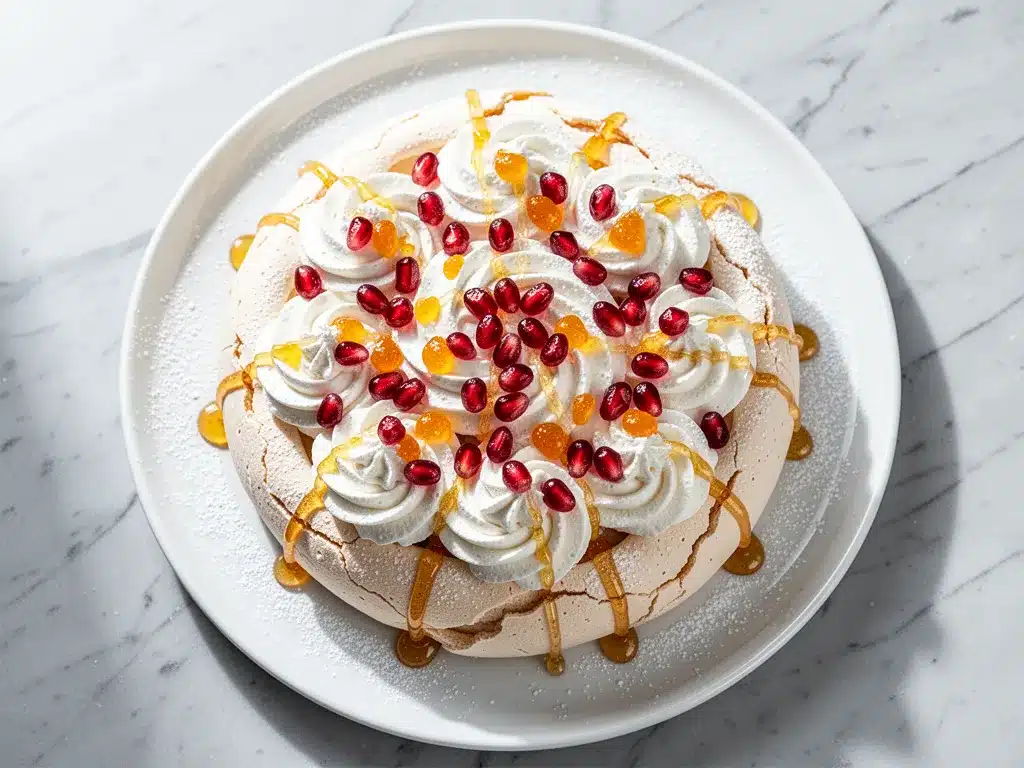
It’s Visually Stunning — The white meringue against the deep red pomegranate seeds and golden honey drizzle is Instagram-worthy. I had guests taking photos before they even took a bite. It’s the kind of dessert that sets the tone for the whole meal.
It’s Light and Refreshing — After a heavy holiday meal with cholent, brisket, and knishes, a heavy chocolate cake feels like a burden. This pavlova is light, airy, and refreshing. It’s the perfect ending to a rich meal without weighing you down.
This dessert has completely changed my holiday hosting game. It’s reliable, it’s beautiful, and it’s genuinely loved by everyone who tries it. Whether you’re feeding a crowd or just treating yourself, this honey pomegranate pavlova is worth the effort.
Ingredients You’ll Need
Before we dive into the steps, let’s talk about what you need. The good news? Most of this is simple pantry staples. The bad news? You need to be precise with the meringue. Baking is chemistry, after all.
For the Meringue Shells
Egg whites (4 large / about 120g) — Room temperature egg whites whip up to double the volume. I learned this the hard way when I tried with cold eggs and ended up with a sad, dense meringue. Let them sit out for 30 minutes before you start.
Cream of tartar (½ teaspoon) — This is non-negotiable. It stabilizes the egg whites and prevents them from collapsing. Don’t skip it. It’s cheap and keeps the meringue from weeping.
Granulated sugar (1 cup / 200g) — I use white sugar for the purest white color. Brown sugar will turn it beige, which isn’t what we’re going for here. Add it slowly, one tablespoon at a time, to ensure it dissolves completely.
Vanilla extract (1 teaspoon) — Pure vanilla, not imitation. It adds a subtle warmth that complements the honey.
Arrowroot powder (1 teaspoon) — This helps stabilize the meringue and gives it that soft, chewy interior. Cornstarch works too, but arrowroot is smoother.
For the Honey Whipped Cream
Heavy whipping cream (2 cups / 480ml) — Cold! Very cold. If your cream isn’t cold, it won’t whip. I keep my bowl in the fridge for 15 minutes before starting.
Honey (3 tablespoons) — Use a mild honey like clover or orange blossom. Stronger honeys like buckwheat might overpower the delicate meringue. This is the star flavor here.
Confectioners’ sugar (2 tablespoons) — Just a little bit to sweeten the cream. You don’t want it too sweet, as the honey and meringue already provide plenty of sweetness.
For the Toppings
Pomegranate seeds (1 cup) — You can buy pre-seeded pomegranates, but I prefer doing it myself. It’s meditative and ensures you get the freshest seeds. Look for heavy, deep red pomegranates at the store.
Extra honey (for drizzling) — Use a nice, thick honey for the drizzle. It looks beautiful and adds a final touch of sweetness.
Fresh mint leaves (optional) — For garnish. It adds a pop of green and a fresh aroma that contrasts with the rich cream.
Equipment Needed
You don’t need fancy gadgets for this, but having the right tools makes a huge difference.
Stand mixer or hand mixer — I use a stand mixer because it’s hands-off. But a hand mixer works fine if you have the arm strength. Just be prepared to whip for 10-15 minutes.
Copper or glass bowl — Copper bowls are traditional for a reason; they react with the egg whites to create a more stable meringue. But a clean glass or metal bowl works too. Just make sure it’s completely grease-free. Any trace of oil will prevent the whites from whipping.
Baking sheet — Line it with parchment paper. I’ve tried silicone mats, but parchment gives me better control over the shape.
Piping bags or ziplock bags — For shaping the meringue. I use a large star tip for a rustic look, but a round tip works too. If you don’t have a piping bag, just use a spoon and dollop it into circles.
Wire whisk — If you’re not using a mixer, you’ll need a strong whisk. This is the workout you didn’t know you needed.
Offset spatula — For spreading the cream. A regular spatula works, but the offset makes it easier to get under the cream without digging into the meringue.
Small sieve — For sifting the confectioners’ sugar into the cream. This prevents lumps and ensures a smooth texture.
How to Make It: Step-by-Step
Alright, let’s make this! I’m walking you through exactly how I do it, including the little tricks I’ve picked up over the years.
Step 1: Prep Your Oven and Meringue (10 minutes)
Preheat your oven to 225°F (110°C). This low temperature is crucial. It dries out the meringue slowly, giving it that crisp exterior and soft interior. Line your baking sheets with parchment paper.
In your mixer bowl, add the room temperature egg whites and cream of tartar. Start beating on medium speed until soft peaks form. This means when you lift the whisk, the peaks curl over slightly. Don’t rush this step.
Step 2: Add the Sugar Slowly (5-7 minutes)
With the mixer running on medium-high, slowly add the granulated sugar, one tablespoon at a time. Wait until each tablespoon is fully incorporated before adding the next. This usually takes about 5 minutes. The meringue should become glossy and stiff. When you lift the whisk, the peaks should stand straight up, like a rooster’s tail. If they droop, keep whipping.
Once stiff peaks form, add the vanilla extract and arrowroot powder. Beat on low speed just to combine. Be careful not to overmix here, or the meringue can become grainy.
Step 3: Shape the Shells (5 minutes)
Transfer the meringue to a piping bag fitted with a large star tip. Pipe circles onto the prepared baking sheets, about 6-8 inches wide. You can make one large pavlova or several smaller individual ones. I usually make four large ones for a family gathering.
Use the back of a spoon to create a slight well in the center of each circle. This is where your cream and toppings will go. Don’t make the well too deep, or the cream will leak out.
Step 4: Bake and Cool (2-3 hours)
Bake for 1 hour and 30 minutes to 2 hours. The meringue is done when it’s dry to the touch and lifts easily from the parchment paper. It should be crisp on the outside but still slightly soft inside. Turn off the oven and leave the meringues inside with the door slightly ajar for another hour. This gradual cooling prevents cracking.
Once completely cool, store them in an airtight container. They can last up to two days.
Step 5: Whip the Cream (10 minutes)
In a cold bowl, combine the heavy whipping cream, honey, and confectioners’ sugar. Whip on medium-high speed until stiff peaks form. Be careful not to overwhip, or the cream will turn into butter. You want it smooth and creamy.
Step 6: Assemble (10 minutes)
Place the cooled meringue shells on serving plates. Spoon the honey whipped cream into the center well, creating a slight mound. Top generously with pomegranate seeds. Drizzle with extra honey and garnish with fresh mint leaves if desired.
Serve immediately. The meringue will start to soften if left out for too long, so it’s best to assemble right before serving.
Expert Tips & Tricks
Here’s everything I’ve learned from making this dozens of times. These tips will save you from my mistakes.
Room Temperature Egg Whites
This is the #1 tip. Cold egg whites take longer to whip and don’t reach the same volume. I take mine out of the fridge 30 minutes before I start. If I forget, I can warm them gently by placing the bowl in a bowl of warm water for a few minutes.
Clean Bowl is Crucial
Any trace of grease or yolk will prevent the egg whites from whipping. I wipe my bowl with a little lemon juice or vinegar before starting. It ensures the surface is perfectly clean.
Slow Sugar Addition
Adding the sugar too quickly can cause the meringue to deflate. I add it one tablespoon at a time, waiting until it’s fully dissolved. This ensures a smooth, glossy texture.
Low and Slow Baking
High heat will brown the meringue too quickly and leave the inside wet. 225°F is the sweet spot. It takes time, but the result is worth it.
Gradual Cooling
Turning off the oven and leaving the meringues inside prevents cracking from sudden temperature changes. It’s a small step that makes a big difference.
Cold Cream
For the whipped cream, keep everything cold. Chill your bowl and beaters in the fridge for 15 minutes before whipping. This helps the cream whip faster and hold its shape.
Variations & Substitutions
Once you’ve nailed the basic version, here’s how you can mix it up. I’ve tried all of these.
Berry Pavlova
Swap the pomegranate for fresh strawberries, raspberries, and blueberries. It’s a classic combination and equally delicious. I love the mix of tart and sweet berries.
Lemon Pavlova
Add the zest of one lemon to the whipped cream. It adds a bright, citrusy flavor that pairs beautifully with the honey. This is great for spring or summer.
Chocolate Pavlova
Add 2 tablespoons of cocoa powder to the whipped cream. It turns it into a chocolate mousse-like topping. Drizzle with chocolate sauce for extra indulgence.
Coconut Pavlova
Replace the honey in the whipped cream with coconut cream and top with toasted coconut flakes. It’s a tropical twist that’s surprisingly good.
Dairy-Free Option
Use coconut cream instead of heavy whipping cream. Whip it with a little maple syrup instead of honey. It’s richer but still delicious.
Serving & Storage
How to Serve:
I usually serve this straight from the plates at the dinner table. It’s elegant and easy to eat. But here are other ways I’ve enjoyed it:
Side Dishes:
This dessert is self-contained, so you don’t need sides. But if you want to balance the meal, serve it after a light salad or some roasted vegetables. I avoid heavy starches before dessert to keep things light.
Toppings Bar:
When I have guests, I put out extra pomegranate seeds, honey, and fresh mint. Everyone can customize their own pavlova. It’s fun and interactive.
Storage Instructions:
Refrigerator:
The meringue shells can be stored in an airtight container at room temperature for up to two days. Do not refrigerate them, as they will absorb moisture and become soft. The whipped cream should be made fresh, right before serving.
Reheating:
You don’t reheat pavlova. It’s served cold or at room temperature. If the meringue has softened slightly, you can crisp it up in a 200°F oven for 10 minutes, but it’s better to make it fresh.
Freezing:
I don’t recommend freezing pavlova. The meringue becomes soggy when thawed, and the whipped cream separates. It’s best enjoyed fresh.
Pro tip:
If you’re making this ahead, prep the pomegranate seeds a day in advance. Store them in a small container in the fridge. It saves time on the day of the party.
Nutrition Information
I’m not a nutritionist, but here’s the breakdown if you’re tracking. This is a dessert, so it’s not exactly diet food, but it’s lighter than a cake.
Per Serving (based on 4 servings):
- Calories: 380
- Protein: 4g
- Carbs: 52g
- Fiber: 2g
- Sugar: 48g
- Fat: 18g
- Saturated Fat: 11g
- Cholesterol: 55mg
- Sodium: 35mg
What’s Good:
It’s gluten-free (if you use arrowroot powder), so it’s safe for most people with gluten sensitivities. The pomegranate seeds add antioxidants and fiber.
What to Know:
It’s high in sugar from the meringue and honey. If you’re watching your sugar intake, you can reduce the honey in the cream and skip the extra drizzle. But honestly, it’s a special occasion dessert, so enjoy it!
My Take:
Look, this is a treat. It’s not a health food. But it’s made with real ingredients and feels indulgent without being heavy. When I make it for my family, I don’t worry about the calories. I just enjoy the moment.
Final Thoughts
So that’s my go-to honey pomegranate pavlova! I’ve probably talked your ear off at this point, but when you make a recipe this often, you have a lot to say about it.
This dessert has saved my holiday dinners more times than I can count. It’s my answer to “what’s for dessert?” when I want something special but don’t have hours to bake. My family is happy, my guests are impressed, and I’m happy because I’m not stressed about cooking.
Make it yours! Try different toppings, swap in your favorite fruits, adjust the honey to your taste. The best recipes are the ones you adapt to your family’s tastes. If you want something sweet and sticky, check out my honey sriracha glazed meatballs for a savory contrast, or if you’re in the mood for something baked, try my maple banana nut muffins for a cozy breakfast.
If you make this, drop a comment and let me know what you think! I love hearing how recipes turn out in your kitchen. And if something doesn’t work, tell me that too—I’m here to help troubleshoot.
Happy cooking! And I hope your kitchen smells half as good as mine does right now.
Frequently Asked Questions
Can I use egg whites from a carton?
You can, but fresh egg whites whip better. Carton egg whites often have stabilizers that can interfere with whipping. If you must use them, make sure they’re at room temperature and whip them longer than usual. But fresh is always best.
Why did my meringue collapse?
This usually happens if the sugar wasn’t fully dissolved or if the oven temperature was too high. Make sure you whip the meringue until stiff peaks form and add the sugar slowly. Also, check your oven temperature with a thermometer, as ovens can vary.
Can I make this gluten-free?
Yes! The basic recipe is naturally gluten-free, as long as you use arrowroot powder or cornstarch instead of flour. Just make sure your honey and other ingredients are certified gluten-free if you have celiac disease.
How do I remove pomegranate seeds without making a mess?
Fill a large bowl with water. Score the pomegranate and submerge it. Break it apart under water, and the seeds will sink while the pith floats. Skim off the pith and drain the seeds. It’s messy but effective. Or just buy pre-seeded ones to save time.
Can I freeze the meringue shells?
I don’t recommend it. Meringue absorbs moisture from the freezer and becomes soft and chewy. It’s best to store them in an airtight container at room temperature for up to two days.
What kind of honey is best?
I prefer mild honeys like clover, orange blossom, or acacia. They don’t overpower the delicate flavor of the meringue. Stronger honeys like buckwheat or manuka can be too intense.
Can I use a different fruit?
Absolutely! Strawberries, raspberries, blackberries, and kiwi all work well. Just make sure the fruit is fresh and not too juicy, or it will make the meringue soggy. Pat the fruit dry before adding it.
Pin This Recipe!
Rosh Hashanah Honey Pomegranate Pavlova
- Total Time: 3 hours
- Yield: 4 servings 1x
Description
A stunning, crisp-on-the-outside and marshmallow-soft-on-the-inside pavlova topped with honey-infused whipped cream, tart pomegranate seeds, and a drizzle of honey. This elegant dessert is make-ahead friendly and perfect for Rosh Hashanah or special occasions.
Ingredients
- 4 large egg whites (about 120g), room temperature
- 1/2 teaspoon cream of tartar
- 1 cup granulated sugar (200g)
- 1 teaspoon vanilla extract
- 1 teaspoon arrowroot powder
- 2 cups heavy whipping cream, very cold
- 3 tablespoons mild honey (e.g., clover or orange blossom)
- 2 tablespoons confectioners’ sugar
- 1 cup pomegranate seeds
- Extra honey for drizzling
- Fresh mint leaves for garnish (optional)
Instructions
- Preheat oven to 225°F (110°C). Line baking sheets with parchment paper.
- In a mixer bowl, beat room temperature egg whites and cream of tartar on medium speed until soft peaks form.
- With mixer running on medium-high, slowly add granulated sugar one tablespoon at a time, waiting until each is incorporated. Whip until glossy and stiff peaks form.
- Add vanilla extract and arrowroot powder. Beat on low speed just to combine.
- Transfer meringue to a piping bag fitted with a large star tip. Pipe 6-8 inch circles onto baking sheets. Use the back of a spoon to create a slight well in the center of each.
- Bake for 1 hour and 30 minutes to 2 hours, until dry to the touch and crisp on the outside.
- Turn off the oven and leave meringues inside with the door slightly ajar for another hour to cool gradually.
- Once completely cool, store in an airtight container at room temperature for up to two days.
- In a cold bowl, whip heavy cream, honey, and confectioners’ sugar on medium-high speed until stiff peaks form.
- Place cooled meringue shells on serving plates. Spoon whipped cream into the center well.
- Top generously with pomegranate seeds, drizzle with extra honey, and garnish with mint. Serve immediately.
Notes
Ensure egg whites are at room temperature and the bowl is completely grease-free for best results. Add sugar slowly to ensure it dissolves completely. The meringue shells can be made up to two days in advance. Do not refrigerate the meringue shells as they will absorb moisture. Assemble the dessert right before serving to prevent the meringue from softening.
- Prep Time: 30 minutes
- Cook Time: 2 hours 30 minutes
- Category: Dessert
- Cuisine: Jewish
Nutrition
- Serving Size: 1 pavlova
- Calories: 380
- Sugar: 48
- Sodium: 35
- Fat: 18
- Saturated Fat: 11
- Carbohydrates: 52
- Fiber: 2
- Protein: 4
Keywords: Rosh Hashanah, Pavlova, Honey, Pomegranate, Meringue, Holiday Dessert, Gluten-Free, Make-Ahead