Last Tuesday, while the first real chill of autumn was settling into my bones, I found myself staring at a stick of butter like it held the secrets to the universe. I wasn’t trying to reinvent baking. I just wanted something warm, something that smelled like cinnamon and caramelized sugar, and something that didn’t require a million tiny bowls and complicated techniques. I wanted that cozy, nostalgic feeling you get from a fresh snickerdoodle, but in a form that was easier to eat, easier to share, and honestly, easier to clean up after.
So I decided to take my favorite fall dessert elements—brown butter, cinnamon, and that soft, chewy texture—and mash them into a blondie. I thought it would be good. It turned out to be so much better than good. It was the kind of dessert that makes your family stop talking long enough to ask for the recipe before the plate is even empty.
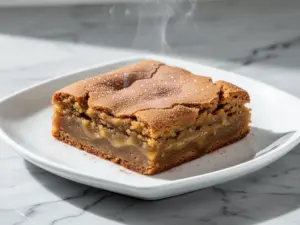
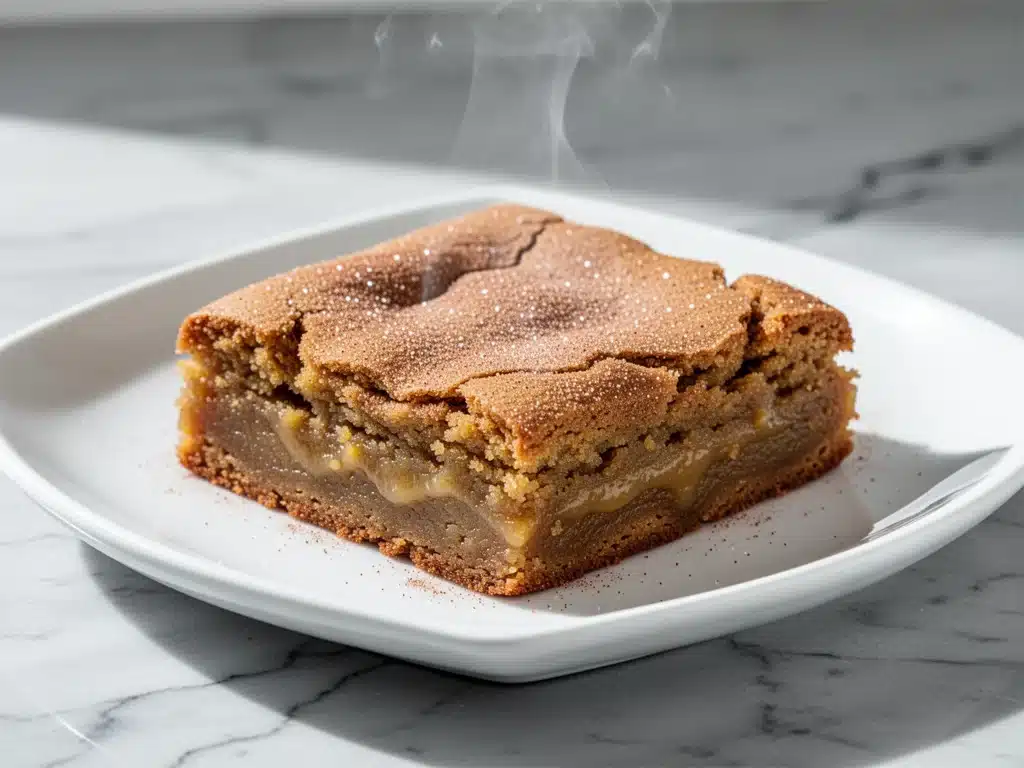
These Fall Brown Butter Snickerdoodle Blondies have completely taken over my kitchen this season. I’ve made them three times in two weeks, and each time, the smell drifting through the house feels like a warm hug. The brown butter adds this deep, nutty richness that elevates the simple sugar dough, while the cinnamon-sugar swirl on top gives you that signature snickerdoodle crunch and spice in every bite. If you’re looking for a dessert that feels fancy but is actually stupid simple, you need to try this. It’s become my go-to for weeknight cravings, holiday potlucks, and just because it’s Tuesday.
I’ve tested this recipe with different brands of brown sugar, varying oven temperatures, and even tried swapping in some whole wheat flour (spoiler: stick to all-purpose for this one). I’ve nailed down the exact timing and technique to ensure they come out soft, chewy, and perfectly spiced every single time. This isn’t just another cookie recipe; it’s the ultimate comfort food for the cooler months.
Why You’ll Love This Recipe
There are a dozen reasons I keep coming back to these blondies, but let’s be real—you probably just need to know why they’re worth the 30 minutes it takes to make them. Here’s the truth:
- The Brown Butter Magic — This is the game-changer. Browning the butter takes just a few minutes extra, but it transforms the flavor from “basic sugar cookie” to “bakery-quality treat.” It adds this toasted, nutty depth that makes everyone ask what secret ingredient you used. Trust me, it’s just butter, but it tastes like you spent hours on it.
- Snickerdoodle Vibes in Blondie Form — Do you love snickerdoodles? Do you love blondies? This recipe gets the best of both worlds. You get that soft, chewy center of a blondie with the cinnamon-sugar crust of a snickerdoodle. It’s like a flavor hug. I’ve made these for my picky eaters, and even the kids who usually only want chocolate chips are obsessed with the cinnamon swirl.
- Stupid Simple Ingredients — You probably have almost everything in your pantry right now. Butter, brown sugar, eggs, flour, cinnamon, sugar. No weird extracts, no fancy flours, no hard-to-find spices. This is a pantry-friendly recipe that feels indulgent but is actually very approachable. If you can make lemon blueberry baked oatmeal, you can make these.
- Perfectly Chewy Texture — The biggest complaint I hear about homemade blondies is that they turn out cakey or dry. Not these. By underbaking them slightly and using the right ratio of brown sugar to butter, these stay soft and chewy for days. They actually get chewier the next day, which is perfect for meal prep or having a snack ready in the fridge.
- Great for Sharing (or Not) — I cut mine into 16 squares, but let’s be honest, they disappear fast. They’re sturdy enough to pack for lunch or take to a party, but soft enough to eat with your hands while standing over the sink. I’ve brought these to book clubs, office meetings, and random neighbors, and they are always a hit.
Real talk: these are the kind of desserts that make you feel like a hero in your own kitchen. No stress, no mess, just incredible flavor that smells amazing and tastes even better.
Ingredients You’ll Need
Before we get into the mixing, let’s talk about what goes into the bowl. This recipe is forgiving, but a few key choices make a huge difference in the final texture and flavor.
For the Blondie Base
Unsalted Butter (1 cup / 226g) — We’re using unsalted so we can control the saltiness, especially since we’re browning it. You need a full cup here; don’t try to cut this down, or you’ll lose that chewy texture. Use high-quality butter if you can—since it’s the star flavor, good butter makes a big difference.
Light Brown Sugar (2 cups / 400g) — I prefer light brown sugar for this because it has a slightly milder molasses flavor than dark brown sugar, which lets the cinnamon and brown butter shine. Make sure it’s packed down when you measure. If it’s hard as a rock, microwave it for 10 seconds to soften it up.
Granulated Sugar (½ cup / 100g) — This helps with the crisp edges. The combination of brown and white sugar gives you that perfect chewy center with slightly crunchy sides.
Large Eggs (2 large) — Room temperature eggs incorporate better into the batter. If you forget to take them out, just crack them into a small bowl and microwave for 10-15 seconds. Don’t cook them, just warm them up.
Vanilla Extract (2 teaspoons) — Use real vanilla, not imitation. It adds that warm, comforting base note that ties everything together. I always keep a bottle of pure vanilla in my spice rack.
All-Purpose Flour (2 ¼ cups / 280g) — Spoon and level your flour! Don’t scoop it directly from the bag, or you’ll pack it down and end up with dry, crumbly blondies. I use Gold Medal or King Arthur, but any standard all-purpose works.
Baking Powder (1 teaspoon) — This gives them a little lift so they aren’t too dense. Make sure yours isn’t expired; old baking powder is the silent killer of baked goods.
Salt (½ teaspoon) — Just a pinch to balance the sweetness. If you used salted butter, you can skip this or reduce it slightly.
For the Cinnamon Sugar Swirl
Granulated Sugar (½ cup / 100g) — This goes on top to create that snickerdoodle crust.
Ground Cinnamon (2 teaspoons) — Use fresh cinnamon if you can. If your bottle has been sitting on the shelf for a year, it’s probably lost its punch. Swap it out for a fresh one for maximum flavor.
Optional: Cream Cheese (4 oz / 115g) — Some people like a cream cheese swirl in the middle. I sometimes do this, but for a pure snickerdoodle vibe, I skip it. If you do use it, soften it and dollop it on before sprinkling the cinnamon sugar.
Equipment Needed
You don’t need fancy gadgets for this. Here’s what I actually use:
Medium Saucepan — Essential for browning the butter. I use a light-colored stainless steel pan so I can see the color changes clearly. A dark pan makes it harder to tell when the butter is done.
Whisk — For beating the eggs and sugar together until smooth. A silicone whisk is great because it scrapes the sides of the bowl.
9×13 Inch Baking Pan — This is the perfect size for this amount of batter. Line it with parchment paper, leaving an overhang on the sides. This is the #1 tip for easy cleanup and removing the blondies without them sticking.
Small Bowl — For mixing the cinnamon and sugar topping.
Spatula — A sturdy rubber spatula for folding in the flour. Don’t use a wooden spoon; you won’t get everything mixed evenly.
Wire Cooling Rack — Let them cool properly so they set up. If you cut them while they’re hot, they’ll fall apart. Patience is key!
How to Make It: Step-by-Step
Alright, let’s make these beauties. I’m walking you through exactly how I do it, including the little tricks I’ve picked up over the years.
Step 1: Brown the Butter (5-7 minutes)
This is where the magic happens. Melt the butter in your saucepan over medium heat. Stir it constantly with a wooden spoon. At first, it’ll just be bubbling. Then, you’ll start to see little foam bubbles on the surface. Keep stirring. Soon, you’ll smell a nutty, toasted aroma. The butter will turn a golden amber color, and you’ll see brown specks (milk solids) at the bottom. As soon as it hits that color and smells amazing, take it off the heat immediately. Pour it into a heat-proof bowl to stop the cooking. Let it cool for about 10-15 minutes until it’s warm but not hot. If you add eggs to hot butter, you’ll scramble them. Trust me on this one.
Step 2: Mix the Wet Ingredients (2 minutes)
In a large mixing bowl, combine the cooled brown butter, packed brown sugar, and granulated sugar. Whisk vigorously for about 2 minutes. You want the mixture to look glossy and smooth. This step helps dissolve the sugar slightly, which contributes to that chewy texture. Add the eggs one at a time, whisking well after each addition. Stir in the vanilla extract.
Step 3: Add the Dry Ingredients (1 minute)
Sift the flour, baking powder, and salt directly into the wet mixture. I like to sift because it removes lumps and aerates the flour, but a whisk works too. Gently fold the flour into the wet ingredients using your spatula. Stop as soon as you no longer see streaks of flour. Do not overmix! Overmixing develops gluten, and we want tender, chewy blondies, not bread-like ones. The batter will be thick and sticky.
Step 4: Prepare the Pan and Swirl (2 minutes)
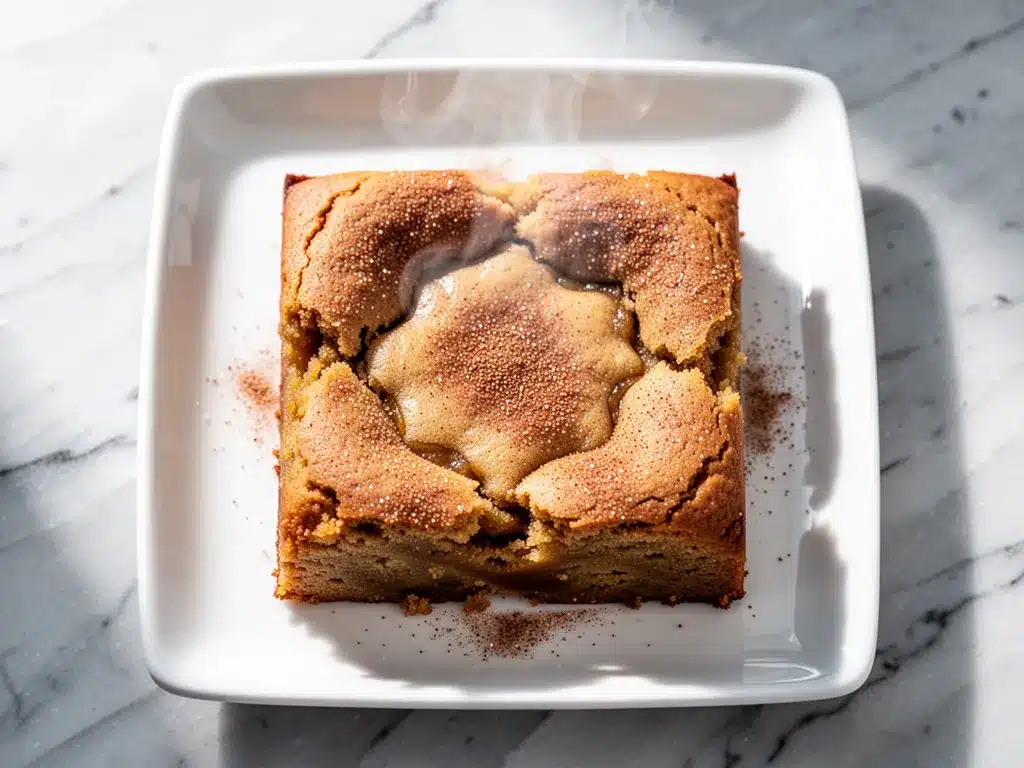
Preheat your oven to 350°F (175°C). Line your 9×13 inch pan with parchment paper. Spread the batter evenly into the pan. In a small bowl, mix the ½ cup granulated sugar with the 2 teaspoons cinnamon. Sprinkle this mixture evenly over the top of the batter. Use a knife or skewer to gently swirl the cinnamon sugar into the top layer of the batter. You don’t need to mix it all the way through; just create those pretty marbled patterns on top.
Step 5: Bake (25-30 minutes)
Place the pan in the center of the oven. Bake for 25-30 minutes. Here’s the trick: you want the edges to be golden brown and set, but the center should still look slightly soft and jiggly. If you wait until the center is fully firm, they’ll be overbaked. I usually pull them out at 26 minutes. The residual heat will continue to cook them as they cool.
Step 6: Cool and Cut (30+ minutes)
Let the blondies cool in the pan on a wire rack for at least 30 minutes. This is the hardest part, I know. But if you cut them hot, they’ll be a mess. Once they’re cool enough to handle, lift them out of the pan using the parchment paper overhang. Cut into squares or bars. Enjoy!
Expert Tips & Tricks
Here’s everything I’ve learned from making these dozens of times. These tips will save you from my mistakes.
Watch the Butter Like a Hawk
Brown butter goes from perfect to burnt in about 30 seconds. Stay by the stove. If it smells like burnt toast, you’ve gone too far, and it will taste bitter. When in doubt, err on the side of lighter. It’s better to have mild brown butter than burnt.
Don’t Skip the Cooling Step
I know you want to eat them now. But the brown butter needs to cool down so it doesn’t melt the sugar or cook the eggs. If the batter is too warm, the blondies will spread too much and become greasy. 10-15 minutes is enough.
Underbake for Chewiness
This is the most important rule for chewy blondies. They should look slightly underdone in the middle when you take them out. They will firm up as they cool. If you bake them until the center is fully set, they will be cakey and dry.
Use Parchment Paper
I cannot stress this enough. Line your pan. Not only does it prevent sticking, but it also makes cleanup a breeze. Just lift the blondies out and discard the paper. No scrubbing pans required.
Storage for Freshness
Store these in an airtight container at room temperature for up to 4 days. They actually get chewier on day 2. If you want to keep them longer, freeze them. Wrap individual squares in plastic wrap and store in a freezer bag for up to 3 months. Thaw at room temperature.
Variations & Substitutions
Once you’ve nailed the basic version, here’s how you can mix it up. I’ve tried all of these.
Add-ins
Chopped pecans or walnuts add a great crunch and complement the cinnamon perfectly. I usually add ½ cup of toasted nuts. You could also add white chocolate chips for a sweeter twist, though it might be too sweet for some. I stick to plain or nutty versions.
Gluten-Free Option
You can substitute the all-purpose flour with a 1:1 gluten-free baking flour blend. I’ve used Bob’s Red Mill and King Arthur Gluten-Free Measure for Measure, and both work well. Just make sure your blend contains xanthan gum, or add ½ teaspoon yourself.
Vegan Version
Swap the butter for a high-quality vegan butter stick (like Miyoko’s or Earth Balance). Use a flax egg (1 tablespoon ground flaxseed mixed with 3 tablespoons water per egg) instead of the eggs. The texture will be slightly different, but still delicious.
Spice It Up
Add a pinch of nutmeg or cardamom to the cinnamon sugar for a more complex fall flavor. Or add a dash of cayenne pepper for a spicy kick. I tried a little cayenne once, and it was surprisingly good with the sweet cinnamon.
Mini Blondies
You can bake these in a muffin tin for individual portions. Fill each cup ¾ full and bake for 12-15 minutes. These are perfect for lunchboxes or party platters. They bake faster, so check them early.
Serving & Storage
How to Serve
I usually serve these warm, right out of the oven with a glass of cold milk. They’re also great at room temperature for potlucks. If you want to make them feel extra special, serve them with a dollop of whipped cream or a scoop of vanilla ice cream. The contrast of warm, chewy blondie and cold ice cream is unbeatable.
Side Dishes
These are a dessert, so they don’t really have a “side.” But if you’re making a fall dinner, they pair well with fall no-bake pumpkin pie if you want a double-dose of fall flavors. Or serve them alongside a cup of spiced cider.
Storage Instructions
Refrigerator: Not recommended. The fridge dries out baked goods. Keep them at room temperature.
Freezer: Yes! Wrap tightly in plastic wrap and foil, or place in a freezer-safe bag. They last up to 3 months. Thaw at room temperature for 30 minutes before eating.
Reheating: If you want them warm, microwave a square for 10-15 seconds. Be careful not to overdo it, or they’ll get tough.
Nutrition Information
I’m not a nutritionist, but here’s the breakdown if you’re tracking. Keep in mind that these are rich, sweet treats, so portion control is key.
Per Serving (based on 16 squares):
- Calories: 280
- Protein: 3g
- Carbs: 42g
- Fiber: 1g
- Sugar: 32g
- Fat: 12g
- Saturated Fat: 7g
- Cholesterol: 45mg
- Sodium: 180mg
What’s Good: They provide some energy from the carbs and fat, which is nice for a post-dinner treat. The brown butter adds a bit of flavor depth without extra ingredients.
What to Know: High in sugar and saturated fat. This is dessert, not a health food. Enjoy in moderation.
Final Thoughts
So that’s my go-to Fall Brown Butter Snickerdoodle Blondies! I’ve probably talked your ear off at this point, but when you make a recipe this often, you have a lot to say about it. These have saved my dessert game more times than I can count. They’re my answer to “what should I bring to the party?” or “I need something sweet to comfort me.” My family is obsessed, my friends ask for the recipe, and I’m obsessed with how easy they are to make.
Make it yours! Try different nuts, add some chocolate chips, or just enjoy them plain. The best recipes are the ones you adapt to your tastes. If you make these, drop a comment and let me know what you think! I love hearing how recipes turn out in your kitchen. And if something doesn’t work, tell me that too—I’m here to help troubleshoot.
Happy baking! And I hope your kitchen smells half as good as mine does right now.
Frequently Asked Questions
Can I use salted butter instead of unsalted?
You can, but reduce the added salt in the recipe to ¼ teaspoon. Salted butter varies in salt content, so it’s harder to control. If you use salted butter, taste the batter before baking (if you dare!) to see if it needs more salt.
Why did my blondies turn out cakey?
This usually happens if you overmixed the flour or overbaked them. Make sure you stop mixing as soon as the flour is incorporated. Also, check your oven temperature. If your oven runs hot, use an oven thermometer to verify. Underbaking slightly is key for chewy blondies.
Can I freeze the batter?
It’s not recommended. The leavening agent (baking powder) starts working as soon as it gets wet. Freezing the batter might affect the rise. It’s better to bake them and then freeze the finished product.
Can I use dark brown sugar?
Yes, but the flavor will be more molasses-heavy. Light brown sugar gives a milder, sweeter taste that pairs better with cinnamon. If you only have dark brown sugar, it will still be delicious, just with a deeper flavor.
How do I know when the butter is browned?
Look for a golden amber color and listen for the sizzling to slow down. The smell should be nutty and toasty, like hazelnuts. You’ll also see brown specks at the bottom of the pan. Take it off the heat as soon as you see these signs.
Can I make these in a different pan size?
Yes, but the baking time will change. For an 8×8 pan, you’ll need to bake for 30-35 minutes. For a 9×13 pan, 25-30 minutes. Keep an eye on them, as oven temperatures vary.
Do I need to sift the flour?
It’s not strictly necessary, but it helps remove lumps and aerates the flour, leading to a lighter texture. If you’re in a hurry, you can just whisk the flour with the baking powder and salt before adding it to the wet ingredients.
Pin This Recipe!
Fall Brown Butter Snickerdoodle Blondies
- Total Time: 45 minutes
- Yield: 16 servings 1x
Description
Soft, chewy blondies infused with nutty brown butter and topped with a cinnamon-sugar swirl for a cozy, nostalgic fall dessert that is easy to make and perfect for sharing.
Ingredients
- 1 cup (226g) unsalted butter
- 2 cups (400g) light brown sugar, packed
- ½ cup (100g) granulated sugar
- 2 large eggs, room temperature
- 2 teaspoons vanilla extract
- 2 ¼ cups (280g) all-purpose flour
- 1 teaspoon baking powder
- ½ teaspoon salt
- ½ cup (100g) granulated sugar (for topping)
- 2 teaspoons ground cinnamon (for topping)
Instructions
- Preheat oven to 350°F (175°C). Line a 9×13 inch baking pan with parchment paper, leaving an overhang on the sides.
- Melt the butter in a medium saucepan over medium heat. Stir constantly until it turns golden amber with brown specks and a nutty aroma (5-7 minutes). Immediately pour into a heat-proof bowl and let cool for 10-15 minutes until warm but not hot.
- In a large mixing bowl, whisk the cooled brown butter, brown sugar, and granulated sugar vigorously for about 2 minutes until glossy and smooth.
- Add eggs one at a time, whisking well after each addition. Stir in the vanilla extract.
- Sift the flour, baking powder, and salt into the wet mixture. Gently fold with a spatula until just combined; do not overmix.
- Spread the batter evenly into the prepared pan.
- In a small bowl, mix the topping granulated sugar and cinnamon. Sprinkle evenly over the batter and gently swirl with a knife or skewer.
- Bake for 25-30 minutes, until edges are golden but the center still looks slightly soft and jiggly.
- Cool in the pan on a wire rack for at least 30 minutes before lifting out and cutting into squares.
Notes
Brown butter goes from perfect to burnt quickly, so watch it closely. Underbaking slightly is key for chewy texture. Store in an airtight container at room temperature for up to 4 days, or freeze for up to 3 months.
- Prep Time: 15 minutes
- Cook Time: 30 minutes
- Category: Dessert
- Cuisine: American
Nutrition
- Serving Size: 1 square
- Calories: 280
- Sugar: 32
- Sodium: 180
- Fat: 12
- Saturated Fat: 7
- Carbohydrates: 42
- Fiber: 1
- Protein: 3
Keywords: fall dessert, brown butter blondies, snickerdoodle blondies, easy baking, chewy blondies, cinnamon sugar, autumn recipes