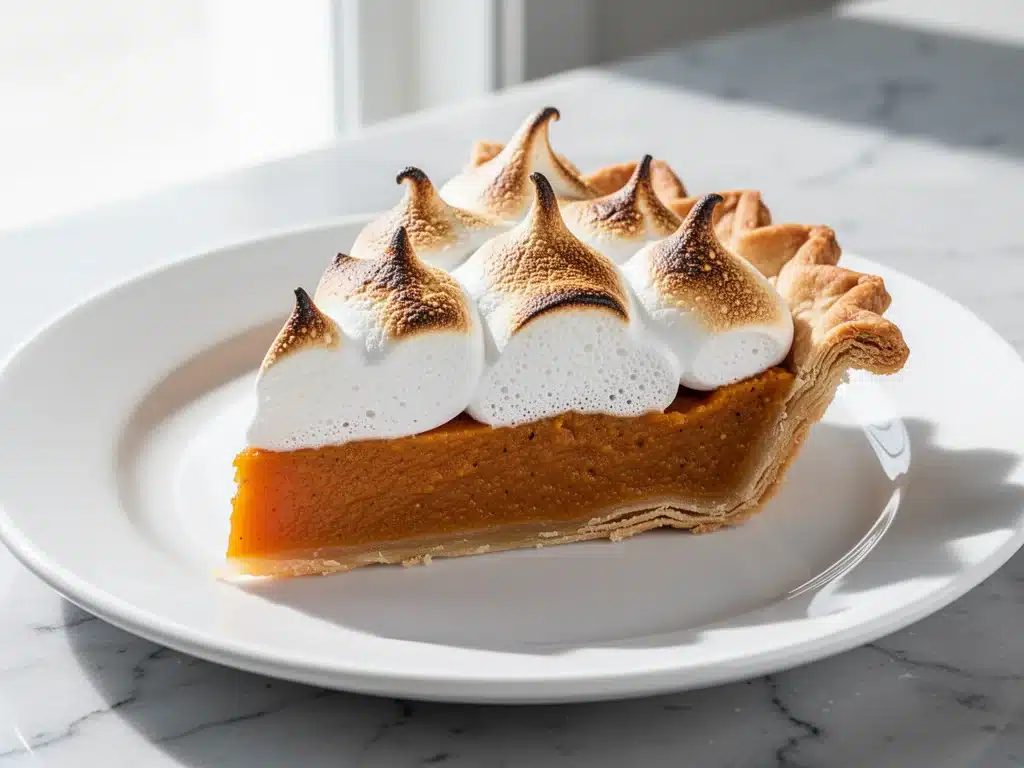
Last Thanksgiving, I walked into the dining room with a pie that I was secretly terrified of. It wasn’t just any pie—it was a sweet potato pie with a marshmallow meringue topping, a combination that sounded like a recipe for disaster on paper. You see, my grandmother’s kitchen was the temple of traditional pumpkin pie. Hers was dense, spiced, and perfect. When I announced I was bringing something “different” to the table, my mother-in-law gave me that polite, tight-lipped smile that usually precedes a gentle critique about how “interesting” my choices were.
But here’s the thing: I’ve made this fall sweet potato pie with toasted marshmallow meringue four times now, and it has become the single most requested dish at our family gatherings. The first time I made it, I burned the meringue because I got distracted by the dog. The second time, I under-whipped the egg whites and it collapsed. But by the third attempt? Perfection. And by the fourth? My mother-in-law actually asked for the recipe. That is the highest praise I can imagine.
This isn’t just a dessert; it’s a conversation starter. It’s that bridge between the classic comfort of sweet potatoes and the nostalgic, gooey joy of campfire s’mores. I know what you’re thinking. “Meringue is hard. Egg whites are temperamental.” And you’re right, it can be. But I’ve cracked the code on how to make it foolproof. The key isn’t fancy equipment; it’s patience and a little bit of science (don’t worry, I’ll explain it simply).
When you pull this pie out of the oven, the kitchen smells like toasted sugar and warm spices. Your guests will lean in before they even take a bite. They’ll see that golden, glossy peaks and think, “Wow, that looks like something from a fancy restaurant.” But then they take a bite, and the creamy, spiced sweet potato filling melts in their mouth, followed by that crisp, sweet crunch of the meringue. It’s the kind of dessert that makes people close their eyes and sigh.
I’ve tested this fall sweet potato pie with toasted marshmallow meringue so many times that I can make it in my sleep. I’ve tweaked the spice blend to be bold but not overwhelming. I’ve figured out exactly how to toast the meringue without burning it. And I’ve learned that the secret to the best texture is actually in how you prepare the sweet potatoes. If you’re looking for a show-stopping dessert that feels homemade but tastes professional, this is it. Let’s get baking.
Why You’ll Love This Recipe
There are about ten reasons I keep making this pie, but here are the big ones. This isn’t just another pumpkin pie in disguise. It’s distinct, it’s creamy, and it has that playful element of the toasted meringue that makes it feel special.
The Flavor Profile is Bold and Balanced — Most sweet potato pies are too sweet or too bland. This one strikes the perfect balance. The natural sweetness of the potatoes is cut by a pinch of sea salt and a warm blend of cinnamon, nutmeg, and ginger. It’s cozy without being heavy. I’ve had people tell me they don’t even like sweet potato pie, but they loved this one because the spices were so well-integrated.
The Meringue is a Game-Changer — Let’s talk about that topping. It’s not just whipped cream; it’s a toasted meringue that mimics the texture of a marshmallow. It’s crisp on the outside and soft and chewy on the inside. It adds a textural contrast that makes every bite interesting. Plus, it looks absolutely stunning on the table. It’s the “wow” factor that makes people pull out their phones.
It’s Actually Easier Than You Think — I know, I know. Meringues have a reputation for being finicky. But I’ve simplified the process. You don’t need a stand mixer if you don’t want one (though it helps). You just need to know two tricks: keeping your bowl grease-free and knowing when to stop whipping. Once you get the hang of it, it’s actually faster than making a custard filling from scratch.
Perfect for Holiday Hosting — This pie is a crowd-pleaser. It’s not too rich, so people can have a second slice. It’s gluten-free (if you use a gluten-free crust), which is a huge bonus for guests with dietary restrictions. And it travels well. I’ve driven it two hours in my car, and it held up beautifully. Just let it cool completely before transporting.
Uses Simple, Accessible Ingredients — You don’t need to go to a specialty store for this. You need sweet potatoes, eggs, sugar, butter, and spices. Things you probably have in your pantry. I often swap in maple syrup for some of the sugar to give it a deeper, earthier sweetness, but regular granulated sugar works just fine. It’s a recipe that feels luxurious but is surprisingly budget-friendly.
This pie has completely changed our Thanksgiving dessert routine. Before, I was stressing about making three different pies to please everyone. Now? I make this one, and everyone is happy. It’s my go-to when I want to impress without spending all day in the kitchen.
Ingredients You’ll Need
Here’s the best part: you probably have most of this already. I’m particular about three ingredients here, and I’ll tell you exactly why. For the filling, we’re using roasted sweet potatoes, not canned. Canned puree often has added sugar and preservatives that throw off the flavor. Fresh roasted potatoes give you that natural, caramelized depth that makes this pie so good.
For the Crust:
Graham cracker crumbs (1 ½ cups / 150g) — I use standard honey graham crackers. Crush them finely in a food processor or put them in a bag and crush with a rolling pin. If you want a gluten-free version, use gluten-free graham crackers or a crushed oat cookie base.
Unsalted butter (6 tablespoons / 85g) — Melted. This binds the crumbs together. Use real butter, not margarine. The flavor difference is noticeable.
Granulated sugar (2 tablespoons / 25g) — Just a little bit to sweeten the crust. If you prefer a less sweet crust, reduce to 1 tablespoon.
Salt (¼ teaspoon) — Crucial. It balances the sweetness and brings out the flavor of the crackers.
For the Filling:
Ripe sweet potatoes (2 large, about 2 lbs / 900g) — Look for potatoes that are soft to the touch and have reddish-brown skin. Garnet or Jewel varieties are best because they’re naturally sweeter and moister. Roast them whole in the oven until tender, then scoop out the flesh. Do not boil them; boiling makes them watery.
Heavy cream (½ cup / 120ml) — Full-fat only. This gives the filling its rich, custard-like texture. Half-and-half will work but will be less rich.
Whole milk (¼ cup / 60ml) — Adds just enough liquid to blend the potatoes smoothly without making it too runny.
Eggs (3 large) — Room temperature eggs blend better into the filling. I take them out of the fridge 20 minutes before I start.
Unsalted butter (¼ cup / 57g) — Melted. Adds richness and a silky mouthfeel.
Packed brown sugar (¾ cup / 150g) — Light or dark brown sugar both work. Dark brown has a deeper molasses flavor, which I love in this pie. Pack it tightly into the cup.
Maple syrup (2 tablespoons / 30ml) — Pure maple syrup, not pancake syrup. This adds a complex, earthy sweetness that pairs beautifully with the spices.
Vanilla extract (1 teaspoon) — Use real vanilla, not imitation. It’s worth the extra cost.
Cinnamon (1 teaspoon) — Ground cinnamon. Freshly ground is best, but ground is fine.
Nutmeg (¼ teaspoon) — Freshly grated nutmeg is ideal, but ground works. It’s a strong spice, so don’t overdo it.
Ginger (¼ teaspoon) — Ground ginger. Adds a little warmth and zing.
Salt (½ teaspoon) — To balance all the sweetness.
For the Toasted Marshmallow Meringue:
Egg whites (4 large, about 120g) — Must be room temperature. Cold whites won’t whip up to the same volume. Separate them carefully; even a tiny bit of yolk will prevent them from whipping.
Cream of tartar (¼ teaspoon) — This stabilizes the egg whites, making them less likely to collapse. It’s a small ingredient that makes a huge difference.
Granulated sugar (¾ cup / 150g) — Fine granulated sugar dissolves better than coarse sugar. If you have superfine sugar, use that.
Vanilla extract (1 teaspoon) — For flavor.
Mini marshmallows (½ cup / 50g) — Optional, but I love them. They melt into the meringue and add that classic s’more texture. If you don’t have them, skip them or use chopped toasted coconut.
Shopping Tips:
- Sweet Potatoes: Buy them when they’re on sale. They store well for weeks in a cool, dark place.
- Eggs: Buy organic or free-range if you can. The flavor is richer.
- Spices: Check your pantry first. Old spices lose potency, so if yours are from last year, buy fresh ones.
Equipment Needed
You don’t need fancy equipment for this. Here’s what I actually use.
Rimmed baking sheet — For roasting the sweet potatoes. I line it with parchment paper for easy cleanup.
Food processor or blender — To puree the sweet potatoes smoothly. A hand blender works too, but you might have to blend longer.
Large mixing bowl — For the meringue. Glass or metal is best. Avoid plastic if it’s scratched, as bacteria can hide in the scratches and affect whipping.
Electric hand mixer or stand mixer — Essential for the meringue. Whipping egg whites by hand is possible but exhausting. I use a hand mixer because it’s easier to control.
9-inch pie dish — Glass or ceramic is best for even baking. Metal pans can over-bake the edges.
Offset spatula — For spreading the meringue smoothly over the pie. A regular spoon works in a pinch.
Pastry brush — Optional, but helpful for brushing the crust with butter.
Cooling rack — To cool the pie evenly. Don’t skip this step; hot pie + cold counter = cracked crust.
Tool Tips:
- Grease-Free Bowl: Wipe your mixing bowl with a little vinegar or lemon juice before whipping egg whites. This ensures no grease interferes with the foam.
- Room Temp Eggs: If you forget to take eggs out, soak them in warm water for 10 minutes.
How to Make It: Step-by-Step
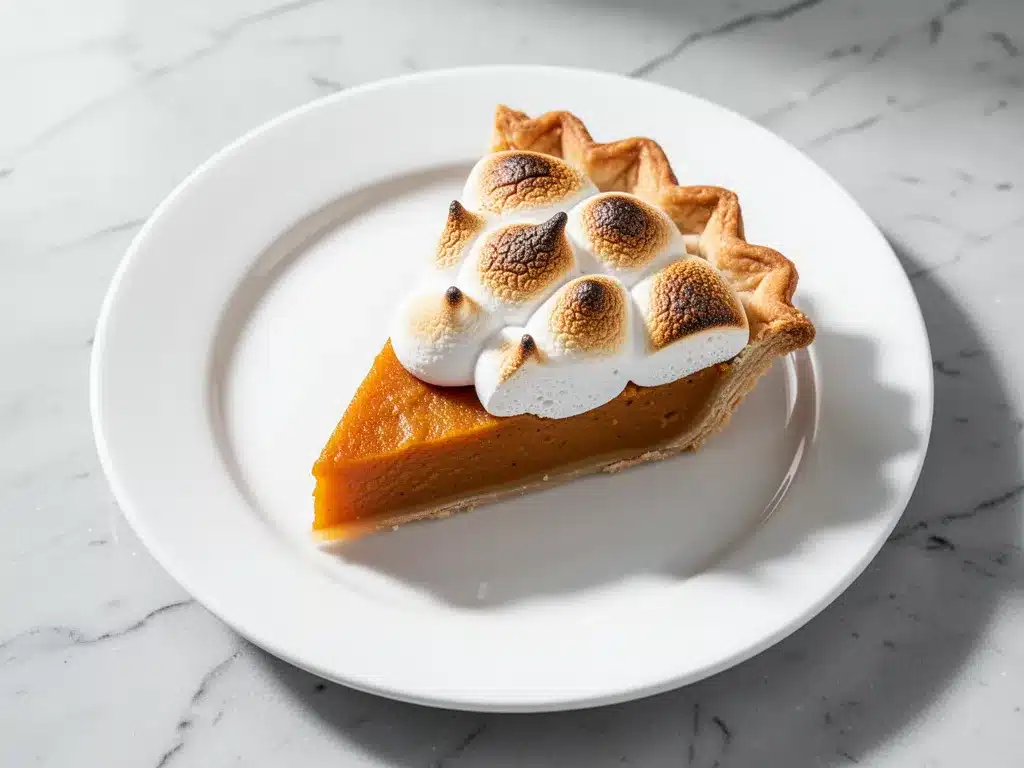
Alright, let’s make this! I’m walking you through exactly how I do it, including the little tricks I’ve picked up.
Step 1: Roast the Sweet Potatoes (45-60 minutes)
Preheat your oven to 400°F (200°C). Wash the sweet potatoes thoroughly and poke them a few times with a fork. Place them directly on the oven rack or on a lined baking sheet. Roast for 45-60 minutes, until they are very soft when squeezed. They should collapse slightly under pressure. Let them cool until you can handle them, then cut them in half and scoop out the flesh. Discard the skin. You should have about 2 cups of puree. If it’s too wet, spread it on a plate and let it air dry for 10 minutes. Water is the enemy of a thick pie.
Step 2: Make the Crust (5 minutes)
Mix the graham cracker crumbs, sugar, salt, and melted butter in a bowl until it looks like wet sand. Press this mixture firmly into the bottom and up the sides of your 9-inch pie dish. Use the bottom of a measuring cup to pack it down evenly. Bake at 350°F (175°C) for 8 minutes to set the crust. Remove and let it cool while you make the filling. This pre-bake prevents a soggy bottom.
Step 3: Prepare the Filling (10 minutes)
In a large bowl, combine the sweet potato puree, brown sugar, maple syrup, melted butter, heavy cream, milk, eggs, vanilla, cinnamon, nutmeg, ginger, and salt. Whisk vigorously until the mixture is completely smooth and no lumps remain. I like to use a hand mixer for this part to ensure it’s silky. Pour the filling into the cooled crust. It should be level.
Step 4: Bake the Pie (45-50 minutes)
Place the pie on a baking sheet (to catch any drips) and bake at 350°F (175°C) for 45-50 minutes. The pie is done when the edges are set but the center still jiggles slightly like Jell-O. It will firm up as it cools. Do not overbake, or the filling will crack. If the edges start browning too quickly, cover them with a ring of aluminum foil.
Step 5: Make the Meringue (15 minutes)
While the pie bakes, prepare the meringue. In your clean, grease-free bowl, whip the egg whites and cream of tartar on medium speed until foamy. Gradually add the sugar, one tablespoon at a time, while increasing the speed to high. Whip until stiff, glossy peaks form. This means when you lift the beaters, the peaks stand straight up without drooping. Fold in the vanilla and mini marshmallows gently.
Step 6: Top and Toast (5-7 minutes)
Remove the pie from the oven. Carefully spoon the meringue over the hot pie, spreading it to the edges to seal it. This prevents the meringue from shrinking. Use an offset spatula to create peaks and swirls—it looks beautiful and toasts evenly. Return the pie to the oven and broil on high for 2-4 minutes. Watch it like a hawk! You want golden brown peaks, not blackened ones. Rotate the pan halfway through for even toasting.
Step 7: Cool and Serve (1 hour)
Let the pie cool on a wire rack for at least 1 hour. This allows the filling to set completely. If you cut it too soon, it will be runny. Serve at room temperature or slightly warm. It’s best eaten the same day, but leftovers keep well in the fridge.
Expert Tips & Tricks
Here’s everything I’ve learned from making this dozens of times. These tips will save you from my mistakes.
Don’t Skimp on the Roasting
Roasting concentrates the flavor. Boiling or steaming leaves too much water. If your puree is watery, your pie will be runny. Spread the puree on a baking sheet and let it sit for 15 minutes to evaporate excess moisture before mixing.
Stiff Peaks are Non-Negotiable
For the meringue, you need stiff peaks. Soft peaks will collapse under their own weight. If you’re unsure, whip a little longer. The meringue should hold its shape when you lift the beaters.
Seal the Edges
Make sure the meringue touches the crust all the way around. If there’s a gap, the meringue will shrink away from the crust as it cools. This is a common mistake, and it looks ugly. Press the meringue gently against the crust.
Watch the Broiler
Broilers vary wildly. Some are gentle, some are fierce. Start checking at 2 minutes. If your oven runs hot, use the middle rack instead of the top rack. You want color, not charcoal.
Room Temperature Ingredients
For the filling, make sure your eggs and butter are room temperature. Cold ingredients can cause the filling to separate or not blend smoothly.
Common Mistakes (and how to avoid them):
- Mistake: Runny filling. Fix: You didn’t roast the potatoes long enough, or you didn’t let the pie cool. Cool for at least 1 hour.
- Mistake: Shrunken meringue. Fix: You didn’t seal the edges to the crust. Also, make sure the pie was hot when you added the meringue.
- Mistake: Grainy meringue. Fix: You didn’t dissolve the sugar completely. Whip longer after adding the sugar.
Variations & Substitutions
Once you’ve nailed the basic version, here’s how you can mix it up. I’ve tried all of these.
Gluten-Free Version
Use gluten-free graham crackers or crushed gluten-free oat cookies for the crust. Ensure your spices and vanilla are certified gluten-free. The filling and meringue are naturally gluten-free.
Dairy-Free Version
Replace butter with coconut oil or vegan butter. Use full-fat coconut milk instead of heavy cream and milk. For the meringue, you can use aquafaba (the liquid from a can of chickpeas) instead of egg whites. Whip aquafaba with cream of tartar and sugar just like egg whites. It works surprisingly well!
Maple Pecan Twist
Add 1 cup of toasted pecans to the filling. Or, sprinkle chopped pecans on top of the meringue before broiling. Adds crunch and nuttiness.
Spiced Latte Version
Add 1 tablespoon of instant espresso powder to the filling. It enhances the chocolate and vanilla notes without making it taste like coffee. Great for coffee lovers.
Mini Pies
Make this in a muffin tin for individual servings. Reduce baking time to 20-25 minutes for the filling. Top with a dollop of meringue and broil for 1-2 minutes. Perfect for parties.
Dietary Modifications:
- Lower Sugar: Reduce brown sugar to ½ cup and maple syrup to 1 tablespoon. It will be less sweet but still flavorful.
- Higher Protein: Add a scoop of vanilla protein powder to the filling (reduce milk by ¼ cup). Texture will be denser.
Serving & Storage
How to Serve:
I usually serve this pie straight from the counter, sliced with a sharp knife. It’s rustic and inviting. For a fancier presentation, add a dollop of whipped cream on the side and a sprinkle of cinnamon. It pairs beautifully with a cup of hot tea or coffee.
Side Dishes:
- Hot chocolate
- Black coffee
- Earl Grey tea
- Whipped cream (if you want extra richness)
Storage Instructions:
Refrigerator: Store in an airtight container or cover tightly with plastic wrap for up to 3 days. The meringue will soften slightly in the fridge, which is normal. Bring to room temperature before serving for the best texture.
Freezing: I don’t recommend freezing this pie. The meringue will weep and lose its texture, and the filling may become watery. It’s best eaten fresh.
Reheating: Do not reheat. Serve at room temperature. If you must warm it, microwave a slice for 10-15 seconds. Don’t overdo it.
Pro tip: If you’re making this ahead, make the filling and crust the day before. Store them separately in the fridge. Assemble and bake the day of. This saves time and ensures the best texture.
Nutrition Information
I’m not a nutritionist, but here’s the breakdown if you’re tracking. This is a rich dessert, so a small slice is plenty.
Per Serving (based on 8 servings):
- Calories: 320
- Protein: 5g
- Carbs: 45g
- Fiber: 2g
- Sugar: 32g
- Fat: 14g
- Saturated Fat: 7g
- Cholesterol: 65mg
- Sodium: 180mg
What’s Good:
- Sweet potatoes provide vitamin A and fiber.
- Relatively low in sodium.
- Gluten-free option available.
What to Know:
- High in sugar due to the meringue and brown sugar.
- Contains dairy and eggs.
- Calorie-dense from butter and cream.
My Take:
Look, this is a dessert. It’s meant to be enjoyed. The sweet potatoes add some nutritional value, but the meringue and sugar make it a treat. I don’t stress about it. I enjoy a slice, share it with friends, and move on. It’s about balance and joy, not perfection.
Final Thoughts
So that’s my go-to fall sweet potato pie with toasted marshmallow meringue! I’ve probably talked your ear off at this point, but when you make a recipe this often, you have a lot to say about it. This pie has saved my Thanksgiving desserts more times than I can count. It’s my answer to “what’s for dessert” when I want something impressive but delicious. My family is happy, my guests are happy, and I’m happy because I know exactly what’s in it.
Make it yours! Try different add-ins, swap in your favorite spices, or adjust the sweetness. The best recipes are the ones you adapt to your family’s tastes. If you make this, drop a comment and let me know what you think! I love hearing how recipes turn out in your kitchen. And if something doesn’t work, tell me that too—I’m here to help troubleshoot.
Happy baking! And I hope your kitchen smells half as good as mine does right now.
Frequently Asked Questions
Can I use canned sweet potato puree?
You can, but I don’t recommend it. Canned puree often has added sugar and preservatives, and it’s usually too watery. If you must use it, drain it in a cheesecloth for an hour to remove excess moisture, and reduce the added sugar in the recipe. Fresh roasted potatoes give a much better flavor and texture.
Why did my meringue collapse?
This usually happens if the egg whites weren’t whipped enough, or if there was grease in the bowl. Make sure your bowl is completely clean and dry. Also, ensure you’ve reached stiff peaks. If you under-whip, the meringue will deflate. Another reason is adding the meringue to a cold pie; always top the pie while it’s still warm from the oven.
Can I make this ahead of time?
Yes! You can make the crust and filling up to 2 days ahead. Store them separately in the fridge. Assemble and bake the pie the day of. The meringue is best made fresh, but you can make it a few hours ahead and store it in the fridge in an airtight container. Just bring it to room temperature before topping the pie.
How do I store leftovers?
Store in an airtight container in the fridge for up to 3 days. The meringue will soften, but the flavor will still be great. Bring to room temperature before serving. Do not freeze, as the texture will suffer.
Can I use maple syrup instead of brown sugar?
You can, but the texture will be different. Brown sugar adds moisture and chewiness. If you use maple syrup, reduce the other liquids (milk/cream) slightly to compensate. I recommend keeping the brown sugar for the best texture, but a mix of both works well.
What type of sweet potatoes should I use?
Garnet or Jewel sweet potatoes are best. They are moist, sweet, and have a smooth texture when roasted. Avoid “dry” varieties like the ones used for fries, as they won’t make a smooth filling.
Pin This Recipe!
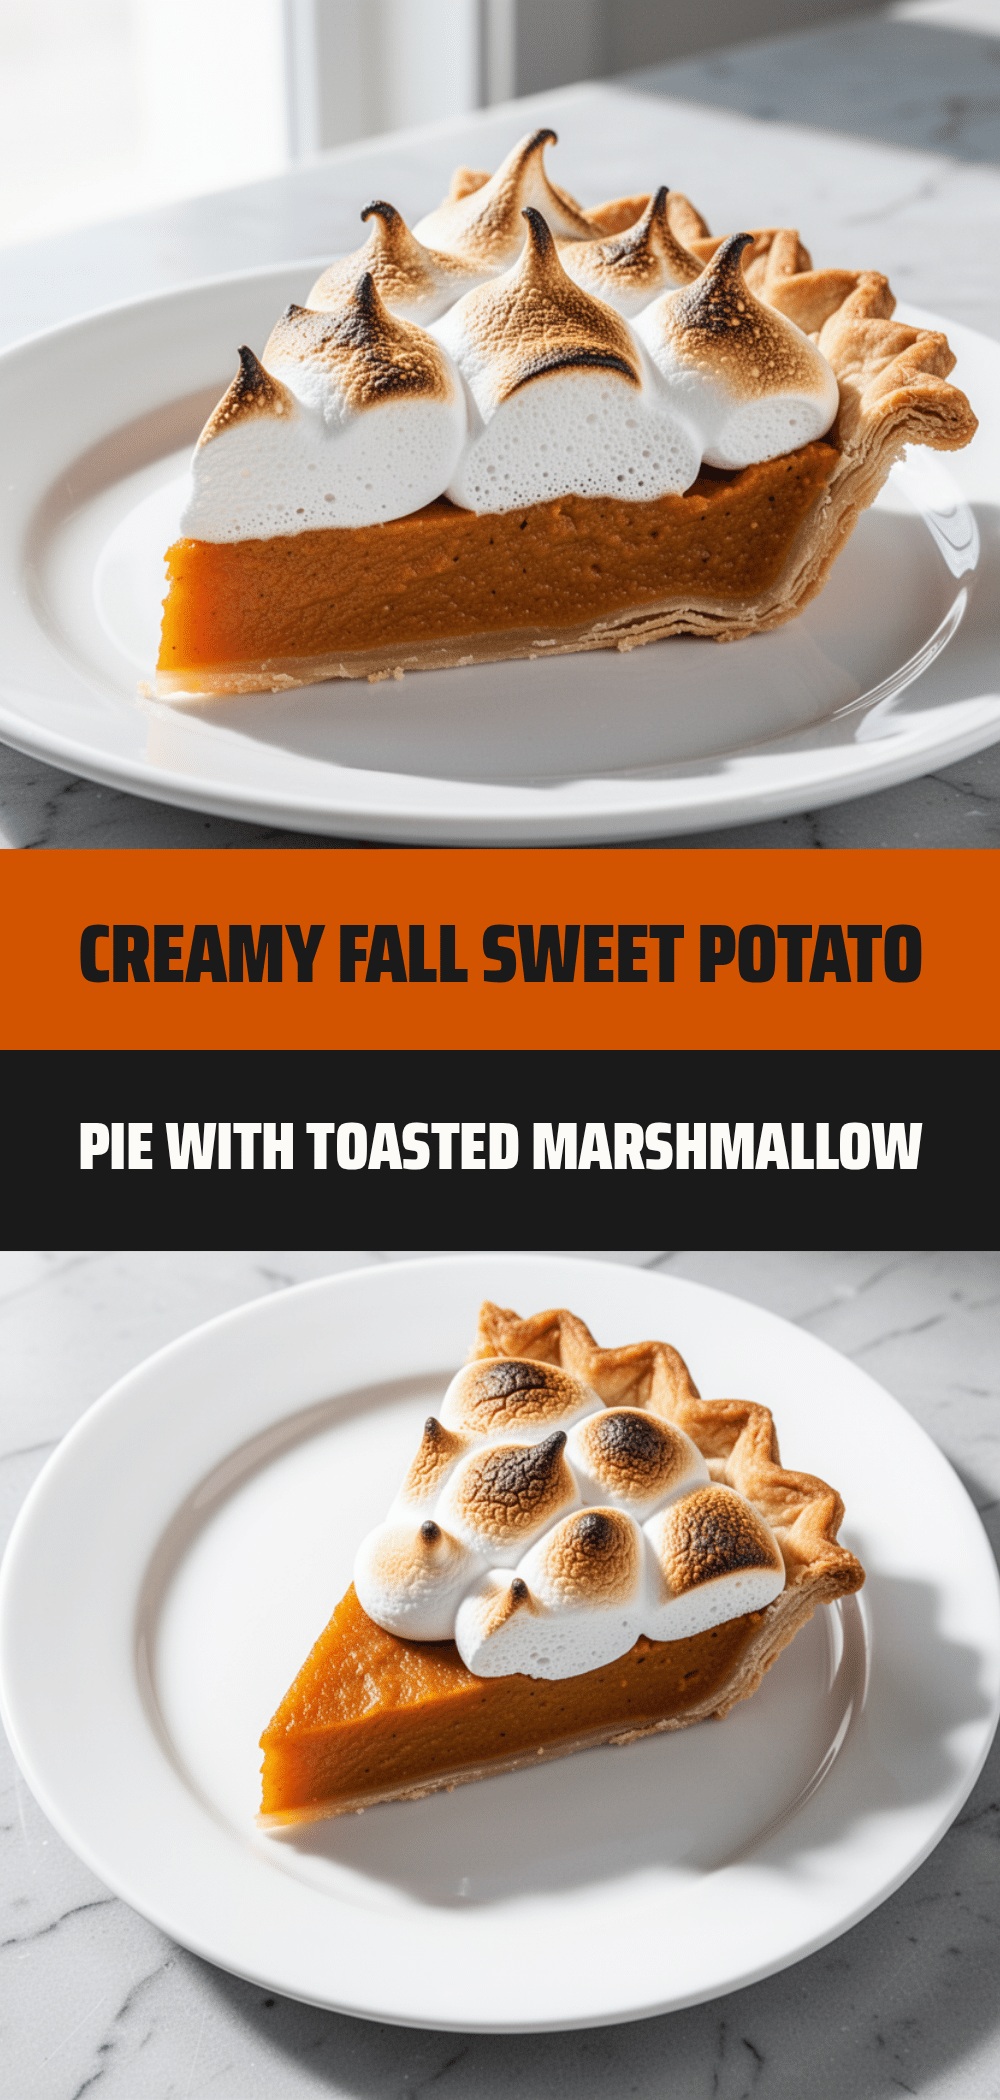

Best Easy Fall Sweet Potato Pie with Toasted Marshmallow Meringue
- Total Time: 1 hour 45 minutes
- Yield: 8 servings 1x
Description
A show-stopping fall dessert featuring a creamy, spiced sweet potato filling in a graham cracker crust, topped with a glossy, toasted marshmallow meringue that offers a perfect balance of sweet, spicy, and textural contrast.
Ingredients
- For the Crust:
- 1 ½ cups (150g) graham cracker crumbs
- 6 tablespoons (85g) unsalted butter, melted
- 2 tablespoons (25g) granulated sugar
- ¼ teaspoon salt
- For the Filling:
- 2 large ripe sweet potatoes (about 2 lbs / 900g), roasted and pureed
- ½ cup (120ml) heavy cream
- ¼ cup (60ml) whole milk
- 3 large eggs, room temperature
- ¼ cup (57g) unsalted butter, melted
- ¾ cup (150g) packed brown sugar
- 2 tablespoons (30ml) pure maple syrup
- 1 teaspoon vanilla extract
- 1 teaspoon ground cinnamon
- ¼ teaspoon ground nutmeg
- ¼ teaspoon ground ginger
- ½ teaspoon salt
- For the Toasted Marshmallow Meringue:
- 4 large egg whites, room temperature (about 120g)
- ¼ teaspoon cream of tartar
- ¾ cup (150g) granulated sugar
- 1 teaspoon vanilla extract
- ½ cup (50g) mini marshmallows (optional)
Instructions
- Preheat oven to 400°F (200°C). Wash sweet potatoes, poke with a fork, and roast for 45-60 minutes until very soft. Cool, scoop out flesh, and puree. If too wet, let air dry for 10 minutes.
- Mix graham cracker crumbs, sugar, salt, and melted butter until resembling wet sand. Press firmly into a 9-inch pie dish. Bake at 350°F (175°C) for 8 minutes to set. Cool completely.
- In a large bowl, whisk sweet potato puree, brown sugar, maple syrup, melted butter, heavy cream, milk, eggs, vanilla, cinnamon, nutmeg, ginger, and salt until completely smooth.
- Pour filling into the cooled crust. Bake at 350°F (175°C) for 45-50 minutes until edges are set but center jiggles slightly. Cover edges with foil if browning too quickly.
- While pie bakes, whip egg whites and cream of tartar on medium speed until foamy. Gradually add sugar while increasing speed to high until stiff, glossy peaks form. Fold in vanilla and mini marshmallows.
- Remove pie from oven. Spoon meringue over the hot pie, sealing edges to the crust. Create peaks with an offset spatula.
- Broil on high for 2-4 minutes until golden brown, watching closely to prevent burning. Rotate pan halfway through.
- Cool on a wire rack for at least 1 hour before slicing to allow filling to set. Serve at room temperature.
Notes
Ensure the mixing bowl for the meringue is completely grease-free (wipe with vinegar or lemon juice) to ensure proper whipping. Do not boil sweet potatoes; roasting concentrates flavor and prevents a watery filling. Seal the meringue edges to the crust to prevent shrinking. The pie is best eaten the same day; freezing is not recommended as the meringue texture will suffer.
- Prep Time: 30 minutes
- Cook Time: 1 hour 15 minutes
- Category: Dessert
- Cuisine: American
Nutrition
- Serving Size: 1 slice
- Calories: 320
- Sugar: 32
- Sodium: 180
- Fat: 14
- Saturated Fat: 7
- Carbohydrates: 45
- Fiber: 2
- Protein: 5
Keywords: sweet potato pie, marshmallow meringue, fall dessert, Thanksgiving pie, toasted meringue, gluten-free dessert, holiday baking