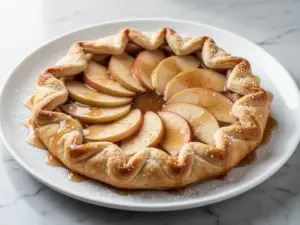
Last November, I was standing in my kitchen at 8:30 PM, feeling that specific brand of weeknight despair that only a hungry family can induce. We’d had a long day. The kids were cranky. The dishwasher was still full. I opened the pantry and found exactly three things that mattered: a bag of frozen pie crusts, a bag of apples from the grocery store, and a bottle of maple syrup that had been sitting there since October.
Most people would have ordered pizza. I wanted to make something that felt like dessert, not just a snack. So I threw together what I thought would be a mediocre, rushed pie. Twenty minutes later, the smell of cinnamon and caramelized apples filled the house, and my husband walked in and actually stopped to ask, “Did you bake this?”
That was the birth of my fall maple cinnamon apple galette. It turned out that sometimes the best desserts aren’t the ones you spend hours perfecting, but the ones you throw together when you’re tired but still want to treat your family. This recipe is my answer to “what’s for dessert?” on busy weeknights. It’s rustic, it’s messy (in a good way), and it tastes like autumn in every bite.
I’ve made this galette at least a dozen times since that night. I’ve tweaked the apple-to-maple ratio, tested different crusts, and argued with my kids about whether the extra cinnamon sugar on top is “too much” (it’s not). This fall maple cinnamon apple galette is the perfect blend of easy weeknight dessert and cozy homemade comfort. It uses just five ingredients, takes less time than a large pizza delivery, and leaves your kitchen smelling like a bakery.
If you’re looking for a way to end your weeknight dinner on a high note without spending hours in the kitchen, this is it. It’s the dessert that saves the night.
Why You’ll Love This Recipe
There are about ten reasons I keep coming back to this galette, but if I had to pick the ones that actually matter to your busy life, here they are:
Five Ingredients, No Excuses — Seriously. I’m not exaggerating. You don’t need a complex list of exotic spices or hard-to-find fruits. Just apples, maple syrup, cinnamon, butter, and pie crust. If you can find these in your pantry or fridge, you can make this dessert. I’ve made it while helping my son with homework because I didn’t have time to go to the store.
Stupid Simple Assembly — Unlike a traditional pie that requires a double crust, a lattice top, and a PhD in pastry arts, a galette is just… folded over. You roll out the dough, pile on the apples, fold the edges, and bake. If you can fold a letter, you can make this. I’ve walked my teenage daughter through it over FaceTime while I was at work.
Lightning Fast — From start to finish, this takes about 45 minutes. Ten minutes to prep, thirty-five to bake. That means you can pull this out right after dinner, and by the time everyone finishes their plates, the dessert is cooling and ready to slice. It’s faster than waiting for a delivery driver.
Uses Store-Bought Crust (No Shame) — I know some purists might wince at using a refrigerated pie crust. But here’s the truth: homemade crust takes hours. This recipe is for *busy* weeknights. Using a store-bought crust doesn’t make it “cheap” or “lazy”—it makes it practical. The filling is so good that no one will ever know the difference. (Unless you tell them, then they’ll be impressed you did it in 30 minutes.)
Maple Syrup Magic — Sugar is fine, but maple syrup brings a depth of flavor that granulated sugar just can’t match. It adds that rich, caramel-like note that makes the apples taste like they’ve been slow-roasted. It’s the secret ingredient that makes this fall maple cinnamon apple galette taste expensive.
Makes Amazing Leftovers — This tastes even better the next day as the flavors meld. I deliberately make extra for breakfast with a dollop of Greek yogurt, or just warm it up in the toaster oven for a mid-afternoon treat. It reheats beautifully.
This is my go-to when I need dessert to just work. No complicated techniques, no weird ingredients, just reliable, delicious food that makes everyone happy. It’s the reason I actually look forward to dessert time now.
Ingredients You’ll Need
Here’s the best part: you probably have most of this already. This isn’t a recipe that requires a special trip to a specialty store. Here’s exactly what you need and why I’m particular about each item.
For the Crust
Refrigerated pie crusts (1 package, 2 crusts) — You need two crusts for this recipe. One for the bottom, one for the top fold-over. I always use Pillsbury or store-brand. Don’t feel guilty! A flaky, buttery crust is the foundation. If you want to go gourmet, you can use homemade pie crust, but for a weeknight, the frozen ones are your best friend.
Butter (2 tablespoons, melted) — This gets brushed on the edges of the crust before baking. It gives that golden, bakery-style shine and helps the salt crystals stick. Use real butter, not margarine. The difference in flavor is huge.
Coarse sugar or turbinado sugar (1 tablespoon) — Sprinkled on top before baking. It creates a crunchy, sweet crust that contrasts with the soft apples. If you don’t have coarse sugar, regular granulated sugar works, but the crunch won’t be the same.
For the Filling
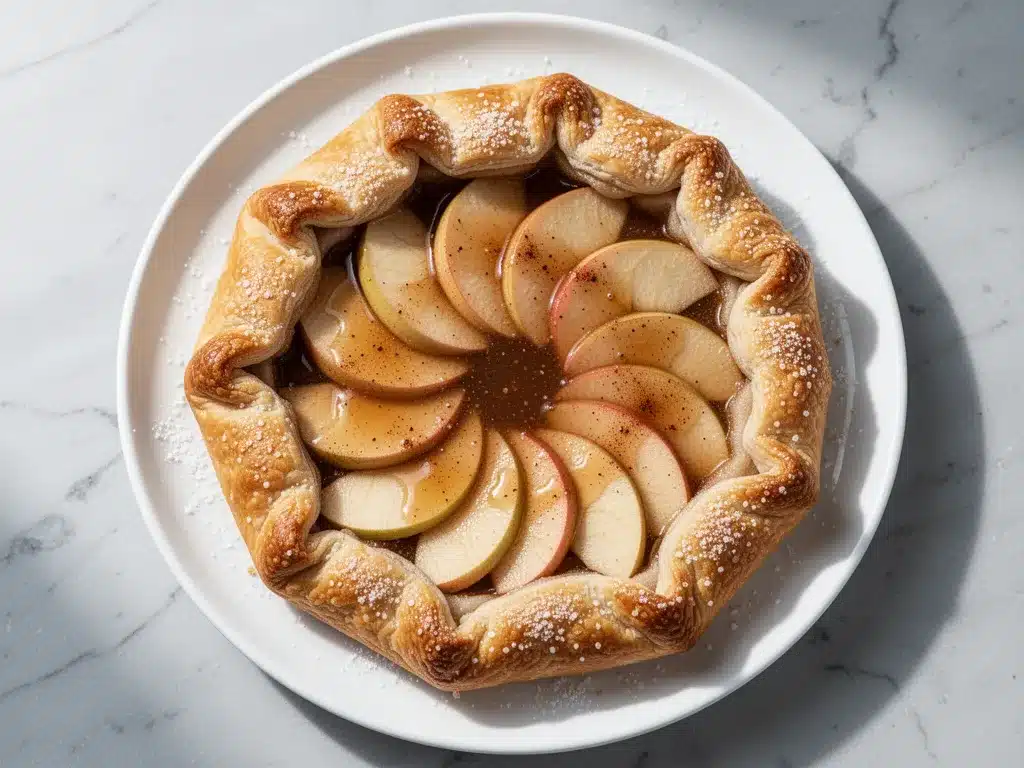
Apples (4 medium, about 1.5 lbs) — This is the star. I recommend using a mix of Granny Smith and Honeycrisp. Granny Smiths hold their shape and provide tartness, while Honeycrisps get soft and sweet. If you only have one type, that’s fine too. Avoid Red Delicious—they turn to mush and taste bland.
Maple syrup (½ cup, pure) — Not pancake syrup! Real maple syrup. Look for the label that says “100% Pure Maple Syrup.” It’s thicker, richer, and has that distinct woody sweetness. This is what gives the dessert its fall flavor. I keep a bottle in the pantry specifically for recipes like this.
Cinnamon (2 teaspoons) — Ground cinnamon. Don’t skimp! Apple and cinnamon are a classic pairing for a reason. If you’re a cinnamon lover, go for 2.5 teaspoons. Just don’t use pumpkin pie spice unless you want that flavor profile.
Lemon juice (1 tablespoon) — This seems minor, but it’s crucial. It prevents the apples from browning while you’re prepping them and adds a tiny bit of acidity to cut through the sweetness of the maple syrup. Fresh lemon is best, but bottled works in a pinch.
Optional but recommended: Vanilla extract (1 teaspoon) — Adds warmth and depth. I usually add this to the maple syrup mixture. If you’re out, skip it, but it’s nice to have.
For Serving
Vanilla ice cream or whipped cream — Not part of the five ingredients, but let’s be real. This galette is begging for a scoop of cold vanilla ice cream. The hot-cold contrast is heaven. I keep a pint of vanilla bean ice cream in the freezer just for this.
Equipment Needed
You don’t need fancy equipment for this. Here’s what I actually use. If you’re missing something, there’s usually a workaround.
Baking sheet — I use a standard 18×13 inch half-sheet pan. Line it with parchment paper or a silicone baking mat. This makes cleanup a breeze. If your baking sheet is smaller, you might need to make two smaller galettes or use a large pizza pan.
Parchment paper — Essential for rolling out the dough and for easy cleanup. It prevents sticking and makes transferring the galette to the oven safer.
Rolling pin — Any rolling pin works. I use a wooden one, but a silicone one is fine too. If you don’t have one, you can use a clean wine bottle, but it’s less precise.
Large mixing bowl — For tossing the apples with the maple syrup and cinnamon. A wide bowl is better so the apples coat evenly.
Pastry brush — For brushing the melted butter on the crust edges. A silicone basting brush works great. If you don’t have one, you can use a paper towel dipped in butter, but it’s messier.
Sharp knife — For slicing the apples. A serrated knife works well if the apples are large. I also use it to cut slits in the top crust for steam to escape.
Cooling rack — Optional but helpful. Letting the galette cool on a rack prevents the bottom from getting soggy. I usually just let it cool on the pan, but if I’m in a hurry, a rack helps.
Measuring cups and spoons — Standard stuff. Dollar store versions work fine for this. Accuracy isn’t super critical here, but it helps.
How to Make It: Step-by-Step
Alright, let’s make this! I’m walking you through exactly how I do it, including the little tricks I’ve picked up over time. This is straightforward, but there are a few key moments to watch.
Step 1: Prep Your Apples (10 minutes)
Start by peeling, coring, and slicing your apples. I cut them into thin wedges, about ¼ inch thick. Too thick, and they won’t cook through; too thin, and they turn into applesauce. Place the sliced apples in a large mixing bowl. Drizzle with lemon juice and toss gently to coat. This keeps them from turning brown while you work.
Step 2: Mix the Filling (5 minutes)
To the apples, add the maple syrup, cinnamon, and vanilla extract (if using). Toss everything together until the apples are evenly coated. The mixture should look glossy and fragrant. Let it sit for a few minutes while you prep the crust. This allows the flavors to meld and the apples to release a little juice.
Step 3: Roll Out the Crust (5 minutes)
Preheat your oven to 375°F (190°C). Line your baking sheet with parchment paper. Take one refrigerated pie crust out of the package. On a lightly floured surface, roll it out into a large circle, about 12 inches in diameter. Don’t worry if it’s not perfect—it’s a galette, rustic is the goal. Transfer the rolled-out crust to the prepared baking sheet.
Step 4: Pile On the Apples (5 minutes)
Arrange the apple slices in the center of the crust, leaving a 2-inch border around the edges. Don’t overload the center! You want enough space to fold the crust over. Pile them high, like a small mountain. If you have too many apples, make a second smaller galette with the second crust.
Step 5: Fold the Crust (5 minutes)
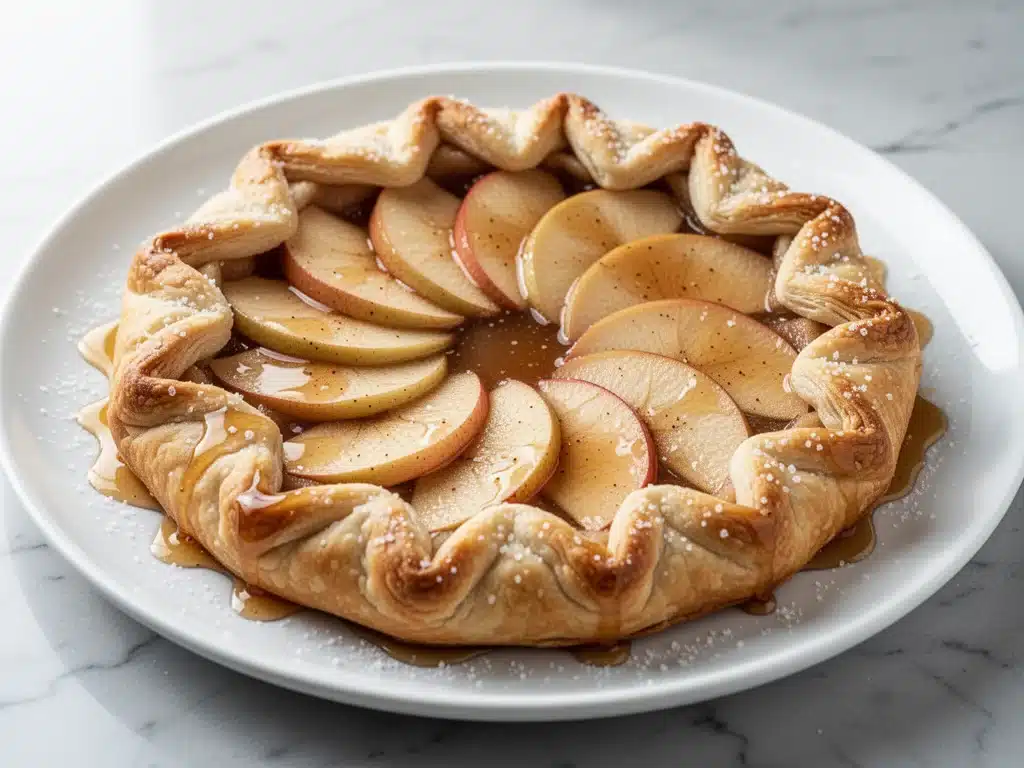
This is the fun part. Fold the edges of the crust over the apples, pleating as you go. You don’t need to seal it completely; just fold it over to create a rustic, free-form shape. The apples will peek out in the middle, which is exactly what you want. Brush the folded edges with melted butter. This helps them brown and crisp up.
Step 6: Add Sugar and Bake (35 minutes)
Sprinkle the coarse sugar over the crust edges. Then, cut a few small slits in the top of the apple pile to let steam escape. This prevents the galette from getting soggy. Place in the preheated oven and bake for 35-40 minutes, or until the crust is golden brown and the apples are tender. If the edges start to brown too quickly, cover them with a piece of foil.
Step 7: Cool and Serve (10 minutes)
Remove from the oven and let it cool on the baking sheet for at least 10 minutes. This allows the filling to thicken slightly. If you cut it too soon, the syrup will run everywhere. Slice into wedges and serve warm with vanilla ice cream or whipped cream.
Total Time: About 45 minutes (15 minutes active, 30 minutes hands-off baking)
Built-in Troubleshooting
- Soggy bottom? Make sure your baking sheet is hot before putting the galette in, or preheat the sheet in the oven for 5 minutes. Also, don’t overload the center with too much filling.
- Crust burning? Cover the edges with foil halfway through baking if they’re browning too fast.
- Apples not tender? Slice them thinner or bake for an additional 5-10 minutes. Check with a fork.
Expert Tips & Tricks
Here’s everything I’ve learned from making this dozens of times. These tips will save you from my mistakes.
Use a Mix of Apples — I can’t stress this enough. Using only one type of apple can result in a texture that’s either too firm or too mushy. A mix of tart (Granny Smith) and sweet (Honeycrisp or Fuji) gives the perfect balance. I’ve tried using only Granny Smith, and it’s too sour. Only Honeycrisp? Too sweet and soft. The mix is the sweet spot.
Don’t Skip the Lemon Juice — It’s not just for color. The acid in the lemon juice helps balance the sweetness of the maple syrup. It adds a brightness that makes the dessert taste less heavy. I’ve made this without it once, and it tasted flat. Don’t skip it.
Brush the Edges Well — The butter on the crust edges is what gives that bakery-quality shine and crunch. Make sure you get a generous coat. If the edges look dry, brush them again before baking.
Let It Cool — I know it’s tempting to cut into it right out of the oven. But the filling is liquid hot syrup. If you cut it immediately, it will spill out. Let it cool for at least 10 minutes. The filling will thicken as it cools, making it easier to slice and serve.
Freeze Extra Crusts — If you have leftover pie crust, wrap it tightly in plastic wrap and freeze it. It keeps for up to 3 months. I always keep an extra package in the freezer for quick desserts like this.
Variations & Substitutions
Once you’ve nailed the basic version, here’s how you can mix it up. I’ve tried all of these, and they all work.
Pear Galette — Swap the apples for ripe pears. Pears are softer, so slice them thinner and bake for a few minutes less. The maple and cinnamon flavors work beautifully with pears too.
Apple Cinnamon Chai — Add ½ teaspoon of ground cardamom and a pinch of ginger to the filling. It adds a warm, spicy kick that’s perfect for fall. This is my favorite variation when I want something extra cozy.
Maple Pecan — Sprinkle ½ cup of chopped pecans over the apples before folding the crust. The nuts add crunch and richness. I love the combination of maple, apple, and pecan.
Gluten-Free — Use a gluten-free pie crust. Most store-bought GF crusts work well, but check the label for butter content. The rest of the ingredients are naturally gluten-free.
Vegan — Use a vegan pie crust (many store-bought ones are) and replace the butter with vegan butter or coconut oil. Use maple syrup (which is vegan) and skip the ice cream or use a vegan alternative. It’s surprisingly good.
Lower Sugar — Reduce the maple syrup to ¼ cup and add 1 tablespoon of honey. It’s still sweet, but less so. You can also use a sugar-free maple syrup if you’re watching sugar intake.
Serving & Storage
I usually serve this straight from the baking sheet at the dinner table—it looks rustic and stays warm. But here are other ways I’ve enjoyed it:
How to Serve: Slice into wedges. Serve warm with a scoop of vanilla ice cream, a dollop of whipped cream, or a slice of sharp cheddar cheese. The cheese pairing is old-school New England style, and it’s delicious.
Side Dishes: This is a dessert, so it stands alone. But if you’re serving it as part of a larger meal, it pairs well with a simple green salad or roasted vegetables. It’s rich enough to balance out lighter mains.
Storage Instructions:
Refrigerator: Store leftovers in an airtight container for up to 3 days. The crust will soften slightly, but it’s still good. Reheat in the oven at 350°F for 10 minutes to crisp up the crust.
Freezing: You can freeze the baked galette. Wrap it tightly in plastic wrap and foil. It keeps for up to 2 months. Thaw in the fridge overnight and reheat in the oven. You can also freeze the unbaked galette, but the crust might get soggy when thawed. I prefer to bake it first.
Reheating: Avoid the microwave. It makes the crust soggy. Use the oven or toaster oven to restore the crispiness. Heat at 350°F for 10-15 minutes.
Nutrition Information
I’m not a nutritionist, but here’s the breakdown if you’re tracking. This is a dessert, so it’s indulgent, but knowing what’s in it helps.
Per Serving (based on 8 servings):
- Calories: 280
- Protein: 3g
- Carbs: 45g
- Fiber: 3g
- Sugar: 28g
- Fat: 10g
- Saturated Fat: 4g
- Cholesterol: 15mg
- Sodium: 220mg
What’s Good: The apples provide fiber and vitamins. It’s lower in fat than a typical cream pie. The maple syrup has minerals like zinc and manganese.
What to Know: It’s high in sugar from the maple syrup and crust. Use this as an occasional treat, not a daily snack. If you’re watching sugar, reduce the maple syrup or use a sugar-free alternative.
My Take: Look, this is dessert with maple syrup and butter. It’s not a diet recipe. But it’s way better than store-bought pie, costs less, and I know exactly what’s in it. When I want to make it lighter, I use less syrup and add more apples. But usually? I just enjoy a slice and appreciate the flavor.
Final Thoughts
So that’s my fall maple cinnamon apple galette! I’ve probably talked your ear off at this point, but when you make a recipe this often, you have a lot to say about it. This has saved weeknight dinners more times than I can count. It’s my answer to “what’s for dessert?” when I’m tired, don’t want takeout, and still want something that tastes really good. My kids are happy, my husband’s happy, and I’m happy because I’m not stressed about cooking.
Make it yours! Try different apples, swap in your favorite nuts, or add a dash of spice. The best recipes are the ones you adapt to your family’s tastes. If you make this, drop a comment and let me know what you think! I love hearing how recipes turn out in your kitchen. And if something doesn’t work, tell me that too—I’m here to help troubleshoot.
Happy cooking! And I hope your kitchen smells half as good as mine does right now.
Frequently Asked Questions
Can I use homemade pie crust?
Yes! If you have the time, homemade pie crust is delicious. Just roll it out and follow the same steps. The baking time might be slightly longer if the crust is thicker. I usually stick to store-bought for weeknights, but for weekends, I love making my own.
Why did my galette leak syrup?
This usually happens if you used too many apples or didn’t let the filling cool before slicing. Make sure you leave a 2-inch border around the crust. Also, let it cool for at least 10 minutes before cutting. The syrup will thicken as it cools.
Can I make this ahead of time?
You can assemble it ahead and refrigerate it for up to 24 hours before baking. Just cover it tightly with plastic wrap. When you’re ready to bake, let it sit at room temperature for 15 minutes, then bake as directed. You might need to add 5 minutes to the baking time.
What’s the best apple for this recipe?
I recommend a mix of Granny Smith and Honeycrisp. Granny Smith provides tartness and structure, while Honeycrisp adds sweetness and softness. Avoid Red Delicious or McIntosh, as they turn too mushy.
Can I freeze the unbaked galette?
Yes, but the crust might get soggy when thawed. If you want to freeze it, bake it first, then freeze the baked galette. Thaw in the fridge and reheat in the oven. It tastes almost as good as fresh.
Is maple syrup necessary?
You can use honey or brown sugar, but maple syrup gives it that distinct fall flavor. Honey is thinner and might make the filling runnier. Brown sugar is granular and won’t coat the apples as evenly. Maple syrup is the best choice for this recipe.
How do I store leftovers?
Store in an airtight container in the fridge for up to 3 days. Reheat in the oven at 350°F for 10 minutes to crisp up the crust. Avoid the microwave, as it makes the crust soggy.
Pin This Recipe!
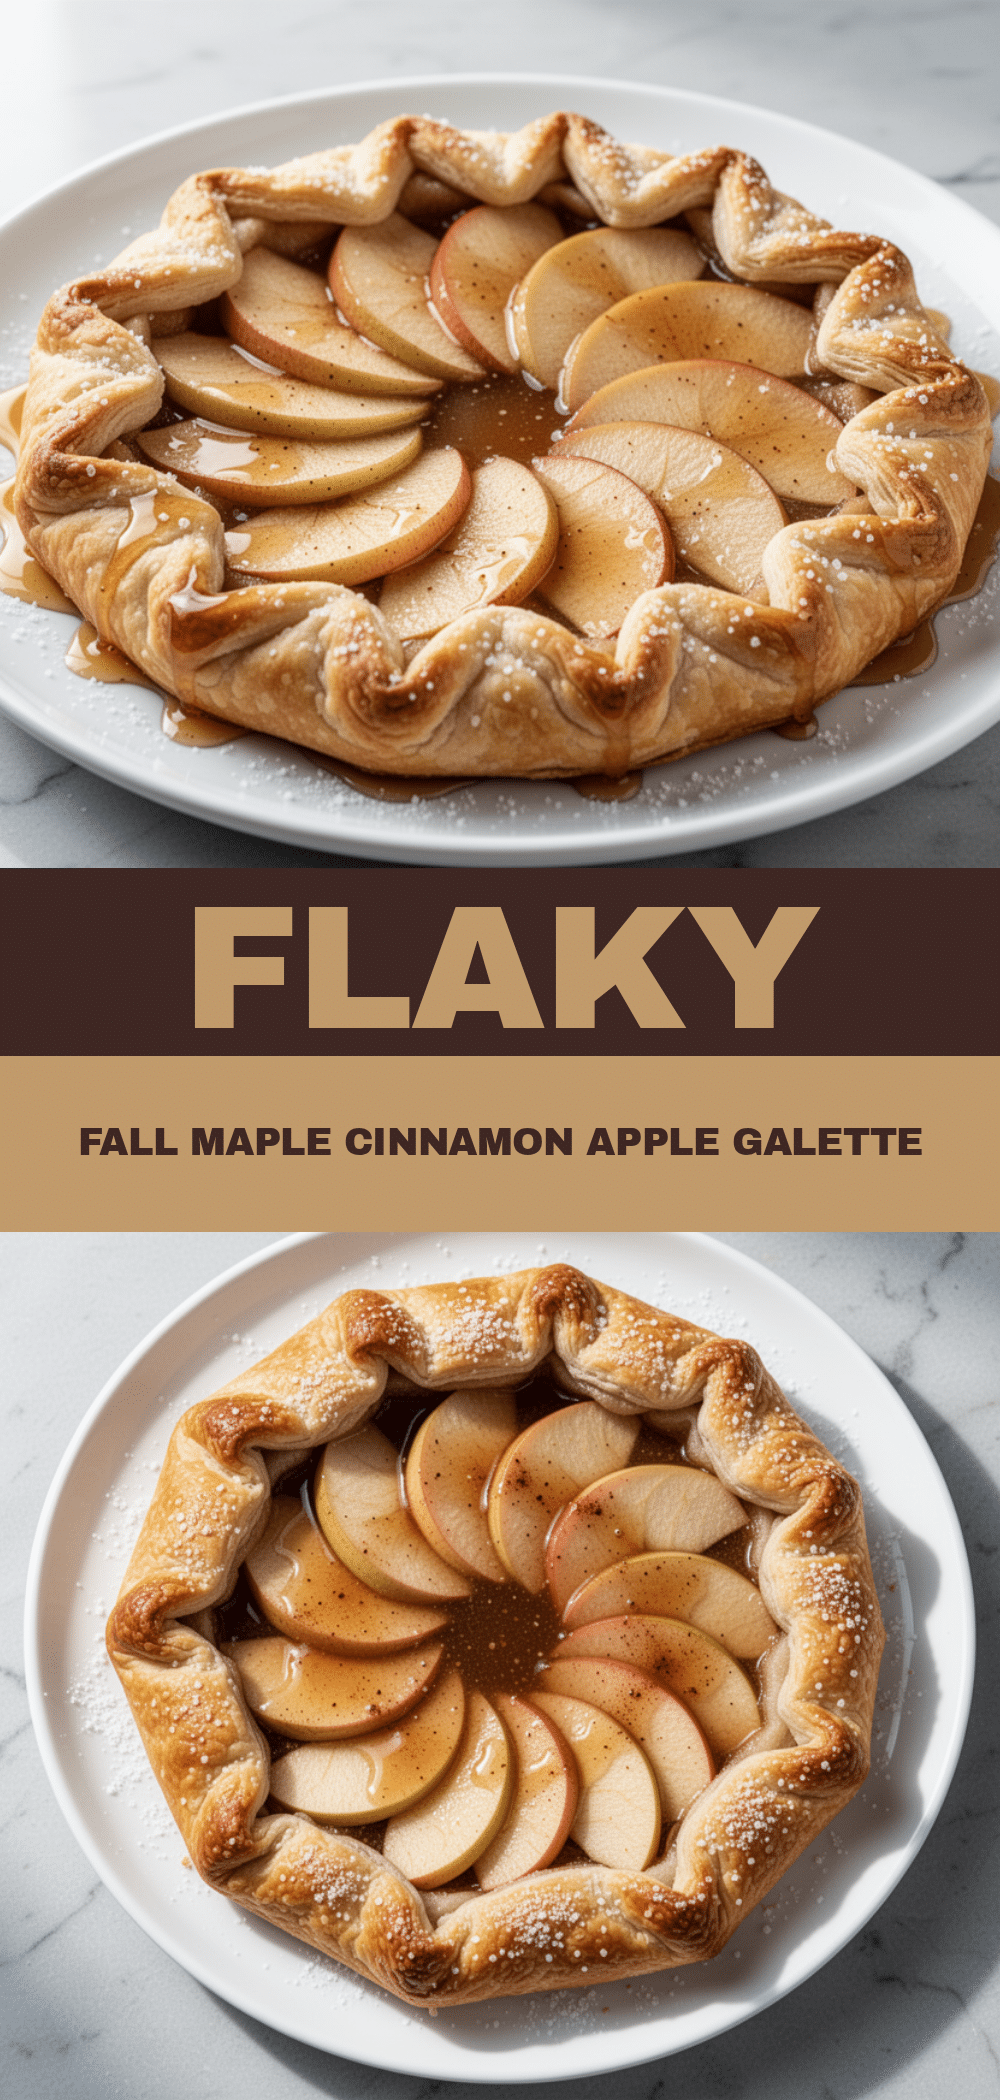
Fall Maple Cinnamon Apple Galette: 5-Ingredient Easy Dessert
- Total Time: 45 minutes
- Yield: 8 servings 1x
Description
A rustic, easy-to-make apple galette using just five ingredients. Perfect for busy weeknights, this dessert combines flaky pie crust with sweet maple syrup, cinnamon, and tender apples for a cozy autumn treat.
Ingredients
- 1 package (2 crusts) refrigerated pie crusts
- 4 medium apples (about 1.5 lbs), peeled, cored, and sliced into ¼ inch wedges (mix of Granny Smith and Honeycrisp recommended)
- ½ cup pure maple syrup
- 2 teaspoons ground cinnamon
- 1 tablespoon lemon juice
- 2 tablespoons butter, melted
- 1 tablespoon coarse sugar or turbinado sugar
- 1 teaspoon vanilla extract (optional)
Instructions
- Preheat oven to 375°F (190°C). Line a baking sheet with parchment paper.
- In a large mixing bowl, toss sliced apples with lemon juice to prevent browning.
- Add maple syrup, cinnamon, and vanilla extract (if using) to the apples. Toss to coat evenly and let sit for a few minutes.
- Roll out one pie crust into a 12-inch circle on a lightly floured surface. Transfer to the prepared baking sheet.
- Pile the apple mixture in the center of the crust, leaving a 2-inch border around the edges.
- Fold the edges of the crust over the apples, pleating as you go. Brush the folded edges with melted butter.
- Sprinkle coarse sugar over the crust edges. Cut a few small slits in the top of the apple pile to let steam escape.
- Bake for 35-40 minutes, or until the crust is golden brown and apples are tender. Cover edges with foil if they brown too quickly.
- Cool on the baking sheet for at least 10 minutes before slicing to allow filling to thicken.
- Serve warm with vanilla ice cream or whipped cream.
Notes
Use a mix of tart (Granny Smith) and sweet (Honeycrisp) apples for best texture. Do not skip the lemon juice as it balances sweetness. Let the galette cool for at least 10 minutes before slicing to prevent the syrup from running. Store leftovers in an airtight container in the fridge for up to 3 days.
- Prep Time: 15 minutes
- Cook Time: 35 minutes
- Category: Dessert
- Cuisine: American
Nutrition
- Serving Size: 1 wedge
- Calories: 280
- Sugar: 28
- Sodium: 220
- Fat: 10
- Saturated Fat: 4
- Carbohydrates: 45
- Fiber: 3
- Protein: 3
Keywords: apple galette, maple cinnamon dessert, easy weeknight dessert, fall recipes, 5 ingredient dessert, rustic apple pie