I used to be the kind of person who drank coffee black. Like, aggressively black. I thought adding anything to it was cheating, or worse, masking the “true flavor” of the beans. Then I moved into an apartment with a terrible kitchen setup—no fancy espresso machine, just a French press and a microwave that sparked if I looked at it wrong. I was tired, broke, and desperate for something that felt like a treat without costing $7 at a coffee shop.
So, I started experimenting. I tried whipping cream with sugar. I tried using a whisk (spoiler: my arm fell off). I tried cold foam from the store (too sweet, weird texture). But then I stumbled onto the vanilla bean method. It was a total accident. I had a vanilla bean paste jar in the back of my fridge, some heavy cream, and a hand mixer. I whipped them together, poured it over my cold brew, and took one sip. I literally stopped mid-chew. It was like a cloud of vanilla sweetness floating on top of strong, smooth coffee. It didn’t taste like a dessert; it tasted like morning peace.
That was three years ago. Now, this homemade vanilla bean cold foam cold brew is my non-negotiable morning ritual. I’ve tested this foam recipe dozens of times—adjusting the sweetness, the thickness, the vanilla intensity—until it was perfect. It’s stupid simple, takes less than five minutes, and makes my small kitchen smell like a high-end café. If you’re tired of expensive drinks or bitter coffee, you need to try this. It’s the easiest upgrade you’ll make to your morning routine.
Why You’ll Love This Cold Foam Recipe
There are about ten reasons I keep making this, but here are the big ones. This isn’t just a drink; it’s a five-minute mood lifter.
Stupid Simple — Seriously, if you can pour cream into a bowl and press a button on a mixer, you can make this. I’ve made this foam while half-asleep, and it still turns out perfect. No fancy barista skills required.
Lightning Fast — From fridge to finished drink in under five minutes. The cold brew can be made ahead (more on that later), so the actual morning routine is just whipping the foam and pouring. It’s faster than waiting for the espresso machine to heat up.
Costs Pennies — A single serving of this foam costs about 40 cents. Compare that to the $6.50 cold foam latte at the big chain coffee shop, and you’re saving enough for a pastry in a month. I keep the ingredients stocked just so I can make this on a whim.
Customizable Sweetness — Store-bought cold foam is often cloyingly sweet. With this homemade vanilla bean cold foam cold brew, you control the sugar. I use a little maple syrup for a richer flavor, but you can use zero sugar, honey, or vanilla syrup. It’s your drink.
Texture Magic — The key is the vanilla bean paste (or real bean). It adds tiny specks and a deep, floral aroma that sugar alone can’t match. The foam stays thick enough to float on top but light enough to sip through easily. It’s the best part of the cup.
This is my go-to when I need coffee to just work. No complicated brewing steps, no weird gadgets, just reliable, delicious coffee that makes me feel like I’m treating myself, even on the busiest Tuesday morning.
Ingredients You’ll Need
Here’s the best part: you probably have most of this already. I’m particular about three ingredients here, and I’ll tell you exactly why. The rest is just pantry staples.
Heavy Cream (½ cup / 120ml) — This is non-negotiable. You need the fat content to create that stable, fluffy foam. Low-fat milk or half-and-half will not whip up properly; it’ll just be thin liquid. I buy the small cartons of heavy whipping cream because it freezes well if you have leftovers.
Vanilla Bean Paste (1 tablespoon / 15ml) — This is the secret weapon. It’s thicker than extract and has real vanilla seeds in it. Those seeds give you those beautiful little black specks and a deeper, more authentic vanilla flavor. If you can’t find paste, you can scrape the seeds from one real vanilla bean, or use 2 teaspoons of high-quality vanilla extract, but the paste is worth the extra dollar. I always keep a jar of Nielsen-Massey in my cabinet.
Maple Syrup (1-2 teaspoons / 5-10ml) — I prefer maple syrup over white sugar because it adds a subtle warmth that complements the coffee. It dissolves into the cold cream easier than granulated sugar. Pure maple syrup is best; avoid the pancake syrup stuff with corn syrup. But honestly, if you’re strictly keto or low-carb, this is where you’d use a sugar-free vanilla syrup or stevia.
Salt (A tiny pinch) — Just a pinch of sea salt. It sounds weird, but it cuts the sweetness and makes the vanilla flavor pop. It’s the same trick chefs use in caramel. Don’t skip it.
Cold Brew Coffee (1-2 cups / 240-480ml) — Obviously, you need the coffee base. I make my own cold brew in a mason jar because it’s cheaper and less acidic than store-bought. But if you’re buying it, look for a smooth, chocolatey brand. You want something that tastes good cold, not something that’s meant to be heated up.
Ice (As needed) — Standard ice cubes. I like using large cubes if I have them because they melt slower and don’t water down the drink as quickly.
Optional Add-ins:
Whipped Cream (1 tablespoon) — Some people like a dollop on top of the foam for extra richness. I usually skip it, but it’s nice for weekends.
Cocoa Powder (1/4 teaspoon) — A dusting of unsweetened cocoa on top adds a nice visual contrast and a hint of chocolate flavor.
Cinnamon (A pinch) — If you’re feeling fancy, a tiny sprinkle of cinnamon on the foam adds a cozy aroma.
Equipment Needed
You don’t need fancy equipment for this. Here’s what I actually use.
Hand Mixer — I use a basic 2-speed hand mixer. It’s the fastest way to get those stiff peaks. A whisk works, but you’ll need serious arm strength and about five minutes of vigorous whisking. A stand mixer works too, but it’s overkill for half a cup of cream.
Small Bowl — Any small mixing bowl works. I like using a glass bowl because I can see the texture change easily. Make sure it’s clean and dry; any water or grease will stop the cream from whipping.
Mason Jar or Cold Brew Maker — For brewing the coffee. I use a simple mason jar with a coffee filter secured by a rubber band for my DIY cold brew. It’s cheap and effective. If you have a dedicated cold brew pitcher, that’s great too.
Measuring Spoons — Pretty standard stuff. Dollar store versions work fine for the syrup and vanilla.
Knife and Cutting Board — Only needed if you’re scraping a real vanilla bean. If you’re using paste or extract, skip this step.
Optional but nice:
Milk Frother — A handheld battery-operated frother can work in a pinch, but it won’t get the foam as thick or stable as a mixer. It’s more for frothing milk for lattes, but it can do light foam for cold brew.
How to Make It: Step-by-Step
Alright, let’s make this! I’m walking you through exactly how I do it, including the little tricks I’ve picked up.
Step 1: Brew Your Cold Brew (24-48 hours ahead)
You can’t make cold foam without cold brew. The best part about cold brew is that you make it once a week and you’re set for days. Coarsely ground coffee (think sea salt texture) goes into a jar or pitcher. Pour cold or room-temp water over it (about a 1:4 coffee-to-water ratio). Stir it up, cover it, and leave it on the counter or in the fridge for 12-24 hours. Strain out the grounds through a fine-mesh sieve or coffee filter. Store the concentrate in the fridge. It lasts up to two weeks. This step is the only “work” involved, so doing it ahead of time makes your mornings effortless.
Step 2: Chill Your Cream (5 minutes)
Take your heavy cream out of the fridge. If it’s not cold, it won’t whip well. I usually take it out about 15 minutes before I’m ready to make the foam, but if I’m in a rush, I put the bowl and the cream in the freezer for 5 minutes. Cold cream whips faster and holds its shape better.
Step 3: Whip the Foam (2-3 minutes)
Pour the heavy cream into your small bowl. Add the vanilla bean paste, maple syrup, and that tiny pinch of salt. Start your hand mixer on low speed to mix the ingredients together. Once they’re combined, turn the speed up to medium-high. Whip for about 2-3 minutes. You’re looking for soft peaks. This means when you lift the beaters, the foam should hold its shape but still be fluid and pourable. Do not over-whip! If you whip it too long, it’ll turn into butter. Stop as soon as you see those soft peaks.
Step 4: Assemble the Drink
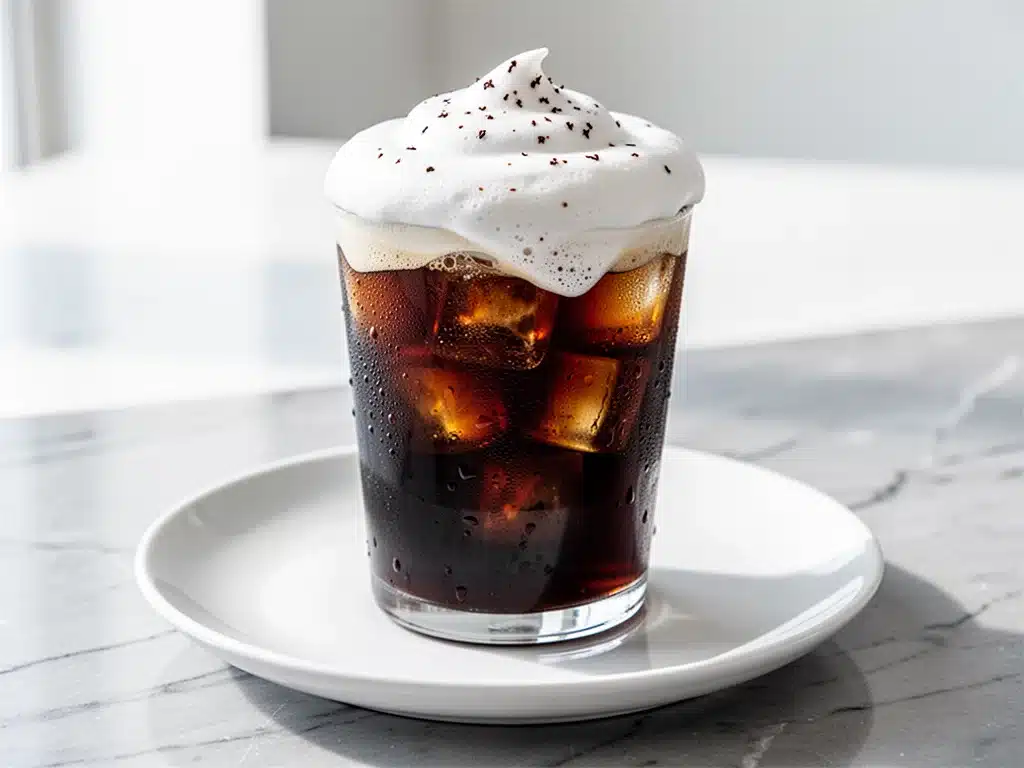
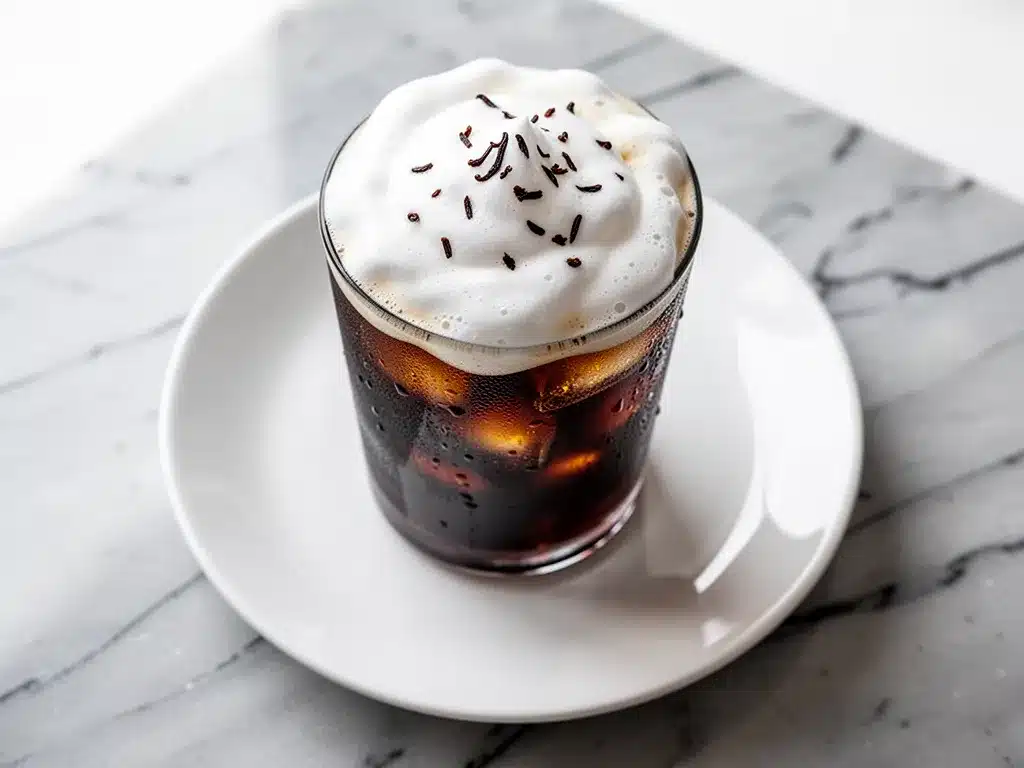
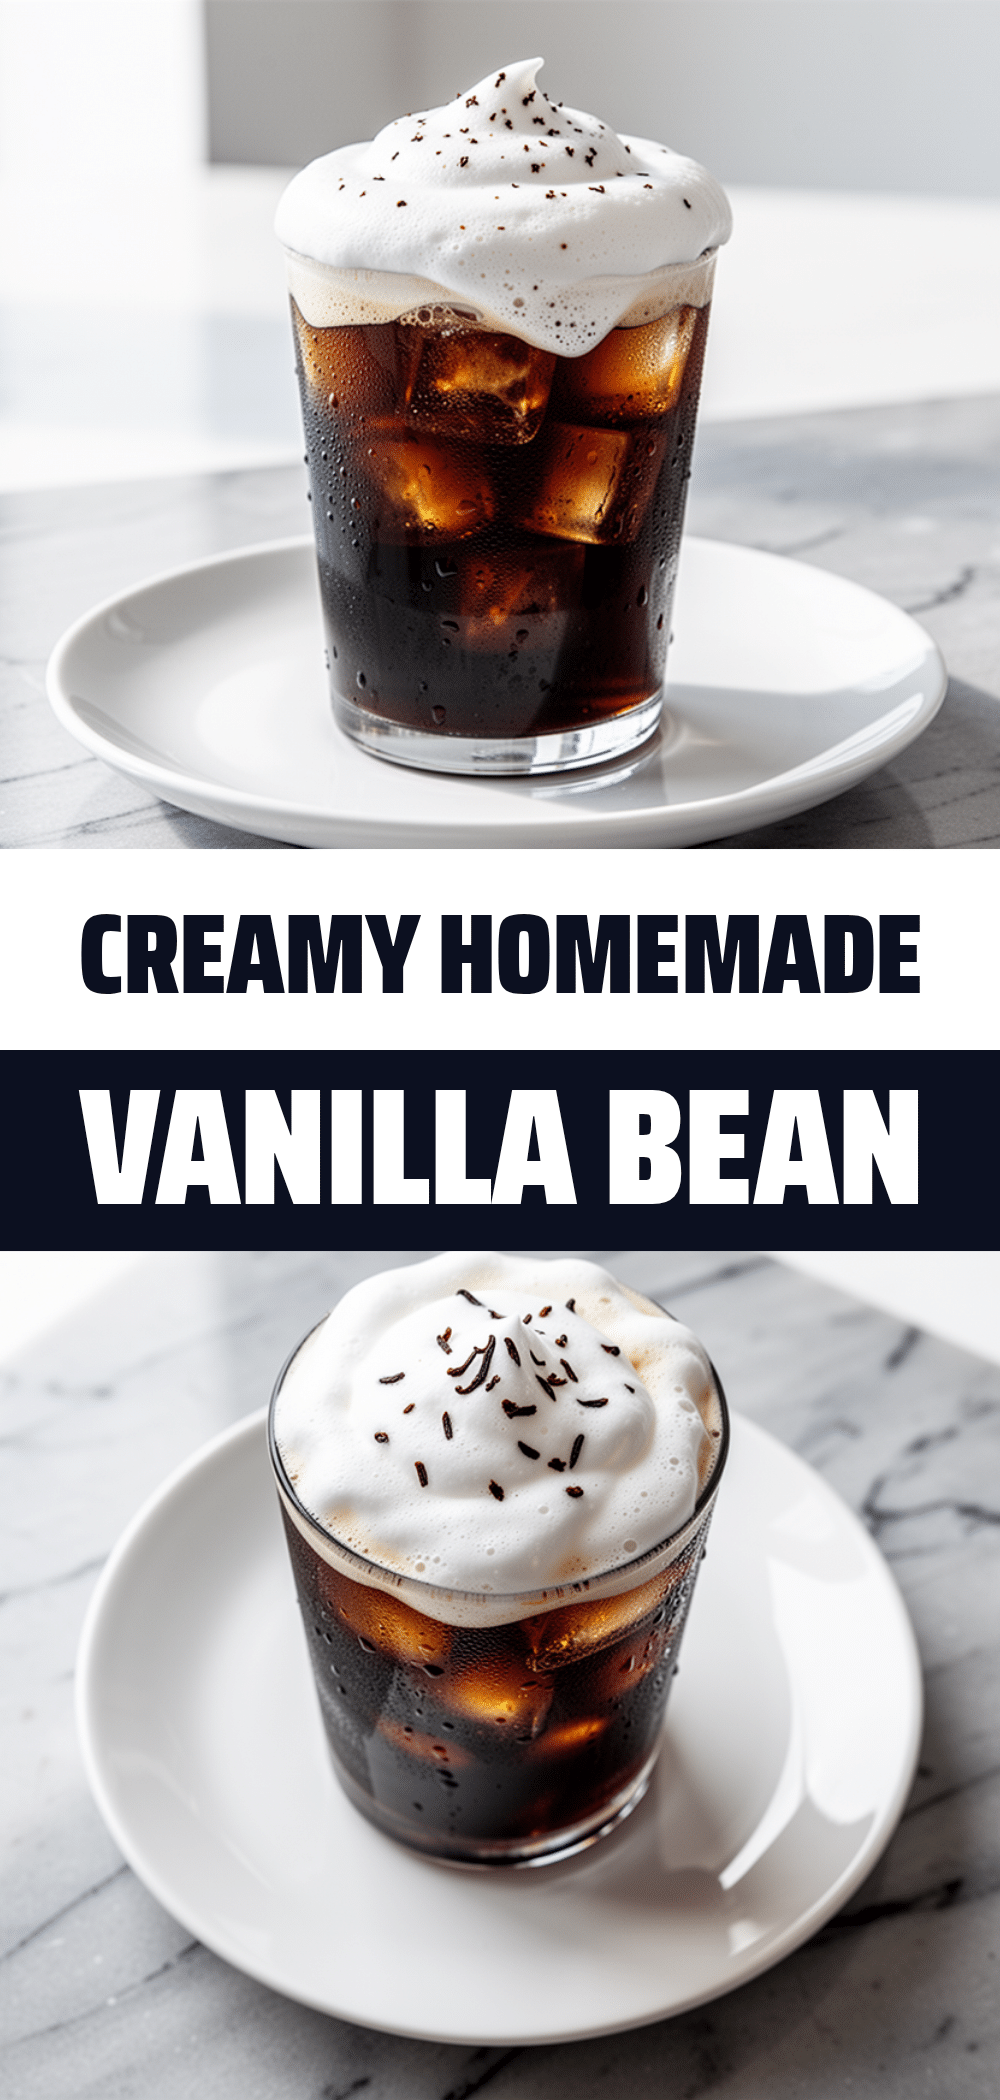
Take a large glass (I like a 16oz pint glass). Fill it with ice. Pour your cold brew coffee over the ice, leaving about an inch of space at the top. Slowly pour the vanilla bean cold foam over the back of a spoon or directly onto the surface of the coffee. It should float on top, creating a distinct layer. The contrast of the dark coffee and the white, speckled foam is beautiful.
Step 5: Sip and Enjoy
Drink it as is for the full experience—the cold, strong coffee mixed with the sweet, airy foam. Or, stir it all together for a sweeter, creamier drink. I usually start with a few sips of just the foam, then stir it in as the drink progresses. It changes the flavor profile throughout the cup, which I love.
Expert Tips & Tricks
Here’s everything I’ve learned from making this dozens of times. These tips will save you from my mistakes.
Don’t Over-Whip
This is the #1 mistake. Cold foam should be soft and pourable, not stiff like cake frosting. If it’s too thick, it won’t pour nicely over the coffee. If it’s too thin, it’ll sink. Aim for that soft peak stage. If it gets too thick, you can gently fold in a teaspoon of milk to loosen it up.
Use Real Vanilla
I cannot stress this enough. Vanilla extract is alcohol-based and can taste sharp or bitter when cold. Vanilla bean paste is emulsified and has real seeds. It makes a huge difference in the flavor depth. If you can’t find paste, buy a real vanilla bean and scrape the seeds. It’s worth the effort.
Keep It Cold
The cream should stay cold until the moment you pour it. If the foam sits out for more than 10-15 minutes, it’ll start to deflate and lose that airy texture. Make the foam right before you drink the coffee.
Adjust Sweetness to Taste
Start with 1 teaspoon of syrup. Taste the foam (yes, taste the plain foam). Add more if you want it sweeter. Remember, the foam is sweeter than the coffee, so you don’t need a ton of sugar. Less is more.
Make-Ahead Strategy
You can’t make the foam ahead of time, but you can prep everything else. Have the cold brew brewed and strained. Have the syrup and vanilla ready to go. When you wake up, it’s literally just a 3-minute whipping process. It’s the perfect lazy morning hack.
Variations & Substitutions
Once you’ve nailed the basic version, here’s how you can mix it up. I’ve tried all of these.
Caramel Cold Foam
Swap the vanilla bean paste for caramel syrup. Use 2 tablespoons of caramel syrup instead of maple syrup. It’s richer and tastes like a caramel macchiato. My kids love this version.
Matcha Cold Foam
Whisk 1 teaspoon of culinary-grade matcha powder into the cream before whipping. It turns the foam green and adds an earthy, antioxidant-rich twist. Great for a morning energy boost without the jitters.
Coconut Cold Foam
Use full-fat coconut cream instead of heavy cream. It’s dairy-free and adds a tropical flavor. Whip it just like the cream. It’s thicker, so you might need a bit less syrup. This is my go-to when I’m feeling dairy-free.
Chocolate Cold Foam
Add 1 tablespoon of cocoa powder and 1 tablespoon of chocolate syrup to the cream. Whip until combined. It’s basically a mocha in foam form. Delicious.
Low-Sugar Version
Skip the maple syrup entirely. Use a sugar-free vanilla syrup or just the vanilla bean paste. The foam will be less sweet but still creamy and flavorful. Great for keto or low-carb diets.
Different Coffee Bases
While cold brew is best, you can use chilled espresso. Pour the espresso over ice, let it cool for a minute, then top with foam. It’s stronger and more bitter, so you might want a bit more sweetener in the foam.
Serving & Storage
How to Serve:
I usually serve this straight up in a clear glass so you can see the layers. It looks so pretty, especially with the vanilla specks. But here are other ways I’ve enjoyed it:
Side Dishes:
This drink is great on its own, but if you’re having a slow morning, pair it with something. I love it with maple banana nut muffins or fluffy cinnamon swirl pancakes. The sweetness of the foam complements breakfast pastries perfectly.
Toppings Bar:
When I have guests over, I put out a few options: extra vanilla bean paste, a drizzle of caramel, a dusting of cocoa powder. Everyone customizes their drink.
Storage Instructions:
Cold Brew:
Store in an airtight container in the fridge for up to 2 weeks. It actually gets smoother after a few days as the flavors meld.
Cold Foam:
Do not store the foam. It will deflate and separate. Make it fresh every time. It’s too quick to worry about prepping ahead.
Reheating:
You don’t reheat cold brew. If you want it hot, make a regular hot coffee and add a splash of cream and vanilla. But the cold foam experience is unique to cold drinks.
Nutrition Information
I’m not a nutritionist, but here’s the breakdown if you’re tracking. Keep in mind, this is just the foam and the coffee, no extra syrup or milk added to the coffee itself.
Per Serving (based on 1 drink with ½ cup foam):
- Calories: 180
- Protein: 1g
- Carbs: 6g
- Fiber: 0g
- Sugar: 5g (from maple syrup)
- Fat: 18g
- Saturated Fat: 11g
- Cholesterol: 60mg
- Sodium: 15mg
What’s Good:
It’s low in carbs if you skip the syrup. The heavy cream provides satisfying fat that keeps you full. It’s much lower in sugar than most café drinks.
What to Know:
Higher in calories from the cream. Contains dairy. If you’re watching saturated fat, you can use half-and-half, but the foam won’t be as thick.
My Take:
Look, this is a treat. It’s not a diet drink. But it’s way better than the sugary syrups at the coffee shop, and you control the ingredients. When I want to make it lighter, I use less syrup or swap the cream for coconut cream. But usually? I just enjoy it and move on with my day.
Final Thoughts
So that’s my homemade vanilla bean cold foam cold brew! I’ve probably talked your ear off at this point, but when you make a recipe this often, you have a lot to say about it.
This has saved my mornings more times than I can count. It’s my answer to “what’s for breakfast” when I’m tired, don’t want to cook a big meal, and still want something that feels special. My family is happy (they love the sweet foam), and I’m happy because I’m not stressed about coffee. It’s simple, it’s delicious, and it smells amazing.
Make it yours! Try different syrups, swap in your favorite cold brew, or adjust the vanilla. The best recipes are the ones you adapt to your tastes. If you make this, drop a comment and let me know what you think! I love hearing how recipes turn out in your kitchen. And if something doesn’t work, tell me that too—I’m here to help troubleshoot.
Happy brewing! And I hope your kitchen smells half as good as mine does right now.
Frequently Asked Questions
Can I use milk instead of heavy cream?
You can, but the foam will be much thinner and less stable. Whole milk will whip a little, but it won’t hold peaks like heavy cream. If you want to try it, use half-and-half for a middle ground. It’ll be lighter and airier, but not as thick. I’ve done this when I ran out of cream—it works okay, just not as good as the real thing.
My foam turned out too thick—what happened?
You probably whipped it too long. Cold foam should be pourable, not stiff. If it’s too thick, you can gently fold in a teaspoon of milk or cream to loosen it up. Next time, stop whipping as soon as you see soft peaks. It takes less time than you think!
Can I make this ahead for a brunch?
Sort of. You can make the cold brew ahead, but you can’t make the foam ahead. It will deflate. If you’re hosting, make the foam in batches right before you serve. It’s so fast that it’s not a big deal. Just keep the cream and bowl chilled.
Why did my foam separate?
Usually, this means the cream wasn’t cold enough, or you over-whipped it. Cold cream whips better. Also, make sure your bowl and beaters are clean. Any grease or water can prevent proper whipping. If it separates, you can still drink it—it’ll just be a creamy coffee, not a layered drink.
Can I use vanilla extract instead of paste?
You can, but the flavor won’t be as deep. Extract is alcohol-based and can taste sharp when cold. If you use extract, start with 1 teaspoon and taste. You might need a bit more to get that vanilla flavor. Paste is definitely preferred for this recipe.
How long does cold brew last?
Cold brew lasts up to two weeks in the fridge if stored in an airtight container. After that, it starts to lose its freshness and can taste flat or acidic. I usually make a new batch every week.
Can I double this recipe?
Absolutely! Double the cream and syrup, and use a larger bowl. The whipping time stays about the same. I do this when I’m making drinks for guests. Just make sure your mixer is big enough to handle the volume.
Pin This Recipe!
Homemade Vanilla Bean Cold Foam: Best 5-Min Morning Ritual
- Total Time: 5 minutes
- Yield: 1 serving 1x
Description
A simple, 5-minute homemade vanilla bean cold foam recipe that creates a light, fluffy, and customizable topping for cold brew coffee, costing pennies compared to coffee shop drinks.
Ingredients
- 1/2 cup heavy cream
- 1 tablespoon vanilla bean paste
- 1–2 teaspoons maple syrup
- A tiny pinch of sea salt
- 1–2 cups cold brew coffee
- Ice cubes
Instructions
- Brew cold brew coffee by steeping coarsely ground coffee in cold water for 12-24 hours, then strain and refrigerate.
- Chill the heavy cream and mixing bowl; if in a rush, place them in the freezer for 5 minutes.
- Pour the cold heavy cream into the bowl and add the vanilla bean paste, maple syrup, and salt.
- Whip the mixture with a hand mixer on low speed to combine, then increase to medium-high speed.
- Whip for 2-3 minutes until soft peaks form; do not over-whip.
- Fill a glass with ice and pour the cold brew coffee over it.
- Slowly pour the vanilla bean cold foam over the back of a spoon or directly onto the coffee to create a layered effect.
- Sip immediately or stir to combine.
Notes
Ensure the cream is very cold for best whipping results. Do not over-whip the foam, as it should be pourable soft peaks, not stiff. The foam should be made fresh and served immediately as it will deflate if stored. Vanilla bean paste is preferred over extract for deeper flavor and visual specks.
- Prep Time: 5 minutes
- Cook Time: 0 minutes
- Category: Beverage
- Cuisine: American
Nutrition
- Serving Size: 1 drink with 1/2 cup
- Calories: 180
- Sugar: 5
- Sodium: 15
- Fat: 18
- Saturated Fat: 11
- Carbohydrates: 6
- Protein: 1
Keywords: cold foam, vanilla bean, cold brew, coffee recipe, morning ritual, homemade coffee, dairy-free option, keto coffee