There is a specific kind of magic that happens in a kitchen in late November, and it doesn’t have anything to do with the oven being on for Thanksgiving dinner. It’s the smell. It’s the scent of cinnamon, clove, and slow-cooking fruit drifting through the hallway, turning a normal Tuesday evening into something that feels like a hug from the inside out. I stumbled onto this spiced pear preserves recipe three years ago, right when I was feeling completely burnt out on holiday hosting. I wanted to contribute something to the table that felt special, artisanal, and deeply seasonal, but I didn’t have the energy or time to make three different types of pie crusts or worry about a complex cheese board that would melt before guests arrived.
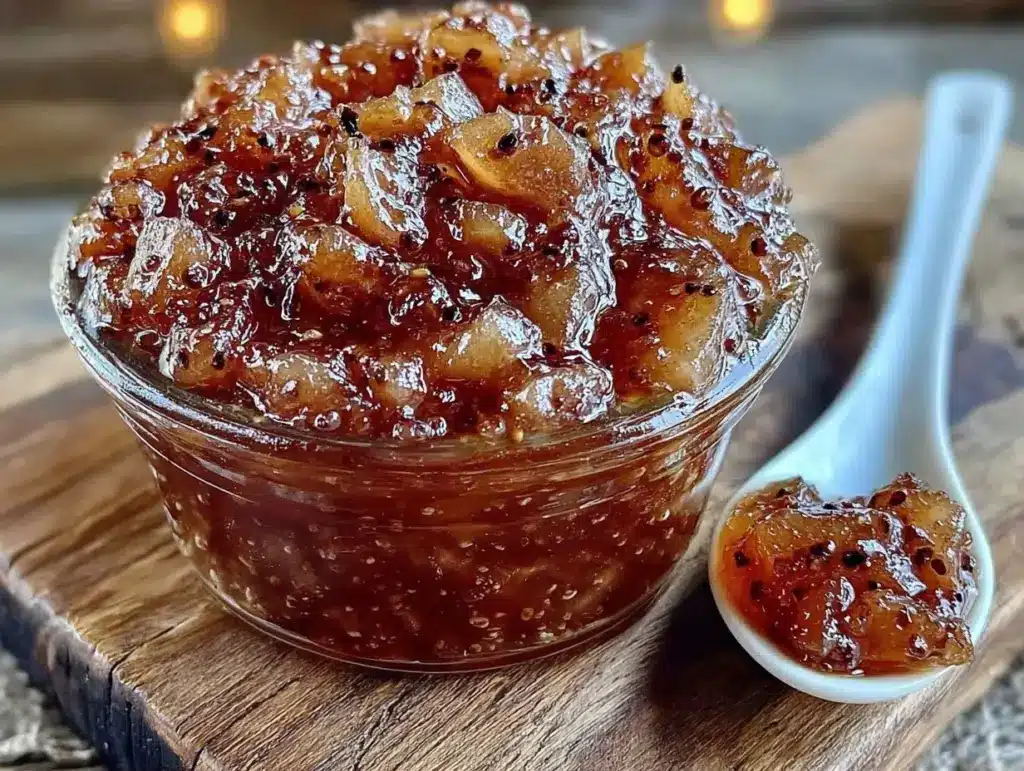
I had a bag of overripe Bartlett pears sitting on the counter, looking a little brown and soft—the kind of fruit you usually throw away or toss into a smoothie. But I knew that pears, when treated right, turn into something luxurious. So, I threw them in a pot with a stick of vanilla bean, a cup of sugar, and a handful of spices I had on hand. I let it simmer on low heat while I folded laundry. Forty minutes later, the kitchen smelled like a cozy cabin in the woods, and the result was a jar of glossy, amber-colored preserve that tasted like autumn in a spoonful.
I’ve made this spiced pear preserves with vanilla bean recipe dozens of times since then. It’s become my secret weapon for holiday hosting. It’s not just a jam; it’s a flavor experience. It’s the kind of gift you wrap in twine and hand to neighbors, or the thing you spread on warm biscuits while your family argues over who gets the last piece. It’s simple, it’s seasonal, and it fuels your day without feeling like diet food. It’s just good, honest ingredients doing what they do best.
Why You’ll Love This Recipe
Look, I know the word “preserves” can sound intimidating. It sounds like something you need a fancy kitchen, special canning jars, and a degree in chemistry to make. Real talk? It’s way easier than making a loaf of bread. And honestly? It’s better for you than most store-bought jams because you control exactly what goes in. Here’s why this spiced pear preserves recipe has earned a permanent spot in my holiday rotation:
- Stupid Simple — Seriously, if you can chop a pear and stir a pot, you can make this. I’ve made this while watching TV, while helping my kids with homework, and while on phone calls with my mom. The active prep time is basically just chopping fruit. The rest is just waiting and smelling good.
- Pantry-Friendly — You probably have 90% of these ingredients already. Pears, sugar, spices, vanilla. I keep these spices stocked specifically so I can make this on a whim when I see pears on sale. It’s my go-to when I need to use up fruit before it goes bad.
- Crowd-Pleaser — I’ve served this to my picky-eater nephew, my wine-snob aunt, and my husband’s boss (who claims to hate “sweet things”). Everyone loved it. It strikes this perfect balance between sweet and spicy that feels sophisticated but tastes comforting.
- Gift-Ready — This is the ultimate holiday gift. There is nothing quite like giving someone a jar of homemade preserves with a handwritten tag. It shows effort without being overwhelming. I make a batch every December and spend an hour wrapping jars for friends.
- Fuel for Your Day — Unlike those sugary, gelatinous store-bought jams that leave you crashing an hour later, this preserves is made with real fruit. Pears are packed with fiber and antioxidants. It’s a natural energy boost that keeps you going through the chaotic holiday season without the refined sugar crash.
- Versatile — It’s not just for toast. I put it on yogurt, swirl it into oatmeal, use it as a glaze for roasted veggies, and even pair it with cheese. It’s a flavor powerhouse that elevates whatever it touches.
This is my go-to when I need to contribute something to the holidays that feels special but doesn’t require me to be in the kitchen for six hours straight. No complicated techniques, no weird ingredients, just reliable, delicious food that makes everyone happy.
Ingredients You’ll Need
Here’s the best part: you probably have most of this already. This spiced pear preserves recipe relies on quality over quantity. Because there are only three main components, the quality of each one matters more than usual. I’m particular about three ingredients here, and I’ll tell you exactly why.
For the Base
Ripe Pears (4 pounds / about 2kg) — I use Bartlett or Bosc pears. Bartletts are juicier and break down faster, making a smoother preserve. Boscs hold their shape better if you like chunkier preserves. The key is ripeness. You want pears that are fragrant and give slightly to pressure. If they’re rock hard, they’ll never get that jammy texture. I look for pears with a few brown speckles on the skin—those are the sweet ones.
Sugar (1 cup / 200g) — I use granulated white sugar. It doesn’t overpower the delicate pear flavor like brown sugar might. Some people ask if I can reduce the sugar. You can, but it affects the setting and preservation. If you’re eating it fresh within a week, you can try reducing to ½ cup, but the texture will be looser. For the classic preserve texture, stick with the cup.
Water (½ cup / 120ml) — Just enough to get things moving. You don’t need much because pears release a lot of their own juice as they cook.
For the Flavor
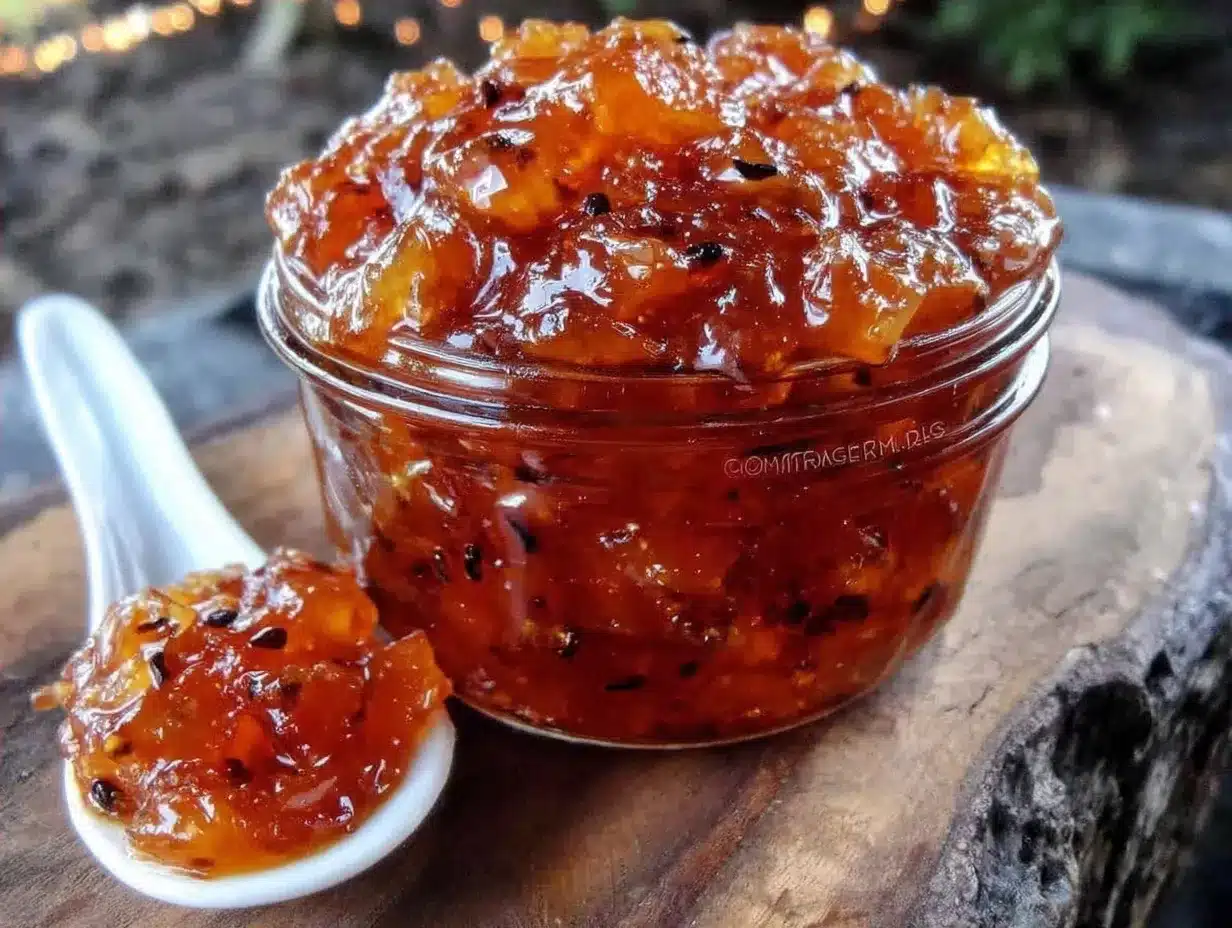
Vanilla Bean (1 whole pod, or 1 teaspoon pure vanilla extract) — This is the game-changer. If you have a vanilla bean, split it open and scrape the seeds into the pot. The black specks look gorgeous in the final product. If you don’t have a bean or a grinder, use high-quality pure vanilla extract. Add it at the very end so the alcohol cooks off and the flavor stays bright.
Cinnamon Sticks (2 whole sticks) — I use whole sticks instead of ground cinnamon because it infuses the flavor without making the preserves gritty. You’ll pull them out before jarring. Ceylon cinnamon is milder and sweeter, which I prefer for fruit, but regular Cassia cinnamon works fine too.
Ground Cloves (¼ teaspoon) — This is the secret weapon. It adds a warm, spicy depth that feels very holiday-specific. Don’t overdo it—cloves are potent. A quarter teaspoon is perfect. If you’re sensitive to spice, skip it, but I highly recommend keeping it.
Ground Ginger (½ teaspoon) — Adds a little zing and warmth. It balances the sweetness of the pears. Fresh ginger works too, but you’ll need to grate about a tablespoon and strain it out later, which is extra work. Ground is easier and tastes great.
Lemon Juice (1 tablespoon / 15ml) — This isn’t just for flavor. The acid helps the pears hold their structure and prevents browning. It also brightens up the heavy spice flavors. Freshly squeezed is best, but bottled works in a pinch.
Butter (1 teaspoon) — Optional, but I always add a tiny pat of butter at the end. It cuts the foam and gives the preserves a gorgeous, glossy shine. It’s a little trick from my grandmother.
Equipment Needed
You don’t need fancy equipment for this. Here’s what I actually use.
Large Heavy-Bottomed Pot — I use a 6-quart Dutch oven. It needs to be heavy-bottomed so the sugar doesn’t burn on the bottom. A stainless steel pot works great. My ancient enamel pot from college still works fine, but avoid thin aluminum pots.
Sharp Knife — For peeling and chopping the pears. A paring knife is ideal for getting into the nooks and crannies around the core.
Peeler — I peel the pears because the skin can get a bit tough in preserves. A Y-peeler works faster than a paring knife.
Wooden Spoon — For stirring. Silicone works too. Don’t use metal on non-stick, but metal is fine on stainless steel or cast iron.
Measuring Cups and Spoons — Pretty standard stuff. Dollar store versions work fine for dry ingredients.
Mortar and Pestle (Optional) — If you’re using whole spices like cloves and cinnamon, crushing them slightly before adding helps release the oils. But whole sticks work fine too if you’re lazy.
Jars — Clean, hot glass jars for storing. I use old pasta sauce jars that I’ve washed thoroughly, or buy new ones from the thrift store. Just make sure they’re sterilized.
How to Make It: Step-by-Step
Alright, let’s make this! I’m walking you through exactly how I do it, including the little tricks I’ve picked up over the years.
Step 1: Prep Your Pears (10 minutes)
Wash your pears thoroughly. Peel them. I know some people leave the skin on for color, but for a smooth, luxurious preserve, peeling is worth the extra two minutes. Cut them in half, remove the core and seeds, and chop the flesh into ½-inch chunks. Try to keep them uniform so they cook evenly. If you’re using Bartletts, they’ll break down more, so don’t worry if they look a bit messy. Set the chopped pears aside in a bowl.
Step 2: Start the Simmer (5 minutes)
Add the chopped pears to your large heavy-bottomed pot. Pour in the water and sugar. Stir gently to coat the pears in the sugar. If you’re using whole spices like cinnamon sticks and whole cloves, add them now. If you’re using ground spices, wait until later to avoid bitterness. Turn the heat to medium-high and bring the mixture to a boil. You’ll see bubbles forming around the edges.
Step 3: Break It Down (20-25 minutes)
Once it’s boiling, reduce the heat to low. This is the long haul. Let it simmer gently. You’ll want to stir it every 5 minutes or so to prevent sticking. The pears will start to break down and release their juices. The mixture will turn from chunky to a thick, jammy consistency. This is where the magic happens. The kitchen will start to smell incredible. If you’re using ground spices like ginger and cloves, add them now. Stir them in well.
Step 4: Add the Vanilla and Acid (2 minutes)
When the pears are soft and the mixture has thickened significantly (you can test this by putting a spoonful on a cold plate—if it wrinkles when you push it, it’s ready), remove the pot from the heat. If you used whole cinnamon sticks and cloves, fish them out now with a slotted spoon. Stir in the lemon juice. If you’re using vanilla extract, stir it in now. If you’re using a vanilla bean pod, scrape the seeds in now. Stir in the teaspoon of butter for that glossy finish.
Step 5: Jar and Cool (15 minutes)
Ladle the hot preserves into clean, hot jars, leaving about ¼ inch of headspace at the top. Wipe the rims clean with a damp cloth to ensure a good seal. Put the lids on tightly. Let the jars cool at room temperature for 15 minutes. You’ll hear a satisfying “pop” as the lids seal. Once cooled, store in the fridge.
Total Time: About 45 minutes (15 minutes active, 30 minutes simmering)
Expert Tips & Tricks
Here’s everything I’ve learned from making this dozens of times. These tips will save you from my mistakes.
Pick the Right Pears
This is the #1 tip. If your pears are underripe, your preserves will be tough and bland. If they’re overripe, they’ll turn to mush (which is fine if you like chunky, but not ideal for smooth preserves). I look for pears that are fragrant and yield slightly to pressure. If they smell like perfume, they’re perfect.
Don’t Rush the Simmer
I know it’s tempting to crank up the heat to finish faster, but high heat can burn the sugar and make the preserves taste bitter. Low and slow is the way to go. It also allows the flavors to meld beautifully. If you’re short on time, you can simmer on medium-low, but watch it closely.
Use Whole Spices for Best Flavor
Ground spices can make the preserves gritty and sometimes bitter if cooked too long. Whole cinnamon sticks and cloves infuse the flavor without the texture issues. If you must use ground spices, add them in the last 5 minutes of cooking.
The Cold Plate Test
How do you know when it’s done? Put a small plate in the freezer before you start. When you think the preserves are ready, drop a spoonful onto the cold plate. Let it sit for 30 seconds, then push it with your finger. If it wrinkles, it’s done. If it’s still runny, keep cooking.
Common Mistakes (and how to avoid them):
Mistake: Preserves are too runny
Fix: You didn’t cook it long enough. Pears need time to break down and release pectin. Keep simmering until it thickens. Also, make sure you’re using ripe pears, as they have more natural pectin.
Mistake: Preserves are too sweet
Fix: Taste the pears before you start. If they’re very sweet, reduce the sugar by ¼ cup. Add more lemon juice to balance the sweetness.
Pro Tricks I’ve Learned:
For Extra Depth
Add a pinch of salt at the end. It sounds weird, but it enhances the sweetness and spice. Just a tiny pinch goes a long way.
For Better Texture
If you like chunkier preserves, chop the pears into larger pieces and stir less frequently. If you like smooth, mash the pears with a potato masher before jarring.
Make-Ahead Strategy
This keeps in the fridge for up to 3 weeks. You can also freeze it for up to 6 months. Just leave headspace in the jar for expansion. I make a big batch in December and freeze half for February when I’m craving summer flavors.
Variations & Substitutions
Once you’ve nailed the basic version, here’s how you can mix it up. I’ve tried all of these.
Apple Cinnamon Version
Swap pears for apples. Use a mix of Granny Smith and Fuji for the best balance of tart and sweet. Add an extra cinnamon stick. This is great for fall.
Rosemary Pear
Add 2 sprigs of fresh rosemary to the pot while simmering. Remove before jarring. The piney flavor pairs beautifully with the pear and vanilla.
Spiced Pear and Ginger
Add 1 tablespoon of freshly grated ginger along with the ground ginger. This adds a spicy kick that’s perfect for winter.
Lower Sugar Version
Use half the sugar and add 1 packet of powdered pectin. Follow the pectin instructions for timing. This makes it lower in sugar but still sets well.
Alcohol-Infused
Stir in 2 tablespoons of bourbon or brandy at the end. The alcohol cooks off, leaving a rich, warm flavor. Great for adult gifts.
Serving & Storage
How to Serve:
I usually serve this warm on toasted sourdough bread with a slice of brie cheese. It’s also amazing on plain yogurt, oatmeal, or mixed into butter for baked potatoes. When I have guests, I put it out with a variety of crackers and cheeses. It’s a crowd-pleaser every time.
Storage Instructions:
Refrigerator: Store in an airtight container for up to 3 weeks. The preserves will thicken in the fridge—totally normal.
Freezing: Freeze in freezer-safe jars or bags for up to 6 months. Leave headspace for expansion. Thaw in the fridge overnight.
Shelf Life: If you’re canning these for long-term storage, follow proper canning procedures. For fridge storage, 3 weeks is safe.
Nutrition Information
I’m not a nutritionist, but here’s the breakdown if you’re tracking.
Per Serving (2 tablespoons):
- Calories: 40
- Protein: 0g
- Carbs: 10g
- Fiber: 1g
- Sugar: 8g
- Fat: 0g
What’s Good:
- Low calorie compared to store-bought jams
- Contains fiber from the pears
- No artificial preservatives
- Natural energy boost from fruit sugars
What to Know:
- Contains sugar (you can reduce this)
- Low in protein and fat
- Best enjoyed as part of a balanced meal
My Take:
Look, this is a sweet preserve. It’s not a diet food. But it’s made with real fruit and minimal sugar, so it’s a much better choice than the artificial stuff in the grocery store. When I eat this, I enjoy it mindfully as a treat. It fuels my day without feeling like a cheat.
Final Thoughts
So that’s my spiced pear preserves with vanilla bean recipe! I’ve probably talked your ear off at this point, but when you make a recipe this often, you have a lot to say about it.
This has saved my holiday hosting more times than I can count. It’s my answer to “what can I bring that feels special but doesn’t take all day?” My family loves it, my friends ask for it every year, and I love it because it’s simple, delicious, and makes my kitchen smell like heaven.
Make it yours! Try different spices, swap in different fruits, or add a splash of alcohol. The best recipes are the ones you adapt to your tastes.
If you make this, drop a comment and let me know what you think! I love hearing how recipes turn out in your kitchen. And if something doesn’t work, tell me that too—I’m here to help troubleshoot.
Happy cooking! And I hope your kitchen smells half as good as mine does right now.
Frequently Asked Questions
Can I use frozen pears?
Yes, you can use frozen pears. Thaw them first and drain off any excess liquid, as frozen pears release more water. You may need to cook them a bit longer to reach the right consistency. I’ve done this when pears are out of season, and it works fine.
Why did my preserves turn out watery?
Usually, this means you didn’t cook it long enough, or the pears weren’t ripe enough. Ripe pears have more natural pectin. Let it simmer longer until it thickens. You can also add a packet of powdered pectin to help it set.
Can I make this ahead for a holiday party?
Absolutely! In fact, it tastes better after a few days as the flavors meld. Make it a week before your party, store it in the fridge, and bring it out when you need it. It keeps well for up to 3 weeks.
How do I know when the preserves are done?
Use the cold plate test. Put a spoonful on a frozen plate. Let it cool for 30 seconds, then push it with your finger. If it wrinkles, it’s done. If it’s still runny, keep cooking.
Can I substitute honey for sugar?
You can, but it will change the flavor and texture. Honey is sweeter and more liquidy than sugar. You’ll need to use less honey and cook it longer to thicken. I prefer sugar for the classic taste, but honey works if you want a different flavor profile.
How long do these last in the fridge?
Up to 3 weeks in an airtight container. If you notice any mold or off smells, throw it out. For longer storage, freeze it for up to 6 months.
Can I can these for long-term storage?
Yes, you can water bath can these. Follow proper canning guidelines: use hot jars, leave ¼ inch headspace, and process in a boiling water bath for 10 minutes. This will give them a shelf life of 1-2 years. Always follow safe canning practices.
Pin This Recipe!
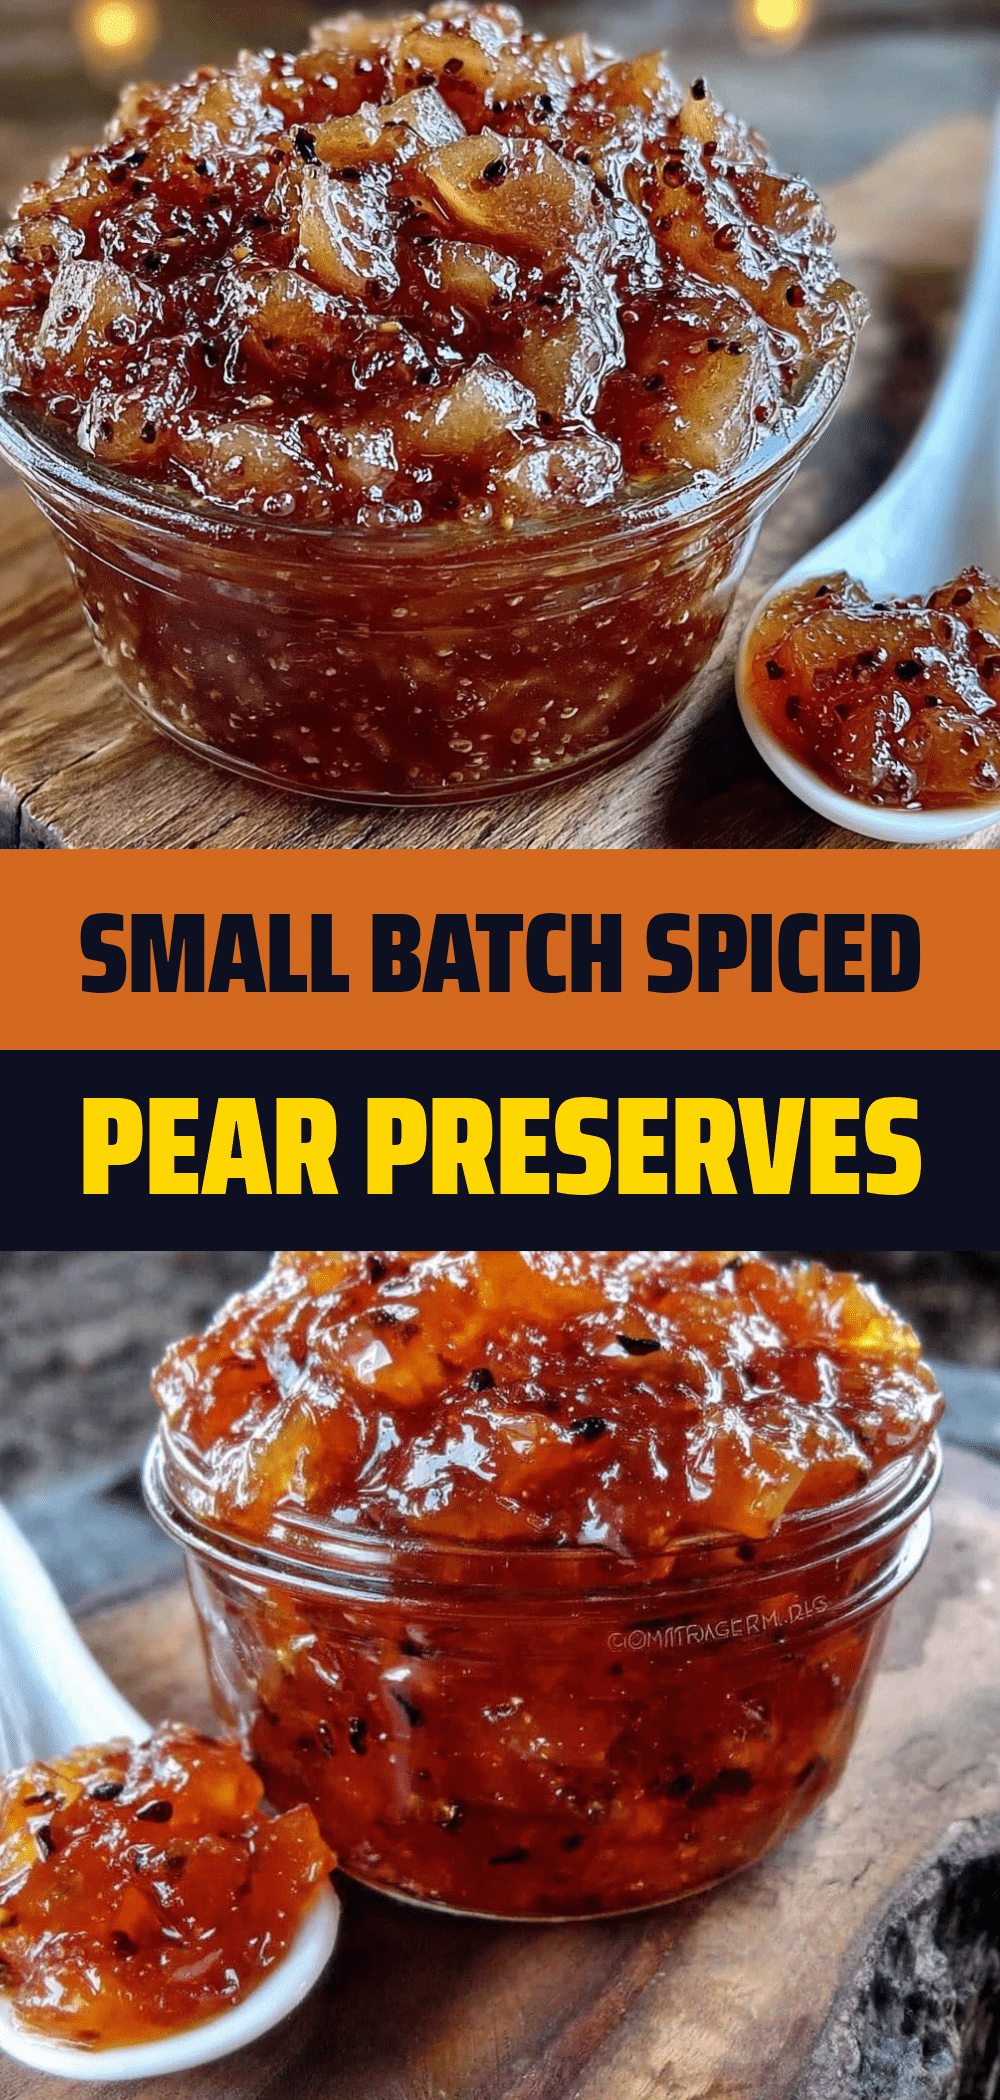
Spiced Pear Preserves: 3-Ingredient Fuel for Holiday Hosting
- Total Time: 45 minutes
- Yield: Makes approximately 4-5 jars 1x
Description
A simple, artisanal spiced pear preserve made with ripe Bartlett or Bosc pears, sugar, and warm holiday spices like cinnamon, clove, and vanilla bean. Perfect for holiday gifting or spreading on toast.
Ingredients
- 4 pounds ripe Bartlett or Bosc pears, peeled, cored, and chopped into ½-inch chunks
- 1 cup granulated white sugar
- ½ cup water
- 1 whole vanilla bean pod (split and seeds scraped) OR 1 teaspoon pure vanilla extract
- 2 whole cinnamon sticks
- ¼ teaspoon ground cloves
- ½ teaspoon ground ginger
- 1 tablespoon fresh lemon juice
- 1 teaspoon butter (optional, for gloss)
Instructions
- Wash, peel, core, and chop the pears into ½-inch chunks.
- Add chopped pears, water, and sugar to a large heavy-bottomed pot. Stir to coat.
- Add whole spices (cinnamon sticks and cloves) to the pot.
- Bring the mixture to a boil over medium-high heat, then reduce heat to low to simmer gently.
- Simmer for 20-25 minutes, stirring every 5 minutes, until pears break down and mixture thickens.
- If using ground spices (cloves, ginger), add them during the last 5 minutes of simmering.
- Test for doneness using the cold plate method; if ready, remove from heat.
- Remove whole cinnamon sticks and cloves with a slotted spoon.
- Stir in lemon juice, vanilla extract (or scraped vanilla bean seeds), and butter.
- Ladle hot preserves into clean, hot glass jars, leaving ¼ inch headspace.
- Wipe rims clean, seal with lids, and let cool at room temperature for 15 minutes until sealed.
Notes
Use ripe pears that yield slightly to pressure for the best texture and flavor. If using ground spices, add them late in the cooking process to prevent bitterness. The cold plate test is the best way to determine if the preserves have set. Preserves can be stored in the fridge for up to 3 weeks or frozen for up to 6 months.
- Prep Time: 15 minutes
- Cook Time: 30 minutes
- Category: Condiments
- Cuisine: American
Nutrition
- Serving Size: 2 tablespoons
- Calories: 40
- Sugar: 8
- Carbohydrates: 10
- Fiber: 1
Keywords: spiced pear preserves, pear jam, holiday gifts, vanilla bean preserves, easy jam recipe, seasonal cooking, autumn recipes