Last Tuesday, after a day that felt like it lasted three days, I came home exhausted. My brain was fried, my feet hurt, and the idea of chopping vegetables or managing a stove made me want to cry. I didn’t want to order takeout. I didn’t want to eat cereal over the sink. I just wanted something sweet, something creamy, and something that required absolutely zero effort. That’s when I remembered the jar of Biscoff spread sitting in the back of my pantry.
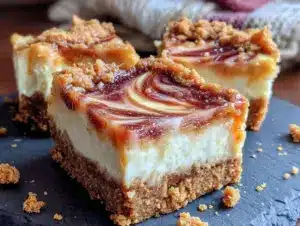
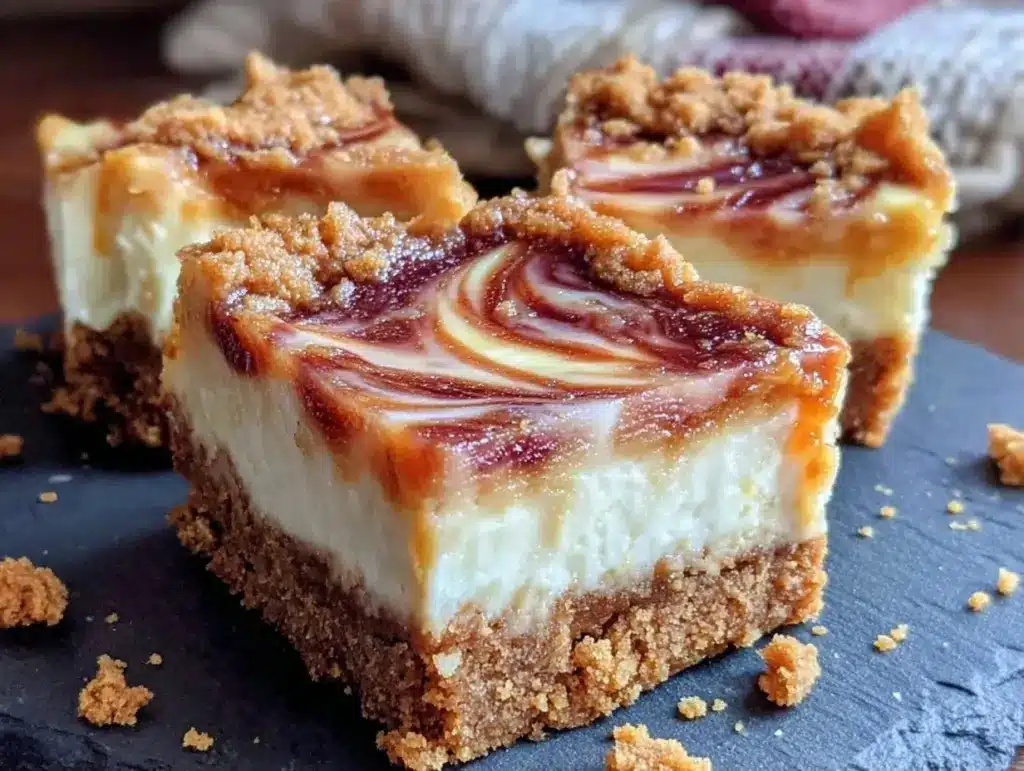
I pulled it out, grabbed some cream cheese, and threw together what I thought would be a mediocre snack. Twenty minutes later, I was sitting on my couch with a square of this No-Bake Biscoff Cheesecake Bars with Cookie Butter Swirl in my hand, and honestly? It was the exact amount of comfort I needed. It was rich, it was buttery, and it tasted like a hug. I’ve made these bars at least seven times since that Tuesday. They’ve become my go-to when I need to take care of myself without the stress of baking.
There’s something so satisfying about a no-bake dessert. You skip the preheating, you skip the waiting for it to cool completely (mostly), and you skip the anxiety of whether it rose correctly. This recipe is forgiving. It’s indulgent. And it’s the one to make when you need to take care of yourself after a long week. If you’re looking for a no-bake pumpkin pie for autumn, this Biscoff version is just as perfect for those cozy, quiet moments.
Why You’ll Love This Recipe
I know, I know—there are a million dessert recipes out there. But this no-bake Biscoff cheesecake bars recipe is different. It’s not complicated, and it doesn’t require a stand mixer or hours of your afternoon. Here’s why I keep coming back to it:
- Zero Baking Required — Seriously. No oven, no mess, no waiting. I make these on nights when I can’t even look at an oven mitt. It’s just mixing, spreading, and chilling.
- Only Four Main Ingredients — You probably have most of these already. Cream cheese, butter, sugar, and Biscoff. That’s it. It’s pantry-friendly in the best way possible.
- Rich but Not Overwhelming — Some cheesecakes are so dense you feel like you need a nap after one bite. These are creamy and light, with that distinct caramelized sugar flavor from the cookie butter that hits you just right.
- Perfect for Self-Care — Making these feels like a small ritual. I put on some soft music, spread the batter, and watch it chill. It’s meditative. It’s gentle. It’s just for me.
- Keeps Well in the Fridge — I make these on Sunday night and eat them throughout the week. They actually get better after a day or two as the flavors meld together. It’s like having a little treat waiting for me when I need it most.
This is my answer to “I need something sweet but I have no energy.” It’s reliable, delicious, and deeply comforting. Just like those fall caramel apple crisp bars I love, this brings that warm, cozy feeling without the work.
Ingredients You’ll Need
Here’s the best part: this recipe is incredibly simple. You don’t need fancy equipment or obscure ingredients. Just good, honest stuff. I’m particular about two things here: the cream cheese and the Biscoff spread. Don’t skimp on quality.
For the Crust
Biscoff Cookies (Lotte Biscoff) (2 cups, crushed / about 250g) — These are the famous cinnamon-spiced cookies that go with the spread. You can use any shortbread cookie, but the Biscoff ones tie the whole flavor together. I crush them in a food processor, but a ziplock bag and a rolling pin works too if you’re feeling old-school.
Unsalted Butter (6 tablespoons / 85g, melted) — This binds the crust. I use unsalted so I can control the sweetness, but if you’re out of salted, just reduce the added sugar in the filling slightly.
For the Cheesecake Layer
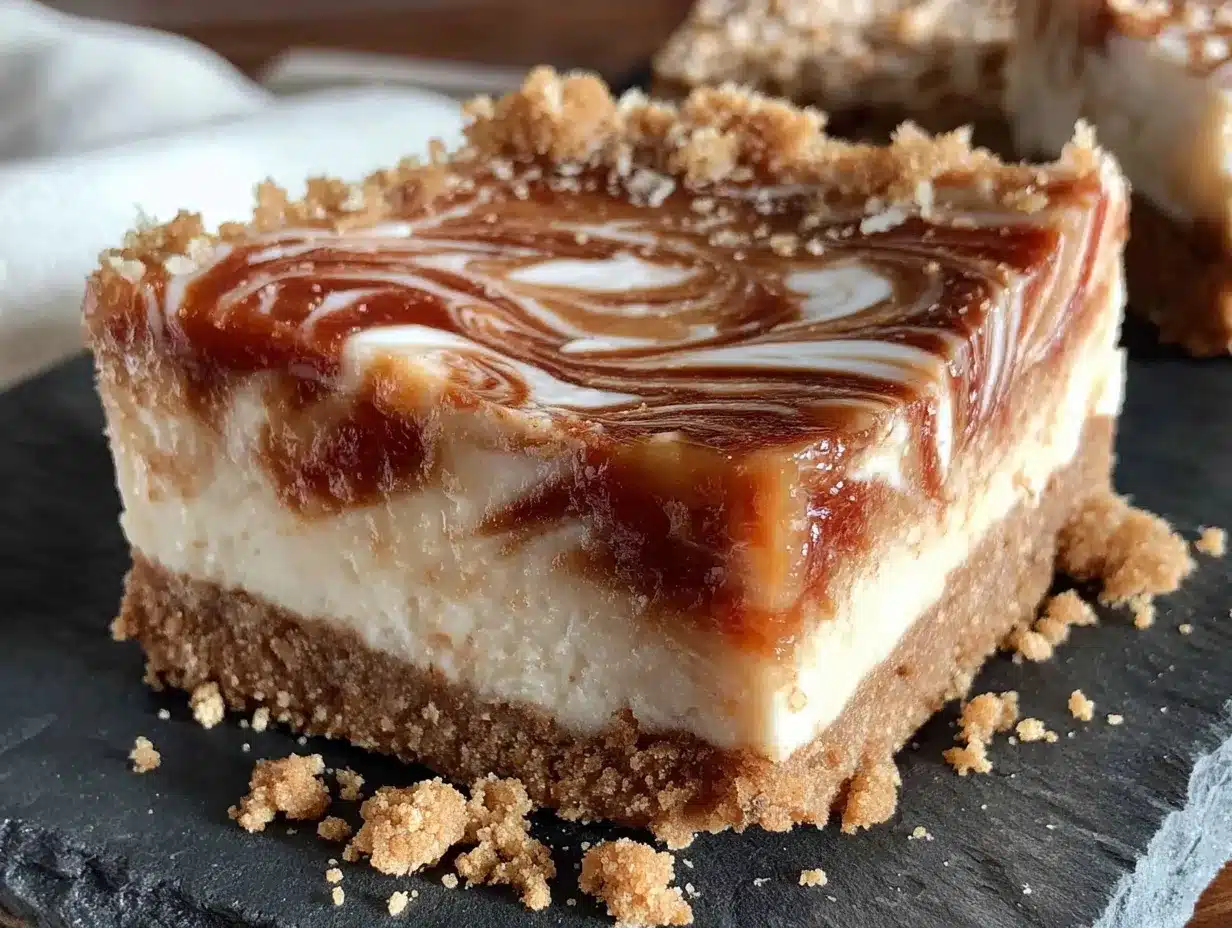
Full-Fat Cream Cheese (8 oz / 225g, softened) — This is non-negotiable. Light cream cheese won’t set properly and will be too tangy. Let it sit on the counter for 30 minutes before you start. Softened cream cheese mixes smoothly; cold cream cheese leaves lumps.
Granulated Sugar (½ cup / 100g) — Sweetens the filling. If you prefer less sweet, drop it to ⅓ cup. I like it balanced because the Biscoff spread is already sweet.
Vanilla Extract (1 teaspoon) — Enhances the flavor. Pure vanilla makes a difference. I use the bottle, not the extract essence.
For the Swirl
Biscoff Cookie Butter Spread (½ cup / 125g) — The star of the show. I use Lotus Biscoff spread because it has that specific caramelized cinnamon flavor. Nutella or other cookie butters work, but the taste will be different.
Heavy Cream (2 tablespoons) — Whisked with the Biscoff spread to make it easier to swirl. If you don’t have heavy cream, a tablespoon of milk works, but it might be thicker.
Optional Topping
Crushed Biscoff Cookies — For garnish. It looks pretty and adds a little crunch. I sprinkle this on right before serving.
Pro Tip: If you’re feeling festive, you can swap the Biscoff for a fall pumpkin pie cheesecake vibe by using pumpkin spice Biscoff spread if you can find it, or just adding a teaspoon of pumpkin pie spice to the filling.
Equipment Needed
You don’t need much for this. Here’s what I actually use:
8×8 Inch Baking Pan — I line it with parchment paper. This is crucial. If you don’t line it, you’ll struggle to get the bars out. Leave overhang on the sides to use as handles.
Food Processor or Ziplock Bag — For crushing the cookies. A food processor is faster, but a bag and a rolling pin is fine if you’re being gentle.
Mixing Bowl — Any medium-sized bowl. I like glass because I can see what’s going on.
Hand Mixer or Fork — You can use a hand mixer for the cream cheese, but honestly? A fork works fine if the cream cheese is softened. I sometimes just whisk it by hand to keep it low-key.
Spatula — A silicone spatula is best for scraping the bowl and spreading the batter evenly.
Refrigerator — Obviously. You need space for the pan to chill.
How to Make It: Step-by-Step
Alright, let’s make these. I’m walking you through exactly how I do it, including the little tricks I’ve picked up over time.
Step 1: Prep Your Pan
Line an 8×8 inch baking pan with parchment paper. Leave a little overhang on the long sides so you can lift the bars out later. This makes cleanup and serving so much easier.
Step 2: Make the Crust
Crush your Biscoff cookies into fine crumbs. If you’re using a food processor, pulse until they look like sand. If you’re using a bag, roll over them until they’re fine. In a medium bowl, mix the cookie crumbs with the melted butter. It should look like wet sand. Press this mixture firmly into the bottom of your prepared pan. Use the bottom of a glass to pack it down tight. A loose crust leads to crumbly bars, and nobody wants that.
Step 3: Mix the Filling
In a large bowl, beat the softened cream cheese until smooth. This takes about 1-2 minutes. Add the sugar and vanilla extract. Beat again until everything is combined and creamy. If you’re using a hand mixer, don’t overbeat—it can incorporate too much air. I usually just whisk it by hand to keep it dense and rich.
Step 4: Spread and Swirl
Pour the cheesecake filling over the crust. Spread it out evenly with your spatula. Smooth the top as much as you can; it doesn’t need to be perfect, just even. In a small bowl, whisk the Biscoff spread with the heavy cream until smooth. Drizzle this mixture over the cheesecake layer. Use a knife or a toothpick to gently swirl the Biscoff into the cream cheese. Don’t overmix—you want distinct ribbons of cookie butter, not a uniform brown color. Just a few gentle swirls are enough.
Step 5: Chill
Cover the pan with plastic wrap or foil. Place it in the refrigerator for at least 4 hours, or ideally overnight. This is the hardest part—waiting. But it’s necessary for the bars to set. If you rush this, they’ll be messy.
Step 6: Slice and Serve
Once set, lift the bars out of the pan using the parchment paper overhang. Use a sharp knife to cut into squares. Wipe the knife between cuts for clean edges. Dust with crushed cookies if you’re feeling fancy. Enjoy.
Total Time: About 20 minutes active, plus 4 hours chilling.
Expert Tips & Tricks
Here’s everything I’ve learned from making these dozens of times. These tips will save you from my mistakes.
Soften Your Cream Cheese
I cannot stress this enough. If your cream cheese is cold, you will have lumps. And lumps in a no-bake cheesecake are visible and texturally annoying. Cut it into cubes and let it sit on the counter for 30-60 minutes. It should yield to gentle pressure.
Don’t Skip the Swirl
The Biscoff swirl is what makes these bars special. If you just mix it in, you lose that beautiful marbled look and the pockets of intense flavor. Drizzle it on top and swirl gently. It’s the artistic part of the recipe.
Use a Sharp Knife
When cutting no-bake cheesecake, a dull knife will crush the bars. Use a sharp chef’s knife. Dip it in hot water and wipe it dry between cuts for the cleanest slices. It’s a small trick, but it makes a big difference in presentation.
Chill Longer if Possible
Four hours is the minimum. Overnight is better. The bars firm up as they chill, and the flavors deepen. I usually make these the night before I want to eat them. It’s the perfect make-ahead dessert.
Storage Is Key
Keep these in the fridge. They don’t freeze well because the texture can change. Store them in an airtight container for up to 5 days. They’re best fresh, but they hold up well.
Variations & Substitutions
Once you’ve nailed the basic version, here’s how you can mix it up. I’ve tried all of these.
Gluten-Free Option
Use gluten-free Biscoff cookies (they make them!) or substitute with gluten-free shortbread. The rest of the recipe is naturally gluten-free. I’ve used gluten-free cookies and they work great.
Dairy-Free Version
Replace the cream cheese with a vegan cream cheese alternative (like Kite Hill or Miyoko’s) and use dairy-free butter. The Biscoff spread is naturally vegan, so that’s easy. It’s not quite the same texture, but it’s still delicious. My lactose-intolerant friend loves this version.
Chocolate Swirl
Swap the Biscoff swirl for melted chocolate or Nutella. It’s a different flavor profile, but still rich and satisfying. Great for chocolate lovers.
Seasonal Spice
Add a teaspoon of pumpkin pie spice or cinnamon to the crust. It enhances the Biscoff flavor and makes it feel more autumnal. I do this when I’m craving those fall apple cider donut muffin vibes.
Extra Crunch
Add chopped toasted pecans or walnuts to the crust. It adds a nice texture contrast to the creamy filling.
Serving & Storage
How to Serve:
I usually serve these straight from the fridge. They’re best cold. I like to pair them with a cup of tea or coffee. It’s a perfect quiet evening treat. You can also serve them with a dollop of whipped cream and a few fresh berries for a pop of color.
Side Dishes:
These are desserts, so they don’t need sides. But if you’re having a small gathering, they pair well with cozy fall creamy wild rice and mushroom casserole as a sweet ending to a savory meal. Or just enjoy them on their own.
Storage Instructions:
Refrigerator: Store in an airtight container for up to 5 days. They keep well in the fridge.
Freezing: I don’t recommend freezing these. The cream cheese texture can become grainy when thawed. It’s better to make them fresh.
Meal Prep: These are perfect for meal prep. Make them on Sunday, and you have a treat ready for the week. Just slice them and store them in individual portions if you want to control your servings.
Nutrition Information
I’m not a nutritionist, but here’s the breakdown if you’re tracking. Keep in mind this is a rich dessert, so portions matter.
Per Serving (based on 16 bars):
- Calories: 180
- Protein: 3g
- Carbs: 18g
- Fiber: 1g
- Sugar: 14g
- Fat: 12g
- Saturated Fat: 7g
- Sodium: 120mg
What’s Good:
- It’s a small treat, so it’s easy to enjoy in moderation.
- Simple ingredients, nothing artificial.
What to Know:
- Higher in sugar and fat from the cream cheese and Biscoff.
- Contains gluten and dairy.
My Take:
Look, this is a dessert. It’s meant to be enjoyed. It’s not a health food. But it’s better than store-bought bars, and it’s made with real ingredients. When I need to take care of myself, I give myself permission to enjoy this. Just a few bites. That’s enough.
Final Thoughts
So that’s my no-bake Biscoff cheesecake bars recipe! I’ve talked your ear off, but when you make a recipe this often, you have a lot to say about it.
This has saved my evenings more times than I can count. It’s my answer to “I’m tired but I want something sweet.” It’s gentle, it’s easy, and it tastes amazing. My family loves it, but honestly, I make it mostly for me. It’s a moment of peace.
Make it yours! Try different toppings, swap in your favorite cookie butter, or just enjoy it as is. The best recipes are the ones that bring you comfort. If you make this, drop a comment and let me know what you think! I love hearing how recipes turn out in your kitchen. And if something doesn’t work, tell me that too—I’m here to help troubleshoot.
Happy cooking! And I hope your kitchen smells half as good as mine does right now.
Frequently Asked Questions
Can I use a different cookie for the crust?
Yes! You can use graham crackers, vanilla wafers, or any shortbread cookie. The flavor will be different, but the texture will be similar. I like Biscoff cookies because they match the spread, but it’s not required.
Why did my cheesecake bars not set?
Usually, this means they didn’t chill long enough. No-bake cheesecakes need time to firm up in the fridge. If you cut them too soon, they’ll be soft. Try chilling them for at least 6 hours or overnight. Also, make sure your cream cheese was softened before mixing.
Can I make this ahead for a party?
Absolutely! This is actually better when made ahead. Make it 1-2 days before the party. Keep it in the fridge until you’re ready to serve. It holds up well and the flavors get better.
Can I use light cream cheese?
I don’t recommend it. Light cream cheese has more water and less fat, which means it won’t set properly. The bars will be runny and tangy. Stick with full-fat cream cheese for the best texture.
How long do these last in the fridge?
They last up to 5 days in an airtight container. They’re best within the first 3 days, but they’ll still be good after that.
Can I freeze these bars?
I don’t recommend freezing them. The cream cheese can become grainy when thawed. It’s better to make them fresh. If you must freeze, wrap them tightly and freeze for up to 1 month, but thaw in the fridge first.
Can I use a different spread instead of Biscoff?
You can use Nutella, hazelnut spread, or other cookie butters. The flavor will be different, but it will still be delicious. Just adjust the sweetness if needed.
Do I need a mixer?
No, you can use a fork or a whisk if the cream cheese is softened. A hand mixer makes it faster, but it’s not necessary. I sometimes just whisk it by hand to keep it low-key.
Pin This Recipe!
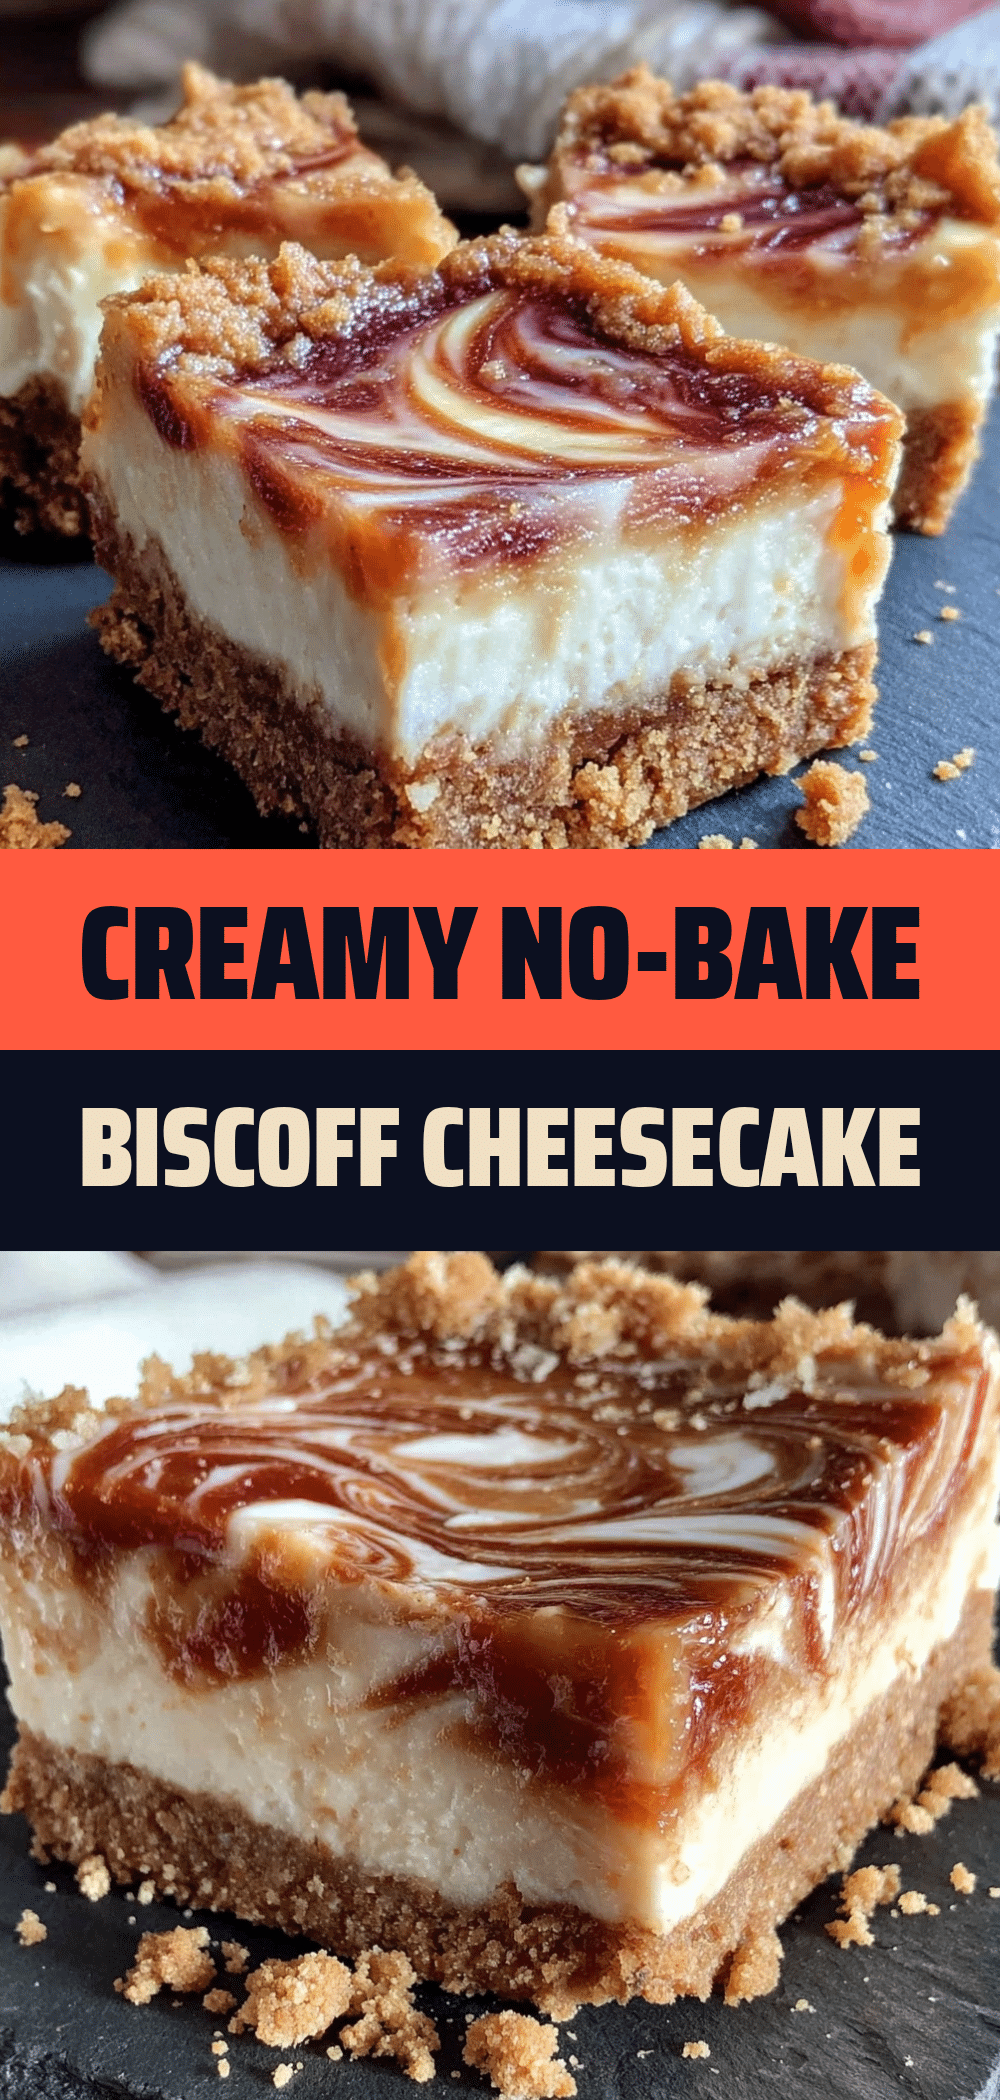
No-Bake Biscoff Cheesecake Bars
- Total Time: 4 hours 20 minutes
- Yield: 16 servings 1x
Description
Rich, creamy, and buttery no-bake cheesecake bars with a Biscoff cookie crust and cookie butter swirl. This easy, self-care friendly dessert requires zero baking and just a few pantry ingredients.
Ingredients
- 2 cups Biscoff cookies (Lotte Biscoff), crushed (about 250g)
- 6 tablespoons unsalted butter, melted (85g)
- 8 oz full-fat cream cheese, softened (225g)
- ½ cup granulated sugar (100g)
- 1 teaspoon vanilla extract
- ½ cup Biscoff cookie butter spread (125g)
- 2 tablespoons heavy cream
- Crushed Biscoff cookies for garnish (optional)
Instructions
- Line an 8×8 inch baking pan with parchment paper, leaving an overhang on the long sides for easy removal.
- Crush the Biscoff cookies into fine crumbs using a food processor or a ziplock bag with a rolling pin.
- In a medium bowl, mix the cookie crumbs with the melted butter until the mixture resembles wet sand.
- Press the crust mixture firmly into the bottom of the prepared pan, packing it down tight with the bottom of a glass.
- In a large bowl, beat the softened cream cheese until smooth (1-2 minutes).
- Add the sugar and vanilla extract to the cream cheese and beat/whisk until combined and creamy.
- Pour the cheesecake filling over the crust and spread it evenly with a spatula.
- In a small bowl, whisk the Biscoff spread with the heavy cream until smooth.
- Drizzle the Biscoff mixture over the cheesecake layer.
- Use a knife or toothpick to gently swirl the Biscoff into the cream cheese to create ribbons; do not overmix.
- Cover the pan with plastic wrap or foil and refrigerate for at least 4 hours, or ideally overnight, until set.
- Lift the bars out of the pan using the parchment paper overhang.
- Use a sharp knife (dipped in hot water and wiped dry between cuts) to slice into squares.
- Dust with crushed Biscoff cookies if desired and serve chilled.
Notes
Ensure cream cheese is fully softened to avoid lumps. For clean cuts, dip the knife in hot water and wipe it dry between slices. These bars are best stored in the refrigerator and do not freeze well due to texture changes in the cream cheese. They can be made gluten-free by using gluten-free shortbread cookies or gluten-free Biscoff cookies.
- Prep Time: 20 minutes
- Cook Time: 0 minutes
- Category: Dessert
- Cuisine: American
Nutrition
- Serving Size: 1 bar
- Calories: 180
- Sugar: 14
- Sodium: 120
- Fat: 12
- Saturated Fat: 7
- Carbohydrates: 18
- Fiber: 1
- Protein: 3
Keywords: no-bake, Biscoff, cheesecake bars, cookie butter, easy dessert, self-care, fall dessert, gluten-free option, dairy-free option