It started with a single bar. Just one. I had made a huge batch of these no-bake Biscoff cheesecake bars for a neighborhood potluck, thinking I was being generous. I set the plate on the table, walked away to grab a drink, and turned around to find the plate completely empty except for a few crumbs. My friend Sarah looked at me with that specific, guilty grin she reserves for when she’s taken the last piece of something precious, and said, “I didn’t even realize you made those. I just kept taking them.”
That was the moment I realized I had created something dangerous. Not in a bad way—just in the way that means it’s going to be the most requested recipe in my house forever. These no-bake Biscoff cheesecake bars have become my secret weapon for impressing people without actually turning on the oven. If you’ve been scrolling through Pinterest looking for that perfect fall dessert that looks fancy but takes zero effort, stop looking. You found it.
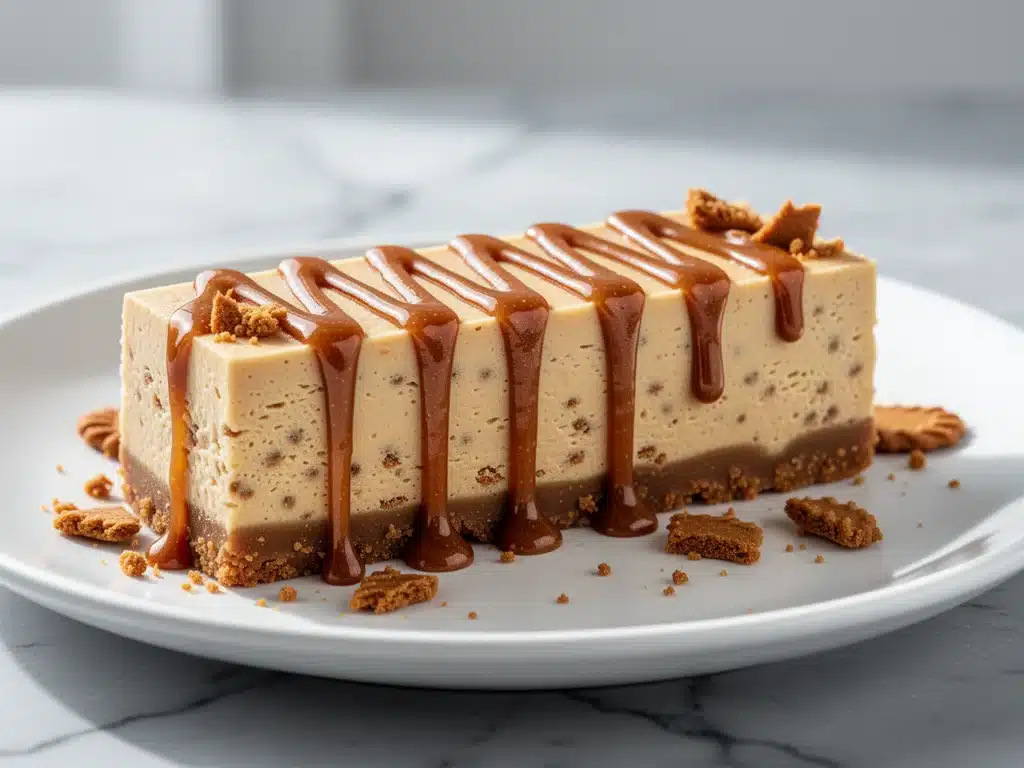
I’ve tested this recipe probably fifteen times. I’ve tweaked the ratio of cream cheese to cookie butter. I’ve tried different crusts. I’ve even experimented with adding a layer of dulce de leche (which was good, but not better than the classic). Through all the trial and error, I’ve landed on the perfect balance: a buttery, crunchy speculoos crust, a thick and tangy cheesecake filling infused with warm spices, and that irresistible drizzle of melted cookie butter on top. It’s sweet, it’s creamy, it’s crunchy, and it’s ready in about ten minutes of active time (plus chilling).
Here’s the thing about these bars—they solve the biggest problem with baking in the fall. You want cozy, spiced desserts, but your kitchen is already warm from cooking Thanksgiving dinner or just surviving the heat. Turning on the oven feels like a betrayal. With this no-bake approach, you get all the comfort flavors of a cinnamon roll or a spiced apple pie without the heat, the fuss, or the cleanup. It’s basically the best of both worlds.
Why You’ll Love This No-Bake Biscoff Cheesecake Recipe
I’m not just saying this because I made it (though I have made it dozens of times). There are actual, provable reasons why this recipe has taken over my dessert rotation and probably will take over yours too.
Zero Oven Required — Seriously. If you have a refrigerator, you can make this. I make this while my kids are doing homework at the kitchen table. No preheating, no waiting for the cake to cool, no worrying about cracking. Just mix, press, chill, and eat. It’s the ultimate low-stress dessert.
Make-Ahead Magic — This is my go-to for dinner parties. I make these bars two days in advance. They actually taste better the next day because the flavors have time to meld. The crust gets slightly firmer, the filling sets perfectly, and it’s ready to grab and go. I love having a dessert that’s already done while I’m stressing about whether the roast is cooked right.
Five-Star Flavor, Simple Ingredients — You don’t need fancy pastry tools or obscure ingredients. The star here is Biscoff cookie butter (or speculoos spread), which gives it that warm, caramelized gingerbread-like flavor. Combined with cream cheese and graham crackers, it tastes like a dessert from a high-end bakery but costs a fraction of the price. I use the same basic pantry staples I use for my no-bake pumpkin pie, which shows you how accessible this is.
Perfectly Portable — Because they are cut into bars, they are so much easier to serve than a whole cheesecake. No slicing wobbly layers. No plates cracking under the weight. Just pick up a bar, maybe drop it on a napkin, and hand it to someone. They hold their shape beautifully, even in hot weather, which is a miracle for summer or early fall gatherings.
Crowd-Pleaser Guaranteed — I’ve served these to people who claim they “don’t like sweet things” and to people who order the dessert menu every single night. Everyone loves them. The cookie butter flavor is familiar but special. It tastes like a treat, not like a chore.
This is the recipe I pull out when I want to feel like a good host without spending six hours in the kitchen. It’s reliable, it’s delicious, and it’s going to make your life easier.
Ingredients You’ll Need for the Perfect Bars
This recipe is incredibly forgiving, but the quality of your ingredients matters. Since there are only four main components, you want them to be good. I’m not going to lie to you—cheap cookie butter just tastes like sweet, bland peanut butter. Spend the extra dollar on the real deal. It makes all the difference.
For the Crust
Graham cracker crumbs (1 ½ cups / 150g) — I buy the boxes of full sheets and crush them in a food processor. It’s faster than buying pre-crushed, and they taste fresher. If you’re in a rush, pre-crushed works, but you might need to add an extra tablespoon of butter to get them to stick.
Unsalted butter (6 tablespoons / 85g) — Melted. I use salted butter if that’s all I have, but I reduce the added salt in the recipe. The butter binds the crumbs and gives that rich, shortbread-like texture. Don’t skimp here, or the crust will crumble apart.
Granulated sugar (2 tablespoons / 25g) — Just a little bit to sweeten the crust. If you’re using very sweet graham crackers, you can skip this. I usually include it for balance.
Pure vanilla extract (½ teaspoon) — Enhances the buttery flavor. Real vanilla, please. The stuff in the brown bottle is fine, but avoid the imitation stuff.
For the Cheesecake Filling
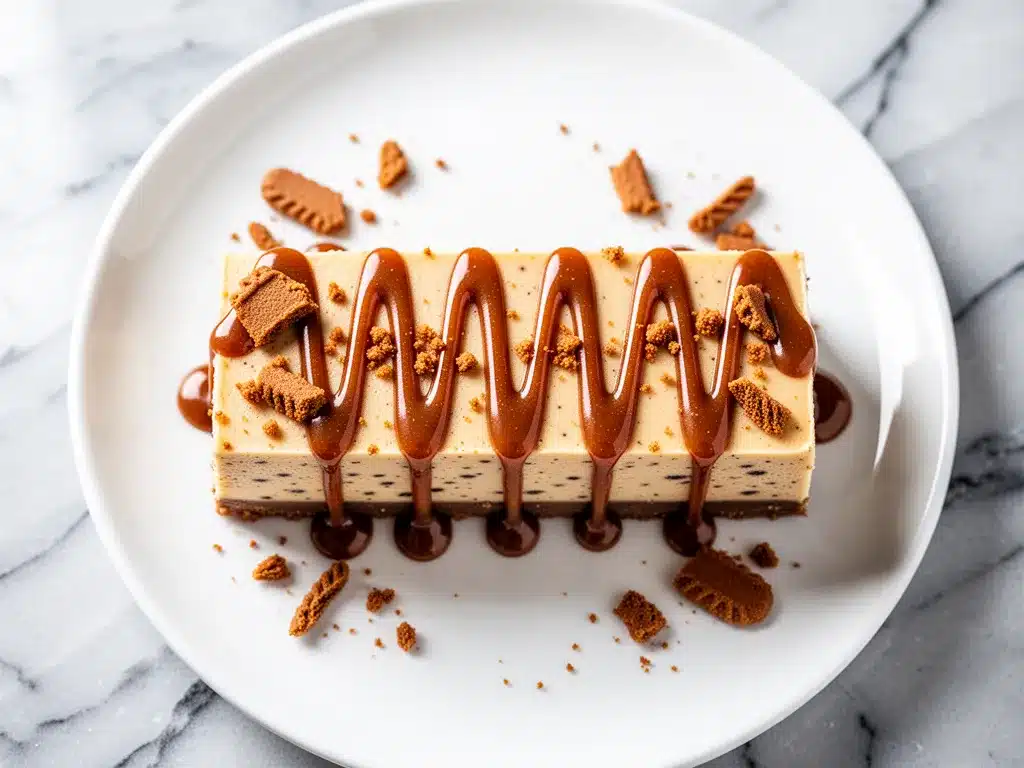
Full-fat cream cheese (16 oz / 450g) — This is non-negotiable. Light cream cheese won’t set properly and will be too tangy. Let it sit on the counter for 30 minutes before you start. Cold cream cheese leads to lumpy filling, and nobody wants that.
Cookie butter (Biscoff spread) (½ cup / 125g) — Softened to room temperature. This is the star. Make sure it’s smooth. If it’s separated in the jar, stir it well before measuring. This gives the filling that distinct caramel-spice flavor.
Heavy whipping cream (1 cup / 240ml) — Cold, straight from the fridge. This is what gives the filling that light, airy texture instead of being dense and heavy. Do not substitute with half-and-half; it won’t whip up properly.
Powdered sugar (½ cup / 60g) — Sweetens the filling without adding graininess. Sift it if there are lumps. You can adjust this up or down depending on how sweet your cookie butter is.
Vanilla extract (1 teaspoon) — Adds depth. Again, use the good stuff.
For the Drizzle
Cookie butter (¼ cup / 60g) — Just enough to drizzle on top. Melt this gently.
Heavy cream (1-2 teaspoons) — Added to the melted cookie butter to thin it out so it drizzles easily. Start with 1 teaspoon; add more if needed.
Equipment You’ll Need
You don’t need much. This is a no-bake recipe, so your oven is basically irrelevant. Here’s what I actually use:
9×13-inch baking pan — I use a glass Pyrex dish because I can see the bottom to check for browning (even though we’re not baking, it helps me visualize the layers). Line it with parchment paper, leaving an overhang on the sides. This is the #1 trick for easy removal. You’ll thank me later when you lift the whole block out to cut it.
Food processor or Ziploc bag + rolling pin — For crushing the graham crackers. The food processor takes 30 seconds. The Ziploc bag takes 5 minutes and gives you a good arm workout. Your choice.
Electric mixer — Hand mixer or stand mixer. You need to whip the heavy cream to soft peaks, which is hard to do by hand. And you need to beat the cream cheese until smooth. A mixer saves your arms.
Spatula — A large silicone spatula for folding the whipped cream into the cheesecake mixture. Be gentle. You want to keep all those air bubbles in there for a light texture.
Saucepan or microwave-safe bowl — For melting the cookie butter drizzle. I prefer the microwave in 15-second intervals because it’s faster and less messy than a stovetop.
Knife or bench scraper — For cutting the bars. Dip your knife in hot water and wipe it dry between cuts for clean, sharp edges. This is a pro tip that makes your bars look bakery-quality.
How to Make No-Bake Biscoff Cheesecake Bars: Step-by-Step
Alright, let’s get into the kitchen. This is going to be fun. I’m going to walk you through exactly how I do it, including the little tricks that keep this recipe from failing.
Step 1: Prep Your Pan and Crust (5 minutes)
Line your 9×13-inch baking pan with parchment paper. Leave a 2-inch overhang on the long sides. This is your lifting handle. In a food processor, pulse the graham crackers until they are fine crumbs. If you’re using a bag, crush them until they’re the size of sand. In a medium bowl, mix the crumbs, melted butter, sugar, and vanilla until it looks like wet sand. Press this mixture firmly into the bottom of your prepared pan. Use the bottom of a measuring cup to pack it down tight. If the crust is loose, it will crumble when you cut it. Place the pan in the fridge while you make the filling. This helps the crust set immediately.
Step 2: Beat the Cream Cheese (3 minutes)
In a large mixing bowl, beat the softened cream cheese on medium-high speed until it is completely smooth and creamy. This usually takes about 2 minutes. Scrape down the sides of the bowl with your spatula. Make sure there are no lumps. If you see lumps, keep beating. You want a silky base. Add the softened cookie butter, powdered sugar, and vanilla extract. Beat again until everything is fully combined and smooth. The mixture should look pale and creamy. Taste it now—it should be delicious. If you want it sweeter, add a little more powdered sugar.
Step 3: Whip the Cream (3 minutes)
In a separate cold bowl, pour the cold heavy whipping cream. Beat on high speed until you form soft peaks. This means when you lift the beaters, the cream holds a shape that gently falls over. Do not over-whip this into stiff peaks, or your filling will be grainy. Soft peaks are perfect for folding. This step adds the light, airy texture that makes these bars so good. It’s the secret to them not feeling like a brick.
Step 4: Fold It All Together (2 minutes)
Add about one-third of the whipped cream to the cream cheese mixture and stir it in to lighten the base. Then, add the rest of the whipped cream. Using your spatula, gently fold the cream into the cheese mixture. Use a figure-eight motion. Stop when you see no more white streaks. Do not over-mix, or you’ll deflate the air you just whipped in. The final mixture should be fluffy, pale, and beautiful.
Step 5: Assemble and Chill (4+ hours)
Pour the cheesecake filling over the chilled crust. Use your spatula to spread it into an even layer. Smooth the top so it’s flat. Cover the pan with plastic wrap or foil. Place it in the refrigerator for at least 4 hours, but overnight is best. I know it’s hard to wait, but this chilling time is crucial. It allows the cheesecake to set firmly so you can cut clean squares. If you cut it too soon, it will be a mess.
Step 6: The Drizzle (2 minutes)
Once the bars are fully set, remove the pan from the fridge. In a microwave-safe bowl, combine the cookie butter and heavy cream. Microwave in 15-second intervals, stirring between each, until smooth and pourable. Let it cool for a minute so it’s not hot. Transfer to a small zip-top bag and snip off a tiny corner of the bag. Drizzle the cookie butter over the top of the bars in a zigzag pattern. Don’t be shy with the drizzle. It’s the best part.
Step 7: Cut and Serve
Lift the bars out of the pan using the parchment paper. Place them on a cutting board. Use a sharp knife to cut into 12 or 16 squares. Dip the knife in hot water and wipe it dry between each cut for clean edges. Serve immediately. These are best eaten cold, right out of the fridge.
Expert Tips for Success
I’ve made these so many times that I’ve learned a few things the hard way. Here’s how to avoid my mistakes and get it right the first time.
Room Temperature is Key — I cannot stress this enough. Your cream cheese and cookie butter MUST be at room temperature. If they are cold, you will get lumps. If you forget to take them out, microwave the cream cheese in 5-second bursts until it’s soft but not melted. It’s worth the extra five minutes of planning.
Don’t Skip the Chilling — I know you want to eat them now. But if you cut them before they are fully set, you will get sad, messy triangles instead of perfect bars. If you’re in a huge rush, put the pan in the freezer for 30 minutes. It speeds things up without compromising the texture.
Use Cold Cream for Whipping — If your heavy cream is warm, it won’t whip. Put your mixing bowl in the fridge for 10 minutes before you start, or even freeze it for 5 minutes. Cold cream whips faster and holds its shape better. This is a classic baker’s trick.
Hot Knife for Clean Cuts — Cutting no-bake cheesecake can be tricky if the knife is cold. The cold cheesecake sticks to the blade. Dip your knife in hot water, wipe it dry, and cut. Then repeat. Your bars will look professional. This is the same trick I use when cutting my pumpkin pie cheesecake.
Adjust the Sweetness — Cookie butter brands vary in sweetness. If you’re using a brand that’s less sweet, you might want to add an extra 2 tablespoons of powdered sugar. Taste the filling before you fold in the whipped cream. That’s your chance to adjust.
Variations and Substitutions
Once you’ve mastered the basic version, here’s how you can mix it up. I’ve tried all of these, and they work.
Strawberry Biscoff Bars — Add ½ cup of finely chopped fresh strawberries to the filling after folding in the whipped cream. The tartness cuts through the sweetness perfectly. Just make sure the strawberries are very dry, or the bars will get soggy.
Salted Caramel Drizzle — Swap the cookie butter drizzle for a salted caramel sauce. Drizzle it over the top before adding the cookie butter drizzle. The salt enhances the cookie butter flavor. This is my favorite version for holidays.
Chocolate Chip Twist — Sprinkle ½ cup of chocolate chips over the crust before adding the filling. It adds a nice crunch and chocolate flavor. Like a Biscoff version of a s’mores bar.
Gluten-Free Option — Use gluten-free graham crackers or even gluten-free digestive biscuits. The rest of the recipe is naturally gluten-free (check your cookie butter label to be sure). I’ve used GF graham crackers with great results.
Dairy-Free Version — Use dairy-free cream cheese (like Kite Hill) and coconut cream instead of heavy cream. Coconut cream whips well if it’s very cold. Use a dairy-free cookie butter if you can find one, or just skip the cookie butter in the filling and use maple butter. It’s different, but still tasty.
Serving and Storage
How to Serve: These bars are great on their own, but they also play well with others. I often serve them with a dollop of whipped cream and a few fresh berries. They pair beautifully with a cup of hot coffee or tea. The coffee flavor complements the cookie butter perfectly. I also love serving them alongside my pumpkin bread with brown butter glaze for a cozy fall brunch spread.
Storage: Store the bars in an airtight container in the refrigerator for up to 5 days. They actually get firmer and more flavorful after a day or two. If you’re serving them for a party, make them 2 days ahead. That’s the sweet spot.
Freezing: Yes, you can freeze these! Wrap the whole block tightly in plastic wrap and then in foil. Freeze for up to 2 months. Thaw in the refrigerator overnight before slicing. The texture might be slightly softer after thawing, but the flavor is still great. I freeze these for holiday gifts sometimes.
Pro Tip: If you’re bringing these to a potluck, keep them in the pan they were chilled in. It’s easier to transport. Just bring a sharp knife and a serving spatula.
Nutrition Information
I’m not a nutritionist, but here’s the breakdown if you’re tracking. Keep in mind that this is a rich, dessert bar, so portions matter.
Per Serving (1 of 12 bars):
- Calories: 320
- Protein: 5g
- Carbs: 32g
- Fiber: 1g
- Sugar: 24g
- Fat: 20g
- Saturated Fat: 12g
This is a treat. Enjoy it. The cookie butter and cream cheese make it rich, so a small square is very satisfying. If you want to lighten it up, use light cream cheese and reduce the powdered sugar, but the texture will change. I usually just enjoy a square and call it a win.
Final Thoughts
So there you have it. My favorite no-bake dessert that always disappears first. These no-bake Biscoff cheesecake bars are the perfect blend of crunch, creaminess, and sweet spice. They are easy to make, easy to store, and easy to love.
I’ve made these for birthdays, office parties, and quiet Tuesday nights when I just need a little something sweet. They never fail. They are my go-to when I want to impress without effort. And I think they’ll become yours too.
Make them. Share them. And then make another batch because the first one will be gone. If you try this recipe, I’d love to hear how it turns out. Drop a comment below and let me know if you added any fun variations. Happy baking—or should I say, happy chilling!
Frequently Asked Questions
Can I use a different type of cookie butter?
You can try other speculoos spreads, but Biscoff is the gold standard for a reason. It has the perfect balance of cinnamon, ginger, and sweetness. If you use a different brand, taste the filling first and adjust the sugar accordingly. Some are sweeter, some are spicier.
Why did my cheesecake filling turn out grainy?
This usually happens if the cream cheese wasn’t fully softened before mixing. Cold cream cheese creates lumps that are hard to beat out. Make sure your cream cheese is room temperature. Also, if you over-whipped the heavy cream, it can break and look grainy. Stop whipping as soon as you see soft peaks.
Can I use whipped topping instead of heavy cream?
You can use Cool Whip or similar whipped topping, but the texture will be different. It will be lighter and less rich. I prefer real heavy cream because it whips up stable and adds a luxurious mouthfeel. If you use whipped topping, fold it in gently and chill longer to set.
How long do these bars last in the fridge?
They last up to 5 days in an airtight container. After that, they start to dry out. If you’re making them for a party, plan to make them 2-3 days ahead. They are best fresh.
Can I make these in a springform pan?
Absolutely. A 9-inch springform pan works great. Just line it with parchment paper. The advantage of a springform pan is that you can remove the sides for easier serving. You’ll get a round cheesecake instead of bars, but the taste is the same. Cut into wedges instead of squares.
Is cookie butter the same as peanut butter?
No. Cookie butter is made from speculoos cookies, which are spiced shortbread cookies. It tastes like caramelized sugar, cinnamon, and ginger. Peanut butter is, well, peanut butter. They are very different flavors. If you substitute peanut butter, you’re making a completely different dessert.
Can I freeze the cookie butter drizzle?
Not really. The drizzle is meant to be fresh. If you make extra, store it in the fridge and reheat it gently before drizzling. It won’t keep well frozen because the oil can separate.
Pin This Recipe!
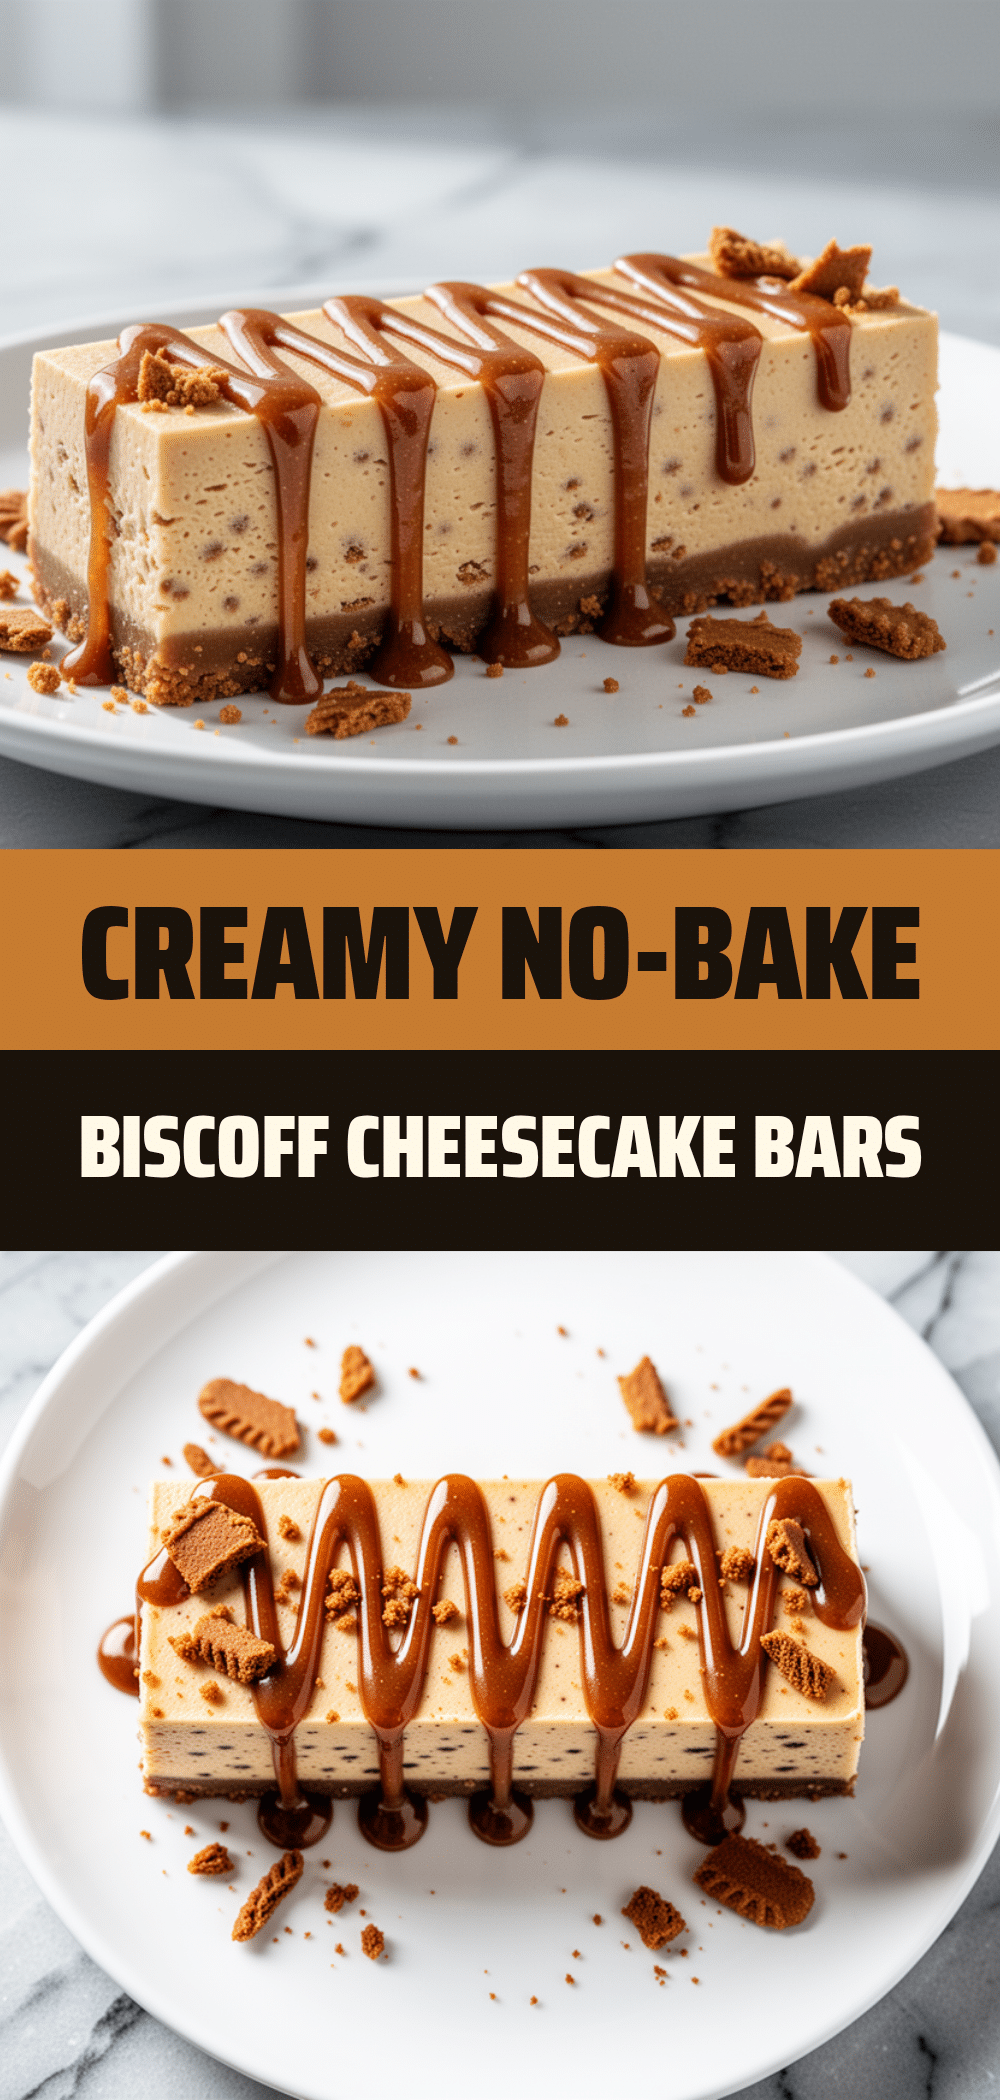
Best No-Bake Biscoff Cheesecake Bars: 10-Min Easy Recipe
- Total Time: 4 hours 15 minutes
- Yield: 12 servings 1x
Description
These no-bake Biscoff cheesecake bars feature a buttery speculoos crust, a thick and tangy cheesecake filling infused with warm spices, and a drizzle of melted cookie butter. They are easy to make, require no oven, and are perfect for fall gatherings.
Ingredients
- 1 ½ cups (150g) graham cracker crumbs
- 6 tablespoons (85g) unsalted butter, melted
- 2 tablespoons (25g) granulated sugar
- ½ teaspoon pure vanilla extract
- 16 oz (450g) full-fat cream cheese, softened to room temperature
- ½ cup (125g) cookie butter (Biscoff spread), softened to room temperature
- 1 cup (240ml) heavy whipping cream, cold
- ½ cup (60g) powdered sugar
- 1 teaspoon vanilla extract
- ¼ cup (60g) cookie butter (for drizzle)
- 1–2 teaspoons heavy cream (for drizzle)
Instructions
- Line a 9×13-inch baking pan with parchment paper, leaving a 2-inch overhang on the long sides.
- Pulse graham crackers in a food processor until fine crumbs form.
- In a medium bowl, mix crumbs, melted butter, sugar, and vanilla until resembling wet sand.
- Press the crust mixture firmly into the bottom of the prepared pan and refrigerate.
- In a large mixing bowl, beat softened cream cheese on medium-high speed until smooth.
- Add softened cookie butter, powdered sugar, and vanilla extract; beat until fully combined and smooth.
- In a separate cold bowl, whip heavy cream on high speed until soft peaks form.
- Lighten the cream cheese mixture by stirring in one-third of the whipped cream.
- Gently fold in the remaining whipped cream using a figure-eight motion until no white streaks remain.
- Pour the filling over the chilled crust and spread into an even layer.
- Cover and refrigerate for at least 4 hours, or overnight, until set.
- Microwave cookie butter and heavy cream in 15-second intervals until smooth and pourable.
- Transfer drizzle mixture to a zip-top bag, snip a corner, and drizzle over the set bars.
- Lift bars out of the pan using parchment overhang and cut into 12 or 16 squares using a hot knife.
Notes
Ensure cream cheese and cookie butter are at room temperature to avoid lumps. Use cold heavy cream for whipping. For clean cuts, dip the knife in hot water and wipe dry between each cut. The bars taste better after chilling overnight as flavors meld.
- Prep Time: 15 minutes
- Cook Time: 0 minutes
- Category: Dessert
- Cuisine: American
Nutrition
- Serving Size: 1 bar
- Calories: 320
- Sugar: 24
- Fat: 20
- Saturated Fat: 12
- Carbohydrates: 32
- Fiber: 1
- Protein: 5
Keywords: no-bake, Biscoff, cheesecake bars, cookie butter, speculoos, fall dessert, easy dessert, make-ahead dessert