I have a confession to make. For years, I was terrified of cheesecake. Not because I don’t like it—obviously, I love a dense, creamy slice—but because I was terrified of cracking the top. You know that perfect, smooth surface? The one that looks like it came from a high-end patisserie? I couldn’t replicate it to save my life. My attempts always looked like fractured geology, and no amount of whipped cream topping could hide the fact that I’d bombed the bake.
Then, about three years ago, I stumbled across the concept of Basque burnt cheesecake. At first, I was skeptical. The whole point of a cheesecake, I thought, was to keep it pale and pristine. Why would I want a recipe that explicitly tells you to burn the top? It sounded like a cop-out for lazy bakers. (I know, I’m a traditionalist. Sue me.)
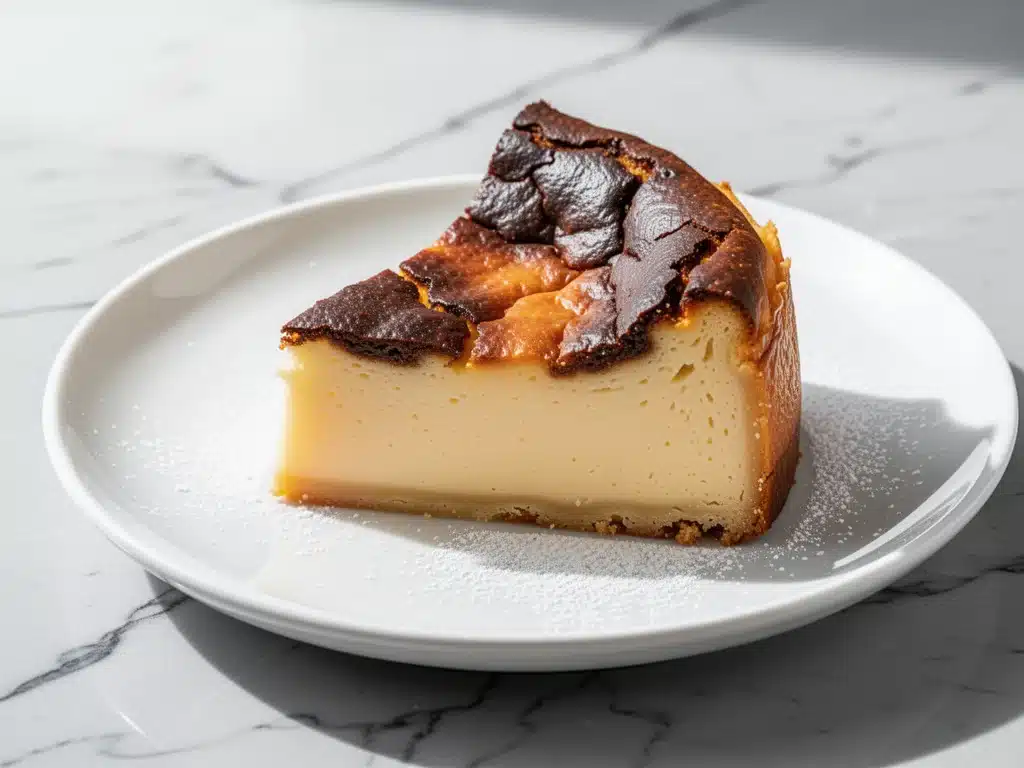
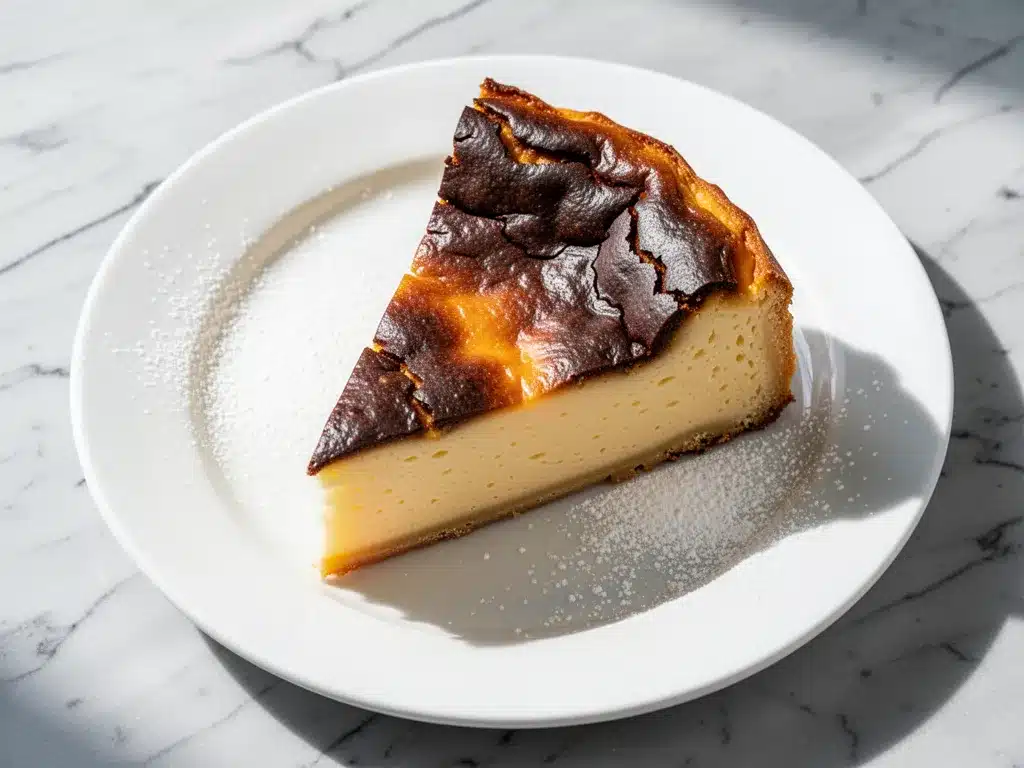
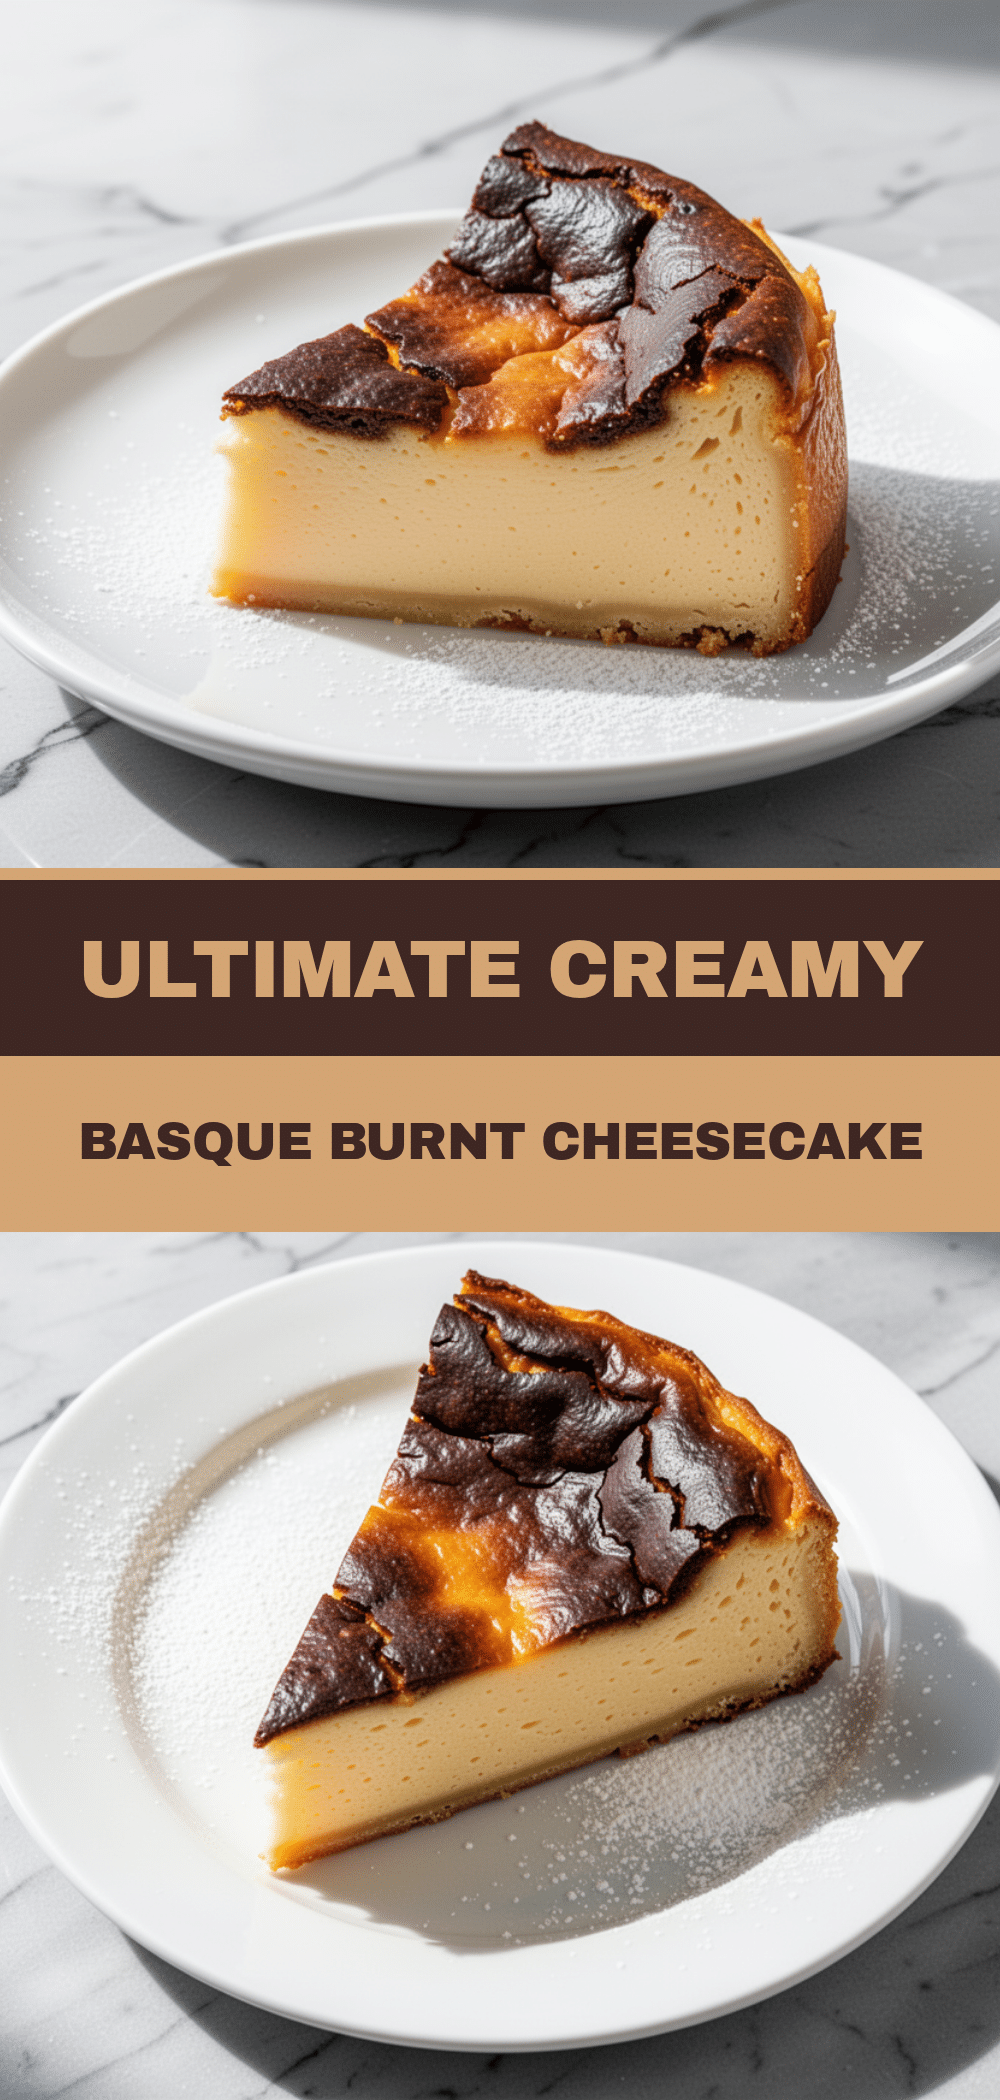
But then I made it. Just to prove it was impossible. And you know what? The top was charred, yes, but the inside? It was impossibly rich, creamy, and custard-like. It didn’t crack because it wasn’t supposed to be smooth. The rustic, burnt exterior was the whole point. It was elegant in its imperfection. It was sophisticated but required zero fancy techniques, no water baths, and zero worries about overmixing.
I made it for a holiday dinner party last November, serving it alongside my usual pumpkin pie cheesecake and some no-bake pumpkin pie. While my guests devoured the pumpkin options, they kept coming back to the Basque cheesecake. They said it felt “fancy” but “easy.” That’s the magic of this dessert. It looks like you spent hours at a French bakery, but it’s basically just whisking ingredients together and walking away.
This ultra-rich Basque burnt cheesecake has become my secret weapon for special occasions. Whether it’s a birthday, a dinner party, or just because I want to feel like a serious baker on a Tuesday, this is the recipe I reach for. It’s foolproof, it’s deeply satisfying, and it tastes better the next day. Let me walk you through why this specific version works so well and how you can make it without stressing.
Why You’ll Love This Ultra-Rich Basque Burnt Cheesecake
There are a handful of reasons this recipe has earned a permanent spot in my weekly rotation, especially when I need to impress people without spending the whole day in the kitchen. Here’s the real deal on why this cheesecake works:
Zero Cracks, Zero Stress — Seriously. If you can whisk eggs, you can make this. There’s no water bath to worry about, no springform pan leaks, and no anxiety about the oven temperature fluctuating. The top is supposed to be dark. The sides can slump. It’s part of the charm. I’ve made this for picky eaters who usually hate “burnt” food, and they couldn’t get enough of the smoky contrast.
Insanely Creamy Texture — This isn’t that dry, crumbly cheesecake you get at a gas station. This is dense, fudgy, and custard-like. It’s rich—like, dangerously rich. The high ratio of cream cheese and heavy cream creates a texture that melts on your tongue. It’s the kind of dessert that makes you stop talking and just eat.
Simple Ingredients, No Fancy Gear — You don’t need a stand mixer. You don’t need a springform pan (though it helps). You don’t need gelatin or cornstarch. Just cream cheese, sugar, eggs, heavy cream, and a tiny bit of flour. If you have these in your fridge, you’re good to go. It’s pantry-friendly in the best way possible.
Actually Better the Next Day — This is a game-changer for hosting. You can bake this the day before your guests arrive. In fact, I always recommend baking it a day ahead. The flavors meld, the texture sets up perfectly, and it’s easier to slice when it’s fully chilled. It saves you so much stress on the day of the event.
Impressive Presentation — Because it’s rustic and charred, it doesn’t need fancy decorations. A dusting of powdered sugar, a few fresh berries, or a dollop of whipped cream is all it needs. It looks stunning on a serving platter, which makes you look like a pro baker even if you’re just rolling in from work.
This is my go-to when I want dessert to just work. No complicated techniques, no weird ingredients, just reliable, delicious food that makes everyone happy.
Ingredients You’ll Need
Here’s the best part: you probably have most of this already. This recipe relies on high-quality, simple ingredients. Because there’s so little of it, the quality of each component really shines through. I’m particular about three things here, and I’ll tell you exactly why.
Full-Fat Cream Cheese (32 oz / 900g, 4 blocks) — This is non-negotiable. Do not use low-fat or light cream cheese. It will not set properly, and the texture will be grainy. I use Philadelphia brand because it’s consistent. Make sure it’s softened to room temperature before you start. Cold cream cheese creates lumps, and we want this silky smooth. I usually take it out of the fridge the night before.
Granulated Sugar (1 cup / 200g) — Yes, a full cup for this size. Don’t reduce it. The sugar is what creates that caramelized, burnt crust. It also balances the tang of the cream cheese. If you’re worried about sweetness, just serve it with unsweetened whipped cream or fresh berries.
Large Eggs (5 large) — Room temperature eggs mix better and create a smoother batter. If you’re in a rush, you can warm them in a bowl of warm water for 5 minutes. Don’t skip this; cold eggs can cause the batter to separate slightly.
Heavy Cream (1 cup / 240ml) — Again, full-fat only. Half-and-half won’t give you that luxurious, custardy mouthfeel. I use heavy whipping cream because it’s what I always have. It adds the fat content that makes the cheesecake rich and stable.
All-Purpose Flour (2 tablespoons / 15g) — This is the secret ingredient that helps the cheesecake set without being cakey. It’s a very small amount, so it doesn’t make the texture bready. It just provides a little structure. Don’t substitute with almond flour or gluten-free blends unless you’re okay with a different texture.
Vanilla Extract (1 teaspoon / 5ml) — Use real vanilla, not imitation. It adds that warm, aromatic background note that ties everything together. If you’re feeling fancy, scrape in half a vanilla bean, but extract works perfectly fine.
Salt (½ teaspoon) — Just a pinch of salt to balance the sweetness. It’s easy to skip, but I promise it makes a difference. It highlights the dairy flavors.
Optional Toppings:
- Fresh Berries — Strawberries, raspberries, or blueberries add a nice acidic contrast to the rich cheese.
- Whipped Cream — Makes it even richer, but it’s optional if you’re watching calories.
- Caramel Sauce — Drizzled on top for extra indulgence.
Equipment Needed
You don’t need fancy equipment for this. Here’s what I actually use:
9-inch Springform Pan — This is the standard pan for cheesecakes. The springform mechanism allows you to remove the sides easily. If you don’t have one, a 9-inch round cake pan works, but you’ll need to line it well with parchment and flip it out to serve.
Parchment Paper — You’ll need a large sheet. I crumple it up into a ball and then flatten it out before lining the pan. This creates wrinkles that give the cheesecake its signature rustic look and prevent sticking.
Large Mixing Bowl — Something big enough to hold all the ingredients. Glass or stainless steel works best.
Hand Mixer or Whisk — I use a hand mixer because it’s faster, but a whisk works if you have strong arms. You need to mix until smooth, so whatever gets the job done.
Spatula — A silicone spatula is great for scraping the bowl and ensuring everything is incorporated.
Oven — A standard oven is fine. I don’t use convection, but if you do, just keep an eye on it.
Cooling Rack — Essential for letting the cheesecake cool gradually to prevent cracking (though cracking isn’t a huge issue here, it helps with setting).
How to Make It: Step-by-Step
Alright, let’s make this! I’m walking you through exactly how I do it, including the little tricks I’ve picked up over the years.
Step 1: Prep Your Pan (5 minutes)
Preheat your oven to 400°F (200°C). This is a high heat, which is key to getting that burnt top. Line your 9-inch springform pan with parchment paper. Crumple the paper first, then flatten it out, and press it into the pan. It doesn’t need to be neat—it should look wrinkled. This creates the rustic look and ensures the cheesecake doesn’t stick. Grease the parchment lightly with butter or oil.
Step 2: Beat the Cream Cheese (2-3 minutes)
In a large bowl, add the softened cream cheese. Beat it on medium speed until it’s completely smooth and creamy. This is crucial. If there are any lumps, they’ll show up in the final product. Scrape down the sides of the bowl. You want it to look like frosting. This usually takes about 2 minutes with a hand mixer.
Step 3: Add Sugar and Vanilla (1 minute)
Add the granulated sugar and vanilla extract to the cream cheese. Mix on low speed until the sugar is dissolved and incorporated. Scrape the bowl again. The mixture should be smooth and pale.
Step 4: Incorporate Eggs One at a Time (2 minutes)
Add the eggs one at a time, mixing on low speed after each addition. Just until combined. Do not overmix here. Once the egg is in, stop mixing. Overmixing incorporates too much air, which can cause the cheesecake to rise and then collapse. We want a dense, fudgy texture, not a fluffy one.
Step 5: Add Cream and Flour (1 minute)
Pour in the heavy cream and add the flour. Mix gently until just combined. The batter should be liquidy and smooth. If you see small bits of flour, that’s okay; they’ll dissolve as the cheesecake bakes. Pour the batter into the prepared springform pan.
Step 6: Bake (50-60 minutes)
Place the pan in the center of the oven. Bake at 400°F (200°C) for 50-60 minutes. The top should be deeply browned, almost black in spots. The edges should be set, but the center should still jiggle slightly like Jell-O when you shake the pan. This is normal. It will set as it cools. If the top isn’t dark enough after 50 minutes, leave it in for another 5-10 minutes. If it’s too dark too soon, you can tent it with foil, but I prefer a darker char.
Step 7: Cool Completely (4+ hours)
Remove the cheesecake from the oven and let it cool in the pan on a wire rack for 10 minutes. It will start to sink in the middle—that’s the signature Basque look. Then, leave it in the pan at room temperature for another hour. After that, run a knife around the edge to loosen it (optional), and refrigerate it for at least 4 hours, preferably overnight. This chilling time is essential for the texture to set properly.
Visual Cues: The cheesecake is done when the top is dark brown/black and the center jiggles like a custard. It should look slightly puffed, then settle as it cools.
Expert Tips & Tricks
Here’s everything I’ve learned from making this dozens of times. These tips will save you from my mistakes.
Room Temperature is Key
I cannot stress this enough. Your cream cheese and eggs must be at room temperature. Cold ingredients create lumps and uneven mixing. If you forget, soak the eggs in warm water for 5 minutes and microwave the cream cheese blocks for 10-15 seconds each to soften them slightly.
Don’t Overmix
Once you add the eggs, mix gently. Overmixing adds air bubbles, which can cause the cheesecake to rise too much and then crack or collapse unevenly. We want a dense, fudgy interior, not a soufflé-like texture.
The Jiggle Test
Don’t rely solely on the clock. When you take it out, the center should jiggle like gelatin. If it’s completely firm, you’ve overbaked it. It will continue to cook from residual heat as it cools. If it’s too runny, give it 5 more minutes.
Patience with Cooling
Do not skip the cooling steps. Cutting into a warm Basque cheesecake is a mess. It needs to set in the fridge for at least 4 hours. Overnight is best. The texture transforms from gooey to perfectly creamy.
Common Mistakes (and how to avoid them):
- Mistake: Top isn’t dark enough. Fix: Bake longer. The char is what gives it the flavor. If your oven runs cool, check at 55 minutes.
- Mistake: Cheesecake is grainy. Fix: Cream cheese wasn’t softened enough, or you overmixed after adding eggs.
- Mistake: Cheesecake is too dry. Fix: Overbaked. Next time, take it out when the center still jiggles.
Variations & Substitutions
Once you’ve nailed the basic version, here’s how you can mix it up. I’ve tried all of these.
Lemon Basque Cheesecake
Add the zest of one lemon to the batter and 1 tablespoon of lemon juice with the cream. It adds a bright, citrusy note that cuts through the richness. My family loves this version in the summer.
Chocolate Chip Basque Cheesecake
Stir in ½ cup of semi-sweet chocolate chips after adding the cream. The chips melt slightly, creating little pockets of chocolate. It’s like a dessert pizza in cheesecake form.
Berry Swirl
Warm ½ cup of raspberry jam with 1 tablespoon of water. Drizzle it over the batter and swirl with a knife before baking. It adds a beautiful marbled effect and tart flavor.
Dairy-Free Version
Use vegan cream cheese (like Kite Hill or Miyoko’s) and coconut cream instead of heavy cream. The texture will be slightly different, but still delicious. I’ve made this for my dairy-free friends, and they loved it.
Gluten-Free
The original recipe is naturally gluten-free except for the 2 tablespoons of flour. You can omit the flour entirely, and it will still set, just slightly less firmly. Or use a gluten-free 1:1 flour blend.
Serving & Storage
How to Serve:
I usually serve this straight from the pan, sliced into wedges. It looks rustic and elegant. Top with fresh berries, a dollop of whipped cream, or a drizzle of caramel. It pairs beautifully with a cup of coffee or a glass of red wine.
Side Dishes:
This is a dessert, so keep sides light. A simple green salad with a vinaigrette works well if you’re serving it after a heavy meal. Or just serve it as is with fruit.
Storage Instructions:
- Refrigerator: Store in an airtight container or covered with plastic wrap for up to 5 days. It actually tastes better after day 2.
- Freezing: Yes, you can freeze it! Wrap the whole pan (or individual slices) tightly in plastic wrap and then foil. Freeze for up to 3 months. Thaw in the fridge overnight. The texture might be slightly softer, but it’s still great.
- Reheating: Don’t reheat this. It’s meant to be eaten cold or room temperature. Heating it up will melt the texture and make it gooey in a way that’s not desirable.
Pro tip: If you’re serving it at a party, slice it the night before and cover it with plastic wrap. It keeps it fresh and makes serving easier.
Nutrition Information
I’m not a nutritionist, but here’s the breakdown if you’re tracking. This is a rich dessert, so portion control is key.
Per Serving (based on 12 slices):
- Calories: 380
- Protein: 6g
- Carbs: 22g
- Fiber: 0g
- Sugar: 20g
- Fat: 32g
- Saturated Fat: 20g
- Cholesterol: 110mg
- Sodium: 250mg
What’s Good: High in protein from the cream cheese. It’s satisfying, so you don’t need a huge slice.
What to Know: High in calories and saturated fat due to the cream cheese and heavy cream. It’s a treat, so enjoy it mindfully.
My Take: This is comfort food. It’s rich and decadent. It’s not a health food, but it’s made with simple, real ingredients. When I make it, I cut it into smaller slices and share it with friends. That’s the best way to enjoy it.
Final Thoughts
So that’s my go-to ultra-rich Basque burnt cheesecake! I’ve probably talked your ear off at this point, but when you make a recipe this often, you have a lot to say about it.
This has saved holiday dinners more times than I can count. It’s my answer to “what’s for dessert” when I’m tired, don’t want takeout, and still want something that tastes really good. My kids are happy, my husband’s happy, and I’m happy because I’m not stressed about baking.
Make it yours! Try different add-ins, swap in your favorite fruits, or adjust the baking time to your oven. The best recipes are the ones you adapt to your family’s tastes.
If you make this, drop a comment and let me know what you think! I love hearing how recipes turn out in your kitchen. And if something doesn’t work, tell me that too—I’m here to help troubleshoot.
Happy baking! And I hope your kitchen smells half as good as mine does right now.
Frequently Asked Questions
Can I use a different size pan?
You can, but the baking time will change. If you use a 10-inch pan, the cheesecake will be thinner, so bake for less time (check at 40 minutes). If you use an 8-inch pan, it will be thicker, so bake for longer (check at 60-70 minutes). The goal is still a dark top and a jiggly center.
Why did my cheesecake crack?
Basque cheesecake is supposed to crack and slump. It’s part of the style. However, if it cracked severely, you might have overmixed the batter or overbaked it. Next time, mix gently after adding eggs and take it out when the center still jiggles.
Can I make this ahead?
Yes! In fact, it’s better made ahead. Bake it the day before, let it cool, and refrigerate overnight. It will be perfectly set and flavorful when you serve it. It saves you so much stress on the day of the event.
Can I freeze this cheesecake?
Absolutely. Wrap the whole pan tightly in plastic wrap and then foil. Freeze for up to 3 months. Thaw in the fridge overnight. The texture might be slightly softer, but it’s still delicious. I do this when I’m meal-prepping desserts.
Why is my cheesecake too runny?
It probably needs more chilling time. Basque cheesecake sets as it cools completely. If it’s still runny after 4 hours in the fridge, leave it for another 4-6 hours. If it’s still runny after 12 hours, you might have underbaked it. Next time, bake for 5-10 minutes longer.
Can I use low-fat cream cheese?
I don’t recommend it. Low-fat cream cheese has more water and less fat, which affects the texture and setting ability. The cheesecake might be grainy or not set properly. Full-fat is worth the extra calories for the taste and texture.
Pin This Recipe!
Ultra-Rich Basque Burnt Cheesecake: Easy Special Occasion Dessert
- Total Time: 4 hours 15 minutes
- Yield: 12 servings 1x
Description
A foolproof, ultra-rich Basque burnt cheesecake that features a rustic, charred exterior and a dense, creamy, custard-like interior. This dessert requires no water bath or fancy techniques, making it perfect for special occasions or weeknight treats.
Ingredients
- 32 oz (900g) full-fat cream cheese, softened to room temperature
- 1 cup (200g) granulated sugar
- 5 large eggs, room temperature
- 1 cup (240ml) heavy cream
- 2 tablespoons (15g) all-purpose flour
- 1 teaspoon (5ml) vanilla extract
- 1/2 teaspoon salt
Instructions
- Preheat oven to 400°F (200°C). Crumple a sheet of parchment paper into a ball, then flatten it and press it into a 9-inch springform pan to create wrinkles. Lightly grease the parchment.
- In a large bowl, beat the softened cream cheese on medium speed until completely smooth and creamy, about 2 minutes. Scrape down the sides of the bowl.
- Add the granulated sugar and vanilla extract to the cream cheese. Mix on low speed until the sugar is dissolved and incorporated. Scrape the bowl again.
- Add the eggs one at a time, mixing on low speed just until combined after each addition. Do not overmix to avoid incorporating too much air.
- Pour in the heavy cream and add the flour. Mix gently until just combined. The batter should be liquidy and smooth.
- Pour the batter into the prepared springform pan.
- Bake in the center of the oven for 50-60 minutes. The top should be deeply browned or black in spots, and the edges should be set while the center jiggles slightly like Jell-O.
- Remove from the oven and let it cool in the pan on a wire rack for 10 minutes. It will sink in the middle, which is normal.
- Let it cool at room temperature for another hour, then refrigerate for at least 4 hours, preferably overnight, until fully set.
- Slice and serve with fresh berries, whipped cream, or caramel sauce.
Notes
Ensure all ingredients, especially cream cheese and eggs, are at room temperature for a smooth batter. Do not overmix after adding eggs to prevent cracking or collapsing. The cheesecake is meant to have a burnt top and a jiggly center when removed from the oven; it will set as it cools. It tastes best when made a day ahead.
- Prep Time: 15 minutes
- Cook Time: 50-60 minutes
- Category: Dessert
- Cuisine: Spanish
Nutrition
- Serving Size: 1 slice
- Calories: 380
- Sugar: 20
- Sodium: 250
- Fat: 32
- Saturated Fat: 20
- Carbohydrates: 22
- Protein: 6
Keywords: Basque burnt cheesecake, easy cheesecake, no water bath cheesecake, rich dessert, special occasion dessert, creamy cheesecake