It’s 5:00 PM. The sun is setting, the kids are hanging off the fridge like vultures, and you’re staring into the abyss of your empty pantry with a profound sense of dread. You’ve got twenty minutes before dinner, three dollars in loose change, and zero energy to chop vegetables or clean up a mountain of dishes. This is the moment where most people reach for the takeout menu. But not me. Not anymore.
Last Tuesday, I was in that exact spot. I didn’t have time to thaw chicken or wash a single leaf of lettuce. So, I raided the back of my cupboard and found a jar of maple syrup, a bag of pecans, and some leftover canned biscuits (don’t judge, I was desperate). I threw them together in a single skillet with some browned butter, and within 25 minutes, I had something that smelled like a bakery window display. My husband walked in, took one bite, and stopped mid-chew to ask if I’d hired a secret chef. I didn’t tell him it took me 10 minutes of active work and zero actual baking skill.
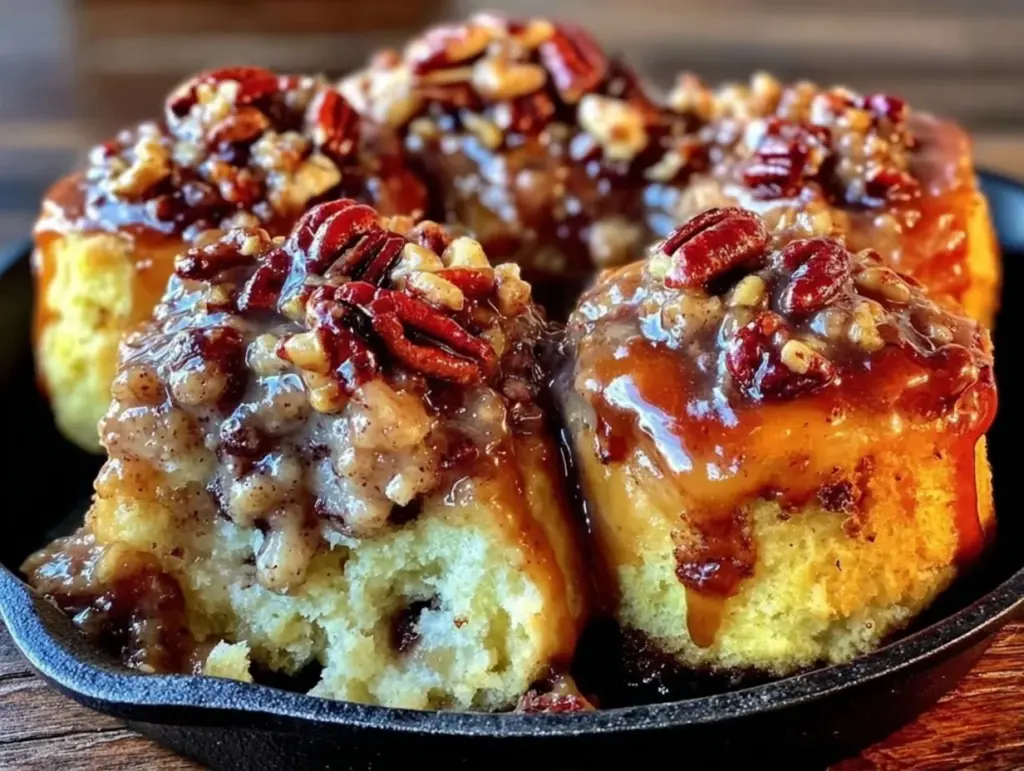
This is the recipe that saved my sanity. These Fall Maple Pecan Sticky Buns are the ultimate 5pm rescue mission. They’re warm, gooey, sticky, and smell like autumn itself. And the best part? You make them in one pan. One. Pan. No rising time required. No complex kneading. Just mix, dump, bake, and flip. If you’re looking for a pumpkin bread with brown butter glaze vibe but faster, this is your answer. It’s that cozy, comforting energy without the hours of effort.
I’ve made these sticky buns at least eight times in the last month. Sometimes for breakfast. Sometimes for dinner (yes, really). Sometimes just because I needed a hug in food form. They’re incredibly forgiving. If you burn the butter slightly, it adds flavor. If you use different nuts, it still works. It’s the kind of recipe that makes you feel like a genius baker when you’ve really just followed five simple steps. Let’s get into how you can pull this off on your busiest nights.
Why You’ll Love This Recipe
Look, I’m not here to sell you on the idea that you need to be a pastry chef to make delicious baked goods. I’m here to tell you that this maple pecan sticky bun recipe is the cheat code for cozy eating. Here’s why it’s taking up real estate in my weekly rotation:
- Zero Rising Time — Seriously. If you’ve ever waited two hours for dough to rise while your family starves, you’ll weep with joy. These use canned biscuits as the base. They’re already risen. You just warm them up and soak them in syrup. It’s cheating, but it’s delicious cheating.
- One Pan, One Bowl — I live for low cleanup. You melt the butter in the skillet, stir the syrup in a small bowl, and dump it all in. One baking dish. One mixing bowl. That’s it. My dishwasher stays happy, and I stay sane.
- Pantry Staples — You probably have everything you need right now. Canned biscuits, butter, maple syrup, brown sugar, pecans. If you don’t have pecans, walnuts work. If you don’t have maple syrup, honey works. It’s flexible.
- Smells Like a Dream — The smell of brown butter and toasted pecans filling your house will make your neighbors knock on the door. It’s that warm, homey scent that makes everyone forget they’re tired or hungry.
- Breakfast or Dessert? — Why choose? I eat these for breakfast on weekends. I serve them as a side dish for Thanksgiving dinner (better than rolls, honestly). I eat them straight out of the pan at 10 PM when the sugar craving hits. They fit every occasion.
This recipe is my go-to when I need to impress people without actually doing any work. It’s reliable, it’s fast, and it tastes like you spent all day in the kitchen. Spoiler alert: you didn’t.
Ingredients You’ll Need
Here’s the best part: this ingredient list is short enough to fit on a napkin. I’m not asking you to hunt down exotic spices or expensive flours. Here’s what you need to make these Fall Maple Pecan Sticky Buns shine.
For the Sticky Base
Butter (1/2 cup / 115g) — I use unsalted so I can control the saltiness, but salted works fine if you reduce added salt elsewhere. The key here is browning it. Don’t skip this step. It adds a nutty depth that regular melted butter just can’t match. (If you want to dive deeper into why brown butter is magic, check out my ultra-moist pumpkin bread recipe where I explain the process in detail).
Maple Syrup (1/2 cup / 120ml) — Use real maple syrup, not the pancake syrup stuff. The grade doesn’t matter much here since we’re mixing it with sugar, but the flavor needs to be genuine. It’s the backbone of the sticky glaze.
Brown Sugar (1 cup / 200g) — This gives that classic molasses-y sweetness. Dark brown sugar is better if you have it, but light works too. It creates that caramel texture when it hits the hot pan.
For the Buns
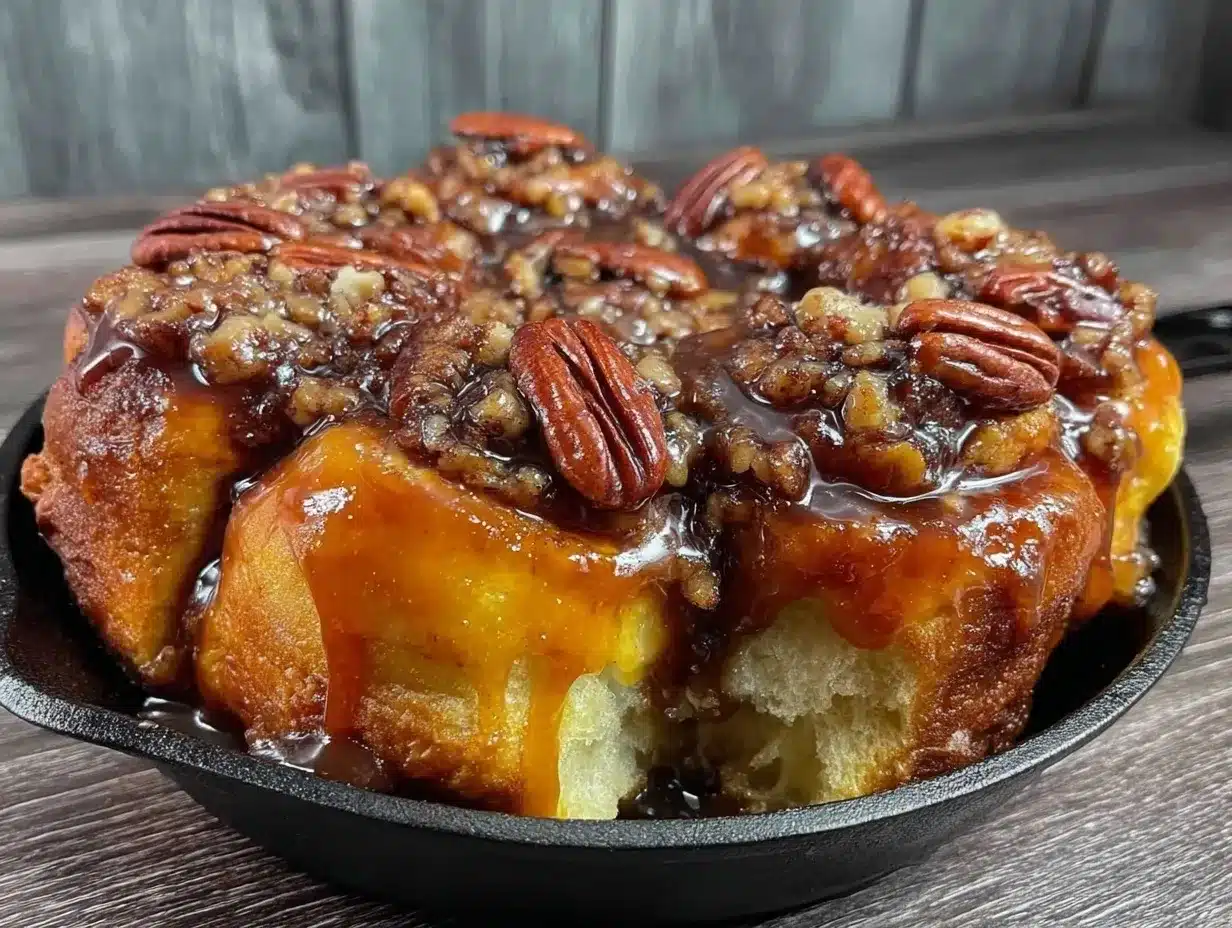
Canned Biscuit Dough (1 can, 16oz / 450g) — This is the secret weapon. I use the flaky refrigerator biscuits. Some people use crescent roll dough, but biscuits hold up better to the heavy syrup without disintegrating. Do not use the refrigerated tube if it’s the “fresh” kind that needs a knife to open; the old-school can with the pop-top is easier to work with for this.
Pecan Halves (1 cup / 100g) — Toasted is best, but raw works if you’re lazy. I like the buttery crunch they add against the soft dough. If you’re not a fan of nuts, you can swap these for walnuts or just leave them out, though they really make the dish.
The Glaze
Powdered Sugar (1 cup / 120g) — Standard icing sugar. Makes a thin, drizzly glaze that isn’t too sweet.
Milk (2-3 tablespoons) — Enough to thin the powdered sugar into a pourable consistency. Whole milk is best for richness.
Cinnamon (1 teaspoon) — Just a pinch of warmth. Optional, but highly recommended for that fall vibe.
Nutmeg (1/4 teaspoon) — Optional. If you love pumpkin pie spice vibes, add a little nutmeg. It pairs beautifully with the maple.
Equipment Needed
You don’t need a fancy stand mixer or a dozen attachments. Here’s what I actually use to make this happen in one pan:
12-Inch Cast Iron Skillet or Oven-Safe Pan — This is non-negotiable. You need something that goes from stovetop to oven. Cast iron is my favorite because it heats evenly and gets that perfect crust on the bottom. If you don’t have cast iron, a heavy-bottomed stainless steel skillet or even a ceramic baking dish works, but you’ll need to brown the butter in a separate saucepan first.
Small Saucepan — For melting the butter and mixing the syrup. If you’re using a cast iron skillet, you can actually do this right in the pan, saving you a dish. Win-win.
Small Mixing Bowl — Just for whisking the powdered sugar glaze at the end.
Whisk or Fork — For mixing the glaze and stirring the syrup.
Parchment Paper (Optional) — If you’re nervous about flipping, line your pan. But honestly, with the sticky syrup, it usually pops right out if you wait a minute.
How to Make It: Step-by-Step
Alright, let’s make these maple pecan sticky buns. I’m going to walk you through exactly how I do it, so you don’t end up with a burnt mess. This takes about 25 minutes total, and only 10 of those are active.
Step 1: Brown the Butter (3-5 minutes)
Place your 1/2 cup of butter in your cast iron skillet over medium heat. Let it melt. Once it’s foaming, keep stirring. It will start to smell nutty. Look for little brown specks at the bottom and that rich, amber color. This is brown butter. It’s going to be hot, so be careful. Immediately remove it from the heat to stop the cooking. This step adds a sophisticated flavor that makes homemade biscuits taste gourmet.
Step 2: Make the Sticky Base (2 minutes)
While the butter is cooling slightly (don’t wait too long, or it’ll solidify), whisk in the maple syrup and brown sugar directly into the skillet. Whisk vigorously until the sugar dissolves into the butter. It should look like a bubbling, glossy caramel sauce. Spread this evenly across the bottom of the skillet. You want full coverage because that’s what the buns will sit in.
Step 3: Arrange the Biscuits (3 minutes)
Open your can of biscuits. Separate the dough. If the biscuits are large, cut each one into quarters. If they’re small, leave them whole. Press them firmly into the syrup mixture. They should be snug, touching each other. If there are gaps, the syrup will pool there, which is fine, but tight packing helps them rise together. Sprinkle the pecans evenly over the top of the dough. They’ll toast in the oven and get crunchy.
Step 4: Bake (15-18 minutes)
Preheat your oven to 375°F (190°C). Place the skillet in the oven and bake for 15-18 minutes. You’re looking for the buns to be puffed up, golden brown on top, and bubbling around the edges. The syrup will be thick and sticky. If you see the edges getting too dark, cover loosely with foil for the last few minutes. Don’t underbake, or the center will be doughy.
Step 5: Make the Glaze (2 minutes)
While the buns bake, whisk the powdered sugar, milk, cinnamon, and nutmeg in a small bowl. Start with 2 tablespoons of milk and add more if needed. You want it thick but pourable. It should drizzle off the spoon slowly.
Step 6: The Flip (1 minute)
Remove the skillet from the oven. Let it cool for just 5 minutes. This is crucial. If you try to flip it immediately, it’ll fall apart. If you wait too long, the syrup hardens and sticks. Five minutes is the sweet spot. Place a large serving platter upside down over the skillet. Using oven mitts (your hands will be hot), firmly hold the platter and skillet together, and flip them over in one confident motion. Lift the skillet off. You should see a glorious, glistening layer of pecans and caramel sauce covering the buns. If a few buns stick, just lift them out with a spatula and place them on top. Nobody will know.
Drizzle the glaze over the warm buns. Serve immediately. Warm buns are the best buns.
Expert Tips & Tricks
Here’s everything I’ve learned from making these dozens of times. These tips will save you from my mistakes.
- Don’t Skip the Brown Butter — I know it takes an extra minute, but melted butter tastes flat compared to brown butter. The nutty flavor pairs perfectly with the maple and pecans. It’s the difference between “okay” and “wow.”
- Watch the Oven Closely — Every oven is different. My oven runs hot, so 15 minutes is enough for me. Yours might take 18. Check at 15 minutes. If the tops are golden and the syrup is bubbling, they’re done.
- The 5-Minute Rule — I cannot stress this enough. Let them cool for 5 minutes before flipping. I tried flipping them hot once, and it was a sticky, messy disaster. Patience pays off.
- Toast Your Pecans — If you have time, toast the pecans in a dry pan for 2 minutes before adding them to the buns. It brings out their oils and makes them crunchier. But raw pecans work too.
- Leftovers? Reheat with Milk — These are best fresh, but if you have leftovers (unlikely), reheat them in the microwave with a splash of milk covered by a damp paper towel. It keeps them soft. They also freeze well for up to 2 months.
Variations & Substitutions
Once you’ve nailed the basic version, here’s how you can mix it up. I’ve tried all of these.
Walnut Version — Swap pecans for walnuts. Same amount. It’s a classic combination, especially if you’re serving these with coffee.
Pumpkin Spice Twist — Add 1 teaspoon of pumpkin pie spice to the glaze. It ties into the fall theme and pairs amazingly with the maple. If you like this, you might also enjoy my pumpkin cinnamon rolls for a more traditional breakfast treat.
Bacon Bits — Sprinkle cooked, crumbled bacon on top before baking. The sweet and salty combo is addictive. It turns this into a savory-sweet brunch item.
Gluten-Free — Use gluten-free canned biscuits. They tend to be a bit more fragile, so be extra gentle when flipping. The rest of the ingredients are naturally gluten-free.
Vegan — Use vegan butter and vegan biscuits (like the ones from refrigerated sections that are oil-based). Use maple syrup and skip the milk in the glaze (use oat milk or coconut cream). It works surprisingly well.
No Biscuits? Make Dough — If you have time, you can make a simple yeast dough or use crescent roll dough. Crescent rolls will make these thinner and crispier on the edges. Biscuits are softer and fluffier.
Serving & Storage
How to Serve:
I usually serve these straight from the skillet at the brunch table. It’s rustic and inviting. Top with extra pecans if you’re feeling fancy. A side of black coffee or hot cider is perfect.
Side Dishes:
These are hearty enough to be a main course. Pair them with:
- Scrambled eggs or bacon
- A simple green salad with vinaigrette (to cut the sweetness)
- Fresh fruit like apples or pears
Storage:
Store leftovers in an airtight container at room temperature for up to 2 days. The syrup keeps them moist. If they get sticky, just reheat gently. They don’t freeze well if glazed, so freeze the buns without glaze if you plan to save them.
Reheating:
Microwave for 20-30 seconds. Or warm them in a 350°F oven for 10 minutes. Avoid the toaster oven; they dry out too fast.
Nutrition Information
I’m not a nutritionist, but here’s the breakdown if you’re tracking. Keep in mind, these are rich, sweet treats, so portion control is key.
Per Serving (based on 8 buns):
- Calories: 450
- Protein: 6g
- Carbs: 65g
- Fiber: 2g
- Sugar: 45g
- Fat: 18g
- Saturated Fat: 8g
- Cholesterol: 25mg
- Sodium: 350mg
What’s Good:
- Real maple syrup has antioxidants.
- Pecans provide healthy fats and fiber.
- It’s a homemade treat, so you know exactly what’s in it.
What to Know:
- High in sugar and calories due to the syrup and butter.
- Contains dairy and gluten.
- Best enjoyed as a special weekend breakfast or occasional dessert.
Final Thoughts
So that’s my Fall Maple Pecan Sticky Buns recipe! I know I’ve talked a lot about how easy this is, but when you’re standing in the kitchen at 5 PM wondering what to do, “easy” is the most important word in the vocabulary. This recipe has saved me more times than I can count. It’s warm, it’s sweet, and it makes your house smell amazing without you having to do any actual work.
Make it yours! Add bacon if you’re feeling savory. Swap the nuts if you’re allergic. Use honey if you’re out of maple syrup. The best recipes are the ones you adapt to your life. And if you make this, drop a comment and let me know how it turned out! I love hearing how these little hacks work in your kitchen.
Happy cooking! And I hope your kitchen smells half as good as mine does right now.
Frequently Asked Questions
Q: Can I make these ahead of time?
A: You can assemble them the night before, cover the skillet with plastic wrap, and refrigerate. In the morning, let them sit out for 30 minutes while you preheat the oven, then bake as directed. You might need to add 2-3 minutes to the baking time since the dough is cold.
Q: Why did my buns stick to the pan?
A: Usually, this means you flipped them too early. The syrup needs to cool slightly to set into a glaze rather than a sticky liquid. If you wait the full 5 minutes, they should release easily. Also, make sure you spread the butter/syrup mixture evenly so every bun is coated.
Q: Can I use honey instead of maple syrup?
A: Yes! Honey works beautifully. It will make the buns slightly sweeter and less “maple-y,” but the flavor is still delicious. Just be careful, honey burns faster than syrup, so keep an eye on the browning.
Q: Do I have to use pecans?
A: No! Walnuts, almonds, or even hazelnuts work great. If you don’t like nuts, you can skip them entirely, though they add a nice texture contrast. You could also add raisins or dried cranberries for a fruity twist.
Q: Can I use crescent roll dough instead of biscuits?
A: Yes, but the texture will be different. Crescent rolls will be thinner, crispier, and more like a pastry. Biscuits will be fluffier and softer. Both are good, just depends on your preference.
Q: How do I store leftovers?
A: Store in an airtight container at room temperature for up to 2 days. They will stay soft due to the syrup. Do not refrigerate, as the cold will make the syrup harden and the dough stale faster.
Pin This Recipe!
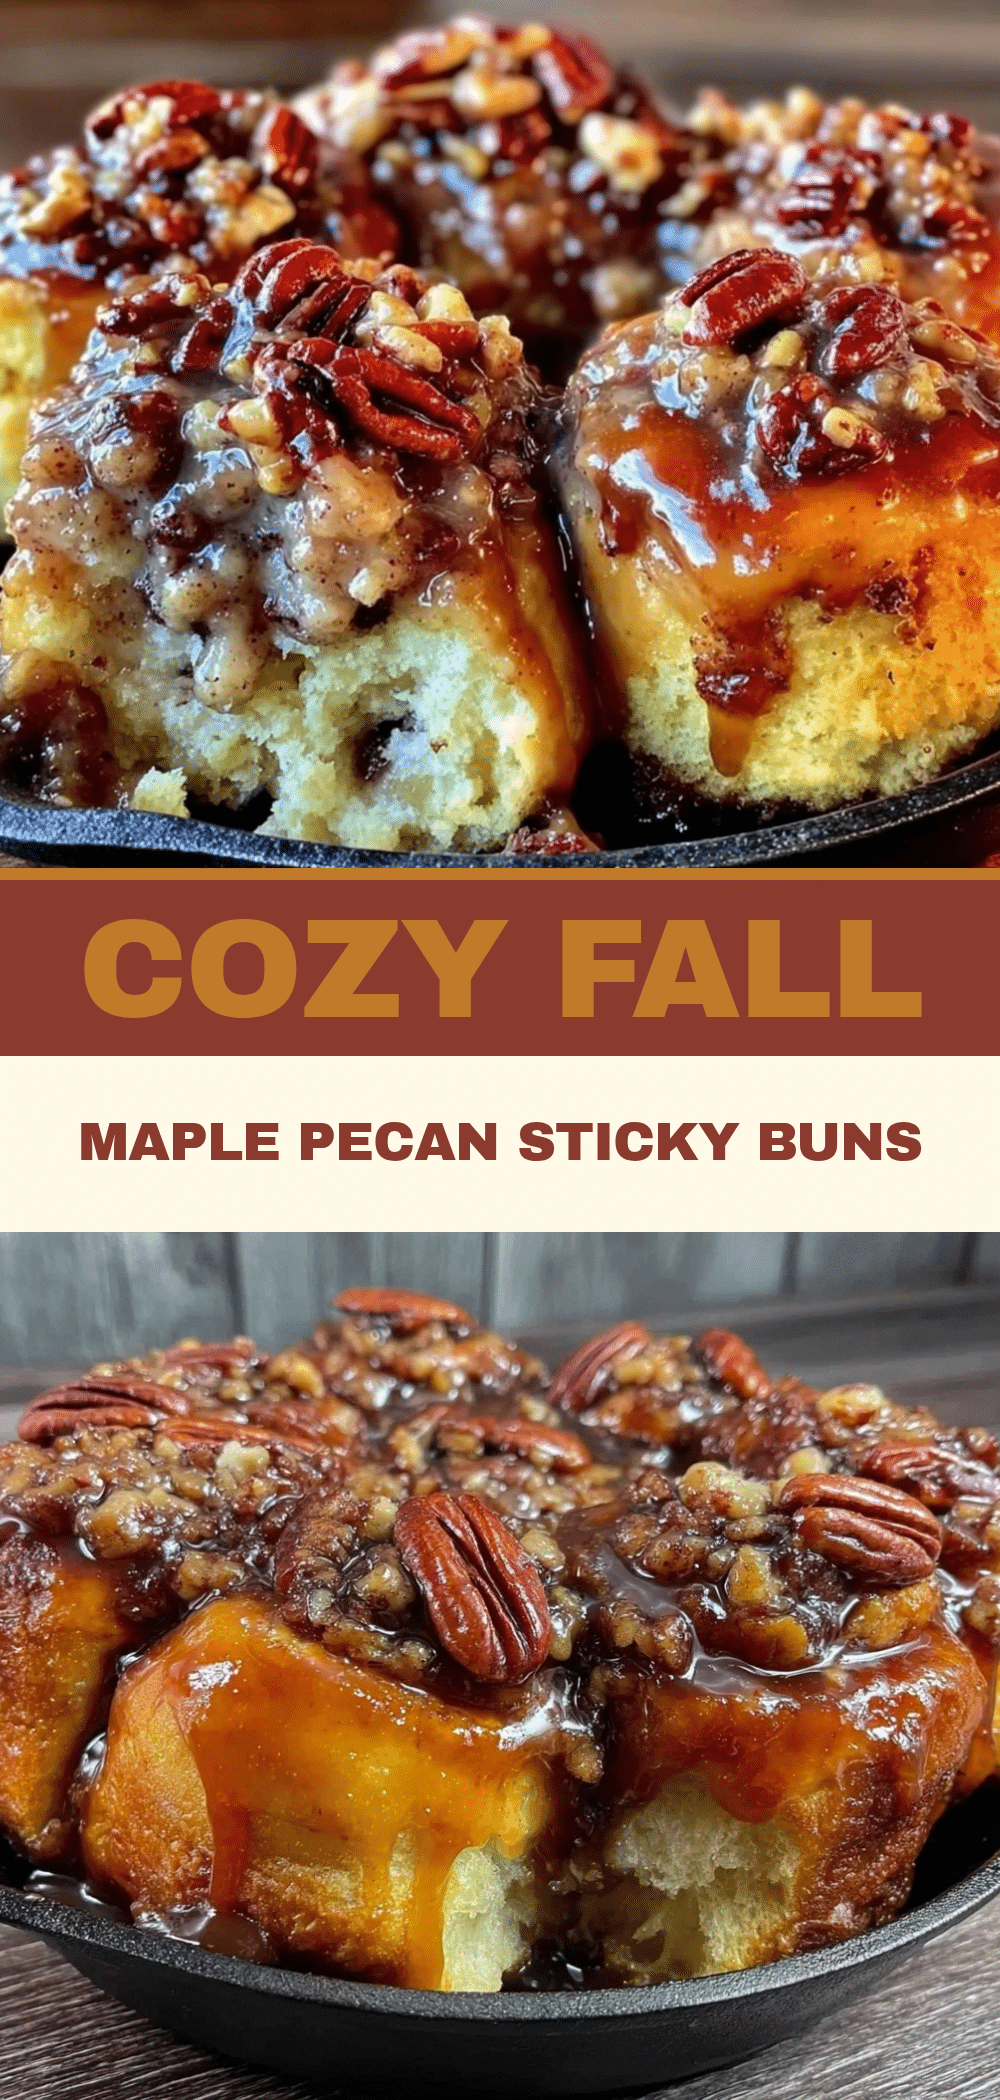
Fall Maple Pecan Sticky Buns
- Total Time: 25 minutes
- Yield: 8 servings 1x
Description
A quick, one-pan rescue recipe for warm, gooey sticky buns made with canned biscuits, brown butter, maple syrup, and pecans. Ready in 25 minutes with zero rising time required.
Ingredients
- 1/2 cup (115g) unsalted butter
- 1/2 cup (120ml) real maple syrup
- 1 cup (200g) brown sugar
- 1 can (16oz / 450g) canned flaky refrigerator biscuits
- 1 cup (100g) pecan halves
- 1 cup (120g) powdered sugar
- 2–3 tablespoons milk
- 1 teaspoon cinnamon
- 1/4 teaspoon nutmeg
Instructions
- Preheat oven to 375°F (190°C).
- Melt butter in a 12-inch cast iron skillet or oven-safe pan over medium heat. Cook until foaming and nutty brown specks appear, then remove from heat.
- Whisk maple syrup and brown sugar into the hot butter until dissolved and glossy. Spread evenly across the bottom of the skillet.
- Separate biscuit dough. Cut large biscuits into quarters or leave small ones whole. Press them firmly into the syrup mixture, ensuring they are snug.
- Sprinkle pecan halves evenly over the top of the dough.
- Bake for 15-18 minutes until buns are puffed, golden brown, and syrup is bubbling.
- While baking, whisk powdered sugar, milk, cinnamon, and nutmeg in a small bowl until a pourable glaze forms.
- Remove skillet from oven and let cool for exactly 5 minutes.
- Place a large serving platter upside down over the skillet. Hold firmly and flip in one confident motion. Lift off skillet.
- Drizzle glaze over warm buns and serve immediately.
Notes
Do not skip browning the butter for deeper flavor. Let the buns cool for 5 minutes before flipping to prevent sticking. Leftovers can be stored at room temperature for up to 2 days. For vegan version, use vegan butter and biscuits, and oat milk for glaze.
- Prep Time: 10 minutes
- Cook Time: 15-18 minutes
- Category: Breakfast
- Cuisine: American
Nutrition
- Serving Size: 1 bun
- Calories: 450
- Sugar: 45
- Sodium: 350
- Fat: 18
- Saturated Fat: 8
- Carbohydrates: 65
- Fiber: 2
- Protein: 6
Keywords: sticky buns, maple pecan, one pan recipe, quick breakfast, canned biscuits, fall baking, easy dessert, 5pm dinner