Last Friday night, I was lying on the couch, doom-scrolling through recipes while watching a documentary about deep-sea squids (don’t judge me, it was 2 AM and I was tired). My stomach growled loudly enough to compete with the narration. I wanted something savory, sticky, and ridiculously crispy. But I also didn’t want to heat up the kitchen with a massive oven, and I definitely didn’t want to deal with a vat of hot oil splattering grease across my stovetop.
That’s when I remembered the air fryer sitting in the corner, gathering dust since that one time I made crispy air fryer zucchini fries for my nephew. I pulled it out, grabbed a pound of chicken wings, and decided to throw together a honey garlic glaze that sounded too good to be true.
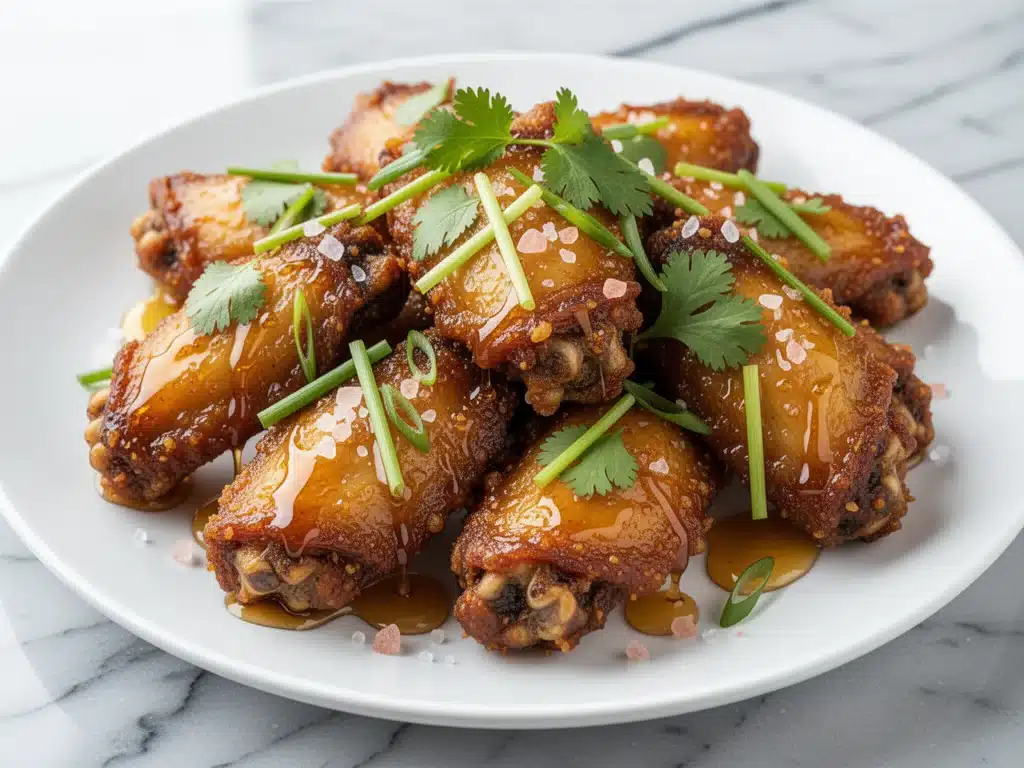
I’ll be honest: the first batch was okay. Not great. The skin was a bit chewy, and the glaze slid right off because the wings weren’t dry enough. But I didn’t throw them out. I ate them anyway. Then I tweaked the method. I changed the temperature. I added a secret ingredient to the dry rub. And suddenly, I had wings that were shatteringly crisp on the outside, juicy on the inside, and coated in a sticky, garlicky honey sauce that clung to every nook and cranny.
That was three weeks ago. I’ve made these air fryer chicken wings at least four times since then. They’ve become my go-to snack, my game-day centerpiece, and my “I need comfort food but don’t want to cook a whole meal” solution. If you’ve ever struggled with soggy wings or complicated deep-frying methods, this recipe is going to change your life. Seriously. It’s easier than ordering takeout, and they taste a million times better.
Why You’ll Love This Air Fryer Chicken Wings Recipe
There are a lot of chicken wing recipes out there. Some are buffalo-style and spicy, others are dry-rubbed and smoky. But this honey garlic version hits a specific sweet spot that my family can’t get enough of. Here’s why these wings have earned a permanent spot in our weekly rotation:
- Actually Crispy Skin — Most air fryer wing recipes fail because the skin stays rubbery. Not this one. By using a specific drying technique and the right temperature, you get that restaurant-quality crunch without any oil. I’ve tested this method with both drumettes and flats, and they both come out perfectly crisp.
- Sticky Glaze That Sticks — Have you ever made glazed wings where the sauce slides off as soon as they cool? I have. It’s frustrating. This recipe uses a reduced honey-garlic syrup that creates a tacky coating that clings to the crispy skin. It’s the difference between a snack and a masterpiece.
- Lightning Fast — From prep to plate, this takes about 35 minutes. The air fryer cooks faster than an oven, and you don’t need to preheat for long. I can make these while my pasta water boils. It’s the perfect air fryer chicken wings recipe for busy weeknights when hunger strikes at an inconvenient time.
- Pantry-Friendly Ingredients — You probably already have everything you need. Honey, garlic, soy sauce, butter, and chicken wings. No weird spices you’ll never use again. This is simple, accessible cooking.
- Game-Changing Versatility — I serve these as an appetizer for dinner parties, but they also work as a main dish if you pair them with something like grilled corn salad with cotija and lime. The sweetness of the wings contrasts beautifully with the tangy, salty corn salad. It’s a flavor combination I didn’t know I needed until I tried it.
Real talk: once you try these, you’ll realize that oven-baked wings just can’t compete. The air circulation in the fryer renders the fat out of the skin so efficiently that you get crispiness that feels almost fried, but without the guilt or the mess.
Ingredients You’ll Need
Here’s the best part: this recipe uses ingredients you likely already have in your fridge and pantry. I’m particular about a few things here, so pay attention to the notes.
For the Wings
Chicken wings (2 pounds / 900g) — I use a mix of drumettes and flats. Avoid the wing tips unless you want to make stock later; they don’t hold sauce well. Pat them very dry. Moisture is the enemy of crispiness. If they’re wet, they steam instead of crisp.
Baking powder (1 tablespoon / 15g) — This is the secret weapon. Not baking soda! Aluminum-free baking powder. It raises the pH of the skin, helping it brown and crisp up in the dry heat. It sounds weird, but trust me. It makes a huge difference in texture.
Garlic powder (1 teaspoon / 5g) — Adds a subtle garlic base note that penetrates the skin. It’s not as strong as fresh garlic, but it provides a good foundation.
Onion powder (1 teaspoon / 5g) — Complements the garlic and adds a bit of savory depth. If you don’t have onion powder, skip it, but it’s worth keeping on hand.
Salt (1 teaspoon / 5g) — Kosher salt is best because it distributes evenly. If you use table salt, reduce to ¾ teaspoon.
Black pepper (½ teaspoon / 2g) — Freshly cracked is best. It adds a little heat and visual contrast.
For the Honey Garlic Glaze
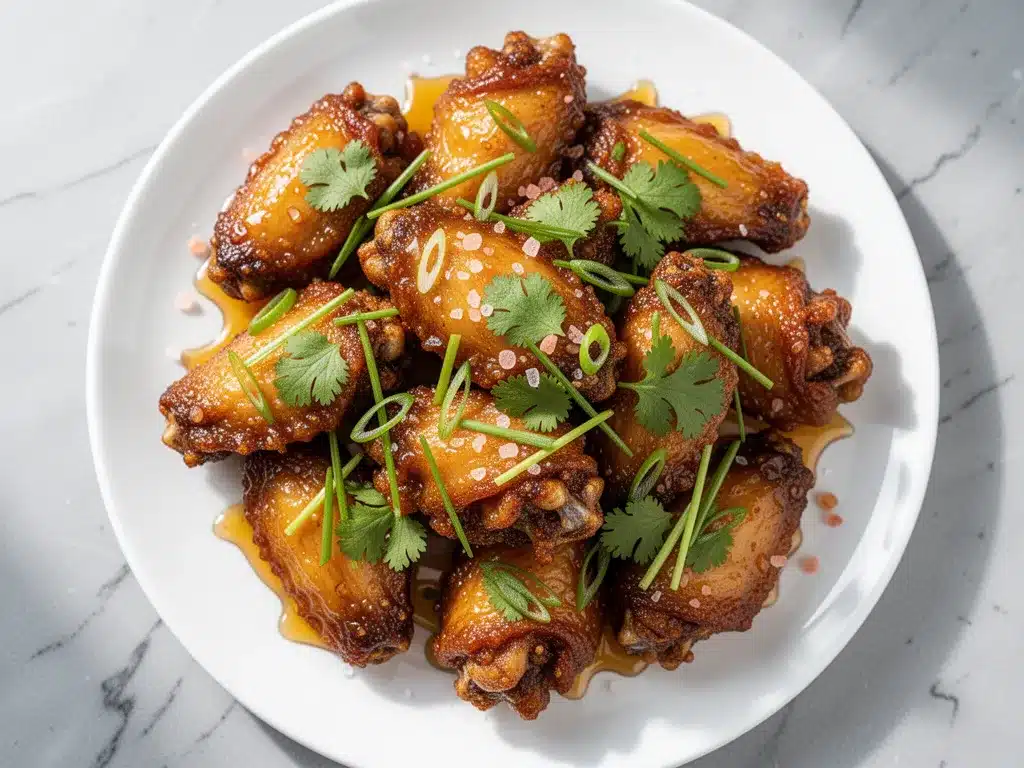
Honey (½ cup / 170g) — Use regular honey. Clove honey or strong floral honeys might overpower the garlic. If your honey is crystallized, microwave it for 15 seconds to loosen it.
Garlic (4 cloves, minced / about 2 tablespoons) — Yes, fresh garlic. Minced as fine as you can get it. I use a microplane or a very sharp knife. Jarred garlic won’t give you that fresh, bright flavor.
Soy sauce (3 tablespoons / 45ml) — I use low-sodium soy sauce so I can control the saltiness. Regular soy sauce works, but you might want to reduce the salt in the wing rub slightly.
Rice vinegar (1 tablespoon / 15ml) — Adds acidity to cut through the sweetness of the honey. If you don’t have rice vinegar, white wine vinegar works too. Avoid apple cider vinegar; it’s too fruity.
Butter (2 tablespoons / 30g) — Unsalted butter. This emulsifies with the honey and soy sauce to create a glossy, restaurant-quality glaze. It also helps the sauce stick to the wings.
Sesame oil (1 teaspoon / 5ml) — Just a teaspoon. It adds that nutty aroma that screams “Asian-inspired.” Don’t skip it, but don’t overdo it—it’s potent.
Red pepper flakes (½ teaspoon / 2g) — Optional. I like a little kick to balance the sweet. If you’re making these for kids, skip this or use just a pinch.
Green onions (2 stalks, sliced) — For garnish. Adds color and a fresh, oniony bite to cut through the richness.
Sesame seeds (1 tablespoon) — Optional, but nice for presentation. Toasted sesame seeds are even better if you have them.
Equipment Needed
You don’t need fancy gadgets for this. Here’s what I actually use:
Air Fryer — I use a 5.8-quart basket-style air fryer. It’s big enough to cook 2 pounds of wings in two batches without overcrowding. Overcrowding is the #1 reason wings turn out soggy. If you have a smaller air fryer, you’ll need to cook in more batches.
Large Bowl — For tossing the wings with the baking powder and spices. A glass or stainless steel bowl works best.
Small Saucepan — For making the glaze. I use a non-stick 8-inch skillet. It heats evenly and makes cleanup easy.
Tongs — For flipping the wings. Metal tongs are durable, but silicone-tipped ones won’t scratch your air fryer basket.
Paper Towels — Lots of them. You’ll need to pat the wings dry thoroughly.
Whisk — For emulsifying the glaze ingredients.
How to Make It: Step-by-Step
Alright, let’s make these wings! I’m walking you through exactly how I do it, including the little tricks that ensure maximum crispiness.
Step 1: Prep and Dry the Wings (10 minutes)
Take your chicken wings out of the packaging and pat them very dry with paper towels. I mean really dry. If there’s surface moisture, the skin won’t crisp. I usually use two layers of paper towels and press down firmly. Once they’re dry, put them in a large bowl.
Step 2: Coat with Dry Rub (2 minutes)
Sprinkle the baking powder, garlic powder, onion powder, salt, and black pepper over the wings. Toss them thoroughly until every wing is coated. The baking powder is key—it helps draw out moisture and crisp the skin. Make sure you get into all the crevices.
Step 3: Air Fry the Wings (20-25 minutes)
Preheat your air fryer to 400°F (200°C). This step is important. A hot start helps render the fat quickly. Arrange the wings in a single layer in the air fryer basket. Do not overlap them! If they touch, they’ll steam each other. You’ll likely need to cook in two batches. Cook for 12 minutes, then flip the wings. Cook for another 8-10 minutes until the skin is golden brown and crispy. The internal temperature should reach 165°F (74°C). If your wings are larger, they might need a minute or two more.
Step 4: Make the Honey Garlic Glaze (5 minutes)
While the wings cook, make the glaze. In a small saucepan over medium heat, combine the honey, minced garlic, soy sauce, rice vinegar, and sesame oil. Whisk everything together. Let it simmer gently for 2-3 minutes. You want it to thicken slightly and become syrupy. It should coat the back of a spoon. Remove from heat and whisk in the butter until melted and incorporated. Stir in the red pepper flakes if using.
Step 5: Combine and Finish (2 minutes)
Once the wings are done, transfer them to a large mixing bowl. Pour the warm honey garlic glaze over the hot wings. Toss immediately and vigorously. The heat from the wings helps the glaze adhere. If you wait too long, the wings cool down and the glaze slides off. Toss until every wing is evenly coated and shiny.
Step 6: Garnish and Serve
Transfer the glazed wings to a serving platter. Sprinkle with sliced green onions and toasted sesame seeds. Serve immediately while they’re hot and crispy. These wings are best eaten within 15 minutes of glazing, as the steam from the sauce can soften the skin if they sit too long.
Total Time: About 35-40 minutes (10 minutes prep, 25 minutes cooking, 5 minutes glaze).
Expert Tips & Tricks
Here’s everything I’ve learned from making these wings dozens of times. These tips will save you from my mistakes.
Pat Them Dry, Then Pat Them Dry Again
I can’t stress this enough. Moisture is the enemy of crispiness. I’ve made the mistake of rushing this step, and the results were chewy, not crispy. Take your time. If the wings are wet, they steam. If they’re dry, they crisp.
Don’t Overcrowd the Basket
This is the second biggest mistake people make. If the wings are touching, they won’t get crispy air circulation on all sides. Cook in batches. It’s annoying, but it’s necessary for the best texture. I usually cook 2 pounds in two batches of 10-12 wings each.
Flip Halfway Through
Even though air fryers circulate air, flipping ensures even browning. I set a timer for the 12-minute mark so I don’t forget. If you skip this, one side might be darker than the other.
Reduce the Glaze Properly
Don’t just mix cold honey and soy sauce. Heating and simmering the glaze reduces the water content and concentrates the flavor. It also helps the glaze thicken so it clings to the wings instead of running off. If your glaze is too thin, it won’t stick. If it’s too thick, it might be too salty. Aim for a syrupy consistency.
Toss Immediately
Have the glaze ready before the wings finish cooking. The moment the wings come out of the air fryer, they’re hot. That heat helps the glaze melt slightly and stick to the crispy skin. If you wait for the wings to cool, the glaze will just sit on top and slide off.
Common Mistakes (and how to avoid them)
- Mistake: Wings are soggy. Fix: You overcrowded the basket or didn’t pat them dry enough. Next time, use more batches and be thorough with the paper towels.
- Mistake: Glaze is too runny. Fix: Simmer the glaze longer. It needs to reduce by about 20% to thicken properly.
- Mistake: Glaze is too salty. Fix: Use low-sodium soy sauce. If you used regular soy sauce, add a little more honey or a splash of water to balance it.
Variations & Substitutions
Once you’ve nailed the basic version, here’s how you can mix it up. I’ve tried all of these.
Spicy Honey Garlic
Add 1 teaspoon of gochujang (Korean chili paste) or ½ teaspoon of cayenne pepper to the glaze. This adds a deeper, more complex heat that pairs beautifully with the sweetness. My friend who loves spice requests this version.
Teriyaki Style
Swap the rice vinegar for mirin and add 1 tablespoon of brown sugar to the glaze. It’s sweeter and more savory, with a distinct Japanese flavor profile. Great served over rice.
Ginger Garlic
Add 1 tablespoon of freshly grated ginger to the glaze. Ginger adds a bright, spicy kick that cuts through the richness of the honey and butter. It’s refreshing and complex.
Buffalo Honey Garlic
Stir 2 tablespoons of Frank’s RedHot sauce into the glaze. This creates a sweet, tangy, spicy wing that’s perfect for game day. It’s a hybrid of two classics.
Dietary Modifications:
- Gluten-Free — Use tamari instead of soy sauce. Everything else is naturally gluten-free.
- Dairy-Free — Skip the butter in the glaze, or use a dairy-free butter alternative. The rest of the recipe is dairy-free.
- Lower Sugar — Reduce the honey to ⅓ cup and add a teaspoon of stevia or erythritol. It’s not quite as rich, but it works if you’re watching sugar intake.
Serving & Storage
How to Serve:
I usually serve these straight from the platter at the dinner table. They look rustic and inviting. Pair them with soft garlic knots with parmesan for a carb-heavy feast, or keep it light with a side of creamy garlic mashed cauliflower. For drinks, a cold beer or a crisp Pinot Grigio works well.
Toppings Bar:
When I have guests, I put out extra sliced green onions, sesame seeds, and red pepper flakes. Everyone can customize their wings to their liking.
Storage Instructions:
Refrigerator: Store leftover glazed wings in an airtight container for up to 3 days. The glaze will harden in the fridge, and the skin might soften slightly.
Reheating: The best way to reheat these is in the air fryer. Reheat at 375°F (190°C) for 3-4 minutes. This restores the crispiness. Avoid the microwave—it will make the skin chewy and rubbery. If you must use the microwave, do it in short bursts and follow up with a quick air fry or oven toast.
Freezing: I don’t recommend freezing glazed wings. The glaze separates and becomes grainy when thawed. If you have plain cooked wings, you can freeze them for up to 2 months. Thaw and reheat in the air fryer, then toss with fresh glaze.
Nutrition Information
I’m not a nutritionist, but here’s the breakdown if you’re tracking. Please note that this is an estimate and can vary based on the size of your wings and the specific brands of ingredients you use.
Per Serving (based on 4 servings, 1 pound of wings each):
- Calories: 650
- Protein: 35g
- Carbs: 45g
- Fiber: 0g
- Sugar: 38g
- Fat: 35g
- Saturated Fat: 8g
- Cholesterol: 140mg
- Sodium: 800mg
What’s Good: High in protein from the chicken. The air frying method reduces fat compared to deep frying.
What to Know: Higher in sugar due to the honey glaze. Sodium is moderate to high depending on the soy sauce used. Use low-sodium soy sauce to reduce sodium content.
My Take: Look, these are wings. They’re indulgent. They’re not a diet food. But they’re way better than takeout, and you control the ingredients. When I want to make it lighter, I eat a smaller portion and load up on vegetables like tangy broccoli bacon salad on the side.
Final Thoughts
So that’s my go-to air fryer chicken wings recipe! I’ve probably talked your ear off at this point, but when you make a recipe this often, you have a lot to say about it.
These wings have saved my weeknight dinners more times than I can count. They’re my answer to “what’s for a snack?” or “what can I make for the game?” when I’m tired, don’t want takeout, and still want something that tastes incredible. My kids are happy, my husband’s happy, and I’m happy because I’m not stressed about cooking.
Make it yours! Try different glazes, swap in your favorite spices, or adjust the heat level. The best recipes are the ones you adapt to your family’s tastes. If you make this, drop a comment and let me know what you think! I love hearing how recipes turn out in your kitchen. And if something doesn’t work, tell me that too—I’m here to help troubleshoot.
Happy cooking! And I hope your kitchen smells half as good as mine does right now.
Frequently Asked Questions
Q: Can I use frozen wings?
A: You can, but I strongly recommend thawing them first. Frozen wings release a lot of water as they cook, which makes the skin soggy. If you must use frozen wings, thaw them in the fridge overnight and pat them very dry before seasoning. Thawing ensures even cooking and better crispiness.
Q: Why did my wings come out soggy?
A: This usually happens for two reasons: overcrowding the basket or not drying the wings thoroughly. If the wings are touching, they steam each other. If they’re wet, they steam instead of crisp. Make sure to pat them dry with paper towels and cook in a single layer with space between each wing.
Q: Can I make the glaze ahead of time?
A: Yes! You can make the glaze up to 3 days ahead and store it in the fridge in an airtight container. Reheat it gently in the microwave or on the stove before tossing with the wings. The flavors actually meld and improve over time.
Q: Why did my glaze slide off the wings?
A: This happens if the wings are too cool when you add the glaze, or if the glaze isn’t thick enough. Make sure the wings are hot right out of the air fryer, and simmer the glaze until it’s syrupy. Toss immediately and vigorously to ensure the glaze adheres to the crispy skin.
Q: Can I use chicken thighs instead of wings?
A: Yes, you can use bone-in, skin-on chicken thighs. They take slightly longer to cook, so you might need to add 5-10 minutes to the air fry time. Make sure the internal temperature reaches 165°F (74°C). The glaze works beautifully with thighs too.
Q: How do I reheat leftovers without losing crispiness?
A: Avoid the microwave! It will make the skin chewy. Reheat in the air fryer at 375°F (190°C) for 3-4 minutes. This restores the crispiness. If you don’t have an air fryer, use a conventional oven at 400°F (200°C) for 10-12 minutes.
Q: Can I double this recipe?
A: Absolutely! Just cook in batches. Do not try to cook 4 pounds of wings in one air fryer basket—it will overcrowd the machine and result in soggy wings. Cook in two batches, and keep the first batch warm in a 200°F (95°C) oven while you cook the second batch.
Pin This Recipe!
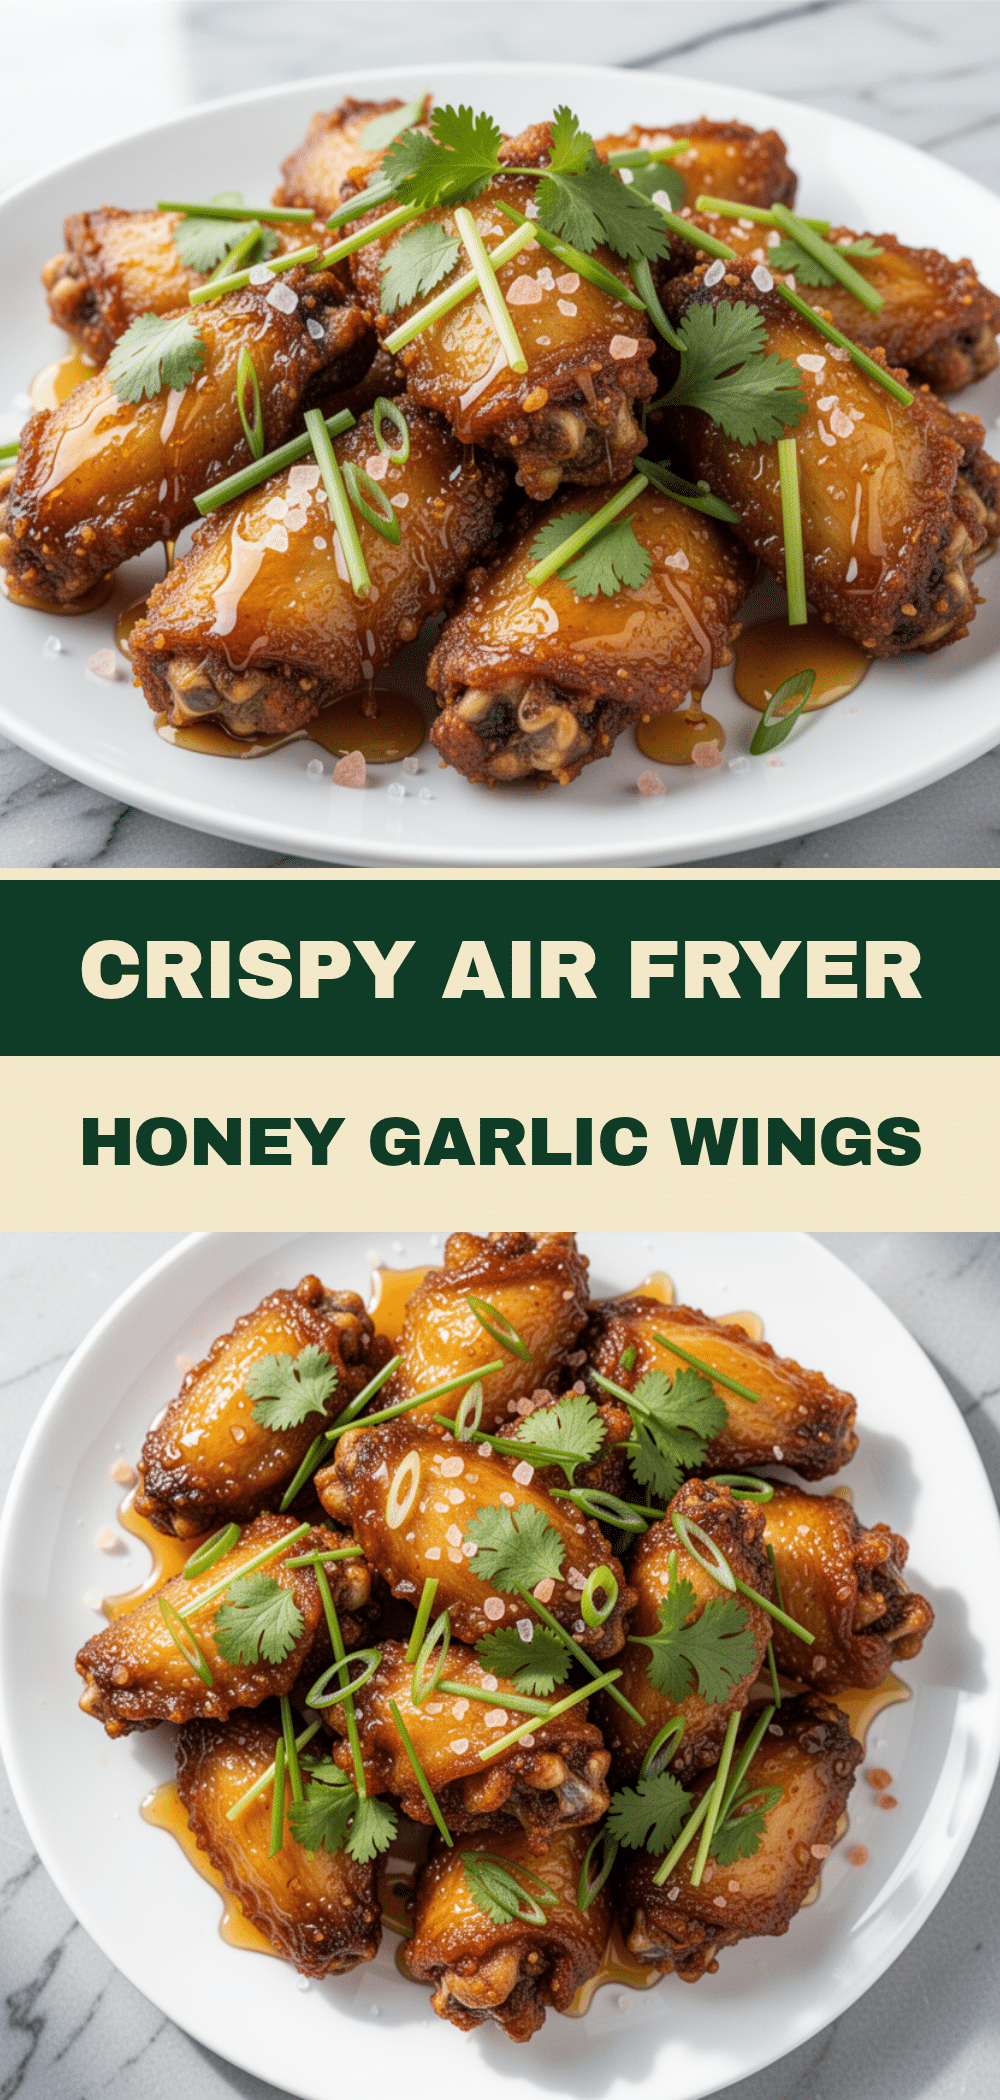
Air Fryer Chicken Wings: Easy Honey Garlic Recipe
- Total Time: 35 minutes
- Yield: 4 servings 1x
Description
Crispy, sticky, and savory air fryer chicken wings coated in a homemade honey garlic glaze. This recipe uses a baking powder trick for maximum crunch without deep frying.
Ingredients
- 2 pounds chicken wings (mix of drumettes and flats)
- 1 tablespoon aluminum-free baking powder
- 1 teaspoon garlic powder
- 1 teaspoon onion powder
- 1 teaspoon kosher salt
- 1/2 teaspoon black pepper
- 1/2 cup honey
- 4 cloves garlic, minced
- 3 tablespoons low-sodium soy sauce
- 1 tablespoon rice vinegar
- 2 tablespoons unsalted butter
- 1 teaspoon sesame oil
- 1/2 teaspoon red pepper flakes (optional)
- 2 stalks green onions, sliced
- 1 tablespoon toasted sesame seeds
Instructions
- Pat chicken wings very dry with paper towels to remove surface moisture.
- Place wings in a large bowl and sprinkle with baking powder, garlic powder, onion powder, salt, and black pepper. Toss thoroughly to coat evenly.
- Preheat air fryer to 400°F (200°C).
- Arrange wings in a single layer in the air fryer basket, ensuring they do not touch. Cook in batches if necessary.
- Air fry for 12 minutes, then flip the wings. Cook for another 8-10 minutes until golden brown and crispy (internal temperature 165°F).
- While wings cook, combine honey, minced garlic, soy sauce, rice vinegar, and sesame oil in a small saucepan over medium heat.
- Simmer glaze for 2-3 minutes until slightly thickened and syrupy.
- Remove from heat and whisk in butter until melted. Stir in red pepper flakes if using.
- Transfer hot wings to a large bowl and pour warm glaze over them. Toss vigorously to coat evenly.
- Serve immediately, garnished with sliced green onions and sesame seeds.
Notes
Patting wings dry is crucial for crispiness. Do not overcrowd the air fryer basket; cook in batches. The glaze should be syrupy to stick properly. Best eaten immediately after glazing to maintain crisp texture.
- Prep Time: 10 minutes
- Cook Time: 25 minutes
- Category: Appetizer
- Cuisine: Asian-Inspired
Nutrition
- Serving Size: 1 pound of wings per
- Calories: 650
- Sugar: 38
- Sodium: 800
- Fat: 35
- Saturated Fat: 8
- Carbohydrates: 45
- Protein: 35
Keywords: air fryer chicken wings, honey garlic wings, crispy chicken wings, easy appetizer, game day food, gluten-free options