I had one of those days last week where the mental load felt heavy enough to carry in a backpack. You know the type. Emails piling up, a minor crisis at work that wasn’t even your fault, and by the time I walked through the front door, I was just… done. My energy was at zero. The last thing I wanted was a complex dinner, a long cleanup, or any decision-making whatsoever. I just wanted something soft, warm, and smelling like a hug.
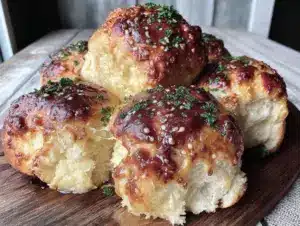
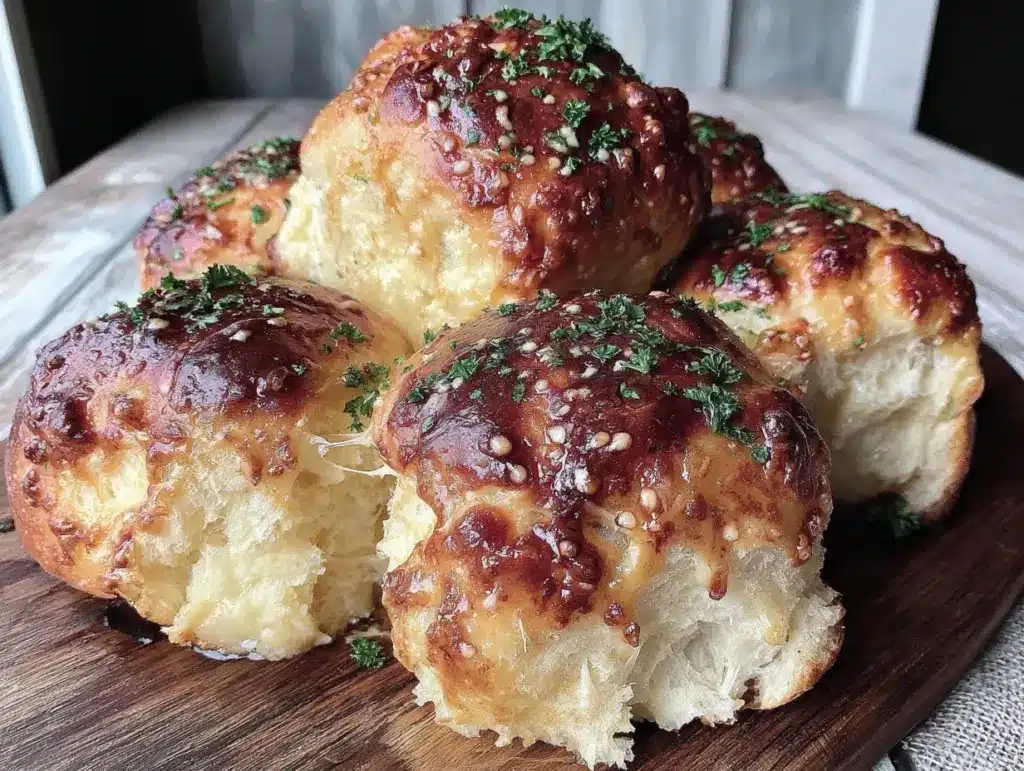
So, I did the thing that always saves me. I made homemade garlic butter dinner rolls. Not the ones from the freezer aisle, but the real deal. Soft, pillowy, golden-brown buns brushed with enough garlic butter to make your heart sing. There is something deeply therapeutic about kneading dough when your brain is fried. It’s rhythmic. It’s slow. It forces you to slow down and focus on the tactile sensation of flour and yeast and warmth.
These rolls aren’t just bread. They are a small act of rebellion against the rush of daily life. They are edible self-care. When I pull the baking sheet out of the oven and the scent of roasted garlic and yeast fills my kitchen, my shoulders drop three inches. I take a deep breath. I let the steam hit my face. And for those twenty minutes while they cool, I am exactly where I need to be.
If you’ve been looking for a way to decompress after a hard day, or if you just want bread that tastes like it came from a fancy bakery but is actually easy to make, this is your recipe. These homemade garlic butter dinner rolls are gentle on the hands and rich in comfort. They are the one to make when you need to take care of yourself.
Why You’ll Love This Recipe
There’s a specific kind of joy that comes from baking bread when you’re tired. It’s not about efficiency. It’s about the result. Here’s why these garlic butter rolls have become my go-to comfort project:
- They Melt in Your Mouth — Seriously. The texture is incredibly soft, almost like a cloud. I’ve made many dinner roll recipes, but this one strikes the perfect balance between chewy and tender. It’s the kind of bread you eat with your hands, ignoring the plate entirely.
- The Garlic Butter is Non-Negotiable — The topping is where the magic happens. It’s not just melted butter; it’s a rich, aromatic mixture of garlic, parsley, and a touch of salt. Brushing it onto the hot rolls creates a glossy, savory crust that contrasts beautifully with the soft interior. It’s addictive. I’ve caught myself eating them straight from the pan, no dinner required.
- It’s a Mental Reset — Making dough requires presence. You can’t multitask while kneading. You have to feel it. This recipe is my way of turning off the noise in my head. It’s slow food for fast days. It doesn’t require fancy skills, just a little patience and a willingness to be gentle with yourself.
- Perfect for Pairing — While I often eat these with nothing but a glass of wine, they are fantastic alongside other cozy meals. They hold up well next to a creamy wild rice and mushroom casserole, soaking up the sauce perfectly. They also pair wonderfully with a hearty roasted chicken with maple dijon glaze, adding a savory touch to the meal.
- They Freeze Well (For Future You) — If you make a double batch, these freeze beautifully. I often bake two sheets on weekends when I have a bit more energy, so I have fresh rolls ready to warm up for a stressful Tuesday night. They taste just as good thawed and reheated as they do fresh out of the oven.
This isn’t just about feeding people. It’s about creating a moment of peace in your kitchen. When the dough is rising, you can sit with your tea. When the butter is melting, you can listen to a podcast. It’s slow, it’s simple, and it’s deeply satisfying.
Ingredients You’ll Need
One of the best things about these homemade garlic butter dinner rolls is how simple the ingredient list is. You likely have most of this in your pantry. I’m particular about quality here, not because it’s fancy, but because with so few ingredients, you taste everything.
For the Dough
Warm milk (1 cup / 240ml) — This needs to be warm to the touch, not hot. Think bathwater temperature (about 110°F / 45°C). If it’s too hot, it’ll kill the yeast. If it’s too cold, it won’t activate. I use whole milk for the best richness, but 2% works too.
Active dry yeast (2¼ teaspoons / 1 packet) — The standard envelope packet. You can use instant yeast, but you’ll skip the blooming step. I prefer active dry because I like seeing that foamy proof to know it’s alive and working.
Granulated sugar (2 tablespoons) — Just a little bit to feed the yeast and help with browning. You don’t want these sweet; you want them savory. This amount is barely noticeable in the final taste.
All-purpose flour (3 to 3½ cups / 375-440g) — This is your base. I use all-purpose because it gives a tender crumb. Bread flour makes them chewier, which some people like, but for soft, pillowy comfort, AP is my choice. Note: You might not need all the flour. It depends on your humidity and how you measure.
Unsalted butter (3 tablespoons, melted) — Added to the dough for tenderness. Room temperature butter is easier to mix, but melted is what this recipe calls for to keep the dough soft.
Egg (1 large) — This adds structure and richness. It helps the rolls rise properly and gives them that golden color.
Salt (1 teaspoon) — Essential for flavor. Since we’re using unsalted butter, this is our main salt source in the dough.
For the Garlic Butter Topping
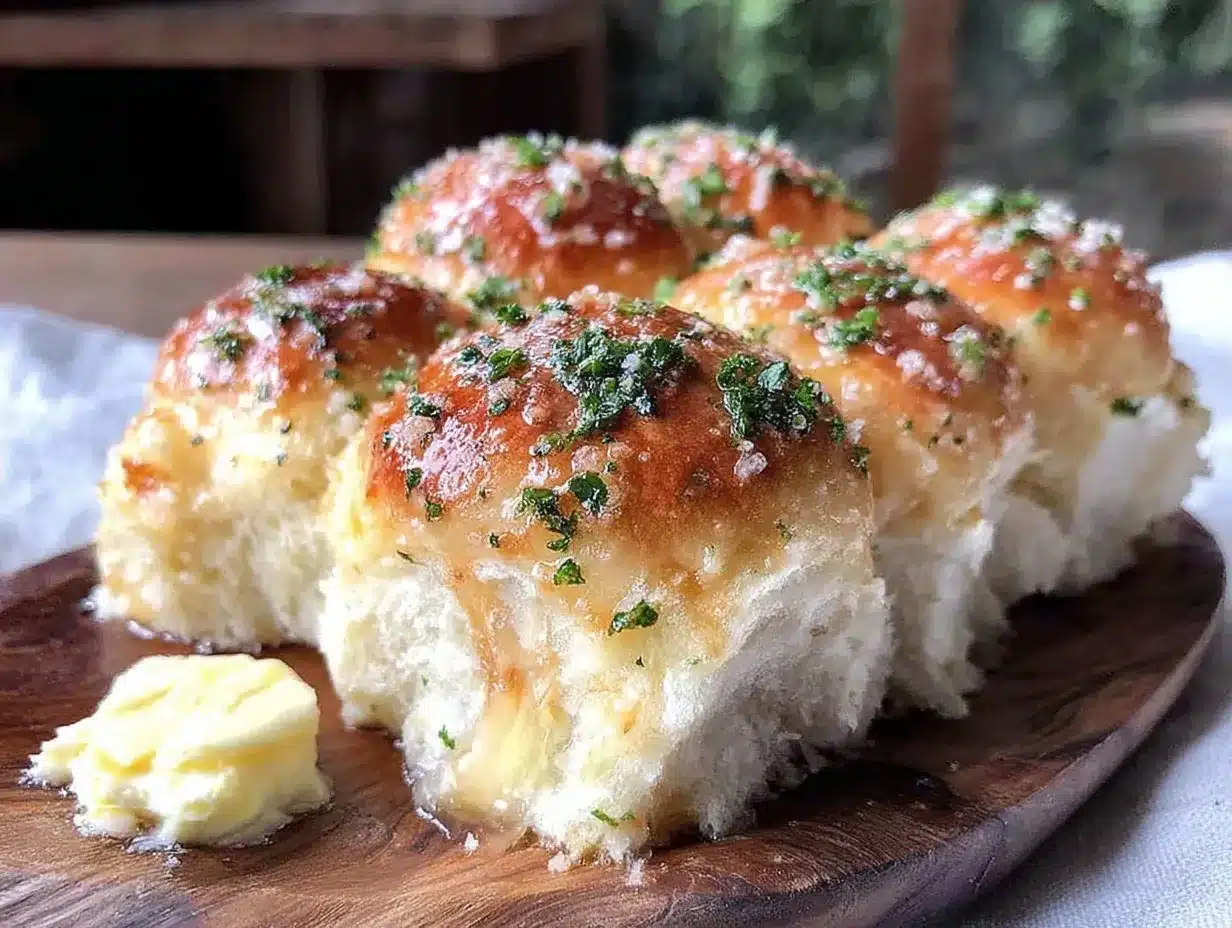
Unsalted butter (½ cup / 115g) — The star of the show. Use good quality butter here. It makes a huge difference in flavor.
Garlic (4-5 cloves, finely minced or grated) — Yes, four or five cloves. Don’t be shy. Fresh garlic is non-negotiable for this recipe. Jarred garlic has a metallic aftertaste that clashes with the butter. I use a microplane to grate it—it melts into the butter faster and distributes evenly.
Dried parsley (1 tablespoon) — Adds a pop of color and a mild herbal note. Fresh parsley works too, but dried holds up better in the melted butter without burning.
Garlic powder (½ teaspoon) — An extra layer of garlic flavor that infuses into the crust. It’s subtle but effective.
Onion powder (½ teaspoon) — This is my secret weapon. It adds a savory depth that complements the garlic without making it taste like onion.
Equipment Needed
You don’t need a fancy kitchen to make these. Here’s what I actually use:
Large mixing bowl — I use a 5-quart ceramic bowl. It’s heavy enough to stay put while I mix, and the smooth sides make scraping the dough easy.
Stand mixer with dough hook (optional) — I love my stand mixer, but these rolls are easy enough to make by hand. If you use a mixer, use the dough hook on low speed. If you knead by hand, expect about 8-10 minutes of arm work. It’s good exercise.
9×13 inch baking dish — This is the standard size for dinner rolls. It allows them to rise close together so they pull apart easily. A square dish works better than a round one for this shape.
Pastry brush — Essential for the garlic butter. Silicone brushes are great because they don’t shed bristles and they hold more butter.
Instant-read thermometer — Not strictly necessary, but helpful for checking milk temperature. If you don’t have one, test it on your wrist. It should feel warm, not hot.
Cling wrap — For covering the dough while it rises. Plastic wrap works, but I like to use a large, clean kitchen towel for a more rustic look.
How to Make It: Step-by-Step
Alright, let’s make these. I’m walking you through exactly how I do it, including the little tricks that ensure soft, fluffy results. Take your time. This is your moment to slow down.
Step 1: Bloom the Yeast (5 minutes)
In the bowl of your stand mixer (or a large mixing bowl), combine the warm milk, sugar, and yeast. Stir gently and let it sit for 5-10 minutes. You’re looking for a foamy, creamy layer on top. This means the yeast is alive and active. If it doesn’t foam, your milk was too hot or too cold, or your yeast is old. Start over with fresh yeast.
Step 2: Mix the Dough (3 minutes)
Add the melted butter, egg, and salt to the yeast mixture. Whisk them together until combined. Then, add 3 cups of flour. If using a mixer, switch to the dough hook and mix on low until a shaggy dough forms. If mixing by hand, stir with a wooden spoon until it’s too thick to stir.
Step 3: Knead the Dough (8-10 minutes)
This is the part where you get your thoughts together. Turn the dough out onto a lightly floured surface. Knead it by pushing it away from you with the heel of your hand, folding it back over, and turning it. Add more flour a tablespoon at a time if it’s too sticky, but try not to add too much. You want a soft, slightly tacky dough, not a dry ball. It should pass the “windowpane test”—stretch a small piece thin enough to see light through it without tearing.
Step 4: First Rise (1 hour)
Lightly grease your mixing bowl with a little oil or butter. Place the dough in the bowl and turn it once to coat. Cover with cling wrap or a damp towel. Place it in a warm, draft-free spot. I usually turn my oven on for 1 minute, then turn it off, and place the bowl inside. The dough should double in size. This takes about 1 hour. Don’t rush it. If it’s cold, it might take longer. If it’s hot, it might take 45 minutes.
Step 5: Shape the Rolls (10 minutes)
Punch down the dough gently to release air bubbles. Turn it out onto a clean surface. Divide the dough into 12 equal pieces. I use a kitchen scale for accuracy, but eyeballing it works too. Roll each piece into a smooth ball by tucking the edges underneath. Place them seam-side down in your greased 9×13 baking dish. They should be touching each other. This helps them rise up rather than out, creating that pull-apart texture.
Step 6: Second Rise (30-45 minutes)
Cover the pan again and let the rolls rise until they look puffy and jiggly. They don’t need to double this time, just get nice and big. While they rise, preheat your oven to 375°F (190°C).
Step 7: Make the Garlic Butter (5 minutes)
Melt the ½ cup of butter in a small saucepan or microwave. Stir in the minced garlic, parsley, garlic powder, onion powder, and a pinch of salt. Let it sit for a minute so the flavors meld. The garlic should smell amazing.
Step 8: Bake (18-22 minutes)
Brush the tops of the rolls generously with the garlic butter. Bake for 18-22 minutes, or until they are golden brown on top and sound hollow when tapped on the bottom. If they look like they’re browning too fast, cover them loosely with foil for the last 5 minutes.
Step 9: The Final Brush (Immediate)
As soon as you take the rolls out of the oven, brush them with the remaining garlic butter. This keeps them soft and adds that final layer of flavor. Let them cool in the pan for 5 minutes, then serve warm.
Expert Tips & Tricks
Here’s everything I’ve learned from making these dozens of times. These tips will save you from my mistakes.
Don’t Over-Flour the Dough — This is the most common mistake. It’s tempting to add flour to stop sticking, but too much flour makes dense, dry rolls. Your hands should be slightly sticky, but the dough should pull away from the sides of the bowl. If it’s sticking to your hands, wet them slightly instead of adding more flour.
Warm, Not Hot, Milk — I’ve killed yeast before by using milk that was too hot. If you don’t have a thermometer, test it on your inner wrist. It should feel warm, like a baby’s bottle. If it burns your wrist, it’s too hot for the yeast.
Let Them Steam — If you like softer crusts, cover the rolls with a clean kitchen towel immediately after taking them out of the oven and brushing with butter. The steam softens the crust. If you like a crispier crust, let them cool uncovered.
Use Fresh Garlic — I cannot stress this enough. Jarred garlic tastes metallic and artificial. Fresh minced garlic, or even grated garlic, makes a world of difference. If you’re worried about large chunks, grate it on a microplane.
Don’t Skip the Second Rise — It’s easy to want to skip this step when you’re tired, but it makes a huge difference in texture. The rolls will be denser and chewier if you bake them immediately after shaping.
Variations & Substitutions
Once you’ve nailed the basic version, here’s how you can mix it up. I’ve tried all of these.
Cheesy Garlic Rolls — Add ½ cup of shredded sharp cheddar or Parmesan to the garlic butter before brushing. Sprinkle extra cheese on top before baking. This is a huge hit with kids.
Herb Garden Rolls — Swap the parsley for a mix of dried rosemary, thyme, and oregano. This gives a more rustic, savory flavor profile.
Honey Butter Rolls — Add 1 tablespoon of honey to the garlic butter for a sweet-savory twist. This pairs beautifully with a cozy fall butternut squash soup.
Gluten-Free Option — Use a 1:1 gluten-free flour blend with xanthan gum. The dough will be stickier, so you may need to handle it with wet hands. The texture will be slightly different but still delicious.
Dairy-Free — Use olive oil instead of butter in the dough, and dairy-free butter for the topping. The flavor will be different, but the texture will still be soft.
Serving & Storage
These homemade garlic butter dinner rolls are best served warm, right out of the pan. I usually set the baking dish on the table and let everyone pull one apart themselves. It’s communal and cozy.
Storage: If you have leftovers (unlikely, but possible), store them in an airtight container at room temperature for up to 2 days. They will soften as they sit.
Reheating: To reheat, wrap them in foil and warm in a 350°F oven for 10 minutes. Or, microwave them for 20-30 seconds. They should be soft and warm.
Freezing: These freeze beautifully. Let them cool completely, then place them in a freezer-safe bag. They last for up to 3 months. Thaw at room temperature and reheat in the oven. I often make a double batch for this reason.
Nutrition Information
I’m not a nutritionist, but here’s the breakdown if you’re tracking. Keep in mind that these are rich in butter and carbs, so they are a treat.
Per Roll (makes 12):
- Calories: 220
- Fat: 11g
- Carbs: 24g
- Protein: 5g
- Fiber: 1g
These are definitely comfort food, not diet food. But they are made with simple, whole ingredients, and there’s something nourishing about eating bread you made yourself. When I’m having one, I’m having it slowly, with intention. That’s part of the experience.
Final Thoughts
So that’s my go-to homemade garlic butter dinner rolls! I’ve probably talked your ear off at this point, but when you make a recipe this often, you have a lot to say about it.
This recipe has saved me on more hard days than I can count. It’s my answer to “I’m exhausted” when I still want to do something nice for myself. It’s warm, it’s fragrant, and it’s deeply satisfying. My kitchen smells amazing, and my mind feels calm.
Make it yours! Try different herbs, add cheese, or just enjoy them plain. The best recipes are the ones you adapt to your needs. If you make these, drop a comment and let me know how they turned out. I love hearing how recipes work in your kitchen.
Happy baking! And I hope your kitchen smells half as good as mine does right now.
Frequently Asked Questions
Can I use instant yeast instead of active dry?
Yes! You can use instant yeast directly in the dry ingredients. You don’t need to bloom it in the milk first, but blooming it still works fine if you want to check that it’s alive. The final result will be the same.
Why are my rolls dense?
This usually happens if you add too much flour during kneading, or if you don’t let them rise long enough. Make sure your dough is soft and tacky, not stiff. Also, ensure your yeast is fresh and active. If the yeast is old, it won’t create the air bubbles needed for fluffy rolls.
Can I make these ahead of time?
Yes! After shaping the rolls and placing them in the pan, cover them tightly and refrigerate overnight. In the morning, let them come to room temperature and rise for 1-2 hours before baking. This is great for busy mornings or when you want to prep the night before.
How do I know when the rolls are done?
They should be golden brown on top. If you tap the bottom of a roll, it should sound hollow. The internal temperature should be around 190°F (88°C). If you don’t have a thermometer, the hollow tap test is reliable.
Can I freeze the garlic butter?
You can, but it’s best to make it fresh. Garlic flavor diminishes when frozen, and the butter can separate. I recommend making the butter right before you bake the rolls for the best flavor.
Do these work for dinner parties?
Absolutely. They look elegant and taste incredible. I often make a double batch for guests. Just brush them with extra butter right before serving to keep them soft. They pair well with soups, stews, and roasted meats.
Pin This Recipe!
Homemade Garlic Butter Dinner Rolls: Easy Self-Care Comfort
- Total Time: 52 minutes
- Yield: 12 servings 1x
Description
Soft, pillowy homemade dinner rolls brushed with a rich garlic butter topping. This recipe is designed to be therapeutic and comforting, perfect for decompressing after a hard day.
Ingredients
- 1 cup warm milk (about 110°F / 45°C)
- 2¼ teaspoons active dry yeast (1 packet)
- 2 tablespoons granulated sugar
- 3 to 3½ cups all-purpose flour
- 3 tablespoons unsalted butter, melted
- 1 large egg
- 1 teaspoon salt
- ½ cup unsalted butter (for topping)
- 4–5 cloves garlic, finely minced or grated
- 1 tablespoon dried parsley
- ½ teaspoon garlic powder
- ½ teaspoon onion powder
- Pinch of salt (for topping)
Instructions
- Bloom the yeast: In a large mixing bowl, combine warm milk, sugar, and yeast. Stir gently and let sit for 5-10 minutes until foamy.
- Mix the dough: Add melted butter, egg, and salt to the yeast mixture. Whisk to combine. Add 3 cups of flour and mix until a shaggy dough forms.
- Knead the dough: Turn dough onto a lightly floured surface. Knead for 8-10 minutes until soft and slightly tacky, adding more flour only if necessary. The dough should pass the windowpane test.
- First rise: Place dough in a greased bowl, cover with cling wrap or a damp towel, and let rise in a warm spot for about 1 hour, or until doubled in size.
- Shape the rolls: Punch down the dough and divide into 12 equal pieces. Roll each into a smooth ball and place seam-side down in a greased 9×13 inch baking dish, ensuring they touch.
- Second rise: Cover the pan and let rolls rise for 30-45 minutes until puffy. Preheat oven to 375°F (190°C) during this time.
- Make garlic butter: Melt ½ cup butter and stir in minced garlic, parsley, garlic powder, onion powder, and a pinch of salt.
- Bake: Brush rolls generously with garlic butter. Bake for 18-22 minutes until golden brown and hollow when tapped.
- Final brush: Immediately upon removing from oven, brush with remaining garlic butter. Let cool for 5 minutes before serving.
Notes
Ensure milk is warm but not hot to avoid killing the yeast. Do not over-flour the dough; it should be soft and slightly tacky. For softer crusts, cover rolls with a towel immediately after baking. Fresh garlic is recommended over jarred for best flavor.
- Prep Time: 30 minutes
- Cook Time: 22 minutes
- Category: Side Dish
- Cuisine: American
Nutrition
- Serving Size: 1 roll
- Calories: 220
- Sugar: 2
- Sodium: 180
- Fat: 11
- Saturated Fat: 7
- Carbohydrates: 24
- Fiber: 1
- Protein: 5
Keywords: garlic butter rolls, dinner rolls, homemade bread, comfort food, easy baking, yeast rolls, garlic bread, self-care recipe