I still remember the first time I tried to make tiramisu for my partner’s birthday. I was convinced I had the recipe down cold because, honestly, how hard can it be? You just dip cookies in coffee, spread some cream, and repeat. Simple, right? Wrong. I used instant coffee instead of espresso, cheap grocery store mascarpone that tasted like sour cream, and I didn’t let it chill long enough. When we dug in, the layers were soggy messes, the cream was grainy, and the whole thing tasted like bitter, watery disappointment. He was polite about it, but I could see the confusion on his face. That night, I went to bed determined to fix it.
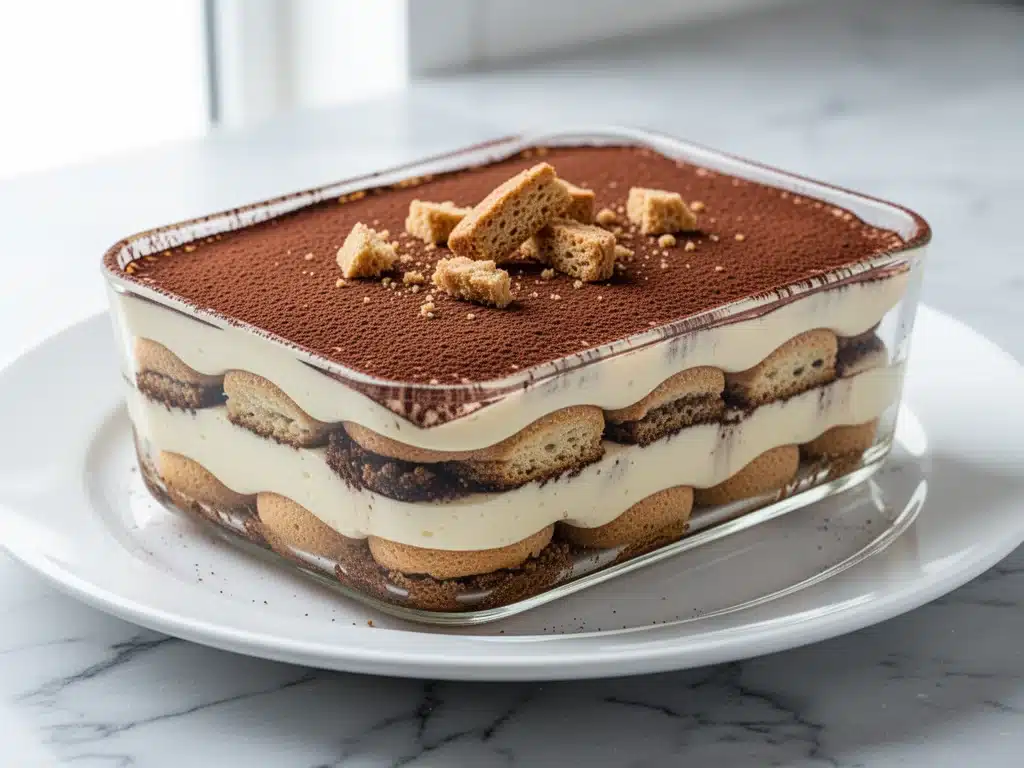
Over the next few months, I tested this homemade tiramisu recipe at least eight times. I experimented with different coffees, checked the fat content on mascarpone brands, and learned the exact timing for dipping ladyfingers so they hold their structure but absorb the flavor. The result? A dessert that is silky, deeply caffeinated, and absolutely stunning. This homemade tiramisu with mascarpone cream is the kind of dessert that makes people stop mid-bite and close their eyes. It’s not just a treat; it’s a memory-maker. And the best part? It’s surprisingly easy. You don’t need an oven, and you don’t need fancy skills. You just need patience and a few quality ingredients.
There’s something magical about tiramisu. It’s elegant enough for a dinner party but simple enough to make on a Tuesday night when you need to impress someone without spending hours in the kitchen. Unlike no-bake pumpkin pie which relies heavily on spices, this dessert relies on texture and temperature. The contrast between the crisp, dry ladyfingers and the cloud-like mascarpone cream is what makes it irresistible. Once you master this version, you’ll never buy the pre-packaged stuff from the grocery store again. Trust me, I’ve stopped buying it entirely.
Why You’ll Love This Recipe
So, why is this the version I keep coming back to? Here’s the thing about tiramisu—it’s all about balance. If one ingredient is off, the whole thing falls apart. This recipe nails that balance every single time. I’ve made this for everything from casual Friday dinners to holiday gatherings, and it’s become my secret weapon for dessert.
- Zero Baking Required — Seriously, no oven needed. This is a no-bake dessert that feels like you worked hard, but you really just whisked and assembled. It’s perfect for summer when you don’t want to heat up the kitchen, or winter when you’re short on time.
- Make-Ahead Magic — This dessert actually gets better the longer it sits. I usually make it the night before I need it. The flavors meld together, the coffee soaks in perfectly, and the texture becomes incredibly smooth. It’s the ultimate stress-free dessert for hosting.
- Restaurant-Quality Texture — By using the right ratio of egg yolks to sugar and whipping the cream to stiff peaks, you get that airy, mousse-like consistency that Italian restaurants are famous for. It melts in your mouth. I’ve had tiramisu from high-end Italian bistros that didn’t taste as good as this simple version.
- Customizable Strength — Want it boozy? Add a splash of Marsala or rum to the coffee. Want it kid-friendly? Skip the alcohol entirely and just use extra espresso. This recipe is flexible enough to handle whatever your crowd prefers.
- Simple Ingredients — You probably have most of these in your pantry. Mascarpone, eggs, sugar, coffee, and ladyfingers. No weird gadgets or hard-to-find spices. It’s straightforward, honest food.
This homemade tiramisu with mascarpone cream has completely changed how I approach desserts. It’s elegant, it’s delicious, and it’s surprisingly forgiving. Even if you’ve never whipped cream or separated eggs before, you can pull this off. It’s my go-to when I want to feel like a pro baker without the stress.
Ingredients You’ll Need
Before we get into the steps, let’s talk about what goes into this. I’m pretty particular about ingredients here because tiramisu has very few components. When you have less, each one has to shine. I’ve tasted the difference between good mascarpone and great mascarpone, and it’s night and day.
For the Mascarpone Cream
Mascarpone cheese (16 oz / 450g) — This is the star. Look for a brand that has a high fat content (around 35-40%). Cheap mascarpone can be watery and won’t whip up properly. I recommend brands like La Valle or Galbani. It should be cold when you start, but not frozen solid.
Egg yolks (6 large) — We use only yolks for that rich, golden color and creamy texture. The whites are whipped separately to give the cream its lift. If you’re worried about raw eggs, you can use pasteurized eggs or heat the yolks with sugar (see tips below).
Granulated sugar (¾ cup / 150g) — This balances the tang of the mascarpone. Don’t reduce this too much, or the dessert will taste bland. I use regular white sugar, but you can use organic if you prefer.
Heavy cream (2 cups / 480ml) — Must be cold. I take it out of the fridge right before whipping. Heavy cream (35% fat) is essential. Half-and-half won’t hold peaks.
Vanilla extract (1 teaspoon) — Pure vanilla, not imitation. It adds a subtle warmth that complements the coffee perfectly.
For the Coffee Mixture
Strong espresso or coffee (2 cups / 480ml) — This needs to be strong. I use a dark roast espresso. If you don’t have an espresso machine, brew a very strong pot of coffee using twice the amount of grounds. Let it cool completely before using. Warm coffee will melt the mascarpone too fast.
Sugar (1 tablespoon) — Just a touch to balance the bitterness of the coffee. Optional, depending on how bitter your espresso is.
Alcohol (Optional) (2-3 tablespoons) — Marsala wine is traditional, but dark rum or coffee liqueur (like Kahlúa) works beautifully. Add this to the cooled coffee mixture.
For the Assembly
Ladyfingers (24-30 pieces) — Also known as Savoiardi. These are dry, crisp sponge cookies. Do not use soft sponge cake or regular cookies. They need to be dry enough to absorb liquid without disintegrating immediately. I buy them in the baking aisle, usually in a plastic bag.
Dark chocolate (for garnish) — Coarsely grated. A nice 70% dark chocolate adds a bitter contrast that cuts through the sweetness. You can also use cocoa powder, but fresh gratings look so much more impressive.
Cocoa powder (unsweetened) — For dusting the final layer. This adds that classic bitter finish.
Equipment Needed
You don’t need much for this, which is part of why I love it. Here’s what I actually use:
Two large mixing bowls — One for the egg yolks and sugar, one for the heavy cream. Glass or stainless steel works best. Make sure they’re clean and dry.
Electric mixer — Hand mixer or stand mixer. Whipping egg whites and cream by hand is possible, but it takes effort. A mixer makes it quick and ensures stiff peaks.
Whisk — For beating the egg yolks and sugar until pale and fluffy.
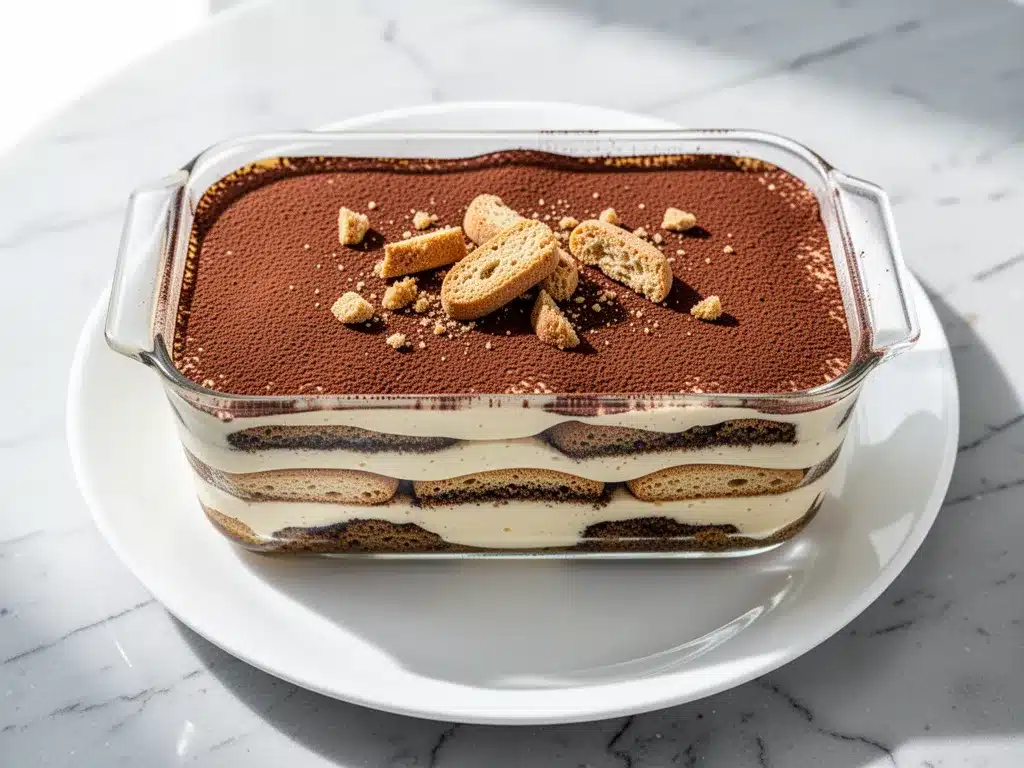
9×13 inch baking dish — Or a similar shallow dish. I use a glass Pyrex dish because I can see the layers, but ceramic or even a large pie plate works. Just make sure it’s deep enough so the cream doesn’t spill over.
Pastry brush or spoon — For brushing the coffee mixture onto the ladyfingers. A brush gives you more control, but a spoon works if you’re careful.
Box grater — For grating the chocolate. A microplane works too for finer shavings.
Plastic wrap — To cover the dish while it chills.
How to Make It: Step-by-Step
Alright, let’s make this! I’m walking you through exactly how I do it. The process is simple, but the timing matters. Take your time with the whipping steps—that’s where the magic happens.
Step 1: Brew and Cool the Coffee
Brew your espresso or strong coffee. You need about 2 cups. Spread it out in a shallow bowl or pie plate to cool down faster. It needs to be completely room temperature or cold before you use it. If it’s warm, it will melt the mascarpone and make your layers soggy. I usually brew it in the morning or the night before. Add your sugar and alcohol (if using) once it’s cool.
Step 2: Whip the Egg Yolks and Sugar
In a large bowl, beat the egg yolks and ¾ cup of sugar together. Use your electric mixer on medium-high speed. Beat for about 4-5 minutes until the mixture is pale yellow, thick, and fluffy. It should leave a ribbon trail when you lift the whisk. This step incorporates air into the yolks, which adds volume to the final cream. If you’re nervous about raw eggs, you can heat the yolks and sugar over a double boiler until they reach 160°F (71°C), then cool completely before beating. But honestly, using pasteurized eggs makes this unnecessary.
Step 3: Whip the Heavy Cream
In a separate cold bowl, whip the heavy cream and vanilla extract on high speed. Watch it closely! You want stiff peaks. This means when you lift the beaters, the cream stands up straight and doesn’t droop. Don’t over-whip it into butter, though. It should still be smooth and creamy. Set this aside.
Step 4: Fold in the Mascarpone
Add the mascarpone cheese to the beaten egg yolks. Beat on low speed just until combined and smooth. Be careful not to overmix here, or it can become grainy. Once smooth, gently fold in the whipped heavy cream. Use a spatula and fold gently—lift from the bottom and turn over. Do this until there are no streaks of white cream left. The mixture should be light, airy, and uniform. This is your mascarpone cream.
Step 5: Dip the Ladyfingers
This is the most critical step for texture. Quick-dip each ladyfinger into the cooled coffee mixture. I mean quick—1-2 seconds per side. You want them to absorb the coffee but stay firm. If you soak them too long, they’ll turn to mush. If you don’t soak them enough, they’ll be dry and crumbly. Lay the dipped ladyfingers in a single layer in your baking dish. You’ll likely need two layers, so dip enough for the whole bottom.
Step 6: First Layer of Cream
Spread half of the mascarpone cream over the first layer of ladyfingers. Use an offset spatula to make it even. Don’t worry about making it perfect; it will settle. This layer should cover all the cookies.
Step 7: Second Layer of Ladyfingers
Dip another batch of ladyfingers in the coffee and lay them over the cream. Try to fit them as tightly as possible, breaking pieces if needed to fill gaps. They should be snug against each other.
Step 8: Final Cream Layer and Chill
Spread the remaining mascarpone cream over the second layer of ladyfingers. Smooth the top. Cover the dish tightly with plastic wrap. Place it in the refrigerator for at least 6 hours, but ideally overnight. This chilling time is non-negotiable. It allows the flavors to meld and the texture to set into that beautiful, firm-but-creamy consistency.
Step 9: Garnish and Serve
Just before serving, remove the plastic wrap. Grate dark chocolate over the top in a decorative pattern. Dust lightly with unsweetened cocoa powder using a fine-mesh sieve. Slice with a sharp knife dipped in hot water for clean cuts. Serve immediately.
Expert Tips & Tricks
Here’s everything I’ve learned from making this dozens of times. These tips will save you from my early mistakes.
Keep Everything Cold
The mascarpone and cream need to be cold to whip properly. If your kitchen is hot, put your mixing bowls in the fridge for 15 minutes before starting. Cold cream whips faster and holds peaks better.
Don’t Over-Soak the Cookies
I cannot stress this enough. Ladyfingers are like sponges. A quick dip is all they need. If you see coffee pooling on the plate after dipping, you’ve gone too long. The cookies should be moist but not falling apart.
Fold, Don’t Stir
When combining the mascarpone with the whipped cream, gentle folding preserves the air you worked so hard to incorporate. Stirring vigorously will deflate the cream and make the tiramisu dense and heavy.
Use Good Coffee
Since coffee is a primary flavor, bad coffee means bad tiramisu. Use a fresh, dark roast. If your coffee tastes burnt or stale, your dessert will too. I often use a blend meant for espresso.
Chill Your Knife
For clean slices, dip your knife in hot water and wipe it dry before each cut. This prevents the creamy layers from sticking to the blade and ruining the presentation.
Safety Note
If you’re serving this to pregnant women, young children, or elderly individuals, use pasteurized eggs or the cooked yolk method (heating yolks with sugar to 160°F) to eliminate any risk of salmonella.
Variations & Substitutions
Once you’ve nailed the basic version, here’s how you can mix it up. I’ve tried all of these.
Alcohol-Free Version
Simply omit the Marsala or rum. Add an extra tablespoon of coffee or even strong tea (like Earl Grey) to the dipping liquid. The flavor will still be rich and delicious, just less boozy.
Vegan Tiramisu
Replace mascarpone with a vegan cream cheese blend (like Kite Hill). Use aquafaba (chickpea water) instead of egg whites for whipping. Use coconut cream instead of heavy cream. Use vegan ladyfingers (check labels, as some contain honey). It’s not identical, but it’s surprisingly close.
Chocolate Tiramisu
Add 2 tablespoons of unsweetened cocoa powder to the mascarpone cream mixture. You can also sandwich a layer of chocolate ganache between the cream layers for extra decadence.
Fruit Tiramisu
Swap the coffee for a strong black tea or even apple juice. Layer fresh berries (like strawberries or raspberries) between the ladyfingers and cream. This is lighter and great for spring.
Gluten-Free
Use gluten-free ladyfingers. They can be more delicate, so dip them even faster than usual. Most major brands work well.
Serving & Storage
How to Serve:
I usually serve this straight from the fridge. It tastes best cold. Pair it with a simple espresso or a cup of tea. It’s also wonderful with a glass of dessert wine like Moscato or Port. For a party, I set up a small garnish station with extra chocolate shavings and cocoa powder so guests can customize their slices.
Storage:
Store leftover tiramisu in the refrigerator, covered tightly with plastic wrap or in an airtight container. It will keep for up to 3 days. After that, the ladyfingers may start to get too soft, and the cream may lose its texture. Do not freeze tiramisu. The dairy separates when frozen and thawed, resulting in a grainy, watery mess.
Make-Ahead Strategy:
This is best made 24 hours in advance. The flavors need time to marry. I usually make it the night before a dinner party. It saves me so much stress on the day of. Just remember to garnish it right before serving, not the night before, or the cocoa powder will dissolve into the cream.
Nutrition Information
I’m not a nutritionist, but here’s the breakdown if you’re tracking. Keep in mind that this is a rich, indulgent dessert.
| Per Serving (1/8 of recipe) | Amount |
|---|---|
| Calories | 380 |
| Protein | 6g |
| Carbs | 35g |
| Fat | 24g |
| Sugar | 22g |
| Sodium | 120mg |
What’s Good:
It provides a nice energy boost from the caffeine and sugar. The eggs and cheese offer some protein.
What to Know:
It’s high in saturated fat and sugar due to the cream, cheese, and cookies. Enjoy in moderation. If you’re watching carbs, use a smaller portion or try the fruit variation with fewer cookies.
Final Thoughts
So that’s my homemade tiramisu with mascarpone cream! I’ve probably talked your ear off at this point, but when you make a recipe this often, you have a lot to say about it. This dessert has saved me more times than I can count. It’s my answer to “what’s for dessert?” when I want something impressive but don’t want to stress. It’s elegant, it’s delicious, and it’s surprisingly easy.
Make it yours! Try different coffees, add your favorite liqueur, or change up the garnishes. The best recipes are the ones you adapt to your tastes. If you make this, drop a comment and let me know what you think! I love hearing how recipes turn out in your kitchen. And if something doesn’t work, tell me that too—I’m here to help troubleshoot.
Happy baking! And I hope your kitchen smells half as good as mine does right now (it smells like coffee and happiness).
Frequently Asked Questions
Can I use instant coffee instead of espresso?
Yes, you can. Dissolve 2-3 tablespoons of instant espresso powder in 1 cup of hot water and let it cool. It works surprisingly well and is much faster. Just make sure it’s cooled completely before dipping the cookies.
Why is my tiramisu runny?
Usually, this happens because the cream wasn’t whipped to stiff peaks, or the mascarpone was too warm. Make sure your cream is cold and whip it until it holds its shape. Also, ensure you didn’t over-soak the ladyfingers, which can release too much liquid into the cream.
Can I make this ahead of time?
Absolutely! In fact, it’s better made ahead. It needs at least 6 hours to set, but 24 hours is ideal. You can assemble it up to 2 days in advance. Just keep it covered in the fridge.
What kind of ladyfingers should I use?
Use traditional Italian Savoiardi. They are dry and crisp. Avoid soft sponge cakes or cookie-style ladyfingers that are already moist. The dry ones absorb the coffee perfectly without turning to mush.
Can I use regular cream cheese instead of mascarpone?
It’s not recommended. Mascarpone has a higher fat content and a milder, sweeter flavor. Regular cream cheese is tangier and has more water, which can make the texture grainy and the flavor too sharp. If you must substitute, use a high-fat cream cheese and drain it well, but the result won’t be authentic.
How do I store leftovers?
Store in an airtight container in the refrigerator for up to 3 days. Do not freeze it. The texture will suffer significantly upon thawing.
Pin This Recipe!
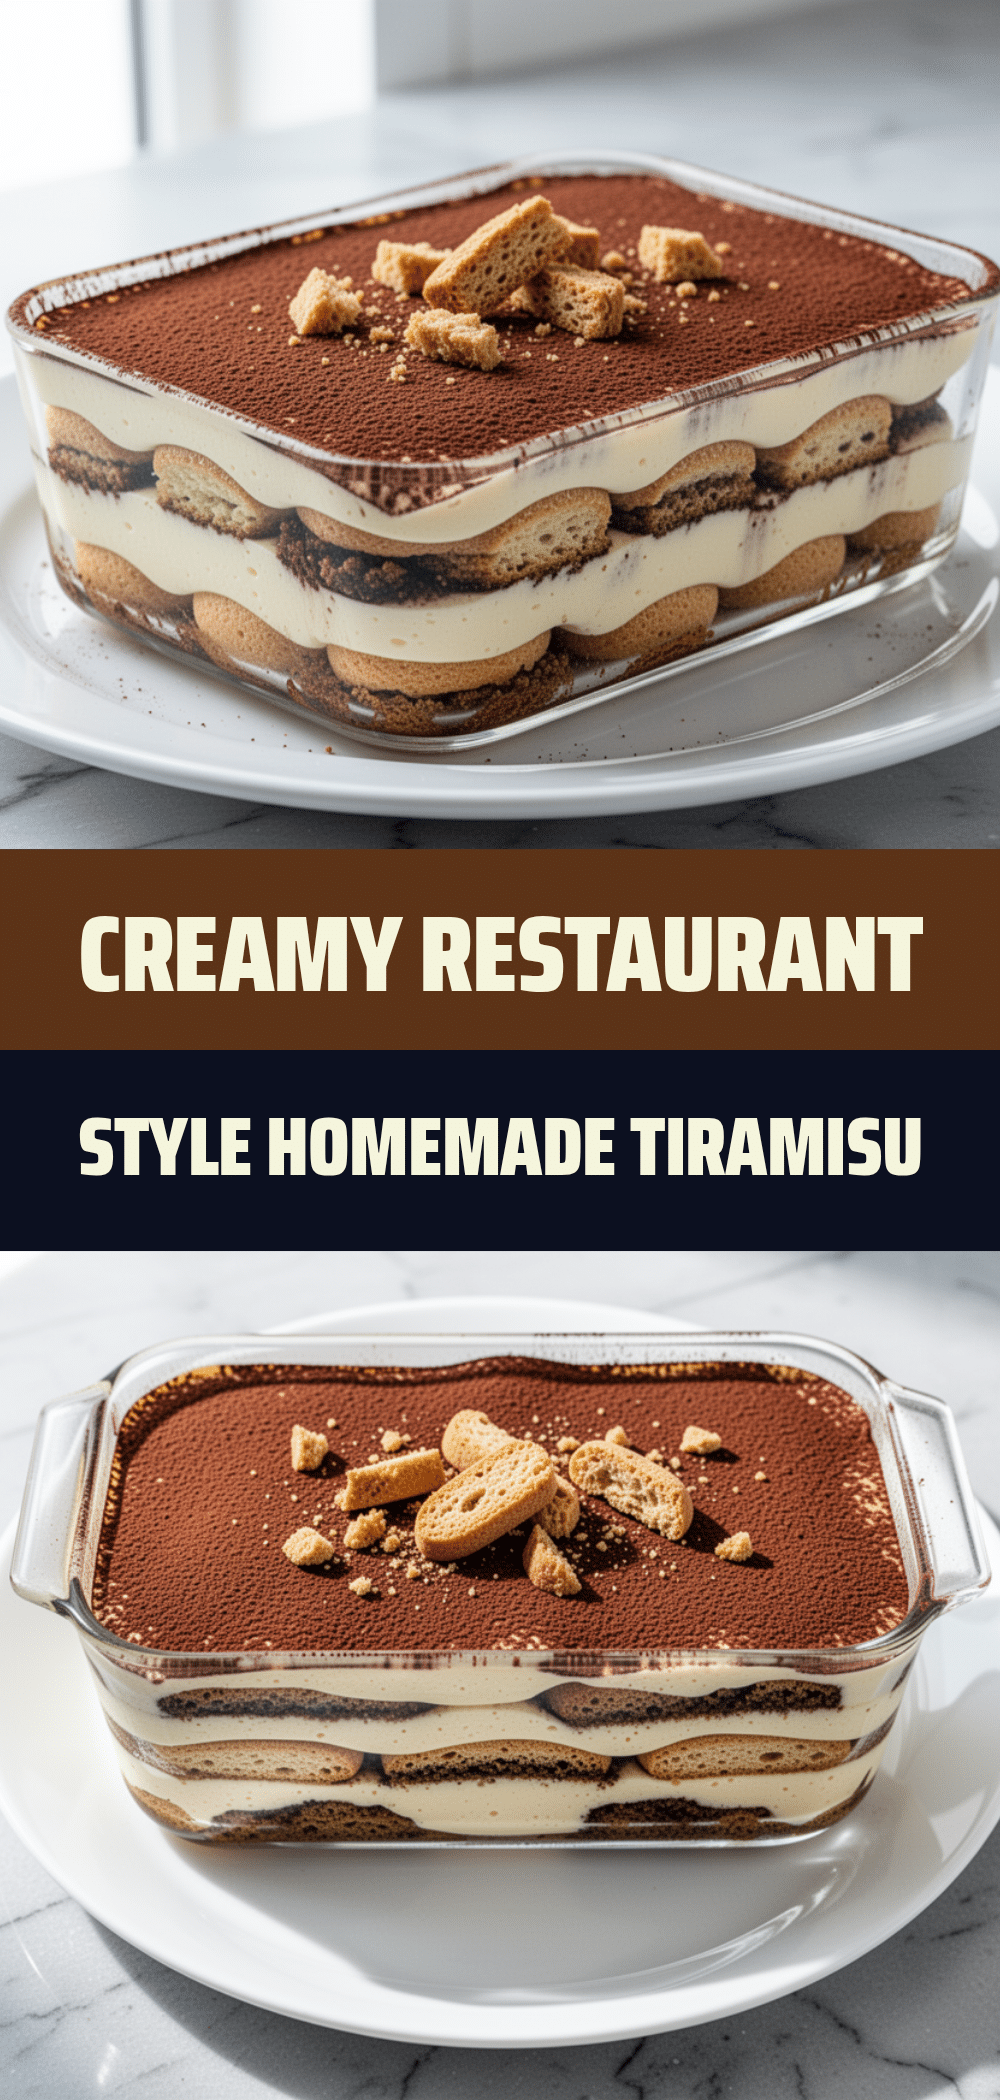
Homemade Tiramisu: 10-Min Best Recipe
- Total Time: 6 hours 30 minutes
- Yield: 8 servings 1x
Description
A silky, no-bake Italian dessert featuring layers of coffee-soaked ladyfingers and a rich, airy mascarpone cream. This recipe balances texture and flavor for a restaurant-quality treat that is surprisingly easy to make at home.
Ingredients
- 16 oz (450g) mascarpone cheese, cold
- 6 large egg yolks
- 3/4 cup (150g) granulated sugar
- 2 cups (480ml) heavy cream, cold
- 1 teaspoon vanilla extract
- 2 cups (480ml) strong espresso or coffee, cooled
- 1 tablespoon sugar (optional, for coffee)
- 2–3 tablespoons Marsala wine, dark rum, or coffee liqueur (optional)
- 24–30 ladyfingers (Savoiardi)
- Dark chocolate, for grating
- Unsweetened cocoa powder, for dusting
Instructions
- Brew strong espresso or coffee and let it cool completely to room temperature. Stir in optional sugar and alcohol if using.
- In a large bowl, beat egg yolks and 3/4 cup sugar on medium-high speed for 4-5 minutes until pale, thick, and fluffy.
- In a separate cold bowl, whip heavy cream and vanilla extract on high speed until stiff peaks form. Set aside.
- Add mascarpone to the beaten egg yolks and beat on low speed just until combined. Gently fold in the whipped cream until uniform.
- Quickly dip each ladyfinger into the cooled coffee mixture (1-2 seconds per side) and arrange in a single layer in a 9×13 inch dish.
- Spread half of the mascarpone cream over the first layer of ladyfingers.
- Dip another batch of ladyfingers in coffee and layer them over the cream.
- Spread the remaining mascarpone cream over the second layer of ladyfingers.
- Cover tightly with plastic wrap and refrigerate for at least 6 hours, ideally overnight.
- Before serving, grate dark chocolate over the top and dust with unsweetened cocoa powder. Slice with a hot knife and serve cold.
Notes
Keep all ingredients cold to ensure the cream whips properly. Do not over-soak the ladyfingers or they will become soggy. For safety, use pasteurized eggs if serving pregnant women, children, or the elderly. Do not freeze this dessert as the texture will become grainy.
- Prep Time: 30 minutes
- Cook Time: 0 minutes
- Category: Dessert
- Cuisine: Italian
Nutrition
- Serving Size: 1/8 of recipe
- Calories: 380
- Sugar: 22
- Sodium: 120
- Fat: 24
- Saturated Fat: 14
- Carbohydrates: 35
- Fiber: 1
- Protein: 6
Keywords: tiramisu, mascarpone cream, no-bake dessert, Italian dessert, coffee dessert, homemade tiramisu, easy dessert