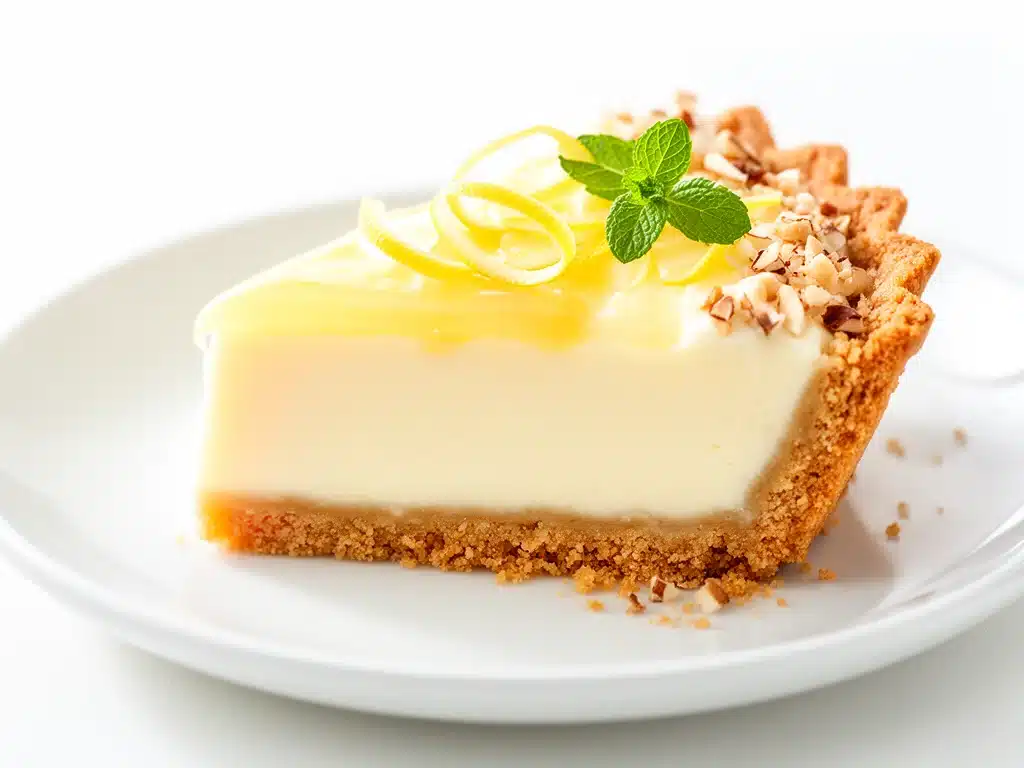
Last summer, on a scorching afternoon when the air conditioner was working overtime and the last thing I wanted was to turn on the oven, I found myself craving something bright, tangy, and refreshingly cool. I had a few lemons sitting on the counter and a box of graham crackers in the pantry, so I decided to sketch together a dessert that wouldn’t heat up the kitchen but would still feel like a special treat. That’s how this no-bake lemon icebox pie was born—purely out of necessity and a bit of kitchen curiosity.
After testing it a handful of times (and yes, eating way too much of it in the process), I landed on a version that balances zesty lemon brightness with a creamy, dreamy filling that your whole family will crave. This pie is perfect for those days when you want a homemade dessert without the fuss, and it’s become my go-to for summer gatherings, weekend treats, or whenever that sweet, tangy craving hits.
What makes this no-bake lemon icebox pie stand out? It’s that perfect harmony of tart and sweet, the buttery graham cracker crust that holds everything together, and the ease of just chilling instead of baking. Plus, it’s a dessert that feels fancy but comes together in under 20 minutes—win-win in my book.
Why You’ll Love This No-Bake Lemon Icebox Pie Recipe
This pie isn’t just a quick fix—it’s a dessert that consistently wows and fits right into busy family life. Here’s why I reach for this recipe over and over:
- Effortless Prep — No oven? No problem. This pie comes together in less than 20 minutes, making it ideal for hot days or last-minute guests.
- Tangy Brightness That Pops — The lemon juice and zest deliver a vibrant, refreshing zing without being overpowering. My kids (who usually avoid tart desserts) ask for seconds every time.
- Creamy, Silky Texture — The filling strikes the perfect balance between light and indulgent. It’s like a cloud of lemony goodness with just the right amount of sweetness.
- Family-Friendly — I’ve served this at birthday parties, potlucks, and casual dinners. Everyone loves it, from toddlers to grandparents.
- Make-Ahead Magic — You can prepare it a day ahead, giving the flavors time to meld and the crust to set perfectly. The stress-free dessert your future self will thank you for.
Honestly, this pie has become my secret weapon for those times I want a dessert that tastes like I spent hours but actually took minutes. If you’re anything like me, juggling family, work, and a million other things, this recipe is about to become your new best friend.
Ingredients You’ll Need
Here’s the best part: most of these ingredients are pantry staples or easy to find. I’m picky about a few things here, especially the crust and the lemon components, so I’ll share some tips along the way.
- Graham crackers (1 ½ cups / 150g, finely crushed) — I use honey or cinnamon-flavored graham crackers for an extra layer of warmth in the crust. If you want to mix it up, try vanilla wafers.
- Unsalted butter (6 tablespoons / 85g, melted) — This binds the crust and adds richness. I always use unsalted so I can control the salt level better.
- Granulated sugar (¼ cup / 50g) — Just enough sweetness to balance the tang of the lemon without overpowering.
- Sweetened condensed milk (1 can / 14 ounces / 396g) — This is the secret to the creamy filling’s silky texture and natural sweetness. Don’t swap this out unless you want a totally different pie.
- Fresh lemon juice (½ cup / 120ml, about 3-4 lemons) — Fresh is non-negotiable here. It brings the bright, tangy punch that canned juice just can’t match.
- Lemon zest (1 tablespoon, finely grated) — Adds an aromatic lemon boost. I always zest before juicing for ease.
- Heavy whipping cream (1 cup / 240ml) — Whipped until soft peaks form, folded into the filling for lightness and volume. Full fat only, please.
- Vanilla extract (1 teaspoon) — Just a touch to round out the flavors.
- Pinch of salt — Helps balance the sweetness and brighten the lemon flavor.
Optional toppings I love:
- Whipped cream dollops
- Fresh lemon slices or curls of lemon zest
- Toasted coconut flakes for texture
If you’re curious about variations or want to lighten it up, keep reading—I’ll share my favorite tweaks later.
Equipment Needed
You don’t need anything fancy for this no-bake lemon icebox pie. Here’s what I actually use in my kitchen:
- 9-inch pie dish — Glass or ceramic works best. I’ve even used disposable aluminum pans for easy cleanup at potlucks.
- Mixing bowls — One big bowl for the filling and a smaller one for whipping cream.
- Electric mixer or hand whisk — Whipping the cream by hand is doable but takes some arm power. My hand mixer gets the job done in minutes.
- Citrus zester or microplane — For getting fine lemon zest without the bitter pith.
- Spatula — For folding the whipped cream into the lemon filling gently.
- Measuring cups and spoons — Basic but essential.
Quick note: I sometimes use a food processor to crush the graham crackers, but putting them in a zip-top bag and smashing with a rolling pin works just as well.
How to Make It: Step-by-Step
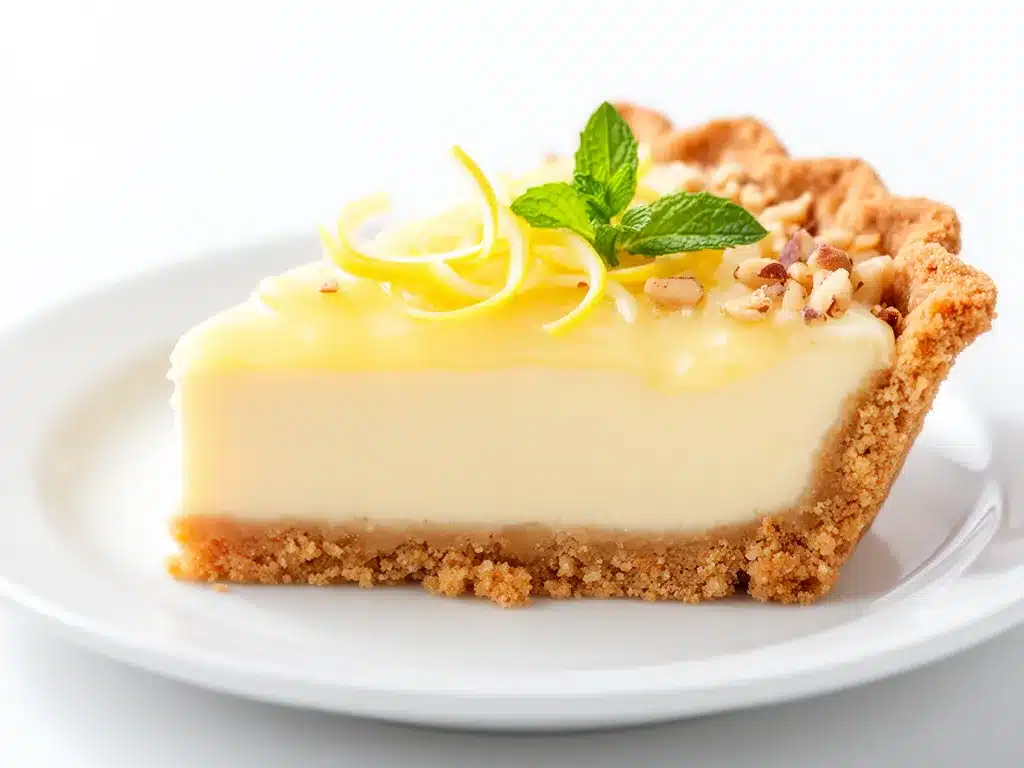
Alright, let’s dive into making this pie! I’m walking you through exactly how I do it, including those little tricks that make a difference.
Step 1: Make the Crust (10 minutes)
Start by crushing your graham crackers until they’re fine crumbs. I use a food processor, but a rolling pin and zip-top bag works perfectly. In a medium bowl, mix the crumbs with granulated sugar, then stir in melted butter until the mixture resembles wet sand.
Press the crust mixture firmly and evenly into the bottom and up the sides of your 9-inch pie dish. Use the bottom of a glass or measuring cup to pack it down tightly—this helps it hold together better after chilling.
Pop the crust in the fridge while you make the filling. This step chills and sets the crust so it holds up under that luscious filling.
Step 2: Prepare the Lemon Filling (10 minutes)
In a large bowl, whisk together the sweetened condensed milk, fresh lemon juice, lemon zest, vanilla extract, and a pinch of salt. The mixture will thicken slightly as the acid in the lemon juice reacts with the condensed milk—that’s what gives it that silky texture.
In a separate bowl, beat the heavy cream with an electric mixer until soft peaks form. This usually takes 3-4 minutes on medium speed.
Gently fold the whipped cream into the lemon mixture in batches, being careful not to deflate the air you just whipped in. This step lightens the filling and gives it that dreamy, fluffy texture.
Step 3: Assemble and Chill (at Least 4 Hours)
Pour the filling into the chilled graham cracker crust and smooth the top with a spatula. Cover loosely with plastic wrap and place it in the fridge for at least 4 hours, but ideally overnight. This chilling time lets the filling set to the perfect creamy consistency.
When you’re ready to serve, garnish with extra whipped cream, lemon slices, or toasted coconut if you’re feeling fancy.
Expert Tips & Tricks
- Use fresh lemons only. I’ve tried bottled lemon juice and it just doesn’t have the same zing or freshness. Plus, zest is key here.
- Don’t rush the chilling. The pie needs at least 4 hours to firm up properly. I usually make it the night before and it’s always perfect.
- Press that crust firmly. A tightly packed crust means less crumbly slices and a more professional look.
- Fold the whipped cream gently. Overmixing can deflate the filling, making it dense instead of airy.
- Leftover whipped cream is your friend. Save some to dollop on top at serving time for that extra touch.
One mistake I made the first few times was using cold heavy cream straight from the fridge—it took forever to whip and sometimes ended up lumpy. Now I always take it out 15 minutes before whipping or warm it gently for 10 seconds in the microwave.
Variations & Substitutions
Once you’ve nailed this classic, here are some fun ways to switch it up without losing that signature tang:
- Key Lime Version: Swap lemon juice and zest for fresh key lime juice and zest. It gives a slightly sweeter, more floral note.
- Berry Swirl: Fold in ½ cup of fresh or thawed frozen raspberries or blueberries into the filling before chilling. Adds color and a little fruity punch.
- Graham Cracker Alternatives: Use crushed digestive biscuits or vanilla wafers for a different crust flavor.
- Lightened-Up: Substitute half the heavy cream with Greek yogurt for a tangier, lower-fat filling. The texture will be a bit denser but still delicious.
- Dairy-Free: Use coconut cream whipped in place of heavy cream and a sweetened condensed coconut milk alternative.
For a fun twist, I often make a batch of double chocolate cookies to serve alongside this pie—they’re a hit contrast of rich and bright.
Serving & Storage
This pie is best served chilled straight from the fridge. I usually slice it with a sharp knife dipped in hot water—that helps get clean edges without mess.
Serving Ideas:
- Top with fresh whipped cream and a few thin lemon slices or curls of zest for a pretty presentation.
- A sprinkle of toasted coconut or chopped pistachios adds great texture and color.
- Pair with a light, crisp white wine or a sparkling lemonade for a refreshing summer combo.
Storage: Store leftovers in an airtight container in the fridge for up to 4 days. The crust may soften a bit over time but still tastes great.
Reheating: This dessert is best served cold and doesn’t reheat well. If you want a quick treat, slice and enjoy chilled or at room temperature.
For a full meal idea that pairs well with this kind of fresh dessert, I sometimes make chicken bacon ranch sliders—they’re savory and satisfying before this sweet finish.
Nutrition Information
I’m not a nutritionist, but here’s a rough breakdown per serving (based on 8 servings):
| Calories | 320 |
|---|---|
| Protein | 5g |
| Carbohydrates | 38g |
| Fiber | 1g |
| Sugar | 28g |
| Fat | 16g |
| Saturated Fat | 10g |
| Cholesterol | 55mg |
| Sodium | 150mg |
| Calcium | 100mg |
What’s good? You get some protein and calcium from the dairy, and the fresh lemon adds vitamin C. What to watch? The sugar and saturated fat are on the higher side, thanks to the sweetened condensed milk and heavy cream. For a lighter version, try the substitutions above or enjoy smaller slices with fresh fruit.
Final Thoughts
So that’s my easy, no-bake lemon icebox pie with tangy brightness your whole family will crave. I probably could have just said “easy no-bake lemon pie,” but where’s the fun in that? This recipe has saved countless summer afternoons and made dessert feel effortless without losing any of the wow factor.
It’s the kind of dessert that feels special but doesn’t stress you out—and that’s a rare combo in my kitchen. Whether you’re new to making pies or an experienced baker looking for a no-fuss option, this recipe will quickly become a favorite.
Make it your own! Add more zest if you love lemon, swap in berries for a twist, or keep it classic with a generous dollop of whipped cream. And if you ever want a sweet treat that pairs perfectly with a cozy coffee moment, try pairing this with a slice of pumpkin streusel coffee cake—talk about dessert harmony.
If you make this pie, please drop a comment and let me know how it turns out! I love hearing from you, whether it’s a glowing review or a question about a step. Cooking is better when we share tips and stories.
Happy chilling and happy eating! May your kitchen smell like fresh lemons and your pie be perfectly tangy every single time.
Frequently Asked Questions
Q: Can I use bottled lemon juice instead of fresh?
A: You can, but honestly, it won’t taste the same. Bottled juice is missing that bright, fresh zing and the zest is a huge part of the flavor here. If fresh lemons aren’t available, try to find fresh lemon juice in the refrigerated section, but fresh lemons are best.
Q: How long does this pie need to chill?
A: At least 4 hours, but overnight is even better. The longer it chills, the more the filling sets and the crust soaks up the moisture, giving you that perfect slice.
Q: Can I make this pie gluten-free?
A: Absolutely! Just swap the graham crackers for a gluten-free variety or crushed gluten-free cookies. The rest of the recipe is naturally gluten-free.
Q: What if I don’t have heavy cream?
A: Heavy cream is key for whipping and giving the filling that fluffy texture. You could try whipping chilled coconut cream for a dairy-free version or mix Greek yogurt with a little whipped butter for a lighter substitute, but it won’t be quite the same.
Q: Can I double this recipe for a bigger crowd?
A: Yes! Double all the ingredients and use a larger pan or two pie dishes. Just keep the chilling time the same and make sure you gently fold the whipped cream in batches.
Q: How do I get clean slices when serving?
A: Dip your knife in hot water and wipe it dry before slicing. This helps cut through the creamy filling without dragging or sticking.
Q: Can I freeze this pie?
A: Freezing is tricky because the filling can separate and the crust can get soggy. I don’t recommend freezing this pie. It’s best fresh or refrigerated for up to 4 days.
Pin This Recipe!


No-Bake Lemon Icebox Pie
- Total Time: 4 hours 20 minutes
- Yield: 8 servings 1x
Description
A quick and easy no-bake lemon icebox pie with a tangy, creamy filling and a buttery graham cracker crust, perfect for hot days and family gatherings.
Ingredients
- 1 ½ cups (150g) graham crackers, finely crushed
- 6 tablespoons (85g) unsalted butter, melted
- ¼ cup (50g) granulated sugar
- 1 can (14 ounces / 396g) sweetened condensed milk
- ½ cup (120ml) fresh lemon juice (about 3–4 lemons)
- 1 tablespoon lemon zest, finely grated
- 1 cup (240ml) heavy whipping cream, whipped to soft peaks
- 1 teaspoon vanilla extract
- Pinch of salt
Instructions
- Crush graham crackers into fine crumbs using a food processor or rolling pin and zip-top bag.
- In a medium bowl, mix graham cracker crumbs with granulated sugar, then stir in melted butter until mixture resembles wet sand.
- Press the crust mixture firmly and evenly into the bottom and up the sides of a 9-inch pie dish. Use the bottom of a glass or measuring cup to pack it down tightly.
- Chill the crust in the refrigerator while preparing the filling.
- In a large bowl, whisk together sweetened condensed milk, fresh lemon juice, lemon zest, vanilla extract, and a pinch of salt until slightly thickened.
- In a separate bowl, beat heavy whipping cream with an electric mixer until soft peaks form (about 3-4 minutes).
- Gently fold the whipped cream into the lemon mixture in batches, being careful not to deflate the air.
- Pour the filling into the chilled crust and smooth the top with a spatula.
- Cover loosely with plastic wrap and refrigerate for at least 4 hours or overnight to set.
- Before serving, garnish with whipped cream, lemon slices, or toasted coconut flakes if desired.
Notes
Use fresh lemons only for best flavor. Chill the pie at least 4 hours or overnight for best texture. Press crust firmly to avoid crumbling. Fold whipped cream gently to keep filling airy. Leftover whipped cream can be used as topping. For easier whipping, let heavy cream sit at room temperature for 15 minutes before whipping.
- Prep Time: 20 minutes
- Cook Time: 0 minutes
- Category: Dessert
- Cuisine: American
Nutrition
- Serving Size: 1 slice (1/8 of pie)
- Calories: 320
- Sugar: 28
- Sodium: 150
- Fat: 16
- Saturated Fat: 10
- Carbohydrates: 38
- Fiber: 1
- Protein: 5
Keywords: no-bake lemon pie, lemon icebox pie, easy lemon dessert, summer dessert, no oven pie, tangy lemon pie