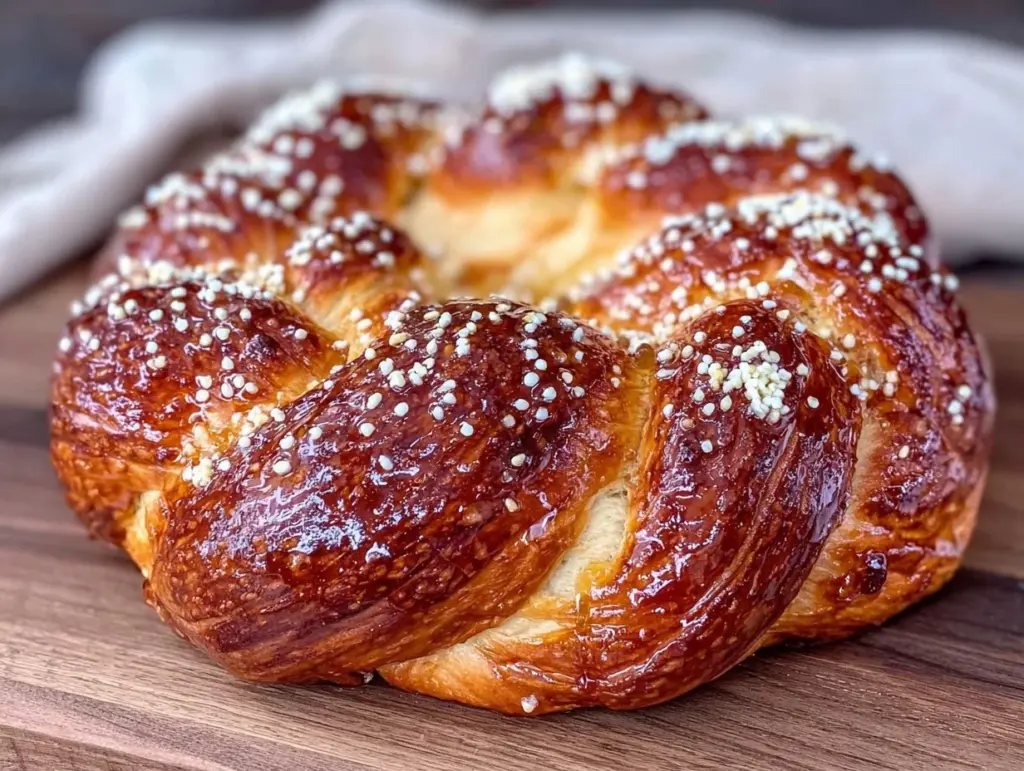
I still remember the first Rosh Hashanah I spent living on my own. It was 2015, and I was determined to make everything from scratch. I wanted that perfect, golden, braided loaf that smells like heaven. So I went to a standard recipe online, bought a bag of flour, and started mixing. I followed it to the letter. I kneaded until my arms burned. I waited for the first rise. I braided it beautifully.
And then I ate it. Oh, it was delicious. But here’s the thing: it was a massive loaf. Two pounds of bread. For one person.
I ate two slices for breakfast on Rosh Hashanah morning. I had toast for lunch. I brought some to work. By day three, that beautiful, sweet, eggy bread had gone slightly stale. I tried to revive it in the toaster, but it was dry and tough. I ended up throwing half of it away, and honestly, that tasted worse than the bread itself. It felt like a failure. I had tried so hard, but the recipe didn’t fit my life.
That was the moment I decided I needed a small batch Rosh Hashanah round challah that actually made sense for one or two people. No more giant loaves. No more throwing away good food. Just enough sweet, honey-kissed bread for a cozy, symbolic morning, with nothing left over to fight with later.
After testing this round challah recipe about seven times—yes, I ate a lot of round bread in those weeks—I finally nailed the ratio. It’s tender, it holds its shape beautifully in the pan, and it bakes up in a fraction of the time. If you’re tired of standard recipes that feed an army when you just want a peaceful holiday breakfast for you, this is the one. It’s finally a recipe that doesn’t leave you with a week of leftovers you didn’t ask for.
Why You’ll Love This Small Batch Round Challah
There is something deeply satisfying about baking bread that fits your actual life. This small batch round challah isn’t just about convenience; it’s about getting the perfect texture without the commitment of a massive loaf. Here’s why this version has taken over my holiday baking:
- Perfectly Portioned — This recipe makes one single, beautiful round loaf (about 8-10 inches wide). It feeds 2-4 people generously, or maybe 6 if you’re just having it with coffee. No massive leftovers.
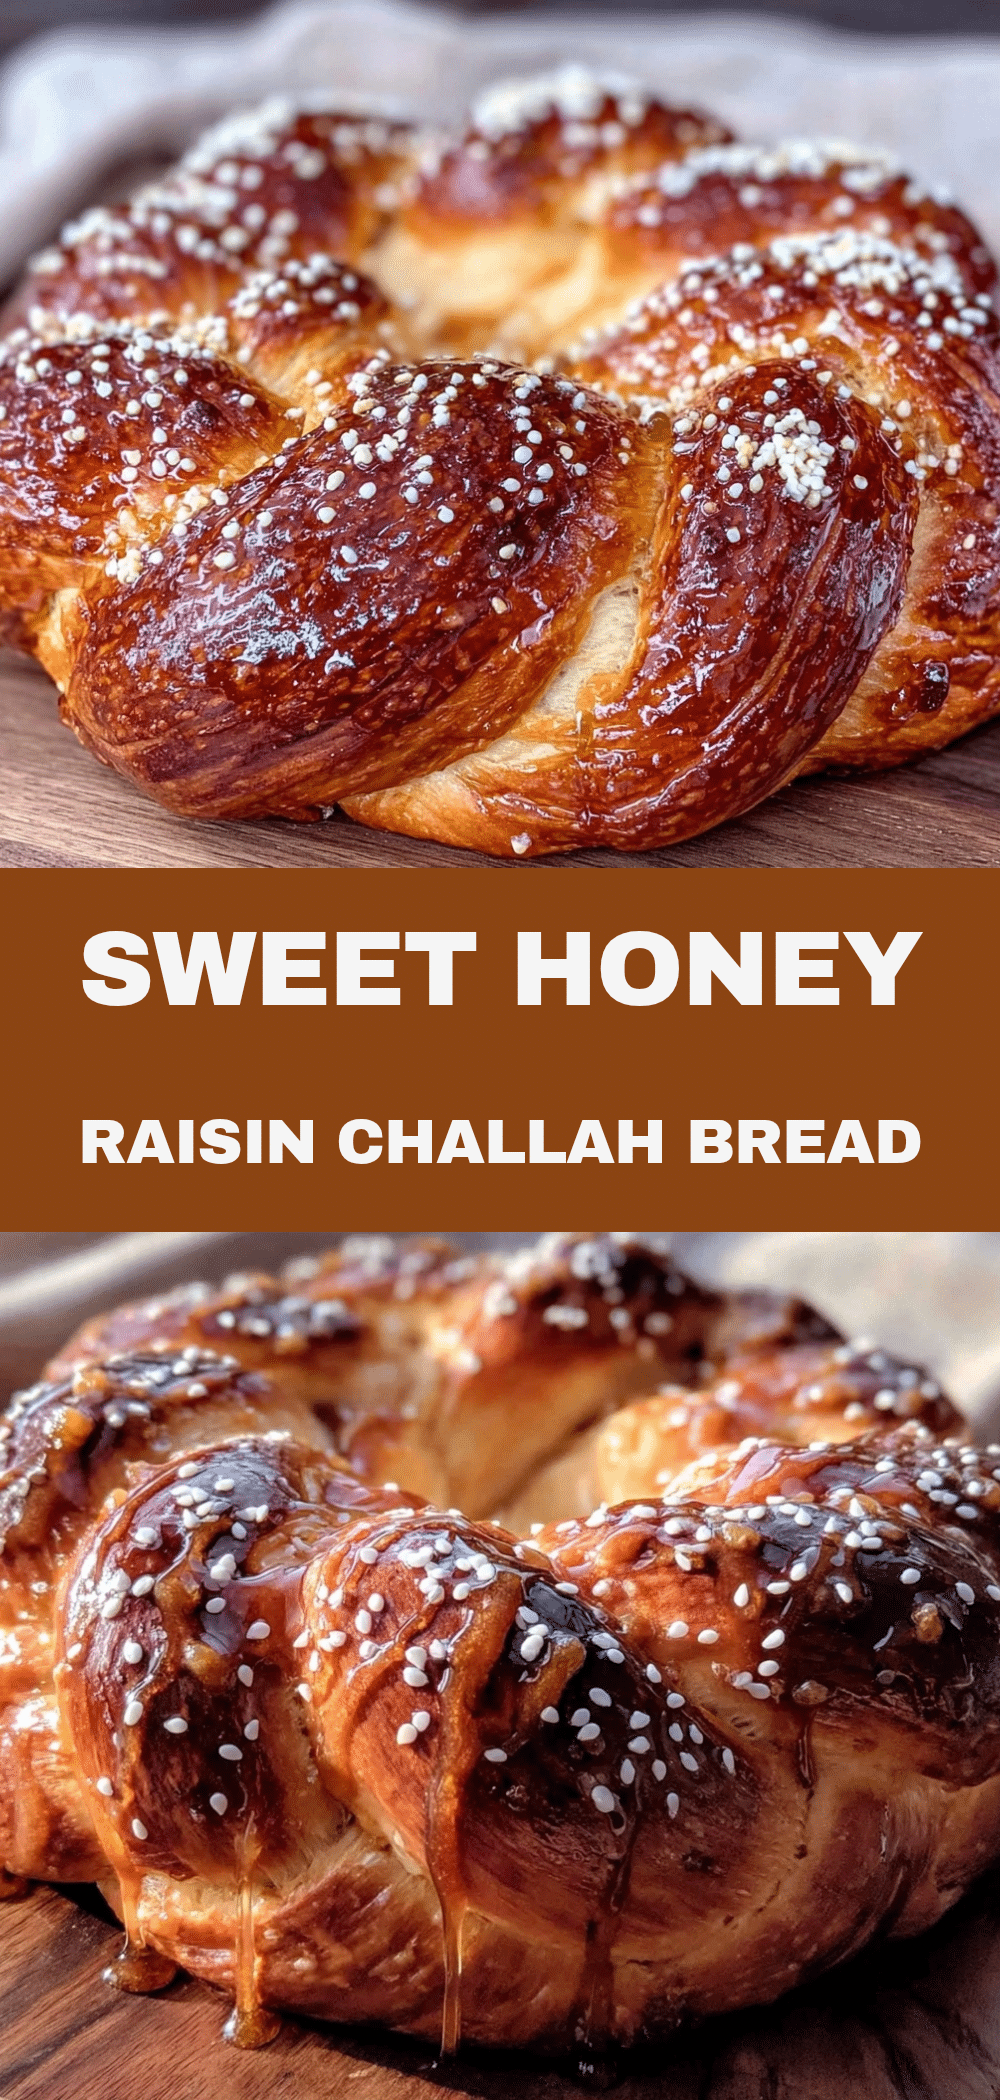
- Round Shape Magic — We skip the complex braiding for the round “table loaf” shape. It’s traditional for Rosh Hashanah (symbolizing the cycle of the year) and so much easier to shape perfectly every time.
- Quick Rise Time — Because the dough ball is smaller, it rises faster. You’re looking at about 1.5 hours total active time, rather than the 3-4 hours for a standard loaf. Perfect for a lazy holiday morning.
- Freezes Like a Dream — Since it’s a small loaf, if you do have a slice or two left, it freezes flat and reheats perfectly. No weird, dense freezer-burned chunks from a giant loaf.
- Soft and Sweet — The honey and egg ratio is tweaked for this size so it’s not dry. It stays soft for two days, which is plenty.
This is the challah I make when I want the ritual without the stress. It’s cozy, it’s symbolic, and it’s just the right amount of food.
Ingredients You’ll Need
Good news: you probably have most of these in your pantry already. This small batch round challah uses simple, wholesome ingredients. The key here is quality, especially for the honey and the yeast, since there’s less dough to mask any imperfections.
For the Dough
Bread flour (2 ¼ cups / 280g) — I prefer bread flour for challah because of the higher protein content. It gives that chewy, bouncy texture. All-purpose works, but the bread will be softer and less structured. If you only have all-purpose, that’s fine, just don’t over-knead.
Instant yeast (2 ¼ teaspoons / 1 packet) — Standard packet size. I love instant yeast because you don’t need to proof it in water first. Just mix it right in. Active dry works too, but you’ll need to warm the milk and let it sit for 5 minutes first.
Warm milk (¾ cup / 180ml) — Whole milk is best for richness. Make sure it’s warm to the touch (about 110°F/45°C), not hot. If it’s too hot, it’ll kill the yeast. If it’s cold, the rise will take forever. I just microwave it for 45 seconds.
Honey (3 tablespoons / 45ml) — This is where the sweetness comes from. Use good quality honey. I love clover or orange blossom for Rosh Hashanah. It adds that distinct holiday flavor. Maple syrup can substitute, but the flavor will be different.
Egg (1 large, room temperature) — This binds the dough and adds richness. Room temperature eggs incorporate better into the dough than cold ones.
Vegetable oil (3 tablespoons / 45ml) — I use vegetable or canola oil. Some recipes use butter, but oil keeps the crumb softer for longer, which is great for a small loaf that might sit out a day.
Salt (1 teaspoon) — Don’t skip this. It balances the sweetness. Use fine sea salt or table salt.
For the Egg Wash & Topping
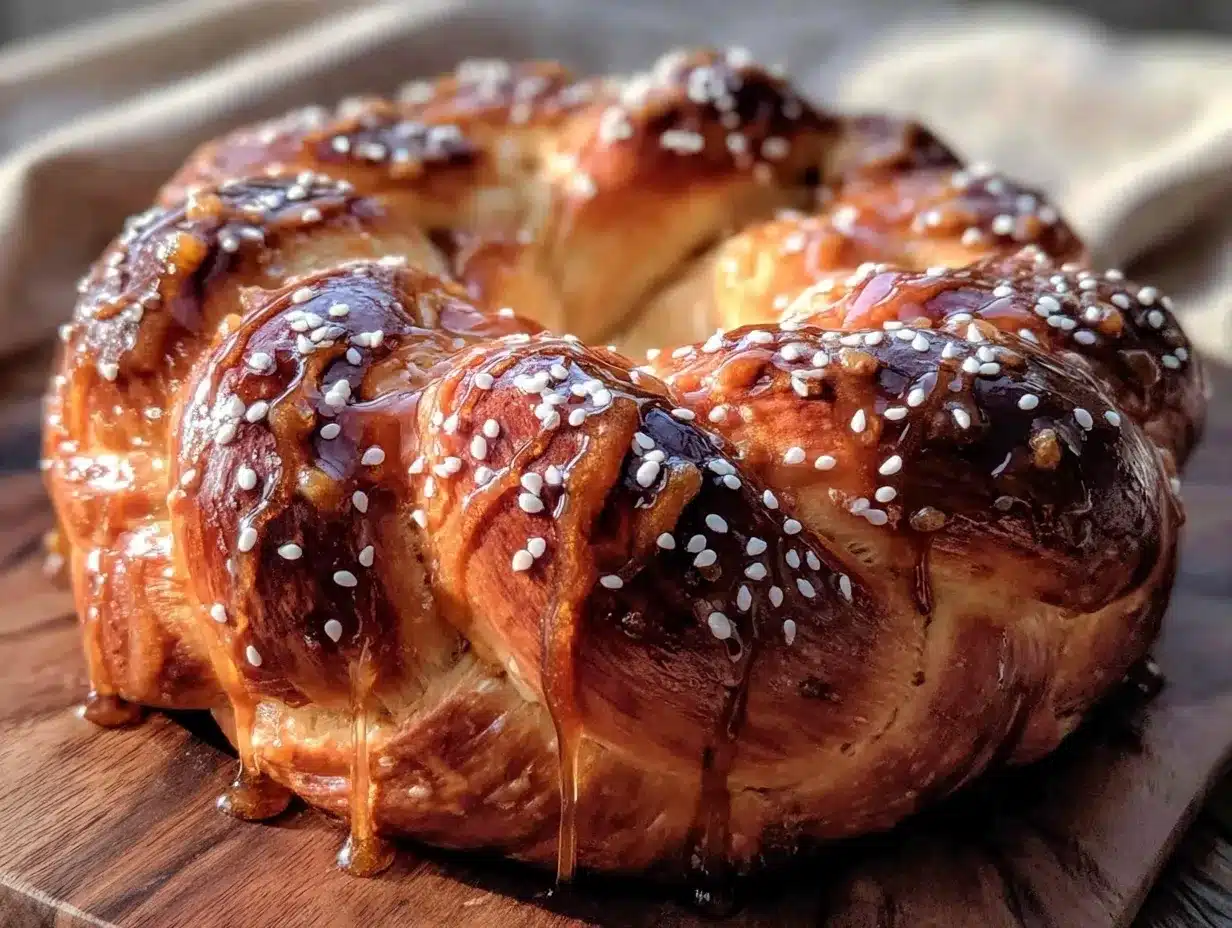
Egg (1 large, beaten with 1 tablespoon water) — This is for the shiny, golden crust. The water thins it out so it spreads evenly.
Sesame seeds or poppy seeds (1-2 tablespoons) — Traditional for round challah. Sesame is nutty and classic. Poppy adds a nice crunch. You can skip this, but it really completes the look.
Extra honey (optional) — I sometimes brush the warm loaf with a tiny bit of thinned honey for extra shine and sweetness.
Shopping Tips & Substitutions
No bread flour? Use all-purpose, but add 1 tablespoon of vital wheat gluten if you have it. If not, just accept a softer texture.
Dairy-free? Use warm almond or oat milk instead of dairy milk. The rest of the recipe is naturally dairy-free (using oil instead of butter).
Egg-free? This is trickier for challah, as the egg provides structure. You can try a flax egg (1 tbsp ground flax + 3 tbsp water), but the texture will be denser. It won’t be traditional challah, but it’ll still be tasty bread.
Equipment Needed
You don’t need fancy tools for this small batch round challah. Here’s what I actually use:
9-inch round cake pan or 8-inch pie dish — I use a round cake pan because it gives nice straight sides. A pie dish works too, but the bread will be flatter. Make sure it’s greased well.
Stand mixer with dough hook — I use this for convenience. It saves my hands. But you can absolutely do this by hand. It just takes about 10 minutes of kneading.
Measuring cups and spoons — Standard stuff. I love my nested set.
Parchment paper — I line the pan with parchment for easy cleanup and to ensure the bottom doesn’t stick. It’s worth the extra step.
Pastry brush — For the egg wash. A silicone one is easy to clean.
Cooling rack — Essential for letting the bread cool evenly so the bottom doesn’t get soggy.
How to Make It: Step-by-Step
Alright, let’s make this! I’m walking you through exactly how I do it, including the little tricks I’ve picked up to ensure your small batch round challah turns out perfect.
Step 1: Mix the Dough (5-8 minutes)
In the bowl of a stand mixer (or a large bowl if mixing by hand), combine the warm milk, honey, egg, and oil. Whisk them together until the honey is dissolved. Add the yeast and stir gently. Let it sit for 5 minutes. You should see it get a bit foamy—that means the yeast is alive and happy.
Add the salt, then gradually add the flour. If using a mixer, start on low speed with the dough hook. If mixing by hand, stir with a wooden spoon until it becomes a shaggy mass. The dough will look sticky at first. This is normal.
Step 2: Knead Until Smooth (8-10 minutes)
Increase the mixer speed to medium-low. Let it knead for 8-10 minutes. The dough should pull away from the sides of the bowl and form a smooth, slightly tacky ball. It should pass the “windowpane test”—if you tear off a small piece and stretch it, it should get thin and translucent without tearing. If you’re kneading by hand, turn it out onto a floured surface and push, fold, and turn for 10 minutes. Add a sprinkle of flour if it’s super sticky, but don’t overdo it.
Step 3: First Rise (1 Hour)
Lightly grease a clean bowl with oil. Place the dough ball in the bowl and turn it once to coat it in oil. Cover with plastic wrap or a damp kitchen towel. Let it rise in a warm, draft-free spot for about 1 hour. It should double in size. Since this is a small batch, it goes faster than a giant loaf—check it at 45 minutes.
Step 4: Shape the Round Loaf (5 minutes)
Grease your 9-inch round cake pan or line it with parchment. Gently punch down the risen dough to release air bubbles. Turn it out onto a lightly floured surface. Gently press it into a rough circle. Then, starting from the outside, roll the dough inward toward the center, tucking the edges underneath to create a smooth, tight ball. This tension is key for a nice dome shape.
Place the shaped dough ball into the prepared pan. It should fit snugly but have a little room to expand.
Step 5: Second Rise (30-45 minutes)
Cover the pan loosely with oiled plastic wrap. Let it rise again for 30-45 minutes. It should puff up and fill the pan, maybe rising slightly above the rim. It should feel jiggly and soft when you gently poke it.
Step 6: Bake (30-35 minutes)
Preheat your oven to 350°F (175°C). While it heats, brush the top of the risen dough generously with the egg wash. Sprinkle with sesame or poppy seeds.
Bake for 30-35 minutes. The top should be a deep, golden brown. If it’s browning too fast, tent it loosely with foil after 20 minutes. The loaf is done when it reaches an internal temperature of 190°F (88°C) or when it sounds hollow when you tap the bottom.
Step 7: Cool and Enjoy
Let the bread cool in the pan for 10 minutes, then turn it out onto a wire rack to cool completely. This is the hardest part. Resist the urge to slice it warm. The inside needs to set. If you cut it too soon, it will be gummy.
Expert Tips & Tricks
Here’s everything I’ve learned from making this small batch round challah dozens of times. These tips will save you from my mistakes.
Don’t Over-Flour
Challah dough should be slightly tacky, not sticky. If you add too much flour, the bread will be dense and dry. If it sticks to your hands, oil your hands instead of adding more flour. This keeps the crumb soft.
Watch the Oven Temp
Ovens vary. If your oven runs hot, your small loaf might burn on the outside before cooking inside. Use an oven thermometer to check. If the top is browning too quickly, use that foil tent.
Make sure your egg and milk are room temperature. Cold ingredients can shock the yeast and slow down the rise. I usually take the egg out of the fridge while the milk is warming up.
The “Jiggle” Test
After the second rise, gently shake the pan. The loaf should jiggle like a waterbed. If it’s firm, it needs more time. If it’s too loose and spreading out, it might be over-proofed.
Brush with Honey
For that extra shiny, sweet crust, mix 1 tablespoon honey with 1 tablespoon water. Brush this over the loaf immediately after it comes out of the oven. It adds a beautiful gloss.
Variations & Substitutions
Once you’ve nailed the basic version, here’s how you can mix it up. I’ve tried all of these.
Apple Cinnamon Round
After shaping the dough, sprinkle a mixture of 2 tbsp brown sugar and 1 tsp cinnamon on top before the second rise. It creates a delicious, spiced crust. This pairs beautifully with my Rosh Hashanah Honey Apple Cake if you’re making a full holiday spread.
Poppy Seed Focus
Use 2 tablespoons of poppy seeds instead of sesame. They add a nice nutty flavor and visual contrast. I love this version for a more traditional look.
Whole Wheat Blend
Swap ½ cup of the bread flour for whole wheat flour. It adds a nuttier flavor and more fiber. The texture will be slightly denser, which some people prefer.
Sugar-Free Option
Use a sugar-free honey alternative or maple syrup. The yeast might rise slightly slower, so give it extra time in the first rise.
Serving & Storage
How to Serve:
I slice this round challah into wedges, like a pie. It’s perfect with a schmear of cream cheese or butter. It’s also amazing toasted. For Rosh Hashanah, I serve it with honey on the side for dipping.
Leftovers:
Store in an airtight container or plastic bag at room temperature for up to 3 days. It stays soft for 2 days, then starts to dry out.
Reheating:
To reheat, wrap a slice in foil and warm in a 300°F oven for 10 minutes. Or, toast it like bread. It reheats better than most breads because of the egg and oil content.
Freezing:
This small batch loaves freezes incredibly well. Let it cool completely, then wrap tightly in plastic wrap and foil. Freeze for up to 3 months. Thaw at room temperature or warm directly from frozen in the oven.
Nutrition Information
I’m not a nutritionist, but here’s the breakdown if you’re tracking. This is per serving (1 wedge, assuming 8 wedges).
| Nutrient | Amount |
|---|---|
| Calories | 145 |
| Protein | 4g |
| Carbs | 24g |
| Fiber | 1g |
| Sugar | 5g |
| Fat | 4g |
| Sodium | 180mg |
Look, this is bread with honey and egg. It’s not a diet food. But it’s way better than store-bought, and you know exactly what’s in it. When I want to make it lighter, I use whole wheat flour and reduce the honey slightly. But usually? I just enjoy a slice and appreciate the tradition.
Final Thoughts
So that’s my go-to small batch round challah! I’ve probably talked your ear off at this point, but when you make a recipe this often, you have a lot to say about it. This has saved my Rosh Hashanah mornings more times than I can count. It’s my answer to “what’s for breakfast” when I want something special but don’t want the stress of a massive bake.
Make it yours! Try different toppings, adjust the sweetness, or just enjoy it plain with butter. The best recipes are the ones you adapt to your life. If you make this, drop a comment and let me know what you think! I love hearing how recipes turn out in your kitchen. And if something doesn’t work, tell me that too—I’m here to help troubleshoot.
Happy baking! And I hope your kitchen smells half as good as mine does right now.
Frequently Asked Questions
Can I use active dry yeast instead of instant yeast?
Yes! Just add ¼ cup of warm water to the milk step and sprinkle the yeast on top. Let it sit for 5-10 minutes until it’s foamy. Then proceed with the recipe. The rise time might be 10-15 minutes longer, but it works just fine.
Why did my challah turn out dense?
Usually, this means the yeast wasn’t active or the dough was over-floured. Check your yeast expiration date. Also, make sure you didn’t add too much flour during kneading. The dough should be soft and tacky, not stiff.
Can I bake this in a loaf pan instead of a round pan?
You can, but the shape will be different. Use a small 4×8 inch loaf pan. The bake time might be slightly shorter (check at 25 minutes). The round pan is traditional for Rosh Hashanah because of the circle shape, so I recommend sticking with it if you can.
How do I store leftovers?
Keep it in an airtight container at room temperature for 2-3 days. For longer storage, freeze it. Do not refrigerate, as it will make the bread go stale faster.
Can I make the dough ahead and refrigerate it?
Yes! After the first rise, punch it down, shape it, place it in the pan, cover tightly, and refrigerate for up to 24 hours. Let it come to room temperature and rise for an extra 30-60 minutes before baking. This is great for planning ahead.
Is this recipe vegan?
Not traditionally, as it uses egg and milk. But you can make it vegan by using plant-based milk (soy or oat) and a flax egg (1 tbsp ground flax + 3 tbsp water) instead of the egg. The texture will be slightly different, but it will still be delicious.
Can I add raisins or nuts?
Absolutely! Toss ½ cup of raisins or walnuts into the dough after the first rise and before kneading the second time. Just make sure they’re coated in a little flour so they don’t sink to the bottom.
Pin This Recipe!
Small Batch Rosh Hashanah Round Challah: No Leftovers
- Total Time: 1 hour 50 minutes
- Yield: 8 servings 1x
Description
A tender, honey-kissed round challah recipe designed for 2-4 people, eliminating leftovers while maintaining traditional holiday symbolism and flavor.
Ingredients
- 2 ¼ cups (280g) bread flour
- 2 ¼ teaspoons (1 packet) instant yeast
- ¾ cup (180ml) warm milk
- 3 tablespoons (45ml) honey
- 1 large egg (room temperature)
- 3 tablespoons (45ml) vegetable oil
- 1 teaspoon salt
- 1 large egg (beaten with 1 tablespoon water, for egg wash)
- 1–2 tablespoons sesame seeds or poppy seeds
- 1 tablespoon honey mixed with 1 tablespoon water (optional, for glaze)
Instructions
- In a stand mixer bowl or large bowl, combine warm milk, honey, egg, and oil. Whisk until honey is dissolved.
- Add yeast and stir gently. Let sit for 5 minutes until foamy.
- Add salt and gradually add flour. Mix on low speed with dough hook or by hand until a shaggy mass forms.
- Knead on medium-low speed for 8-10 minutes until dough is smooth, slightly tacky, and passes the windowpane test.
- Place dough in a lightly greased bowl, turning to coat. Cover and let rise in a warm spot for 1 hour until doubled.
- Grease a 9-inch round cake pan or line with parchment. Punch down dough, press into a rough circle, and roll inward to form a tight ball.
- Place dough ball in prepared pan. Cover loosely with oiled plastic wrap and let rise for 30-45 minutes until puffy and jiggly.
- Preheat oven to 350°F (175°C). Brush risen dough with egg wash and sprinkle with seeds.
- Bake for 30-35 minutes until deep golden brown and internal temperature reaches 190°F (88°C). Tent with foil if browning too fast.
- Cool in pan for 10 minutes, then transfer to a wire rack to cool completely before slicing.
Notes
Ensure milk is warm (110°F/45°C) but not hot to avoid killing yeast. Dough should be slightly tacky, not sticky; oil hands instead of adding extra flour. For extra shine, brush with honey-water mixture immediately after baking. Can be made vegan by substituting plant milk and using a flax egg.
- Prep Time: 15 minutes
- Cook Time: 30-35 minutes
- Category: Breakfast
- Cuisine: Jewish
Nutrition
- Serving Size: 1 wedge (recipe yiel
- Calories: 145
- Sugar: 5
- Sodium: 180
- Fat: 4
- Saturated Fat: 0.5
- Carbohydrates: 24
- Fiber: 1
- Protein: 4
Keywords: Rosh Hashanah, challah, round challah, small batch bread, holiday baking, Jewish holiday recipes, easy challah