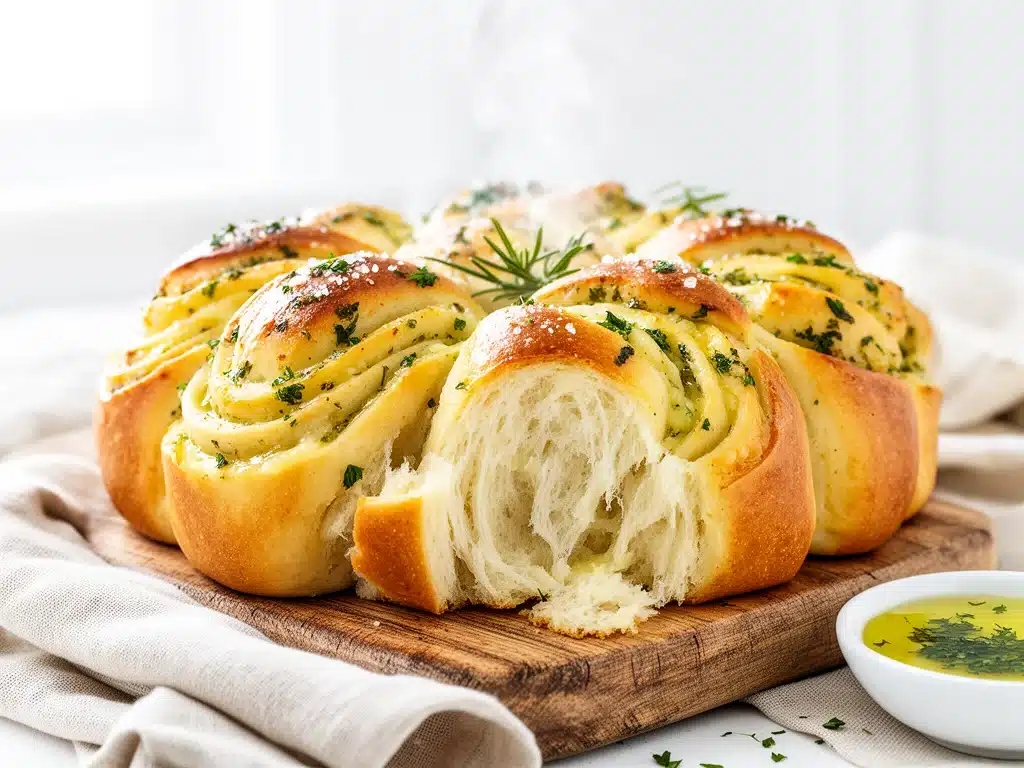
One rainy Saturday afternoon, I found myself craving something warm and comforting that didn’t require running to the grocery store. The pantry was partially stocked, but nothing fancy. I had flour, yeast, garlic, and some herbs growing on the windowsill looking a little sad. That’s when I decided to bake these soft garlic herb pull-apart rolls with simple ingredients I always keep on hand.
Turns out, these rolls are pure magic. The smell of fresh garlic and herbs baking fills the whole house, and the way they pull apart with a little tug? Irresistible. I’ve since made these rolls over and over—whether it’s for a cozy dinner or to impress guests without breaking a sweat. No fancy ingredients or complicated techniques here. Just good, honest bread with a garlic-herb twist.
After years of fiddling with yeast breads that sometimes came out tough or bland, I finally nailed this recipe. It’s soft, fluffy, and bursting with flavor. Plus, they’re perfect alongside almost any meal, from a simple soup to a chicken bacon ranch sliders night.
Why You’ll Love These Soft Garlic Herb Pull-Apart Rolls
Seriously, I can’t say enough good things about these rolls. They’ve earned a permanent spot in my baking rotation for plenty of reasons:
- Simple Ingredients — No need to hunt down fancy cheeses or obscure herbs. If you can find garlic, butter, and dried herbs, you’re all set. I always have these basics stocked.
- Soft, Fluffy Texture — These rolls come out pillowy soft every time. I’ve made them for my pickiest eaters who usually avoid new breads, and they gobble them up.
- Garlicky Herb Goodness — The garlic butter glaze is what makes these special. It’s rich but not overpowering, and the fresh herbs add just the right brightness.
- Fun Pull-Apart Design — Kids (and adults) love pulling the rolls apart. It’s almost like eating little garlic herb nuggets rather than a big loaf.
- Perfect for Any Occasion — Whether you’re hosting a casual dinner or just want a cozy side for weeknight pasta, these rolls fit the bill. They even pair nicely with a warm cup of tea or a vanilla chai apple cider for chilly evenings.
Bottom line: these rolls make me feel like a home baker without the stress. And the compliments? They just keep coming.
Ingredients You’ll Need
Here’s the kicker: most of what you need is probably already in your kitchen. I’m pretty picky about a few things, so I’ll explain what works best.
- All-purpose flour (3 ½ cups / 440g) — The base of this bread. I use King Arthur for consistency, but any all-purpose flour works fine.
- Active dry yeast (2 ¼ teaspoons / 1 packet) — Fresh yeast is great if you have it, but active dry is what I always use. Make sure it’s not expired to get a good rise.
- Sugar (2 tablespoons / 25g) — Feeds the yeast and adds a touch of sweetness that balances the garlic.
- Salt (1 ½ teaspoons / 8g) — Essential for flavor. I use fine sea salt.
- Warm water (1 cup / 240ml) — Around 110°F (43°C) to activate the yeast. Not too hot or you’ll kill the yeast.
- Milk (½ cup / 120ml) — Adds richness and keeps the rolls soft. Whole milk is my go-to.
- Unsalted butter (4 tablespoons / 56g, melted + 3 tablespoons / 42g softened) — I melt some for the garlic herb butter glaze and use softened butter in the dough for tenderness.
- Garlic (4 cloves, minced / about 2 teaspoons) — Fresh only. This is the star of the show. I usually mince it finely so it blends nicely.
- Italian seasoning (2 teaspoons) — A blend of dried herbs like oregano, basil, and thyme. You can swap this for fresh herbs if you have them, but dried works great.
- Fresh parsley (2 tablespoons, finely chopped) — Adds a fresh pop of green and brightness to the garlic butter.
- Egg (1 large) — For brushing on the rolls before baking to get that golden crust.
Optional add-ins:
- Grated Parmesan cheese (¼ cup / 25g) — Stirred into the garlic butter for an extra savory punch.
- Red pepper flakes (½ teaspoon) — If you like a little heat in your garlic rolls.
Equipment You’ll Need
You don’t need anything fancy here. I keep it simple:
- Large mixing bowl — For proofing the yeast and mixing the dough. Glass or metal works fine.
- Wooden spoon or silicone spatula — For stirring the dough until it comes together.
- Stand mixer with dough hook (optional) — I use mine when I’m feeling lazy, but hand mixing works too.
- Measuring cups and spoons — Accuracy matters, especially with yeast and salt.
- 9×13 inch baking pan — Perfect size for arranging the rolls to bake pull-apart style.
- Pastry brush — For brushing the egg wash and garlic herb butter glaze.
- Plastic wrap or kitchen towel — To cover the dough while it rises.
How to Make Soft Garlic Herb Pull-Apart Rolls: Step-by-Step
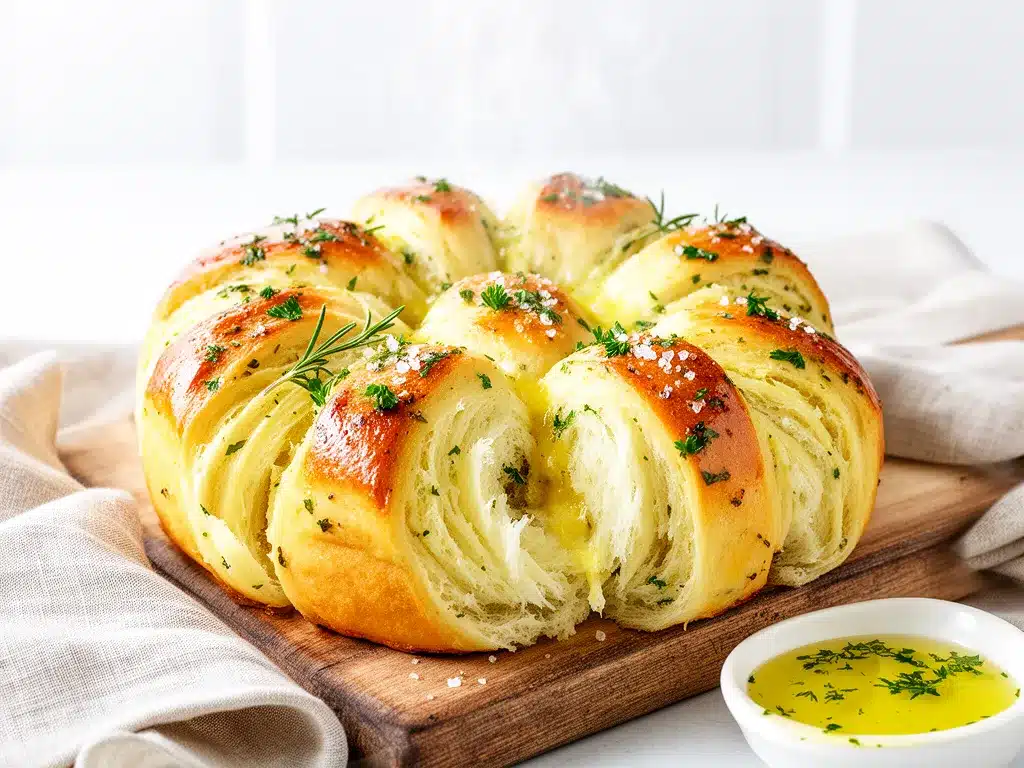
Alright, let’s get baking! I’m walking you through the process exactly as I do it, including my favorite kitchen tricks.
Step 1: Activate the Yeast (5 minutes)
Warm your water to about 110°F (43°C)—it should feel like a warm bath, not hot. Stir in the sugar and yeast, then let it sit for 5 minutes until foamy. If it doesn’t foam, your yeast might be dead. Start over!
Step 2: Make the Dough (10 minutes)
In a large bowl, combine the flour and salt. Add the softened butter, warm milk, egg, and the yeast mixture. Stir with a wooden spoon or use a stand mixer with a dough hook. Mix until the dough starts to come together, then knead on a floured surface for about 8 minutes until smooth and elastic. It should be soft but not sticky. Add a little flour if it’s too sticky.
Step 3: First Rise (60 minutes)
Place the dough in a lightly oiled bowl, cover with plastic wrap or a clean kitchen towel, and let it rise in a warm spot until doubled in size (usually around an hour). I like to preheat my oven to 200°F (93°C), turn it off, and put the dough inside to rise—it’s foolproof.
Step 4: Prepare Garlic Herb Butter (5 minutes)
While the dough rises, melt the butter for the glaze. Stir in minced garlic, Italian seasoning, parsley, and optional Parmesan or red pepper flakes. This is the flavor bomb that makes these rolls unforgettable.
Step 5: Shape the Rolls (10 minutes)
Once the dough has doubled, punch it down gently and divide it into 12 equal pieces. Roll each piece into a smooth ball and place them close together in your greased 9×13 inch pan. Cover again and let them rise for another 30 minutes. This second rise is key for soft, fluffy rolls.
Step 6: Brush and Bake (20-25 minutes)
Preheat your oven to 375°F (190°C). Brush the tops of the rolls with beaten egg for that golden, shiny crust. Bake for 20-25 minutes until golden brown and cooked through.
Step 7: Glaze and Serve (5 minutes)
Right when they come out of the oven, brush the rolls generously with the warm garlic herb butter. The butter soaks into the rolls and keeps them soft and flavorful. Let them cool for a few minutes, then pull apart and enjoy!
Expert Tips & Tricks for Perfect Pull-Apart Rolls
- Warm your liquids properly: Too hot and you kill the yeast; too cold and the dough won’t rise. I use a thermometer to be sure.
- Don’t skip the second rise: It’s tempting to bake right away, but that second rise makes the rolls incredibly soft and tender.
- Use fresh garlic: Jarred garlic just doesn’t have the same punch here. Fresh minced garlic in the butter glaze is worth the extra 2 minutes.
- Brush with egg wash: This step gives the rolls a beautiful golden color and a slight crunch on top.
- Let them cool slightly before glazing: If the butter is too hot, it’ll melt the egg wash off and make the rolls soggy.
- Store leftovers properly: Wrap tightly in foil or store in an airtight container to keep them soft. A quick reheat with a dab of butter brings them back to life.
Variations & Substitutions to Try
Once you’ve nailed the basic recipe, feel free to mix things up:
- Cheesy pull-apart rolls — Add shredded mozzarella or cheddar between the dough balls before baking for a melty surprise.
- Herb swap — Use fresh rosemary or thyme if you have them on hand. Just chop finely and mix into the garlic butter.
- Spicy kick — Toss in some crushed red pepper flakes or a sprinkle of smoked paprika for a smoky heat.
- Whole wheat version — Swap half the flour for whole wheat for a nuttier flavor and more fiber.
- Vegan option — Use plant-based milk and vegan butter, and skip the egg wash or use a plant milk brush before baking.
Serving & Storage Tips
I love serving these rolls warm right from the pan, especially alongside a comforting bowl of soup or a big salad. They’re great at dinner parties too—people can’t resist pulling off a piece (or three!). If you want to turn your meal into a full experience, pair them with some roasted veggies or even a fresh green salad tossed in a light vinaigrette.
For leftovers, store the rolls in an airtight container or wrapped in foil at room temperature for up to 2 days. If you want to keep them longer, refrigerate for up to 5 days but warm them up gently before serving. I reheat them in a low oven with a little foil to keep them soft. Avoid microwaving unless you add a splash of water and cover to prevent drying out.
Nutrition Information
| Nutrient | Per Roll (1/12th) |
|---|---|
| Calories | 180 |
| Protein | 4g |
| Carbohydrates | 25g |
| Fat | 6g |
| Saturated Fat | 3.5g |
| Sodium | 230mg |
| Fiber | 1g |
These rolls aren’t diet food—they’re comfort food at its best. With butter and garlic at the heart, they’re higher in fat but also packed with the soul-warming satisfaction you want from homemade bread. Adding a side of veggies or a salad can help balance the meal.
Final Thoughts
So there you have it—my favorite recipe for soft garlic herb pull-apart rolls made with simple ingredients you probably already have. I’ve probably mentioned this recipe to everyone I know because it’s that good and that easy. It’s saved me more than once when we needed something special but didn’t want to fuss.
These rolls make any meal feel a little more festive and a lot more delicious. Don’t hesitate to customize the herbs or add cheese if you’re feeling fancy. Really, the best part is pulling them apart warm, buttered, and smelling like pure heaven.
If you try this recipe, drop me a comment! I love hearing how these rolls turn out in your kitchen or if you put a unique spin on them. And if something doesn’t work quite right, I’m here to help troubleshoot—because I’ve been there (more than once!).
Happy baking! May your home smell like garlic and herbs, and your rolls be soft enough to pull apart with a smile.
Frequently Asked Questions
Q: Can I make these rolls ahead of time?
A: Yes! You can prepare the dough the night before and let it rise slowly in the fridge overnight. Just take it out an hour before baking to come to room temperature and rise a bit more. It helps develop flavor and fits well with busy schedules.
Q: What if I don’t have Italian seasoning?
A: No worries. You can mix your own blend with dried basil, oregano, and thyme. If you only have one herb on hand, just use that—it’ll still taste great. Fresh herbs are wonderful too, just add them to the garlic butter last minute.
Q: My rolls turned out dense—what did I do wrong?
A: Most likely, the dough didn’t rise enough. Yeast needs warm conditions and time to work. Make sure your liquids aren’t too hot or cold, and give the dough enough time to double in size. Also, kneading helps develop gluten which makes the rolls soft and airy.
Q: Can I freeze these rolls?
A: Absolutely! Let the rolls cool completely, then freeze them in an airtight container or freezer bag for up to 3 months. Reheat in the oven at 350°F (175°C) for about 10 minutes, covered with foil, until warmed through.
Q: Can I use garlic powder instead of fresh garlic?
A: You can, but fresh garlic gives the best flavor and aroma. If you’re in a pinch, use 1 teaspoon garlic powder, but keep in mind it won’t have the same fresh punch.
Q: How do I know when the rolls are done baking?
A: They should be golden brown on top and sound hollow when you tap the bottom. If you have a kitchen thermometer, the internal temperature should be around 190°F (88°C).
Q: Can I add cheese inside the rolls?
A: Yes! Small cubes or shredded cheese tucked inside the dough balls before the second rise add a delicious melty surprise. I recommend mozzarella or cheddar for best results.
Pin This Recipe!
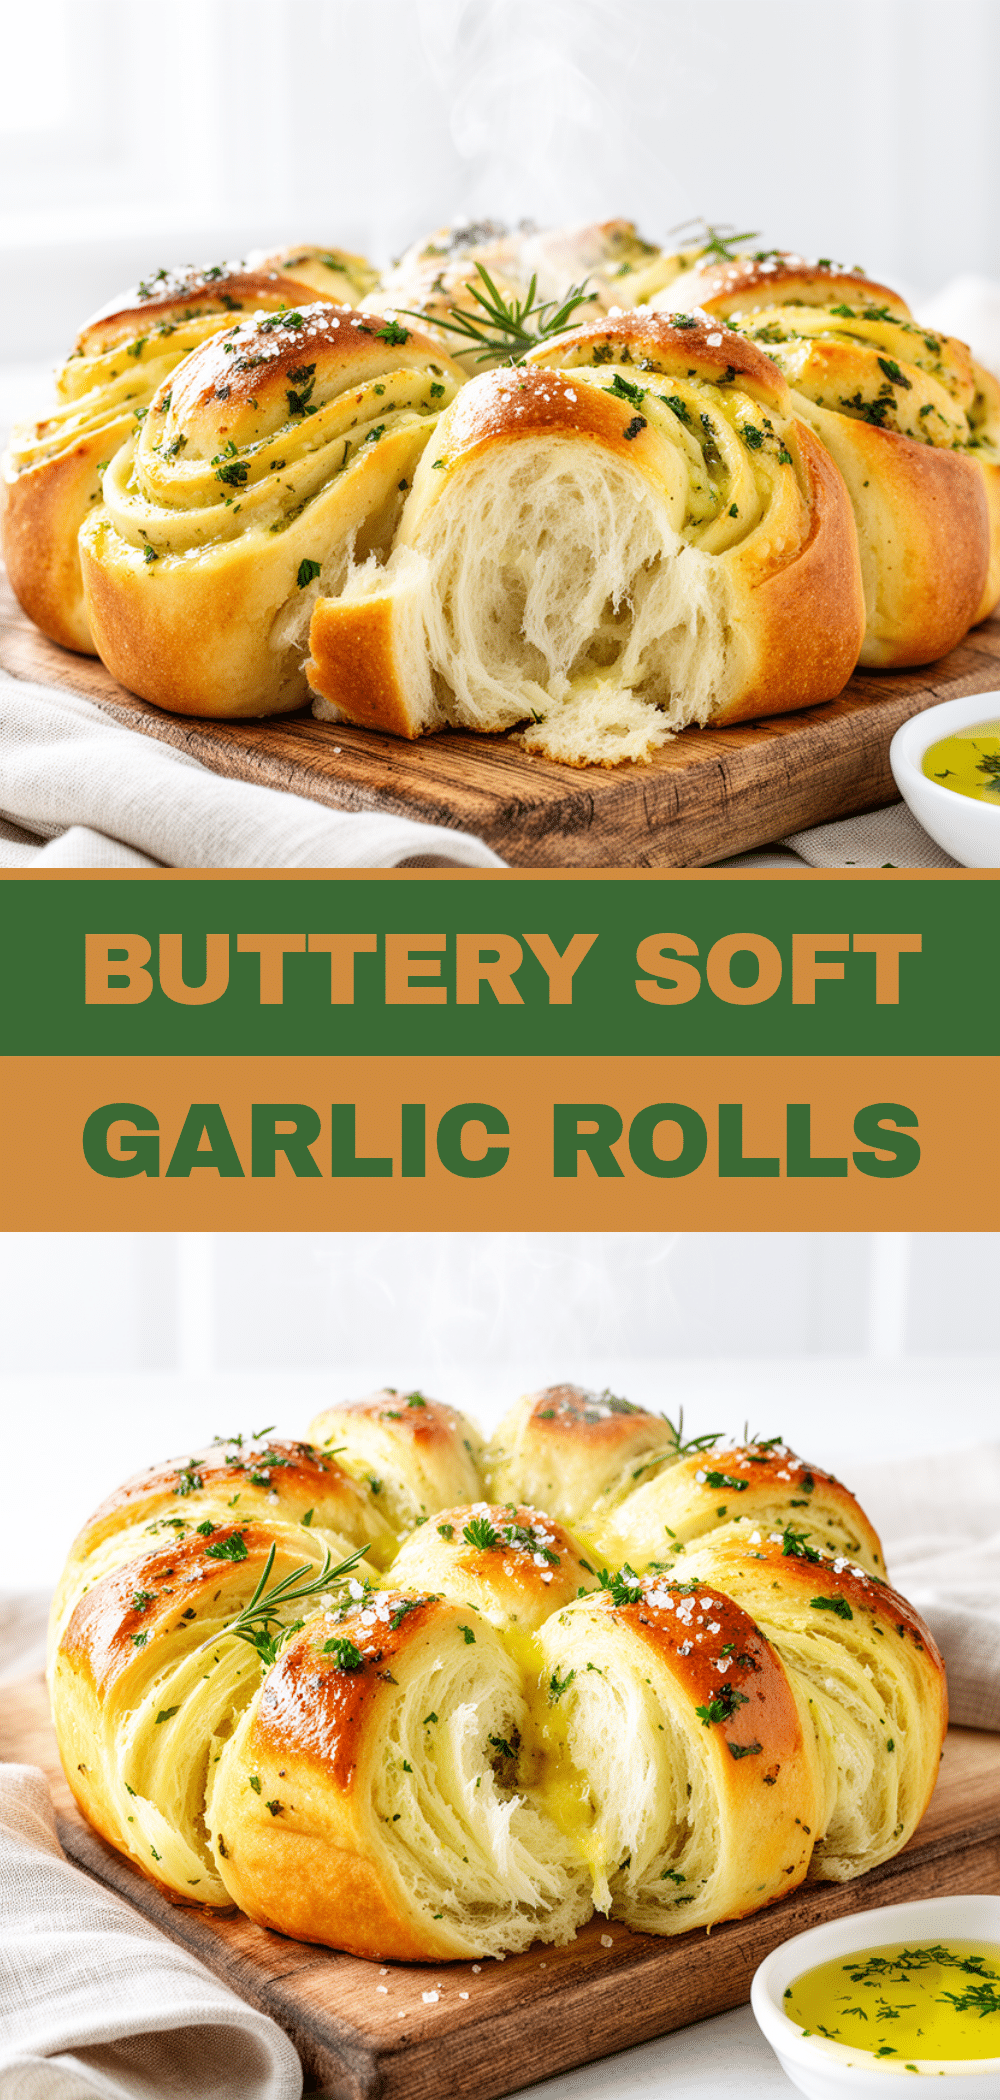
Soft Garlic Herb Pull-Apart Rolls Easy Homemade Recipe with Simple Ingredients
- Total Time: 1 hour 55 minutes
- Yield: 12 rolls 1x
Description
These soft garlic herb pull-apart rolls are pillowy, flavorful, and easy to make with simple pantry ingredients. Perfect for any occasion, they feature a garlicky herb butter glaze and a fun pull-apart design.
Ingredients
- 3 ½ cups (440g) all-purpose flour
- 2 ¼ teaspoons (1 packet) active dry yeast
- 2 tablespoons (25g) sugar
- 1 ½ teaspoons (8g) salt
- 1 cup (240ml) warm water (about 110°F / 43°C)
- ½ cup (120ml) whole milk
- 4 tablespoons (56g) unsalted butter, melted
- 3 tablespoons (42g) unsalted butter, softened
- 4 cloves garlic, minced (about 2 teaspoons)
- 2 teaspoons Italian seasoning
- 2 tablespoons fresh parsley, finely chopped
- 1 large egg
- Optional: ¼ cup (25g) grated Parmesan cheese
- Optional: ½ teaspoon red pepper flakes
Instructions
- Activate the yeast: Warm water to about 110°F (43°C). Stir in sugar and yeast. Let sit 5 minutes until foamy.
- Make the dough: In a large bowl, combine flour and salt. Add softened butter, warm milk, egg, and yeast mixture. Stir until combined, then knead on floured surface for 8 minutes until smooth and elastic.
- First rise: Place dough in lightly oiled bowl, cover, and let rise in warm spot until doubled in size, about 60 minutes.
- Prepare garlic herb butter: Melt butter for glaze. Stir in minced garlic, Italian seasoning, parsley, and optional Parmesan or red pepper flakes.
- Shape rolls: Punch down dough and divide into 12 equal pieces. Roll each into a ball and place close together in greased 9×13 inch pan. Cover and let rise 30 minutes.
- Brush and bake: Preheat oven to 375°F (190°C). Brush rolls with beaten egg. Bake 20-25 minutes until golden brown.
- Glaze and serve: Brush warm garlic herb butter over hot rolls. Let cool slightly, then pull apart and enjoy.
Notes
[‘Warm liquids properly to avoid killing yeast.’, ‘Do not skip the second rise for soft, tender rolls.’, ‘Use fresh garlic for best flavor in the butter glaze.’, ‘Brush with egg wash for a golden, shiny crust.’, ‘Let rolls cool slightly before glazing to avoid sogginess.’, ‘Store leftovers in airtight container or foil; reheat gently in oven.’, ‘Optional add-ins include Parmesan cheese and red pepper flakes.’, ‘For vegan option, use plant-based milk and butter, and skip egg wash.’]
- Prep Time: 20 minutes
- Cook Time: 25 minutes
- Category: Bread
- Cuisine: American
Nutrition
- Serving Size: 1 roll
- Calories: 180
- Sodium: 230
- Fat: 6
- Saturated Fat: 3.5
- Carbohydrates: 25
- Fiber: 1
- Protein: 4
Keywords: garlic rolls, pull-apart rolls, herb rolls, homemade bread, soft rolls, garlic herb butter, easy bread recipe