I’ll be honest with you. Last Sunday, I was staring at the clock at 4:45 PM, panic rising in my chest. The game started at 5:30, my friends were already halfway through the first half of their pre-game chat, and I had absolutely nothing ready to eat. No dip, no snacks, no wings. Just me, a half-empty fridge, and a desperate need to not show up empty-handed.
I didn’t have time to marinate anything. I didn’t have time to deep fry. I didn’t even have time to preheat a massive oven. So, I did what any stressed-out home cook does: I threw everything into a single skillet and prayed.
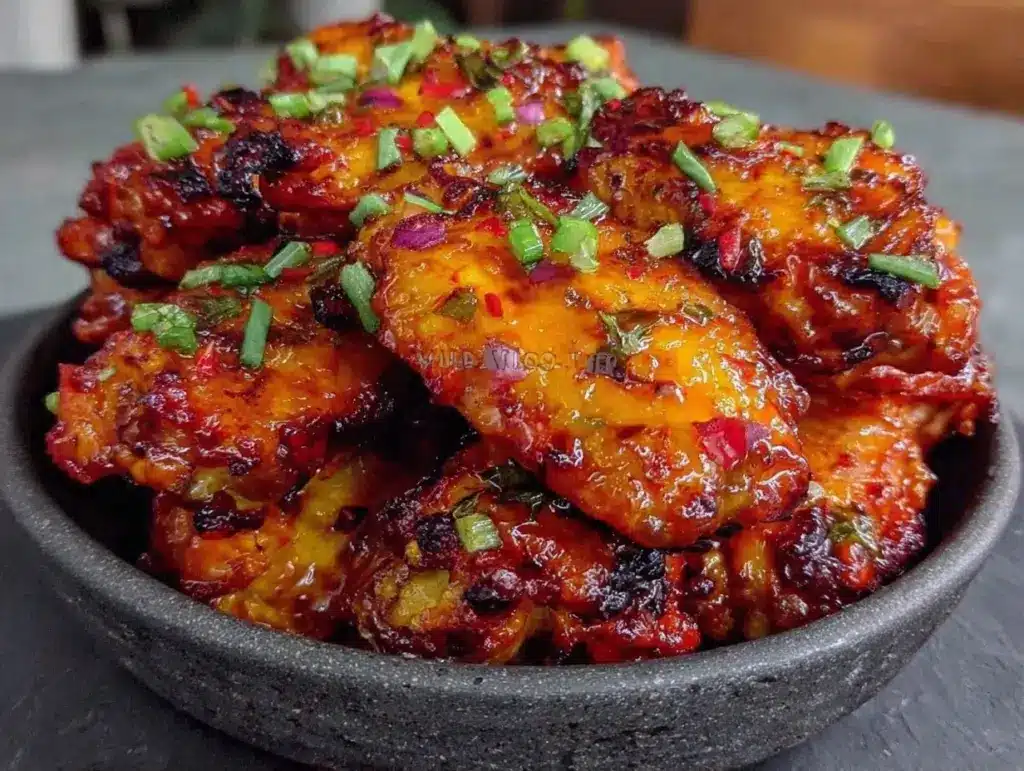
What came out of that pan? Absolute magic. Crispy, sticky, spicy, garlicky wings that coated my fingers and disappeared in minutes. My friends asked if I ordered takeout. I didn’t tell them it took less time than it takes to watch one commercial break.
That was the birth of my Spicy Honey Garlic Wings. They’ve been my secret weapon for game day ever since. Seriously, if you can boil water and chop a clove of garlic, you can make these. They’re the ultimate answer to “5pm and nothing planned,” and they taste like you spent hours in the kitchen (you didn’t).
Here’s why this recipe has completely taken over my game day rotation, and why it should probably take over yours too.
Why You’ll Love This Recipe
There are about ten reasons I keep making these wings, but here are the big ones that actually matter when you’re stressed about hosting:
Stupid Simple — Seriously, this is a one-pan wonder. You cook the wings, you make the sauce in the same pan, you toss. No complicated marinades, no waiting for the oven to heat up, no messy deep fryer cleanup. I’ve walked my teenage son through this over FaceTime while he was at college. It’s that easy.
Lightning Fast — From start to finish, we’re talking 20 minutes. But the active cooking time? Maybe 10 minutes. The rest is just the wings crisping up in the oven or air fryer while you chop garlic and mix sauce. I make this on weeknights when I get home at 7pm and still want something impressive.
Pantry-Friendly — You probably have 80% of these ingredients already. Honey? Check. Garlic? Check. Hot sauce? Check. Soy sauce? Check. I keep the key items stocked just so I can make this on a whim when guests drop by. It’s better than any takeout I’ve ever ordered.
Crowd-Pleaser — I’ve served these to my vegetarian sister (who just eats the wings and skips the sides), my spicy-food-loving best friend, and my mild-palate dad (who asks for less hot sauce next time). Everyone loves them. The sweet-savory-spicy combo is just universally liked.
Makes Amazing Leftovers — Actually, there are rarely leftovers. But if there are, they taste even better the next day as the flavors meld. I deliberately make extra for lunch throughout the week, though I usually eat them cold straight from the fridge. Don’t judge me.
Budget-Smart — Feeds 4-6 people for under $20, depending on where you buy chicken. That’s less than one large pizza delivery order, and infinitely tastier. Plus, you control the quality of the chicken.
This is my go-to when I need dinner to just work. No complicated techniques, no weird ingredients, just reliable, delicious food that makes everyone happy and keeps them away from the TV for at least five minutes.
Ingredients You’ll Need
Here’s the best part: you probably have most of this already. I’m particular about three ingredients here, and I’ll tell you exactly why.
Chicken Wings (3 pounds / 1.4kg) — I use a mix of drumettes and flats. Whole wings are fine if you cut them at the joint, but pre-cut saves time. Look for fresh wings, not frozen, if you can help it. Fresh wings crisp up better. I always buy from the local butcher or a well-stocked grocery store.
Neutral Oil (2 tablespoons / 30ml) — I use avocado oil or vegetable oil. Olive oil works but has a strong flavor that might clash. You just need enough to coat the wings so they get crispy.
Garlic (8-10 cloves, minced / about 4 tablespoons) — Yes, ten cloves. Don’t skimp. Fresh only—no jarred garlic in this recipe. Jarred garlic has a weird metallic taste that really shows up in a sauce like this. If you hate chopping, buy pre-peeled cloves, but mince them yourself for the best flavor.
Honey (½ cup / 120ml) — Use good quality honey if you have it. It makes a difference in the sweetness. I don’t use artificial honey substitutes here; they don’t caramelize the same way. Raw honey is great, but regular grocery store honey works perfectly fine.
Soy Sauce (¼ cup / 60ml) — I use low-sodium soy sauce so I can control the saltiness. Regular soy sauce works, but you might want to reduce added salt elsewhere. It adds that savory umami depth that balances the sweet honey.
Hot Sauce (3-4 tablespoons / 45-60ml) — This is where you control the heat. I use Frank’s RedHot or Texas Pete. Sriracha works too, but it’s garlic-heavy already, so adjust accordingly. For mild, use 2 tablespoons. For spicy, go full 4 tablespoons.
Rice Vinegar (1 tablespoon / 15ml) — This adds a little tang to cut through the richness. If you don’t have rice vinegar, white wine vinegar or even a splash of apple cider vinegar works. It’s not mandatory, but it lifts the flavor.
Red Pepper Flakes (½ teaspoon) — Optional but adds nice kick. Start with less if you’re sensitive to spice. I usually add a pinch to the sauce for extra heat without changing the flavor profile.
Green Onions (2-3, sliced) — For garnish. Adds color and a fresh onion bite. I use these because they look pretty and add a little crunch.
Sesame Seeds (1 tablespoon) — Optional garnish. Adds a nice nutty flavor and visual appeal. Toasted sesame seeds are better, but regular ones work.
Butter (1 tablespoon / 15g) — The secret weapon. Adding a knob of butter at the end makes the sauce glossy and rich. It’s a restaurant trick I learned years ago, and it makes a huge difference.
Equipment Needed
You don’t need fancy equipment for this. Here’s what I actually use.
Baking Sheet or Air Fryer Basket — I use a large baking sheet lined with parchment paper or foil for easy cleanup. If you have an air fryer, this recipe works beautifully in there too. The air fryer gets them crispier in less time. I prefer my air fryer for speed, but the oven is fine if you’re feeding a crowd.
Large Skillet — 12-inch works best for the sauce. I prefer stainless steel or cast iron, but non-stick works too. You need something wide so the sauce reduces quickly.
Sharp Knife — For chopping garlic and green onions. Dull knives make you cry more—learned this the hard way.
Cutting Board — Any size works. I use plastic for easier cleanup.
Wooden Spoon or Silicone Spatula — For stirring the sauce. Don’t use metal on non-stick.
Measuring Cups and Spoons — Pretty standard stuff. Dollar store versions work fine.
Tongs — For tossing the wings in the sauce. Or a large spoon works if you don’t have tongs.
Parchment Paper or Foil — For lining the baking sheet. Saves so much cleanup time. I never skip this.
Optional but nice:
- Food Processor — If you’re mincing lots of garlic, this saves time. But a knife works fine.
- Instant-Read Thermometer — To check if wings are done (165°F / 74°C). Not necessary if you cook them until crispy.
How to Make It: Step-by-Step
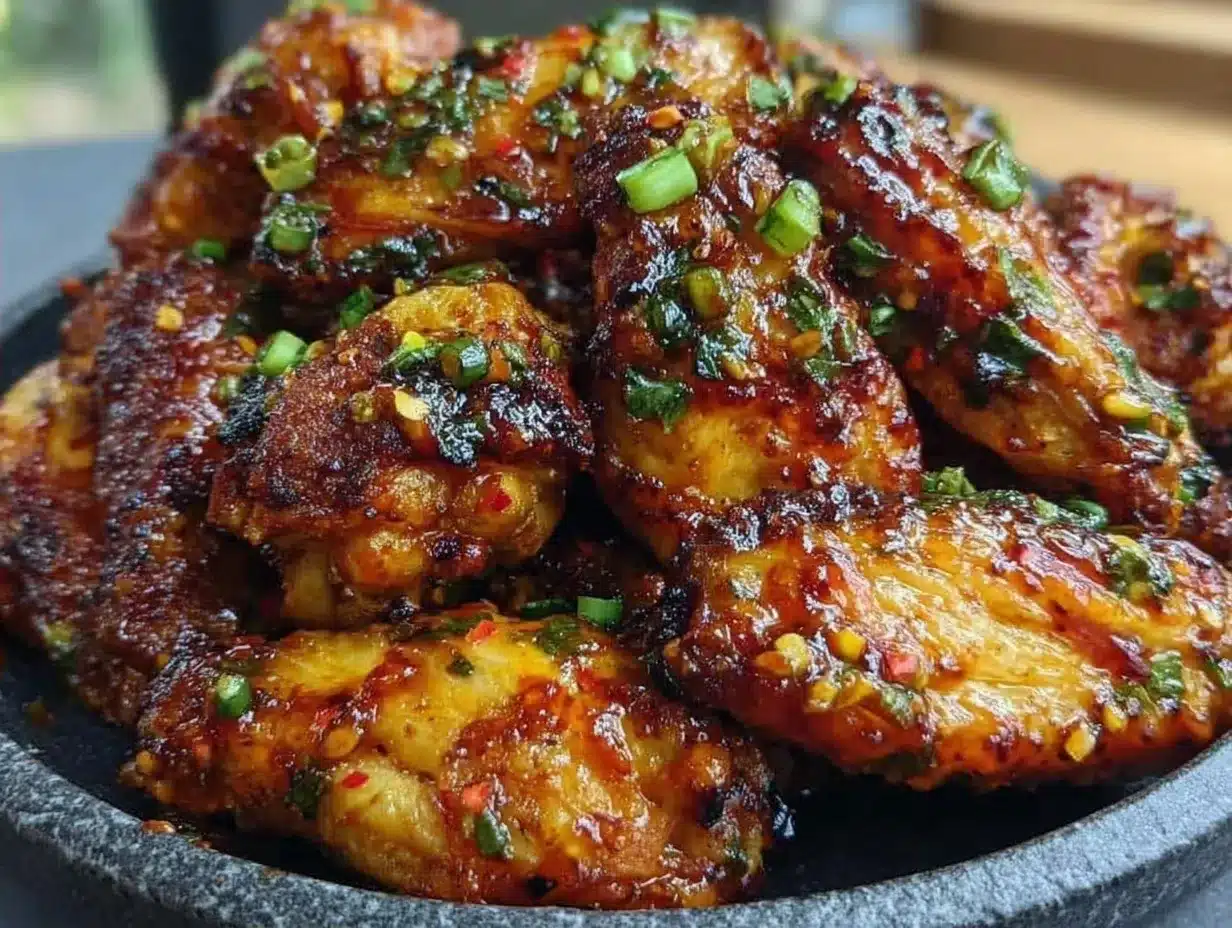
Alright, let’s make this! I’m walking you through exactly how I do it, including the little tricks I’ve picked up.
Step 1: Prep the Wings (5 minutes)
Pat the wings dry with paper towels. This is crucial. Wet wings steam instead of crisp. I know it’s tedious, but dry wings = crispy wings. If using whole wings, cut them at the joints. Toss them with the oil and a pinch of salt and pepper. Make sure they’re evenly coated.
Step 2: Cook the Wings (15-20 minutes)
Preheat your oven to 400°F (200°C). Line a baking sheet with parchment paper or foil. Arrange the wings in a single layer, not touching. Don’t crowd the pan! If you crowd them, they’ll steam. Cook for 15-20 minutes, flipping halfway through, until golden and crispy. If using an air fryer, cook at 380°F (190°C) for 12-15 minutes, shaking the basket halfway. The wings are done when they’re crispy and internal temperature reaches 165°F (74°C).
Step 3: Make the Sauce (5 minutes)
While the wings cook, heat a large skillet over medium heat. Add the minced garlic and red pepper flakes. Sauté for 30 seconds until fragrant—don’t let the garlic brown! Add the honey, soy sauce, rice vinegar, and hot sauce. Stir well to combine. Let it simmer for 2-3 minutes until it thickens slightly. It should coat the back of a spoon.
Step 4: Add the Butter (1 minute)
Remove the skillet from heat. Stir in the butter until melted and incorporated. This gives the sauce that glossy, restaurant-quality finish. Taste and adjust. Want more heat? Add more hot sauce. Want more sweet? Add a splash more honey.
Step 5: Toss and Serve (2 minutes)
Transfer the crispy wings to the skillet with the sauce. Toss everything together until the wings are evenly coated. The sauce will cling to the crispy skin. Serve immediately, garnished with sliced green onions and sesame seeds. These are best eaten hot and sticky.
Total Time: About 20 minutes (5 minutes prep, 15 minutes cooking, 5 minutes sauce)
Troubleshooting:
- Wings not crispy? Make sure they’re dry before oiling, and don’t crowd the pan. Give them space to breathe.
- Sauce too thin? Let it simmer longer. It will reduce and thicken.
- Sauce too thick? Add a splash of water or more vinegar to thin it out.
- Garlic burning? Lower the heat immediately. Garlic burns fast. If it’s already brown, start over—it tastes bitter.
Expert Tips & Tricks
Here’s everything I’ve learned from making this dozens of times. These tips will save you from my mistakes.
Pat Those Wings Dry
This is the #1 tip. Moisture is the enemy of crispiness. I spend extra time patting each wing dry with paper towels. It takes an extra minute, but it makes the difference between soggy and crispy.
Don’t Crowd the Pan
If you’re cooking in the oven, use two baking sheets if needed. Overcrowding causes steaming. The wings need space to get crispy. I’ve ruined batches by being lazy and crowding the pan. Don’t make my mistake.
Use Fresh Garlic
Pre-minced garlic in a jar tastes metallic and weak. Fresh garlic has a bright, sharp flavor that stands up to the honey and heat. If you’re in a rush, buy pre-peeled cloves, but mince them yourself.
Butter is Your Friend
Adding butter at the end isn’t just for flavor—it emulsifies the sauce, making it glossy and helping it cling to the wings. It’s a small step that makes a big difference.
Adjust Heat to Taste
The hot sauce amount is flexible. Start with 2 tablespoons if you’re serving kids or mild-palate guests. Go to 4 tablespoons for serious heat lovers. You can always add more hot sauce later, but you can’t take it away.
Air Fryer Shortcut
If you have an air fryer, use it. It cuts cooking time in half and gets them crispier than the oven. Cook at 380°F for 12-15 minutes. Shake the basket halfway through.
Common Mistakes (and how to avoid them):
- Mistake: Sauce is too watery Fix: Simmer longer. The sauce needs to reduce to coat the wings.
- Mistake: Wings are soggy Fix: Pat dry, don’t crowd, and cook until crispy. Maybe add an extra 2-3 minutes.
- Mistake: Garlic is burnt Fix: Lower heat. Garlic burns in seconds. Remove from heat if it starts to brown.
Pro Tricks I’ve Learned:
- For Extra Crisp Sprinkle a tiny bit of baking powder on the wings before oiling. It helps draw out moisture and crisp the skin. I learned this from a food scientist friend, and it works.
- For Better Flavor Toast the sesame seeds in a dry pan before garnishing. It releases more nutty flavor.
- For Meal Prep Cook the wings ahead, store in the fridge. Reheat in the oven or air fryer to crisp up, then toss in fresh sauce. Almost as good as fresh.
Variations & Substitutions
Once you’ve nailed the basic version, here’s how you can mix it up. I’ve tried all of these.
Buffalo Style
Skip the honey and soy sauce. Use just hot sauce and butter. Classic buffalo wings. My husband loves this version for game day.
Korean BBQ Wings
Add 1 tablespoon gochujang paste and 1 tablespoon sesame oil to the sauce. Top with sesame seeds and green onions. Totally different vibe—sweet, spicy, and savory.
Teriyaki Wings
Replace the hot sauce with teriyaki sauce. Add a splash of mirin. Less spicy, more sweet and savory. Great for kids.
Maple Bacon Wings
Replace honey with maple syrup. Top with crispy bacon bits. My friends always ask for these. They’re rich and indulgent.
Spicy Sriracha Wings
Use Sriracha instead of hot sauce. Add a teaspoon of sesame oil. Adds garlic flavor from the Sriracha, so reduce fresh garlic slightly.
Dietary Modifications:
- Gluten-Free Use tamari instead of soy sauce. Everything else is naturally gluten-free.
- Dairy-Free Skip the butter. Use olive oil or coconut oil instead. Still tasty, just less glossy.
- Lower-Sodium Use low-sodium soy sauce and reduce hot sauce if needed. Control salt levels.
Serving & Storage
I usually serve these straight from the skillet at the dinner table—it looks rustic and stays warm. But here are other ways I’ve enjoyed them:
Side Dishes:
- Celery sticks with blue cheese or ranch dip (classic wing pairing)
- Carrot sticks with ranch
- Coleslaw (creamy or vinegar-based)
- Simple green salad with vinaigrette
Toppings Bar:
When I have guests, I put out: extra hot sauce, blue cheese crumbles, ranch dressing, sliced green onions, sesame seeds, lemon wedges. Everyone customizes their bowl.
Wine Pairing:
Not a wine expert, but my wine-snob friend says a crisp Pinot Grigio or a light-bodied Pinot Noir works great. For beer, a lager or pale ale cuts through the richness. I also love these with a classic mojito—the mint and lime balance the spicy-sweet wings perfectly.
Storage Instructions:
Refrigerator: Store in an airtight container for up to 3 days. The wings will soften in the fridge—totally normal.
Reheating: Best method: Oven or air fryer at 375°F (190°C) for 5-7 minutes. This restores crispiness. Microwave works but makes them soggy. If you do microwave, do it in short bursts and let them sit to crisp up slightly.
Freezing: Cooked wings freeze well for up to 2 months. Thaw in the fridge, then reheat in the oven or air fryer. Sauce doesn’t freeze well separately—make it fresh.
Meal Prep: Cook wings ahead, store in fridge. Reheat and toss in fresh sauce right before serving. Saves time on game day.
Nutrition Information
I’m not a nutritionist, but here’s the breakdown if you’re tracking.
Per Serving (based on 6 servings):
- Calories: 380
- Protein: 22g
- Carbs: 24g
- Fiber: 0g
- Sugar: 18g
- Fat: 22g
- Saturated Fat: 6g
- Cholesterol: 95mg
- Sodium: 620mg
What’s Good:
- Decent protein from chicken
- Can add vegetables to boost nutrition
- More filling than it looks
What to Know:
- Higher in calories from honey and butter
- Contains dairy and gluten (unless modified)
- Moderate sodium (use low-sodium soy sauce to reduce)
My Take: Look, these are game day wings. They’re not diet food. But they’re way better than takeout, cost less, and I know exactly what’s in them. When I want to make them lighter, I skip the butter and use less honey. But usually? I just eat a reasonable portion and enjoy them.
Final Thoughts
So that’s my go-to Spicy Honey Garlic Wings! I’ve probably talked your ear off at this point, but when you make a recipe this often, you have a lot to say about it.
This has saved game days more times than I can count. It’s my answer to “5pm and nothing planned” when I’m tired, don’t want takeout, and still want something that tastes really good. My friends are happy, my family’s happy, and I’m happy because I’m not stressed about cooking.
Make it yours! Try different add-ins, swap in your favorite hot sauce, adjust the garlic (though more is always better in my opinion). The best recipes are the ones you adapt to your family’s tastes.
If you make this, drop a comment and let me know what you think! I love hearing how recipes turn out in your kitchen. And if something doesn’t work, tell me that too—I’m here to help troubleshoot.
Happy cooking! And I hope your kitchen smells half as good as mine does right now.
Frequently Asked Questions
Can I use chicken thighs instead of wings?
You can, but thighs have more fat and skin, so they’ll cook differently. Cut them into bite-sized pieces and cook at 400°F for 20-25 minutes. They’ll be juicier but maybe not as crispy. I prefer wings for that crunch, but thighs work if that’s what you have.
Why did my wings come out soggy?
Usually means they were too crowded on the pan, or they weren’t patted dry enough. Make sure there’s space between each wing, and spend extra time drying them with paper towels. Also, make sure your oven is fully preheated before putting them in.
Can I make this ahead for a party?
Sort of. Cook the wings ahead and store in the fridge. Reheat in the oven or air fryer right before serving to crisp them up. Make the sauce fresh, then toss. It won’t be quite as good as fresh-made, but it’s close and saves you stress during the party. I do this all the time.
How spicy are these wings?
Depends on how much hot sauce you use! With 2 tablespoons, they’re mild and sweet. With 4 tablespoons, they’re properly spicy. I recommend starting with 3 tablespoons for a medium heat that most people enjoy. You can always add more hot sauce after tossing.
Can I use an air fryer?
Absolutely! Air fryers are great for this. Cook at 380°F (190°C) for 12-15 minutes, shaking the basket halfway through. They’ll be crispier and cook faster than the oven. I actually prefer the air fryer method for speed and texture.
Can I freeze the sauce?
I wouldn’t recommend it. The butter and honey can separate when frozen and thawed. Make the sauce fresh—it takes 5 minutes and tastes much better. If you must, freeze the honey and soy sauce base, then add fresh butter and hot sauce when reheating.
What’s the best dip for these wings?
Classic blue cheese or ranch works well. I also like a simple garlic aioli. Since the wings are already garlicky and spicy, a cool, creamy dip balances it out. I serve a small bowl of ranch on the side for dipping.
Pin This Recipe!
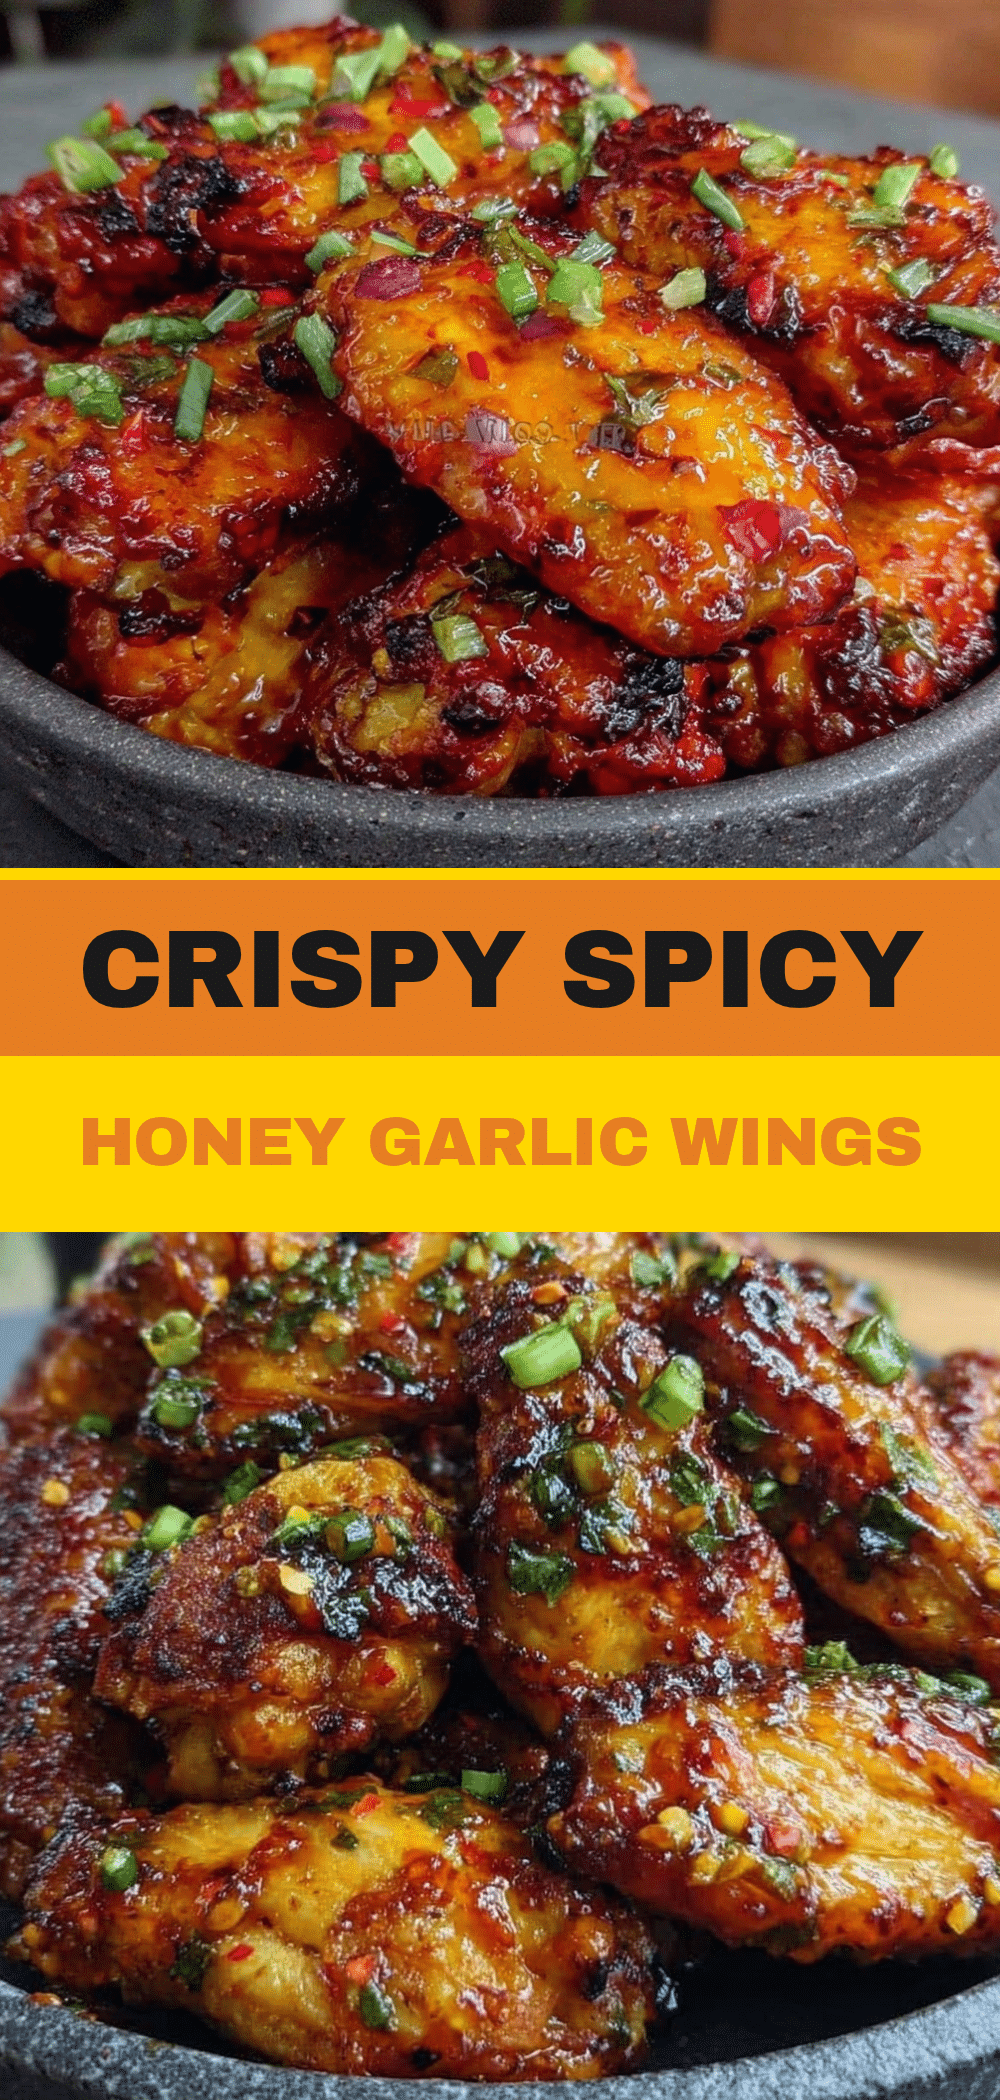
Spicy Honey Garlic Wings: 10-Minute Game Day Snack
- Total Time: 20 minutes
- Yield: 4-6 servings 1x
Description
A quick, one-pan recipe for crispy, sticky, and spicy honey garlic wings that are perfect for game day or busy weeknights. Ready in just 20 minutes with pantry-friendly ingredients.
Ingredients
- 3 pounds chicken wings (drumettes and flats)
- 2 tablespoons neutral oil (avocado or vegetable)
- 8–10 cloves garlic, minced
- ½ cup honey
- ¼ cup soy sauce (low-sodium recommended)
- 3–4 tablespoons hot sauce (Frank’s RedHot, Texas Pete, or Sriracha)
- 1 tablespoon rice vinegar
- ½ teaspoon red pepper flakes
- 1 tablespoon butter
- 2–3 green onions, sliced (for garnish)
- 1 tablespoon sesame seeds (for garnish)
- Salt and pepper to taste
Instructions
- Preheat oven to 400°F (200°C). Pat chicken wings dry with paper towels and toss with oil, salt, and pepper.
- Arrange wings in a single layer on a parchment-lined baking sheet. Cook for 15-20 minutes, flipping halfway, until golden and crispy (internal temp 165°F). Alternatively, air fry at 380°F for 12-15 minutes.
- While wings cook, heat a large skillet over medium heat. Add minced garlic and red pepper flakes; sauté for 30 seconds until fragrant.
- Add honey, soy sauce, rice vinegar, and hot sauce to the skillet. Simmer for 2-3 minutes until slightly thickened.
- Remove skillet from heat and stir in butter until melted and incorporated.
- Transfer crispy wings to the skillet and toss to coat evenly in the sauce.
- Serve immediately, garnished with sliced green onions and sesame seeds.
Notes
Pat wings dry thoroughly for maximum crispiness. Do not crowd the pan to avoid steaming. Use fresh garlic for best flavor. Adjust hot sauce quantity based on preferred spice level. Sauce can be adjusted for thickness by simmering longer or adding a splash of water/vinegar.
- Prep Time: 5 minutes
- Cook Time: 15 minutes
- Category: Appetizer
- Cuisine: American
Nutrition
- Serving Size: Approximately 1/6th
- Calories: 380
- Sugar: 18
- Sodium: 620
- Fat: 22
- Saturated Fat: 6
- Carbohydrates: 24
- Protein: 22
Keywords: spicy honey garlic wings, game day snacks, quick chicken wings, one pan recipe, air fryer wings, honey garlic sauce, easy appetizer