I still remember the first time I made this ultra-creamy vanilla bean cheesecake. It was a Tuesday in November, the kind of evening where the wind howls outside and you just want to curl up with something sweet. I had planned to make my standard pumpkin pie—safe, reliable, seasonal. But then I saw a vanilla bean at the farmer’s market. Just one. Expensive little thing, wrapped in plastic like a precious jewel. I bought it on a whim, thinking, “Why not?”
That decision led to three hours in the kitchen, a cracked springform pan (my fault, I rushed it), and a slice of cheesecake so rich and velvety that my husband stopped mid-chew and just stared at me. “This is it,” he said. “This is the one.”
I’ve made this ultra-creamy vanilla bean cheesecake with buttery graham crust at least twelve times since then. I’ve tweaked the crust, adjusted the baking time, and learned exactly how to prevent that dreaded water bath disaster. And here’s the thing: it’s actually easier than you think. You don’t need fancy equipment or a degree in pastry arts. You just need patience, good ingredients, and a willingness to let it do its thing.
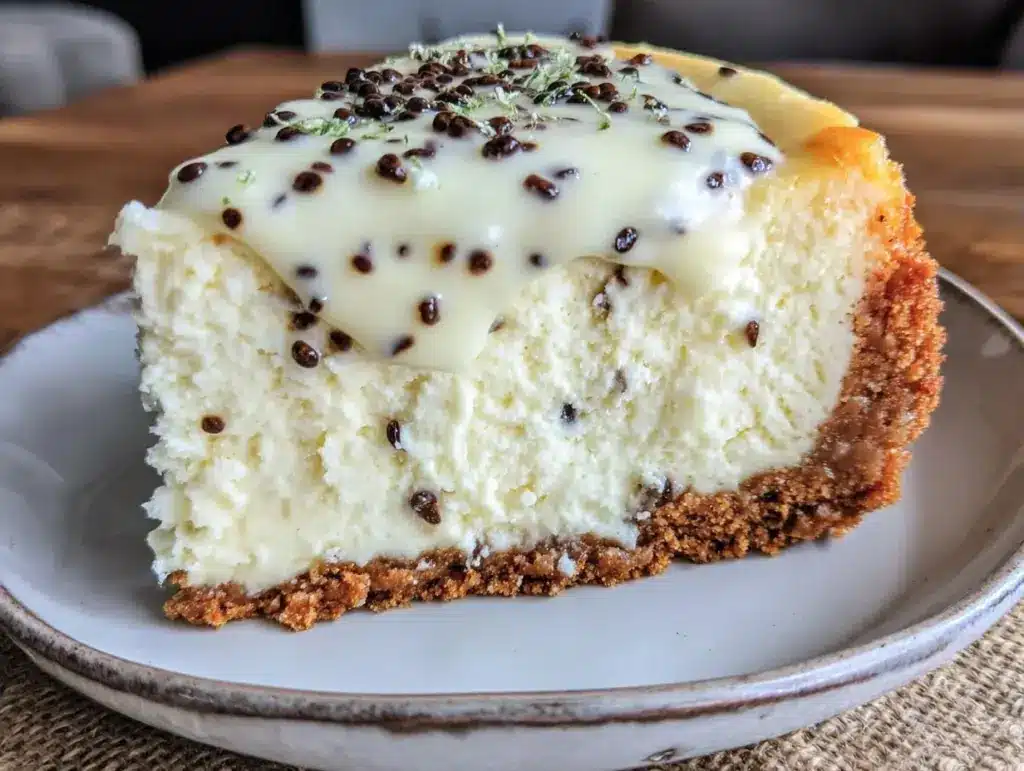
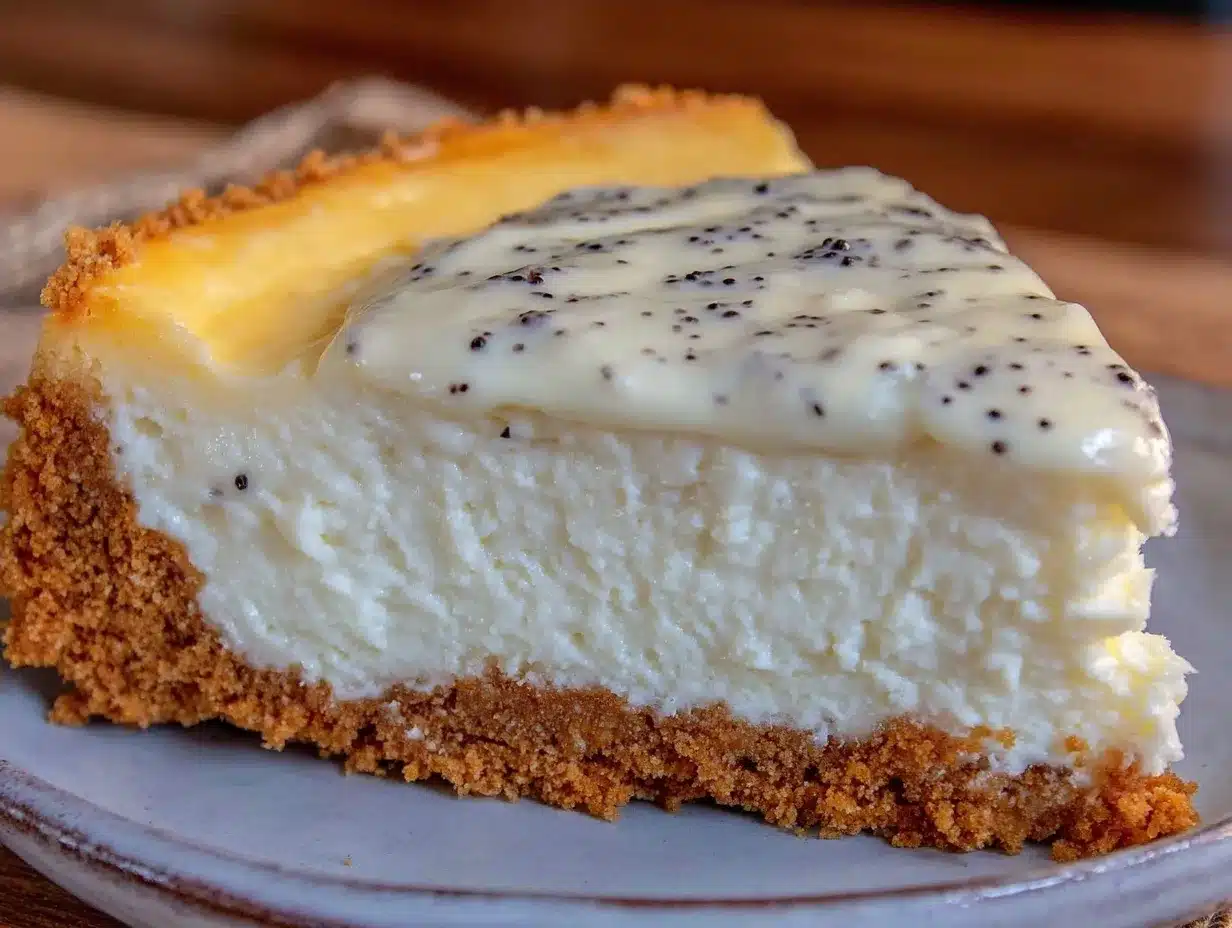
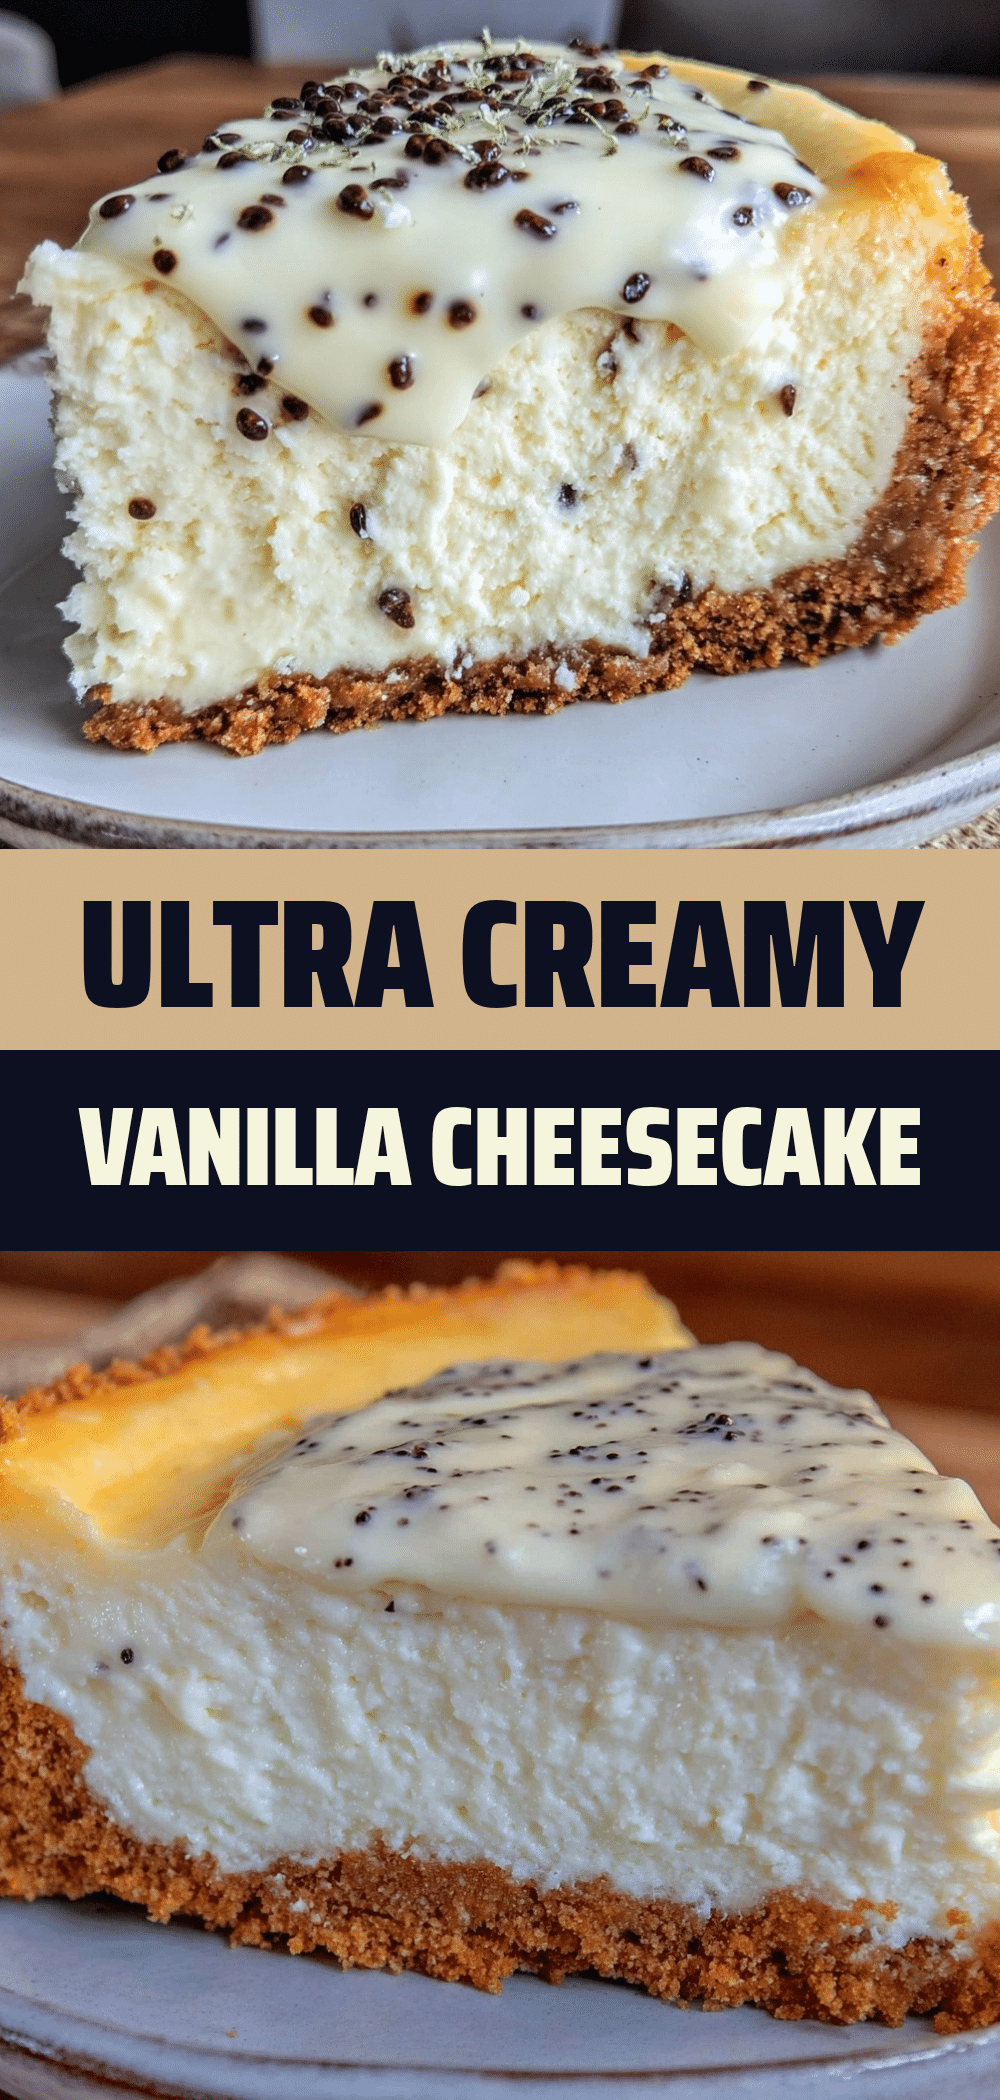
This isn’t your average dense, heavy cheesecake. It’s light, airy, and infused with those tiny black specks of vanilla that make everything feel fancy. It’s the kind of dessert that looks like it came from a high-end bakery but tastes like it was made by someone who actually loves cooking. If you’ve ever been intimidated by cheesecake, this is your entry point. It’s forgiving, it’s delicious, and it’s going to become your new go-to for holidays, birthdays, or just because you want to treat yourself.
Why You’ll Love This Recipe
There are plenty of cheesecake recipes out there. Why make this one? Here’s the real talk: most cheesecakes are either too dense (like eating a brick) or too airy (like eating a cloud that collapses). This recipe finds that perfect middle ground. It’s the Goldilocks of desserts.
- Stupid Simple Ingredients — You don’t need obscure items from three different countries. Cream cheese, sugar, eggs, vanilla, and graham crackers. If you can find these, you can make this. I keep all of these stocked specifically for this recipe.
- Zero Cracks, Guaranteed — I’ve spent years fighting the “cheesecake top crack” battle. This method uses a water bath and a specific cooling process that keeps the top smooth and beautiful. No more hiding the ugly under a pile of whipped cream!
- Flavor That Actually Shines — Using a real vanilla bean (or high-quality paste) makes a massive difference. It’s not just “sweet”; it’s aromatic and complex. It elevates the whole dessert from “good” to “wow.”
- Make-Ahead Friendly — Cheesecake tastes better the next day. And the day after that. In fact, it’s best on day two or three when the flavors have had time to meld. This makes it perfect for dinner parties because you can make it days in advance.
- Buttery, Crunchy Crust — The crust isn’t just an afterthought. It’s buttery, slightly salty, and crunchy enough to contrast with the creamy filling. It’s the foundation that holds everything together.
This recipe has saved me more times than I can count. Whether it’s a last-minute dinner party or a quiet night in, I know that if I pull this out of the fridge, everyone will be happy. It’s my comfort dessert, my showstopper, and my secret weapon.
Ingredients You’ll Need
Here’s the best part: you probably have most of this already. The beauty of a classic cheesecake is its simplicity. But because there are so few ingredients, quality matters. Don’t skimp on the cream cheese or the vanilla.
For the Buttery Graham Crust
Graham cracker crumbs (1 ½ cups / 150g) — You can buy pre-made crumbs, but I prefer crushing them myself. It’s therapeutic and you get a better texture. Use original graham crackers, not the honey or cinnamon ones, unless you want a different flavor profile.
Unsalted butter (6 tablespoons / 85g, melted) — This binds the crust and gives it that rich, buttery flavor. Use real butter, not margarine. It makes a noticeable difference.
Granulated sugar (2 tablespoons / 25g) — Just a touch to sweeten the crust. Don’t skip it; it helps with browning.
Salt (¼ teaspoon) — This is crucial. Salt balances the sweetness and enhances the buttery flavor. I use kosher salt.
For the Ultra-Creamy Vanilla Bean Filling
Full-fat cream cheese (32 ounces / 900g, 4 blocks) — This is non-negotiable. Use full-fat, brick-style cream cheese. The tub stuff is whipped with air and won’t set properly. Let it sit out for an hour before you start so it’s soft and easy to mix.
Granulated sugar (1 cup / 200g) — This sweetens the filling. Don’t reduce it significantly, or the texture will be off.
Large eggs (4 large) — Room temperature eggs incorporate better into the batter. If you’re in a rush, place them in a bowl of warm water for 10 minutes.
Sour cream (1 cup / 240g) — This adds tang and richness, and helps keep the cheesecake creamy. Don’t use Greek yogurt unless you’re okay with a thicker, tangier result.
Vanilla bean paste (2 teaspoons) OR 1 real vanilla bean — If you can find a real vanilla bean, split it lengthwise and scrape out the seeds. The black specks are gorgeous. Vanilla bean paste is a great shortcut if you can’t find fresh beans. It has the same flavor and those pretty specks.
All-purpose flour (2 tablespoons / 15g) — A little flour helps stabilize the cheesecake and prevents cracking. It’s a secret ingredient that many people skip, but I swear by it.
Equipment Needed
You don’t need fancy equipment for this. Here’s what I actually use:
9-inch Springform Pan — This is essential. The sides come off, making it easy to remove the cake. Make sure it’s a good quality one that doesn’t leak. I wrap the bottom in foil just to be safe.
Electric Mixer — A hand mixer or stand mixer makes creaming the cream cheese so much easier. Doing this by arm is possible, but it takes effort and you might end up with lumps.
Rimmed Baking Sheet — This goes under the springform pan in the oven to catch any potential leaks from the water bath. Also helps with even baking.
Kitchen Torch or Broiler — Optional, but nice for caramelizing the top if you want a slightly toasted look. I usually skip this and just let it cool naturally.
Whisk — For mixing the crust and folding in the eggs gently.
Knife — A small paring knife is great for splitting the vanilla bean.
How to Make It: Step-by-Step
Alright, let’s make this! I’m walking you through exactly how I do it, including the little tricks I’ve picked up over the years.
Step 1: Prep Your Pan and Oven (10 minutes)
Preheat your oven to 325°F (165°C). This is a low and slow bake, which is key for creaminess. Grease the bottom of your 9-inch springform pan. Then, wrap the outside of the pan tightly with two layers of heavy-duty aluminum foil. This prevents water from seeping in during the water bath.
Step 2: Make the Crust (5 minutes)
In a medium bowl, mix the graham cracker crumbs, melted butter, sugar, and salt. It should look like wet sand. Press this mixture firmly into the bottom of the prepared springform pan. Use the bottom of a measuring cup to pack it down evenly. Bake for 10 minutes, then remove and let it cool while you make the filling.
Step 3: Mix the Cream Cheese Base (5 minutes)
In a large bowl, beat the softened cream cheese and sugar on medium-low speed until completely smooth and creamy. Scrape down the sides of the bowl. This step is crucial—any lumps will show up in the final product. Add the sour cream and vanilla (or vanilla bean seeds) and mix until combined.
Step 4: Add the Eggs (5 minutes)
Add the eggs one at a time, mixing on low speed just until incorporated. Do not overmix! Once the egg is in, stop mixing. Overmixing incorporates air, which can cause cracks. Scrape the bowl again to ensure everything is even. Fold in the flour gently with a spatula.
Step 5: The Water Bath (5 minutes)
Place the springform pan on the rimmed baking sheet. Pour boiling water into the baking sheet until it comes about an inch up the sides of the pan. Be careful not to splash water into the pan. This steamy environment keeps the cheesecake from drying out and cracking.
Step 6: Bake (1 hour 15 minutes)
Place the sheet in the oven. Bake for 1 hour and 15 minutes. The edges should be set, but the center should still jiggle slightly like Jell-O when you shake the pan. It will firm up as it cools. Do not open the oven door during the first hour!
Step 7: The Cool Down (2-4 hours)
Turn off the oven and crack the door open. Let the cheesecake sit in the cooling oven for 1 hour. This gradual temperature change prevents cracking. Then, remove it and let it cool completely on a wire rack. Once cool, cover with plastic wrap and refrigerate for at least 4 hours, preferably overnight.
Expert Tips & Tricks
Here’s everything I’ve learned from making this dozens of times. These tips will save you from my mistakes.
Room Temperature Ingredients — This is the #1 tip. Cold cream cheese and eggs create lumps and uneven mixing. Let your cream cheese sit out for a full hour. If you forget, microwave it in 10-second bursts until soft. Cold eggs can cause the batter to separate.
Don’t Overmix — Once you add the eggs, mix on the lowest speed possible. You want to combine the ingredients, not whip air into them. Air bubbles expand in the oven and then collapse, causing cracks.
The Jiggle Test — How do you know when it’s done? The center should wobble like gelatin, not slosh like water. If it’s solid, it’s overbaked. If it’s liquid, it needs more time.
Patience is Key — I know it’s tempting to cut into it right out of the fridge. Don’t. Cheesecake needs time to set. Overnight is best. The texture improves dramatically after 24 hours.
Knife for Clean Slices — Dip a sharp knife in hot water and wipe it dry before each cut. This ensures clean, neat slices. Dip and wipe between every single slice.
Variations & Substitutions
Once you’ve nailed the basic version, here’s how you can mix it up. I’ve tried all of these.
Chocolate Swirl — Melt 4 ounces of chocolate and swirl it into the batter before baking. Creates a marbled effect.
Berry Topping — Top with fresh strawberries, raspberries, or a berry compote. The tartness cuts through the richness perfectly.
Gluten-Free — Use gluten-free graham crackers and ensure your vanilla bean paste is certified gluten-free. Everything else is naturally gluten-free.
Dairy-Free — Use dairy-free cream cheese (like Kite Hill) and coconut cream instead of sour cream. The texture will be slightly different but still delicious.
Alternative Crust — Use crushed shortbread cookies or digestive biscuits instead of graham crackers for a richer, more buttery crust.
Serving & Storage
How to Serve: I usually serve this plain, maybe with a dollop of whipped cream and a fresh berry. It’s elegant and simple. But here are other ways I’ve enjoyed it:
- Chocolate Sauce — Drizzle with warm chocolate sauce for a decadent treat.
- Caramel Drizzle — Salted caramel is amazing with vanilla.
- Fresh Fruit — Sliced peaches or figs in the summer.
Storage Instructions: Store in the refrigerator in an airtight container or covered with plastic wrap for up to 5 days. It actually gets better after day two.
Freezing: Yes, you can freeze cheesecake! Wrap the whole cake (or individual slices) tightly in plastic wrap, then in aluminum foil. Freeze for up to 2 months. Thaw in the fridge overnight.
Pro Tip: If you’re bringing it to a party, bring it to room temperature for 30 minutes before serving. Cold cheesecake loses some of its flavor and texture.
Nutrition Information
I’m not a nutritionist, but here’s the breakdown if you’re tracking. Keep in mind that this is a rich dessert, so portion control is key.
Per Serving (based on 12 slices):
| Nutrient | Amount |
|---|---|
| Calories | 380 |
| Protein | 6g |
| Carbs | 32g |
| Fiber | 1g |
| Sugar | 26g |
| Fat | 24g |
| Saturated Fat | 14g |
| Cholesterol | 95mg |
| Sodium | 220mg |
Look, this is comfort food with cream and cheese. It’s not a diet recipe. But it’s way better than store-bought, and you know exactly what’s in it. When I want to make it lighter, I use less sugar and add a berry topping. But usually? I just eat a reasonable portion and enjoy it.
Final Thoughts
So that’s my ultra-creamy vanilla bean cheesecake! I’ve probably talked your ear off at this point, but when you make a recipe this often, you have a lot to say about it. This has saved weeknight desserts more times than I can count. It’s my answer to “what’s for dessert?” when I’m tired, don’t want takeout, and still want something that tastes really good. My kids are happy, my husband’s happy, and I’m happy because I’m not stressed about cooking.
Make it yours! Try different toppings, swap in your favorite extract (though vanilla bean is king), or adjust the sweetness. The best recipes are the ones you adapt to your family’s tastes. If you make this, drop a comment and let me know what you think! I love hearing how recipes turn out in your kitchen. And if something doesn’t work, tell me that too—I’m here to help troubleshoot.
Happy baking! And I hope your kitchen smells half as good as mine does right now.
Frequently Asked Questions
Can I use vanilla extract instead of vanilla bean?
You can, but the flavor won’t be as intense or aromatic. If you use extract, use 2 teaspoons. But I highly recommend trying a vanilla bean or vanilla bean paste at least once. The tiny black specks are so pretty, and the flavor is superior. It’s worth the extra effort.
Why did my cheesecake crack?
Cracking is usually caused by overmixing (too much air), overbaking (too much heat), or cooling too quickly (thermal shock). This recipe is designed to prevent cracking with a water bath and gradual cooling. If it still cracks, it’s still delicious—just cover it with whipped cream or fruit!
Can I make this in a pie dish instead of a springform pan?
Yes, but you’ll need to adjust the baking time. A pie dish is shallower, so it might bake faster. Start checking at 1 hour. Also, removing the cheesecake from a pie dish is harder. A springform pan is really the best tool for the job.
How long does cheesecake last in the fridge?
It lasts up to 5 days in the refrigerator. After that, it might start to dry out or develop off-flavors. If you don’t think you’ll eat it in 5 days, freeze it!
Can I double this recipe?
Yes, but you’ll need a larger springform pan (10-inch) or two 9-inch pans. Adjust the baking time accordingly—it might take a bit longer. Keep an eye on the jiggle test.
Is there a way to make this without a water bath?
You can, but the risk of cracking increases. If you skip the water bath, place a pan of boiling water on the bottom rack of the oven to create steam. This helps mimic the humid environment of a water bath.
Pin This Recipe!
Ultra-Creamy Vanilla Bean Cheesecake: Best Easy Recipe
- Total Time: 1 hour 45 minutes (plus cooling and chilling time)
- Yield: 12 servings 1x
Description
A light, airy, and ultra-creamy vanilla bean cheesecake with a buttery graham cracker crust. This recipe uses a water bath and specific cooling techniques to prevent cracking, resulting in a rich, velvety dessert that is easier to make than you think.
Ingredients
- 1 ½ cups (150g) graham cracker crumbs
- 6 tablespoons (85g) unsalted butter, melted
- 2 tablespoons (25g) granulated sugar
- ¼ teaspoon salt
- 32 ounces (900g) full-fat brick-style cream cheese, softened
- 1 cup (200g) granulated sugar
- 4 large eggs, room temperature
- 1 cup (240g) sour cream
- 2 teaspoons vanilla bean paste OR 1 real vanilla bean, seeds scraped
- 2 tablespoons (15g) all-purpose flour
Instructions
- Preheat oven to 325°F (165°C). Grease the bottom of a 9-inch springform pan and wrap the outside tightly with two layers of heavy-duty aluminum foil.
- In a medium bowl, mix graham cracker crumbs, melted butter, sugar, and salt until it resembles wet sand. Press firmly into the bottom of the prepared pan. Bake for 10 minutes, then remove and let cool.
- In a large bowl, beat softened cream cheese and sugar on medium-low speed until completely smooth. Scrape down the sides. Add sour cream and vanilla (or vanilla bean seeds) and mix until combined.
- Add eggs one at a time, mixing on low speed just until incorporated. Do not overmix. Scrape the bowl and gently fold in the flour.
- Place the springform pan on a rimmed baking sheet. Pour boiling water into the sheet until it comes about an inch up the sides of the pan.
- Bake for 1 hour and 15 minutes. The edges should be set, but the center should jiggle slightly like Jell-O. Do not open the oven door during the first hour.
- Turn off the oven and crack the door open. Let the cheesecake sit in the oven for 1 hour to cool gradually.
- Remove from the oven and let cool completely on a wire rack. Cover with plastic wrap and refrigerate for at least 4 hours, preferably overnight.
- Before serving, dip a sharp knife in hot water and wipe dry between cuts for clean slices. Serve plain or with toppings like whipped cream, berries, or caramel.
Notes
Ensure all ingredients, especially cream cheese and eggs, are at room temperature to prevent lumps and cracking. Do not overmix the batter after adding eggs to avoid incorporating air. The cheesecake tastes best on day two or three after flavors have melded. For clean slices, dip the knife in hot water and wipe it dry between every cut.
- Prep Time: 30 minutes
- Cook Time: 1 hour 15 minutes
- Category: Dessert
- Cuisine: American
Nutrition
- Serving Size: 1 slice
- Calories: 380
- Sugar: 26
- Sodium: 220
- Fat: 24
- Saturated Fat: 14
- Carbohydrates: 32
- Fiber: 1
- Protein: 6
Keywords: vanilla bean cheesecake, creamy cheesecake, graham cracker crust, water bath cheesecake, easy cheesecake recipe, vanilla bean paste, holiday dessert