It was late October, and I was staring at a fully stocked fridge, feeling that specific kind of panic that only happens three days before a family gathering. My sister-in-law had just mentioned she was bringing her famous pumpkin pie, but I wanted to contribute something too. The problem? I had already baked two batches of soft garlic knots with parmesan for the appetizer table, and my oven was still radiating heat from a batch of double chocolate muffins. I didn’t want to turn on the oven again. I didn’t want to deal with a soggy crust or a cracked top. I just wanted something that tasted like autumn but required zero effort.
So I did what any desperate cook does: I raided the pantry and the fridge. I pulled out a can of pumpkin puree, some heavy cream, maple syrup, and a package of graham crackers. I didn’t even have a food processor, so I did everything by hand. I was skeptical. I’ve made enough pumpkin pie from scratch to know that the filling needs structure, and the crust needs to be sturdy. But I also knew that “no-bake” usually means “mushy and sad” in my experience.
I was wrong. Dead wrong.
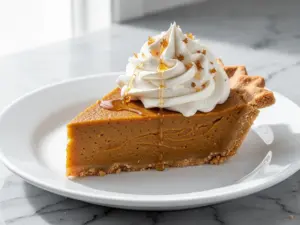
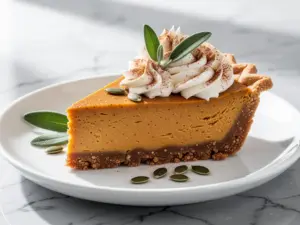
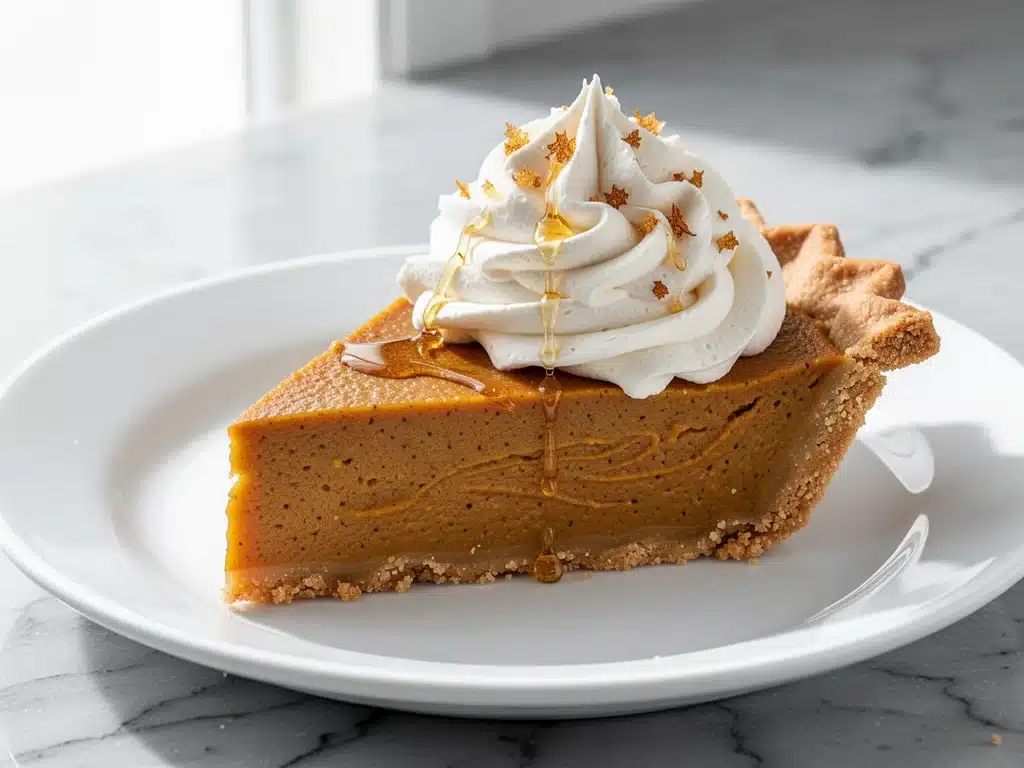
That first bite was… unexpected. The graham cracker base was crunchy and buttery, the filling was incredibly creamy and rich, and the whipped maple cream on top added this perfect, light sweetness that cut through the spices. It tasted like a fancy dessert from a high-end bakery, but I’d made it in 20 minutes while my dog slept on my feet. I served it, and my brother-in-law, who is notoriously picky about desserts, asked for the recipe before he even finished his slice. That was the moment I knew I had found a winner.
Since that October night, I’ve made this fall no-bake pumpkin pie with whipped maple cream at least six times. It’s become my go-to for Thanksgiving, Halloween parties, and random Tuesday cravings when I want something sweet but don’t want to spend hours in the kitchen. It’s simple, it’s delicious, and it’s genuinely impressive. If you’re looking for a dessert that checks all the boxes—easy, seasonal, and absolutely delicious—this is it.
Why You’ll Love This 5-Ingredient No-Bake Dessert
There are about ten reasons I keep making this pie, but here are the big ones that have convinced me to ditch my traditional baked pumpkin pie recipe for good.
Zero Oven Required — Seriously, this is the best part. Your kitchen stays cool, and you don’t have to worry about preheating, timing, or checking if it’s done. I make this on days when my oven is already full of other dishes, or when I just don’t want the heat. It’s a game-changer for busy holiday hosts.
Stupid Simple Ingredients — You probably have most of this already. Pumpkin puree, graham crackers, butter, maple syrup, and heavy cream. That’s it. No weird spices you’ll use once a year and forget about. No gelatin. No cornstarch. Just real, recognizable food. If you can make maple banana nut muffins, you can make this pie.
Whipped Maple Cream is a Game-Changer — Most no-bake pies just have whipped topping. I like to make a proper whipped cream sweetened with maple syrup instead of sugar. It adds this sophisticated, earthy sweetness that pairs perfectly with the pumpkin. It’s the kind of detail that makes people ask, “What is this? This tastes like restaurant quality!”
Makes Amazing Leftovers — Actually, it tastes better the next day. The flavors meld together while it sits in the fridge. The crust softens just enough, and the filling sets perfectly. I deliberately make extra for lunch throughout the week, and it holds up really well in the fridge for up to 4 days.
Budget-Friendly — Feeds 8-10 people for under $10. That’s less than what you’d pay for a single slice at a fancy cafe. I buy the generic brand pumpkin puree and it works just as well as the name brands. This is a smart way to feed a crowd without breaking the bank.
This is my go-to when I need a dessert that just works. No complicated techniques, no weird ingredients, just reliable, delicious food that makes everyone happy. And the best part? You can make it a day ahead, so you’re not stressed on the day of your event.
Ingredients You’ll Need
Here’s the best part: you probably have most of this already. This looks like a short list, but each ingredient plays a specific role in creating that perfect texture and flavor. I’m particular about three things here, and I’ll tell you exactly why.
Graham Crackers (1 ½ cups / about 150g, crushed) — This is your crust. I use regular honey graham crackers, not the cinnamon ones, because the honey flavor is subtle and sweet. You need them finely crushed. I use a food processor, but you can put them in a ziplock bag and crush them with a rolling pin. Don’t skip this step—chunky crumbs make a gritty crust.
Unsalted Butter (6 tablespoons / 85g, melted) — This binds the crust together. I use unsalted so I can control the saltiness, but if you only have salted, reduce the added salt in the filling by half. Melt it completely but let it cool slightly so it doesn’t melt the pumpkin mixture.
Pumpkin Puree (1 can / 15oz or about 425g) — Important: Do not use pumpkin pie filling. That’s already sweetened and spiced. You need 100% pure pumpkin puree. I always use Libby’s or a generic brand, but make sure the label says “100% Pure Pumpkin.” This is the star of the show.
Heavy Cream (1 cup / 240ml) — Full-fat only. This gives the filling its rich, creamy texture. Half-and-half will make it too thin, and skim milk will make it watery. Trust me on this. The fat content is what makes it luxurious.
Maple Syrup (¼ cup / 60ml) — Real maple syrup, not pancake syrup. I use Grade B maple syrup because it has a stronger, more robust flavor that stands up to the pumpkin. If you only have Grade A, it’ll still work, but the flavor will be milder. This is what sweetens the pie and adds that autumnal depth.
Pumpkin Pie Spice (2 teaspoons) — This is a blend of cinnamon, ginger, nutmeg, cloves, and allspice. I buy pre-made because it’s convenient, but you can make your own (1 tsp cinnamon, ½ tsp ginger, ¼ tsp nutmeg, ¼ tsp cloves). Fresh spices make a huge difference, so if yours are from the back of your cabinet, consider buying a new jar.
Vanilla Extract (1 teaspoon) — Just a splash to round out the flavors. I use pure vanilla, not imitation, because the flavor is more complex. It’s subtle but necessary.
For the Whipped Maple Cream:
Heavy Cream (1 cup / 240ml, very cold) — This needs to be ice cold for the best whipping results. If your cream is warm, it won’t whip up. Keep it in the fridge until the last minute.
Maple Syrup (2 tablespoons / 30ml) — Sweetens the whipped cream. Again, use real maple syrup for the best flavor.
Vanilla Extract (½ teaspoon) — Adds aroma and depth.
Pinch of Salt — Enhances all the other flavors. Don’t skip this.
Personal Tips:
- Cream Cheese Option: Some people add 8oz of cream cheese to the filling for extra stability. I haven’t tried it, but it’s a common variation. If you want a firmer pie, you might try it.
- Crust Shortcuts: You can use ginger snaps or vanilla wafers instead of graham crackers for a different flavor profile. I’ve used ginger snaps, and they’re delicious, but they make the crust spicier.
- Puree Consistency: If your pumpkin puree looks watery, drain it in a cheesecloth or paper towel for 10 minutes before using. This prevents a soggy pie.
Equipment Needed
You don’t need fancy equipment for this. Here’s what I actually use.
Food Processor or Blender — For crushing the graham crackers and blending the filling. If you don’t have one, you can use a ziplock bag and rolling pin for the crackers, and a large bowl and whisk for the filling. It takes more elbow grease, but it works.
9-inch Pie Dish — Glass or ceramic is fine. I use a glass dish because I can see if the crust is browning (though we’re not baking it, so it doesn’t matter much). A metal pie pan works too.
Mixing Bowls — One large bowl for the filling, one medium for the whipped cream. I like to have them ready before I start.
Hand Mixer or Stand Mixer — For whipping the cream. A whisk works, but it takes forever. I use a hand mixer because it’s faster and less tiring. If you’re making this on a whim and only have a whisk, be prepared for some arm workout.
Measuring Cups and Spoons — Standard stuff. Dollar store versions work fine.
Spatula — For scraping the bowl and folding the mixture. A silicone spatula is best because it gets everything out of the bowl.
Optional but nice:
- Pastry Brush — For brushing the crust with melted butter evenly.
- Offset Spatula — For spreading the filling smoothly. A regular spatula works, but an offset makes it easier.
How to Make It: Step-by-Step
Alright, let’s make this! I’m walking you through exactly how I do it, including the little tricks I’ve picked up.
Step 1: Prep Your Crust (5 minutes)
Crush your graham crackers until they’re fine crumbs. If you’re using a food processor, pulse until you have a sandy texture. If you’re doing it by hand, put them in a ziplock bag and crush them with a rolling pin until there are no large chunks. In a medium bowl, mix the crumbs with the melted butter and a pinch of salt until it looks like wet sand. Press this mixture firmly into the bottom and up the sides of your 9-inch pie dish. Use the bottom of a glass to pack it down tightly. This is crucial—a loose crust will fall apart when you slice it. Set it aside.
Step 2: Make the Filling (10 minutes)
In a large bowl, combine the pumpkin puree, heavy cream, maple syrup, pumpkin pie spice, vanilla extract, and a pinch of salt. Whisk this together until it’s completely smooth. I use a hand mixer on low speed for about 1 minute to ensure there are no lumps of spice or pumpkin. The mixture should be uniform and creamy. Pour this into your prepared crust and smooth the top with a spatula. Tap the pie dish gently on the counter to remove any air bubbles.
Step 3: Chill the Pie (At least 2 hours)
This is the hardest part: waiting. Place the pie in the refrigerator for at least 2 hours, but preferably 4 hours or overnight. The filling needs time to set. If you try to slice it too soon, it’ll be mushy. I usually make this the day before I need it, so it has plenty of time to set. This is also when the flavors meld together, making it taste even better.
Step 4: Make the Whipped Maple Cream (5 minutes)
When you’re ready to serve, make the whipped cream. In a cold bowl, combine the heavy cream, maple syrup, vanilla extract, and a pinch of salt. Whip with a hand mixer or stand mixer on medium-high speed until stiff peaks form. Be careful not to over-whip, or it’ll turn into butter. You want it light and fluffy. The maple syrup adds a subtle sweetness that complements the pumpkin perfectly.
Step 5: Assemble and Serve
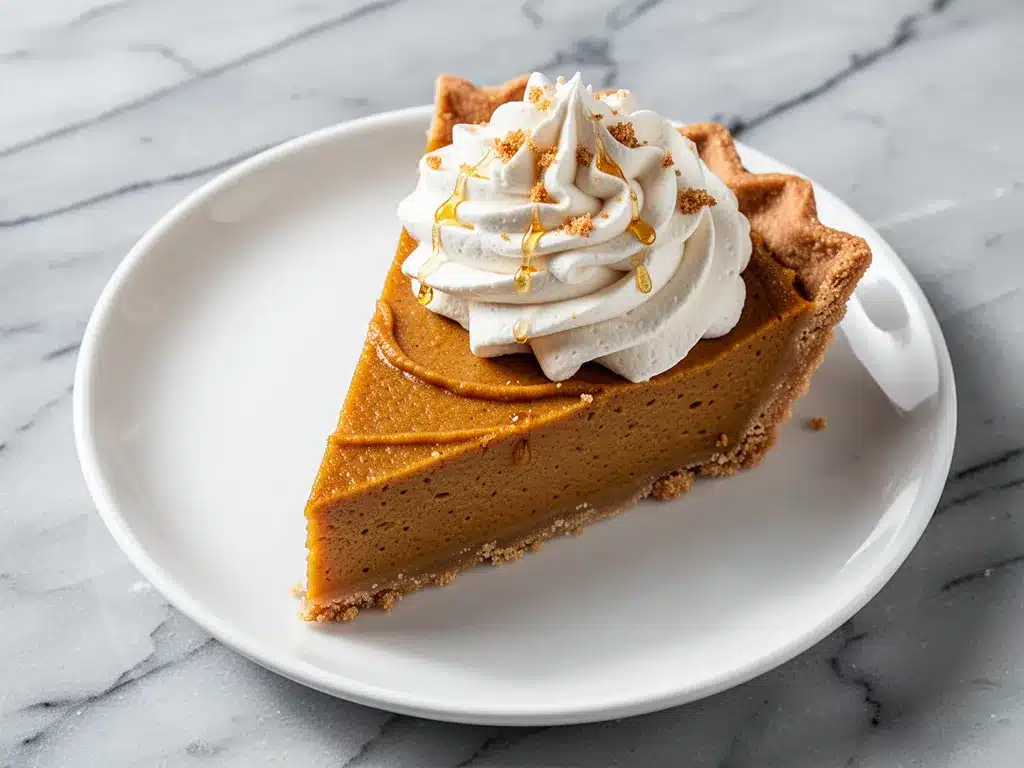
Spoon the whipped maple cream on top of the chilled pie. You can dollop it on or spread it evenly—I prefer dollops for a rustic look. Sprinkle with a little extra pumpkin pie spice or a few crushed graham cracker crumbs for garnish. Slice with a sharp knife, wiping the blade between cuts for clean slices. Serve immediately.
Total Time: About 20 minutes active, plus 2+ hours chilling.
Built-in Troubleshooting:
- Crust is crumbling: You didn’t pack it down tightly enough, or there wasn’t enough butter. Next time, press harder and add a teaspoon more butter if needed.
- Filling is too runny: It probably didn’t chill long enough. Give it more time in the fridge. If it’s still runny after 4 hours, the pumpkin puree might have been too watery. Drain it next time.
- Whipped cream won’t stiffen: Your cream or bowl might be too warm. Chill your bowl and beaters in the fridge for 15 minutes before whipping.
Expert Tips & Tricks
Here’s everything I’ve learned from making this dozens of times. These tips will save you from my mistakes.
Chill Everything
This is the #1 tip for whipped cream. Your bowl, your beaters, and your cream should all be cold. If your kitchen is warm, put the bowl in the fridge for 10 minutes before starting. Warm cream won’t whip up properly, and you’ll end up with soup instead of peaks.
Don’t Skimp on the Spice
Pumpkin can be bland on its own. The pumpkin pie spice is what makes it taste like fall. Don’t reduce it or leave it out. I’ve tried it without, and it just tastes like sweetened pumpkin. The spice is essential.
Real Maple Syrup Only
Maple-flavored syrup is basically colored sugar water. It doesn’t have the depth of flavor that real maple syrup does. The difference is noticeable, especially in a recipe with so few ingredients. Spend the extra dollar for real maple syrup.
Make It Ahead
This pie actually improves with age. Make it the day before you need it. The flavors meld together, and the crust softens just enough. It’s much easier to manage on the day of your event if you’ve already made it.
Common Mistakes (and how to avoid them):
- Mistake: Pie is too sweet
Fix: Reduce the maple syrup in the filling to 2 tablespoons. Pumpkin puree is naturally slightly sweet, and the whipped cream adds more sweetness. Taste the filling before chilling if you’re unsure. - Mistake: Crust is too hard
Fix: You used too much butter. Next time, use 5 tablespoons instead of 6. The crust should be tender, not like a cracker. - Mistake: Whipped cream is grainy
Fix: You over-whipped it. Stop as soon as you see stiff peaks. If it’s already grainy, gently fold in a tablespoon of cold cream to smooth it out.
Variations & Substitutions
Once you’ve nailed the basic version, here’s how you can mix it up. I’ve tried all of these.
Gluten-Free Version
Use gluten-free graham crackers or even gluten-free cookies like Oreos (remove the cream) for a chocolate crust. Everything else is naturally gluten-free. I’ve used gluten-free graham crackers, and they work great, though the texture is slightly different.
Dairy-Free Version
Replace the butter with coconut oil and the heavy cream with full-fat coconut cream. Use maple syrup as usual. The flavor will be slightly coconutty, which actually pairs well with pumpkin. My lactose-intolerant friend requests this version.
Lower-Sugar Version
Reduce the maple syrup in the filling to 2 tablespoons and use a sugar-free maple syrup for the whipped cream. It’s not as sweet, but it’s still delicious. I make this when I’m trying to cut back on sugar.
Spiced Up
Add ½ teaspoon of cinnamon and ¼ teaspoon of nutmeg to the filling if you don’t have pumpkin pie spice. You can also add a pinch of cardamom for a unique flavor.
Crust Variations
Use ginger snaps, vanilla wafers, or even crushed shortbread cookies for the crust. Each gives a different flavor profile. Ginger snaps add spice, vanilla wafers add sweetness, and shortbread adds richness.
Add-Ins
Stir in ½ cup of chopped pecans or walnuts into the filling for crunch. I love the texture contrast. You can also swirl in a little caramel sauce before chilling for a caramel pumpkin pie.
Serving & Storage
How to Serve:
I usually serve this straight from the fridge at the dinner table. It looks rustic and stays cold. But here are other ways I’ve enjoyed it:
Side Dishes:
- Apple cider (hot or cold)
- Coffee or tea (pumpkin pie and coffee are a classic pair)
- Salty snacks like crispy baked parmesan crackers to balance the sweetness
Toppings Bar:
When I have guests, I put out: extra whipped cream, crushed pecans, caramel drizzle, and a little extra pumpkin pie spice. Everyone customizes their slice.
Storage Instructions:
Refrigerator: Store in an airtight container or covered with plastic wrap for up to 4 days. The pie will keep well in the fridge.
Reheating: Do not reheat this pie. It’s meant to be served cold. If you want it slightly warmer, let it sit at room temperature for 10-15 minutes before serving.
Freezing: Honestly, this doesn’t freeze well because of the whipped cream and the texture of the pumpkin puree. The filling can become watery when thawed. Make it fresh or store in the fridge for up to 4 days.
Meal Prep: Make the crust and filling separately. Store the crust in an airtight container and the filling in the fridge. Assemble just before serving. This keeps the crust crunchy.
Nutrition Information
I’m not a nutritionist, but here’s the breakdown if you’re tracking.
Per Serving (based on 8 servings):
- Calories: 320
- Protein: 3g
- Carbs: 28g
- Fiber: 2g
- Sugar: 18g
- Fat: 22g
- Saturated Fat: 13g
- Cholesterol: 65mg
- Sodium: 180mg
- Calcium: 60mg
What’s Good:
- Decent fiber from the pumpkin
- Calcium from the dairy
- No artificial preservatives
What to Know:
- Higher in calories and fat from the cream and butter
- Contains dairy and gluten
- Moderate sugar content
My Take:
Look, this is a dessert with cream and maple syrup. It’s not a diet recipe. But it’s way better than store-bought, costs less, and I know exactly what’s in it. When I want to make it lighter, I use less cream and more pumpkin. But usually? I just eat a reasonable portion and enjoy it.
Final Thoughts
So that’s my go-to fall no-bake pumpkin pie with whipped maple cream! I’ve probably talked your ear off at this point, but when you make a recipe this often, you have a lot to say about it.
This has saved me more times than I can count. It’s my answer to “what’s for dessert” when I’m tired, don’t want to bake, and still want something that tastes really good. My family is happy, my guests are happy, and I’m happy because I’m not stressed about cooking.
Make it yours! Try different crusts, swap in your favorite spices, adjust the sweetness to your taste. The best recipes are the ones you adapt to your family’s tastes. If you make this, drop a comment and let me know what you think! I love hearing how recipes turn out in your kitchen. And if something doesn’t work, tell me that too—I’m here to help troubleshoot.
Happy cooking! And I hope your kitchen smells half as good as mine does right now.
Frequently Asked Questions
Can I use pumpkin pie filling instead of pumpkin puree?
No, you shouldn’t. Pumpkin pie filling is already sweetened and spiced, which will throw off the balance of your pie. You need 100% pure pumpkin puree. If you only have pie filling, you’d need to significantly reduce the maple syrup and pumpkin pie spice in the recipe, which is complicated. Stick with pure puree for the best results.
Why did my whipped cream turn out runny?
This usually happens if the cream or the bowl was too warm. Heavy cream needs to be cold to whip properly. Keep your bowl and beaters in the fridge for 15 minutes before starting, and make sure your cream is straight from the fridge. If it’s still runny, you might have under-whipped it. Whip it a bit longer, but watch closely so you don’t over-whip it into butter.
Can I make this ahead for a dinner party?
Absolutely! This pie is actually better when made ahead. You can make it up to 2 days in advance and store it in the fridge. Just make the whipped cream fresh before serving. This saves you so much stress on the day of your party. I do this all the time.
How long does this pie last in the fridge?
It lasts up to 4 days in the fridge if stored in an airtight container or covered with plastic wrap. After that, the texture might start to break down, and the crust might get too soft. It’s best eaten within the first 2-3 days.
Can I use coconut milk instead of heavy cream?
You can, but the texture will be different. Full-fat coconut milk will work for the filling, but it needs to be chilled overnight so the cream separates from the water. Use the thick cream part for whipping. The flavor will be slightly coconutty, which pairs well with pumpkin. It’s a good option for dairy-free diets.
Why did my crust fall apart when I sliced it?
This usually means the crust wasn’t packed down tightly enough, or there wasn’t enough butter to bind it. Next time, press the crust firmly into the pie dish using the bottom of a glass. Make sure the butter is fully melted and evenly distributed. If the crust is still crumbly, you can brush the bottom with a little extra melted butter before adding the filling.
Pin This Recipe!
Fall No-Bake Pumpkin Pie: 5-Ingredient No-Bake Dessert
- Total Time: 2 hours 20 minutes
- Yield: 8 servings 1x
Description
A simple, creamy no-bake pumpkin pie with a crunchy graham cracker crust and whipped maple cream topping. This dessert requires zero oven time and is perfect for busy holiday gatherings or quick weeknight cravings.
Ingredients
- 1 ½ cups graham crackers, finely crushed
- 6 tablespoons unsalted butter, melted
- 1 pinch salt (for crust)
- 1 can (15oz / 425g) 100% pure pumpkin puree
- 1 cup heavy cream (for filling)
- ¼ cup real maple syrup
- 2 teaspoons pumpkin pie spice
- 1 teaspoon vanilla extract
- 1 pinch salt (for filling)
- 1 cup heavy cream, very cold (for whipped topping)
- 2 tablespoons real maple syrup (for whipped topping)
- ½ teaspoon vanilla extract (for whipped topping)
- 1 pinch salt (for whipped topping)
Instructions
- Crush graham crackers into fine crumbs. Mix with melted butter and a pinch of salt until resembling wet sand.
- Press the crumb mixture firmly into the bottom and up the sides of a 9-inch pie dish. Use the bottom of a glass to pack it down tightly. Set aside.
- In a large bowl, whisk together pumpkin puree, 1 cup heavy cream, ¼ cup maple syrup, pumpkin pie spice, vanilla extract, and a pinch of salt until completely smooth.
- Pour the filling into the prepared crust and smooth the top. Tap the dish gently to remove air bubbles.
- Refrigerate the pie for at least 2 hours, preferably 4 hours or overnight, until the filling is set.
- When ready to serve, whip the cold heavy cream, 2 tablespoons maple syrup, ½ teaspoon vanilla, and a pinch of salt until stiff peaks form.
- Spoon or dollop the whipped maple cream on top of the chilled pie.
- Garnish with extra pumpkin pie spice or crushed graham crackers. Slice with a sharp knife and serve immediately.
Notes
Ensure pumpkin puree is 100% pure, not pie filling. Keep all equipment and cream very cold for whipping. The pie tastes better the next day as flavors meld. Do not freeze as texture may become watery.
- Prep Time: 20 minutes
- Cook Time: 0 minutes
- Category: Dessert
- Cuisine: American
Nutrition
- Serving Size: 1 slice
- Calories: 320
- Sugar: 18
- Sodium: 180
- Fat: 22
- Saturated Fat: 13
- Carbohydrates: 28
- Fiber: 2
- Protein: 3
Keywords: no-bake pumpkin pie, fall dessert, easy pumpkin recipe, whipped maple cream, graham cracker crust, holiday dessert, gluten-free option