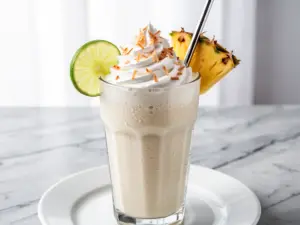
Last July, I was standing in my kitchen at 11 PM, staring at a blender that was covered in sticky, white residue, trying to salvage a birthday party that had completely derailed. The main course was fine, the kids were tired, but the adult beverage situation was a disaster. I had planned a fancy wine pairing, but my husband, who doesn’t drink alcohol, had forgotten his own mocktails, and the guests were hovering near the bar like vultures. I had half a can of coconut milk, a pineapple that was slightly overripe, and a desperate need to save the vibe.
I threw everything into the blender, hit pulse, and prayed. When I poured it into a glass with crushed ice, it looked like a tropical vacation in a tumbler. It was creamy, sweet, tangy, and absolutely delicious. Within five minutes, my husband was sipping it with a grin, and my wine-drinking friends were asking for the recipe because it tasted like a vacation they couldn’t afford. That was the night I discovered the creamy coconut pina colada mocktail. It wasn’t just a fix; it became our summer staple.
Now, every time summer hits—whether it’s a backyard BBQ, a pool party, or just a hot Tuesday evening where I don’t want to cook—I make this drink. It’s the ultimate crowd-pleaser because it’s sweet enough for the kids but sophisticated enough for the adults. I’ve tested this creamy coconut pina colada mocktail probably fifty times in the last three years, tweaking the ratios until it’s perfectly balanced. It’s not just about swapping rum for juice; it’s about creating a texture that feels indulgent without the hangover. If you’ve been looking for a non-alcoholic drink that actually feels special, this is it. It’s my secret weapon for summer gatherings, and I’m sharing exactly how to make it so you can stop stressing about beverages and start enjoying your party.
Why You’ll Love This Creamy Coconut Pina Colada Mocktail
There are about ten reasons I keep making this drink, but here are the big ones that keep it in my regular rotation:
- Zero Alcohol, Maximum Flavor — Seriously, you won’t miss the rum. The coconut and pineapple provide enough sweetness and depth that the lack of alcohol is barely noticeable. It tastes like a treat, not a compromise. I’ve served this to people who swear by their margaritas, and they’ve gone back for seconds.
- Stupid Simple — If you can operate a blender, you can make this. No shaking, no muddling, no fancy bar tools. Just toss ingredients in, blend, and pour. I make this while my kids are playing outside or while I’m plating appetizers. It takes less time than it takes to drive to a store.
- Pantry-Friendly — You probably have most of these ingredients already. Coconut milk (canned), pineapple juice, and ice are staples for me. If you have a can of coconut milk in the back of your cupboard, you’re halfway there. It’s the perfect “I need to impress guests with zero effort” drink.
- Creamy Texture That Satisfies — This isn’t just fruity juice. The coconut milk gives it a rich, velvety mouthfeel that feels luxurious. It’s refreshing but also filling in a good way. It’s like a dessert in a glass, but lighter.
- Kid-Approved — My kids think this is the best drink in the world. It’s sweet, it’s tropical, and it looks like a piña colada from a cartoon. It’s the perfect way to include them in the toast without worrying about caffeine or sugar crashes from soda.
- Budget-Smart — Making this at home costs a fraction of what you’d pay at a beach bar. A single serving costs maybe $1.50 if you buy the ingredients in bulk. That’s way cheaper than a $12 cocktail, and you know exactly what’s in it.
This drink has completely changed our summer hosting game. No more buying expensive premixed drinks that taste artificial. No more stressing about alcohol management. Just pure, creamy, tropical bliss that makes everyone feel like they’re on vacation.
Ingredients You’ll Need
Here’s the best part: you probably have most of this already. I’m particular about two ingredients here—the quality of the coconut milk makes or breaks the drink—but otherwise, this is straightforward.
For the Base
Canned Coconut Milk (1 can / 400ml) — Use full-fat, unsweetened coconut milk. This is non-negotiable for the creamy texture. Do not use the carton version meant for drinking; it’s too thin. Shake the can well before opening. I use Chaokao or Native Forest brands—they have that perfect thick consistency. If you’re worried about sugar, check the label, but unsweetened is best because the pineapple provides the sweetness.
Pineapple Juice (1 cup / 240ml) — Use 100% pure pineapple juice, not from concentrate if you can find it. The flavor is brighter and less chemical-tasting. I buy the big bottles of Dole or Del Monte when they’re on sale. If you have fresh pineapple, you can blend it, but juice is faster and easier for a crowd.
Ice (2 cups / roughly 300g) — You need a lot of ice. This drink relies on the ice to create that slushy, frozen texture. Use fresh, clean ice. If your ice smells like the freezer, your drink will too. I usually grab a fresh bag from the store for parties.
Lime Juice (1 tablespoon / 15ml) — Freshly squeezed. This is crucial. It cuts through the richness of the coconut and brightens the pineapple. Bottled lime juice tastes flat and bitter. Squeeze a lime yourself—it takes 30 seconds and makes a huge difference.
For the Flavor & Sweetness
Simple Syrup or Honey (1-2 tablespoons / 15-30ml) — Optional, depending on your sweetness preference. If your pineapple juice is tart, you’ll need this. If it’s very sweet, skip it. I usually start with 1 tablespoon and taste. Honey adds a nice floral note, but simple syrup blends easier. Agave nectar works too if you’re avoiding honey.
Vanilla Extract (½ teaspoon) — A secret weapon. It adds depth and makes the drink taste more like a traditional piña colada. Don’t skimp, but don’t overdo it. It’s subtle, like a whisper of vanilla bean.
Pinch of Salt — Just a tiny pinch. It enhances the sweetness and balances the flavors. It sounds weird, but trust me. It’s the same reason you salt your caramel apples or fall caramel apple crisp—salt makes sweet things taste sweeter.
For Garnish (Optional but Recommended)
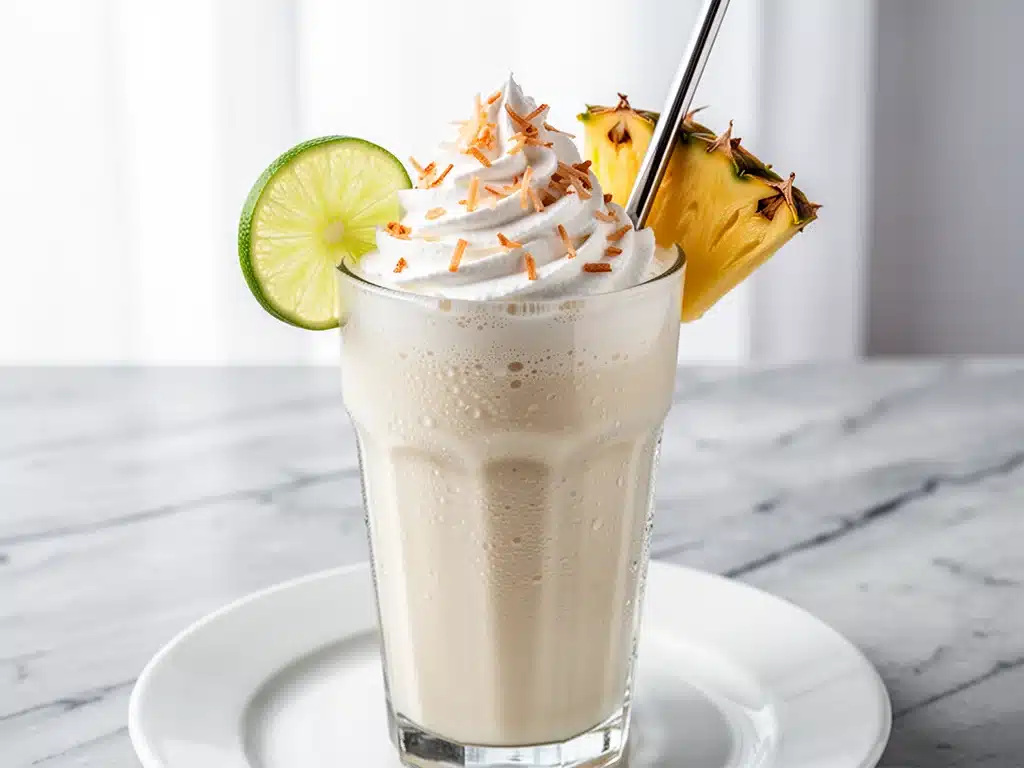
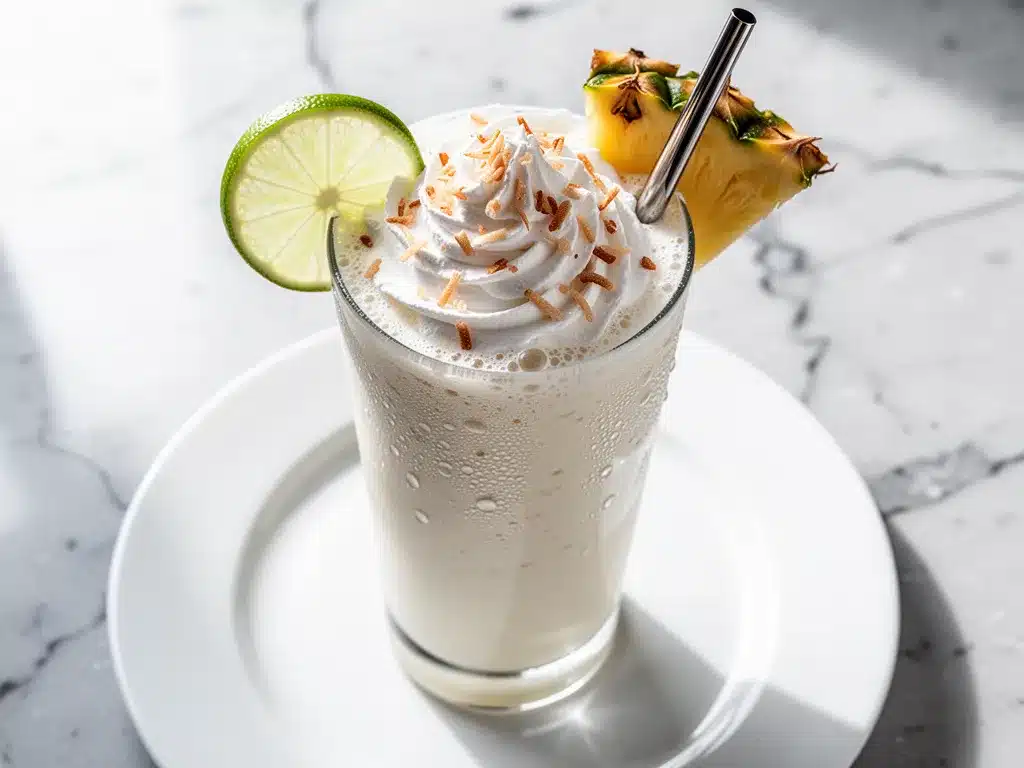
Pineapple Wedge — A fresh piece of pineapple on the rim. It looks tropical and invites people to take a sip.
Cherry — A maraschino cherry or a fresh strawberry adds a pop of color. I love the contrast of red against the white drink.
Shredded Coconut — Toasted shredded coconut sprinkled on top adds texture and looks fancy. I keep a bag of toasted coconut in my pantry specifically for garnishing drinks.
Common Questions:
Can I use frozen pineapple instead of juice?
Yes! If you have frozen pineapple chunks, blend them with a little water or coconut milk. It makes it thicker and colder, but you might need to add a splash of simple syrup since frozen fruit is less sweet than juice.
Where do I find coconut milk?
It’s in the Asian aisle or the canned soup aisle of most grocery stores. Look for cans that say “full-fat” or “creamy.” Avoid the light versions—they’re too watery.
Equipment Needed
You don’t need fancy equipment for this. Here’s what I actually use:
High-Speed Blender — I use my Vitamix, but any good blender works. If your blender is weak, you might end up with chunks of ice. A high-speed blender ensures that silky, smooth texture. If you only have a basic blender, blend for longer and maybe strain it if you’re picky.
Measuring Cups and Spoons — Standard stuff. Dollar store versions work fine. You want consistency so the drink tastes the same every time.
Glasses — Hurricane glasses or tall pint glasses look great for this. It’s a presentation drink, so the vessel matters a bit. I love using clear glasses so you can see the layers if you garnish nicely.
Strainer (Optional) — If your blender isn’t super powerful, a fine-mesh strainer helps remove any ice chunks or pulp. I usually skip this unless I’m making it for very picky guests.
Muddler (Optional) — Not really needed for this recipe, but if you want to add mint leaves, a muddler helps release the oils. I usually skip mint to keep it simple.
Knife and Cutting Board — For cutting limes and pineapple wedges for garnish. Sharp knife makes it easier and safer.
How to Make It: Step-by-Step
Alright, let’s make this! I’m walking you through exactly how I do it, including the little tricks I’ve picked up.
Step 1: Prep Your Ingredients (2 minutes)
Before you start blending, make sure your coconut milk is shaken well. Open the can and give it a vigorous shake. If you’ve opened it before, give it a stir with a spoon. You want the cream and water to be fully combined. Squeeze your lime and measure out your pineapple juice. Have your ice ready. Once you start blending, things move fast.
Step 2: Add Ingredients to Blender (1 minute)
Add the coconut milk, pineapple juice, lime juice, vanilla extract, and simple syrup (if using) to your blender. Don’t add the ice yet. Blend these liquid ingredients together for 10-15 seconds. This helps emulsify the coconut milk and pineapple juice, creating a uniform base. If you skip this, you might get separation in the glass.
Step 3: Add Ice and Blend (2 minutes)
Add the ice to the blender. Start on low speed to break up the ice, then gradually increase to high. Blend for 30-60 seconds until the mixture is smooth and slushy. You want it to look like soft-serve ice cream. If your blender is struggling, stop and shake it, or add a splash more coconut milk to help it move. The texture should be thick enough to hold a spoon upright.
Step 4: Taste and Adjust (1 minute)
Stop the blender and taste a small spoonful. Is it too tart? Add a little more simple syrup. Too sweet? Add a squeeze more lime. Too thick? Add a splash of water or more pineapple juice. Too thin? Add more ice. This is your chance to make it perfect for your taste. I usually find it needs a bit more lime than I initially think.
Step 5: Pour and Garnish (1 minute)
Pour the drink into your prepared glasses. It will be thick, so you might need to use a spoon to help it out. Garnish with a pineapple wedge and a cherry. Sprinkle with toasted coconut if you’re feeling fancy. Serve immediately while it’s cold and slushy.
Total Time: About 5 minutes (2 minutes prep, 3 minutes blending)
Expert Tips & Tricks
Here’s everything I’ve learned from making this dozens of times. These tips will save you from my mistakes.
The Coconut Milk Shake
This is the #1 tip. If you don’t shake the can well, you’ll get a watery drink with a blob of coconut cream on top. Shake it like you mean it. If you’ve opened it before, stir it thoroughly. The cream and water need to be fully integrated for that creamy texture.
Ice Quality Matters
Use fresh, cold ice. If your ice is old or smelly, your drink will taste like it. I always buy a new bag for parties. Also, the more ice you use, the thicker the drink. If you want a thinner drink, use less ice, but it won’t be as refreshing.
Lime Juice is Key
Don’t skip the lime. The acidity cuts through the fat of the coconut and balances the sugar of the pineapple. It’s what makes the drink taste bright instead of cloying. I’ve made this without lime, and it tastes flat and heavy. Always add the lime.
Blending Technique
Start on low, go to high. If you blast it on high from the start, you’ll chip your blender or break the blades. Let the ice break down gradually. If your blender is weak, blend in batches. Don’t overload it.
Make-Ahead Strategy
You can’t really make this ahead because the ice melts. But you can prep the liquid base. Mix the coconut milk, pineapple juice, lime juice, and vanilla in a pitcher and store it in the fridge for up to 2 days. When you’re ready to serve, just blend with ice. This saves time during a party.
Common Mistakes (and how to avoid them)
Mistake: Drink is too watery
Fix: You didn’t use enough ice or the coconut milk was too thin. Use full-fat canned coconut milk and add more ice.
Mistake: Drink is too sweet
Fix: Add more lime juice and a pinch of salt. Salt enhances sweetness perception, but lime cuts it. Taste and adjust.
Mistake: Drink is chunky
Fix: Your blender isn’t powerful enough. Blend longer, or strain the mixture. Or use frozen pineapple chunks instead of ice for a smoother texture.
Variations & Substitutions
Once you’ve nailed the basic version, here’s how you can mix it up. I’ve tried all of these.
Classic Piña Colada (With Rum)
Add 2 ounces of white rum per serving. This turns your mocktail into a classic cocktail. I add the rum after blending, so people can choose whether or not to have it. It’s great for adult parties.
Tropical Twist
Add ½ cup of mango chunks or passion fruit juice. It adds a new layer of tropical flavor. Mango pairs beautifully with coconut and pineapple. This is my favorite variation for summer.
Green Goddess
Add a handful of fresh spinach or kale. You won’t taste it, I promise. The coconut and pineapple mask the greens completely. It’s a sneaky way to add nutrition to a fun drink. My kids love it because it tastes like candy.
Spicy Piña Colada
Add a pinch of cayenne pepper or a slice of jalapeño. It adds a kick that contrasts with the sweetness. It’s surprising but delicious. Great for people who like a little heat.
Dairy-Free Option
Use coconut cream or cashew cream instead of coconut milk. Cashew cream is lighter but still creamy. I use this when I’m serving people who are lactose intolerant but don’t like coconut flavor as much.
Low-Sugar Version
Skip the simple syrup and use unsweetened pineapple juice. It’s tart, so add more lime. It’s still delicious but much lower in sugar. I make this when I’m watching my intake.
Serving & Storage
I usually serve this straight from the blender at the party—it looks rustic and stays cold. But here are other ways I’ve enjoyed it:
How to Serve
Serve in tall glasses with a straw. It’s a sipping drink, so a wide straw helps. Garnish generously. The visual appeal is part of the experience. I love using colorful straws and umbrellas for kids.
Side Dishes
This drink pairs well with savory snacks. It’s great with smoky chipotle queso dip or loaded nacho cheese fries. The sweetness balances the salt and spice. It’s also good with grilled chicken or fish tacos.
Storage Instructions
Refrigerator: The liquid base (without ice) can be stored in an airtight container for up to 2 days. Stir well before blending. The coconut milk might separate, so give it a good shake.
Freezing: You can freeze the liquid base in ice cube trays and blend them later. It’s a convenient way to prep for parties. Just blend the frozen cubes with a splash of water or milk.
Pro tip: If you’re making this for a crowd, set up a “mocktail bar” with different garnishes. Let people customize their drinks. It’s fun and interactive.
Nutrition Information
I’m not a nutritionist, but here’s the breakdown if you’re tracking. This is a treat, so enjoy it in moderation.
Per Serving (based on 4 servings, with simple syrup):
- Calories: 180
- Protein: 2g
- Carbs: 24g
- Fiber: 2g
- Sugar: 20g
- Fat: 10g
- Saturated Fat: 9g
- Sodium: 15mg
What’s Good:
– Contains healthy fats from coconut milk
– Vitamin C from pineapple
– No artificial ingredients
– Can be made lower sugar by skipping syrup
What to Know:
– Higher in calories from coconut fat
– Contains sugar from pineapple juice
– Moderate sodium (naturally low)
My Take:
Look, this is a sweet, creamy drink. It’s not a health food. But it’s better than soda or sugary cocktails because it uses real fruit and coconut. When I want to make it lighter, I skip the syrup and use less juice. But usually? I just enjoy it as a fun, refreshing treat.
Final Thoughts
So that’s my go-to creamy coconut pina colada mocktail! I’ve probably talked your ear off at this point, but when you make a recipe this often, you have a lot to say about it.
This drink has saved summer gatherings more times than I can count. It’s my answer to “what do we drink?” when I’m tired, don’t want to buy alcohol, and still want something that feels special. My kids are happy, my husband’s happy, and I’m happy because I’m not stressed about drinks.
Make it yours! Try different garnishes, swap in your favorite fruits, adjust the sweetness. The best recipes are the ones you adapt to your family’s tastes.
If you make this, drop a comment and let me know what you think! I love hearing how recipes turn out in your kitchen. And if something doesn’t work, tell me that too—I’m here to help troubleshoot.
Happy sipping! And I hope your kitchen smells half as tropical as mine does right now.
Frequently Asked Questions
Q: Can I use pineapple juice from concentrate?
A: You can, but fresh-squeezed or 100% juice tastes way better. From concentrate often has added sugars and tastes artificial. If you must use it, look for the kind with no added sugar. It will still work, just not as vibrant.
Q: Why is my drink too thin?
A: Usually means you didn’t use enough ice or the coconut milk was too watery. Add more ice and blend longer. If it’s still thin, add a bit more coconut milk or freeze some of the mixture in ice cube trays for next time.
Q: Can I make this ahead for a party?
A: You can prep the liquid base (coconut milk, juice, lime, vanilla) and store it in the fridge for up to 2 days. Just blend with ice right before serving. The texture will be best if you blend it fresh.
Q: Can I use almond milk instead of coconut milk?
A: You can, but it won’t be as creamy. Almond milk is thinner and has a different flavor. If you use it, add a banana to thicken it. But for the authentic piña colada taste, stick with coconut milk.
Q: How do I store leftovers?
A: If you have leftovers (unlikely!), store the liquid base in the fridge for up to 2 days. Don’t store the blended drink with ice—it will melt and become watery. Re-blend with fresh ice when ready to serve.
Q: Can I add other fruits?
A: Absolutely! Mango, passion fruit, and strawberry work great. Just add them to the blender with the ice. You might need to adjust the sweetness depending on the fruit.
Q: Is this drink gluten-free?
A: Yes, it’s naturally gluten-free. Just make sure your pineapple juice and coconut milk don’t have any added thickeners that might contain gluten (rare, but check labels if you’re sensitive).
Pin This Recipe!
Creamy Coconut Pina Colada Mocktail
- Total Time: 5 minutes
- Yield: 4 servings 1x
Description
A creamy, tropical, non-alcoholic mocktail that tastes like a vacation in a glass. This easy summer recipe uses full-fat coconut milk and pineapple juice for a rich, slushy texture that is perfect for parties and family gatherings.
Ingredients
- 1 can (400ml) full-fat unsweetened coconut milk, shaken well
- 1 cup (240ml) 100% pure pineapple juice
- 2 cups (300g) ice
- 1 tablespoon (15ml) freshly squeezed lime juice
- 1–2 tablespoons (15-30ml) simple syrup or honey, optional
- 1/2 teaspoon vanilla extract
- Pinch of salt
- Garnish: Pineapple wedge, maraschino cherry, toasted shredded coconut
Instructions
- Shake the can of coconut milk vigorously to combine the cream and water. Squeeze lime and measure pineapple juice.
- Add coconut milk, pineapple juice, lime juice, vanilla extract, and simple syrup (if using) to a blender. Blend on low for 10-15 seconds to emulsify the base.
- Add ice to the blender. Start on low speed to break up the ice, then gradually increase to high speed.
- Blend for 30-60 seconds until the mixture is smooth, thick, and slushy, resembling soft-serve ice cream.
- Taste and adjust sweetness with more syrup or tartness with more lime juice if needed.
- Pour into tall glasses. Garnish with a pineapple wedge, cherry, and/or toasted coconut. Serve immediately.
Notes
Ensure you use full-fat canned coconut milk, not the carton drinking variety, for the correct creamy texture. Shake the can well before opening. If your blender is not powerful, blend in batches or strain the mixture to remove ice chunks. The liquid base can be prepped and stored in the fridge for up to 2 days; just blend with ice when ready to serve.
- Prep Time: 2 minutes
- Cook Time: 3 minutes
- Category: Beverage
- Cuisine: Tropical
Nutrition
- Serving Size: 1 glass
- Calories: 180
- Sugar: 20
- Sodium: 15
- Fat: 10
- Saturated Fat: 9
- Carbohydrates: 24
- Fiber: 2
- Protein: 2
Keywords: mocktail, piña colada, coconut drink, summer recipe, non-alcoholic, tropical drink, easy cocktail, party drink