Let me tell you about the Sunday before Super Bowl last year. I walked into the kitchen at 4:45 PM, saw the clock, and felt that familiar sinking feeling in my stomach. The game started in fifteen minutes. The house was quiet (too quiet), the dog was staring at me like I owed him money, and my grocery list was a blank slate. I didn’t have time to drive to the store. I didn’t have time to assemble anything complicated. I just needed something hot, salty, and crunchy to put on the coffee table before the kickoff.
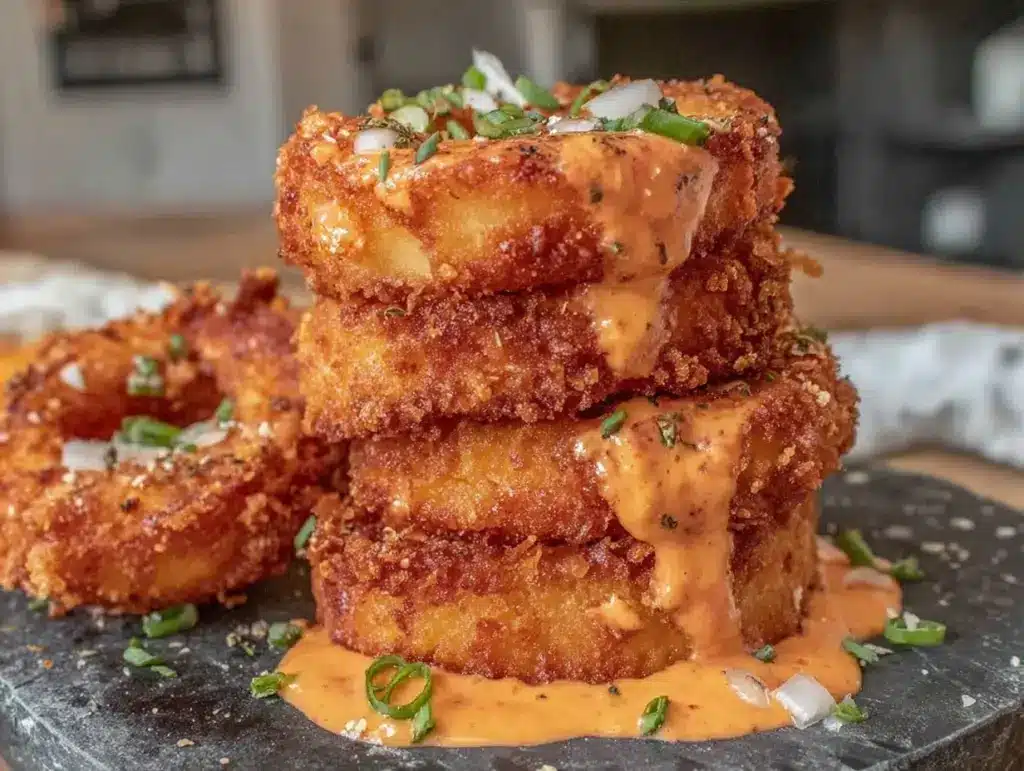
So I raided the pantry. I had onions. I had flour. I had some old spices that were probably still good. I had breadcrumbs. And I had a bottle of ranch dressing that had been hiding in the back of the fridge since Christmas. It was a disaster waiting to happen, or so I thought. But ten minutes later, I was standing over the stove, watching golden rings sizzle in the oil, smelling like a bar in Chicago. By the time the national anthem started, I had a tower of crispy onion rings stacked high on a platter, dripping with that tangy ranch.
My husband took one bite, chewed twice, and said, “Where have these been all my life?”
That was the birth of my Game Day Crispy Onion Ring Tower. It’s better than takeout. It’s faster than ordering delivery. And it uses ingredients you probably already have. I’ve made this for every game since, and it’s become the unofficial star of our party spread. Seriously, if you’re looking for a quick win when you’re stressed about hosting, this is it. It’s simple, it’s delicious, and it makes everyone happy.
Why You’ll Love This Recipe
Look, I get it. Game day food can be a hassle. You want something that looks impressive but doesn’t require a culinary degree or three hours of prep time. This onion ring tower checks every box. Here’s why it’s become my go-to:
Stupid Simple — Seriously, if you can slice an onion and dip it in flour, you can make this. I’ve made this while helping my kid with homework. It’s that easy. No fancy techniques, no special equipment.
Lightning Fast — From start to finish, it takes about 20 minutes. That’s faster than waiting for a pizza delivery driver who’s definitely lost. I can have this ready before the commercials even start.
Pantry-Friendly — You don’t need to run to the store for this. Most people have onions, flour, eggs, and breadcrumbs. The ranch dressing is the secret weapon, but you can swap it for blue cheese if that’s your thing.
Crowd-Pleaser — I’ve served this to my picky eater nephew, my foodie friend who judges everything, and my dad who only likes “meat and potatoes.” They all asked for the recipe. That’s a win.
Makes Amazing Leftovers — Okay, be real. There are rarely leftovers. But if there are, they reheat beautifully in the oven or an air fryer. They stay crispy for days. I actually made extra last week for lunch, and they were still good.
Budget-Smart — This feeds a crowd for under $10. That’s less than what you’d spend on a small appetizer platter at a sports bar. Plus, you’re controlling the quality of the ingredients.
This is my answer to “what’s for game day snacks?” when I’m tired and don’t want to stress. No complicated techniques, no weird ingredients, just reliable, delicious food that makes everyone happy.
Ingredients You’ll Need
Here’s the best part: you probably have most of this already. I’m particular about three ingredients here, and I’ll tell you exactly why. This isn’t a long list, just five key items that do all the heavy lifting.
Yellow Onions (2 large) — Use large, firm onions. They hold their shape better when frying. I like Vidalia or Walla Walla if you can find them, but standard yellow works fine. Cut them into half-inch thick rings. Don’t make them too thin or they’ll burn.
All-Purpose Flour (1 cup) — This is the base of your coating. It helps the egg wash stick to the onion. I use regular all-purpose. Don’t substitute with almond flour or something fancy here; you want that classic crunch.
Eggs (2 large) — These act as the glue. Whisk them with a little water to make an egg wash. I add a splash of water to thin it out slightly so the coating isn’t too thick. Just whisk until smooth.
Breadcrumbs (1.5 cups) — I use panko breadcrumbs for the extra crunch. Regular breadcrumbs work, but they’re denser. Panko gives you that light, airy, crispy texture that makes onion rings addictive. If you don’t have panko, regular is fine, but you might need to toast them a bit longer.
Ranch Dressing (1 cup) — This is the dip. I use a creamy ranch dressing. Store-bought is totally fine. I like Hidden Valley or Kraft. If you want to make your own, mix sour cream, mayonnaise, dried ranch seasoning, and a splash of milk. But honestly? The bottle stuff is faster and tastes just as good for game day.
Oil for Frying (about 2 cups) — I use vegetable oil or canola oil. It has a high smoke point, which is important. Don’t use olive oil; it’ll burn. You need enough oil to cover the bottom of your skillet by about an inch.
Salt and Pepper — For seasoning the onions and the flour. Don’t skip the salt. It brings out the sweetness of the onions.
Quick Tip: I buy pre-sliced onions if I’m being lazy, but they’re usually too thin. I prefer slicing my own for that perfect ring shape.
Equipment Needed
You don’t need fancy equipment for this. Here’s what I actually use.
Large Skillet — I use a 12-inch cast iron skillet. It holds heat well, which is crucial for frying. A stainless steel skillet works too. Just make sure it’s big enough to fit several rings at once without overcrowding.
Three Shallow Bowls — You need three bowls for the dredging station. One for flour, one for egg wash, one for breadcrumbs. I use pie plates or shallow cereal bowls. It makes the dipping process easier.
Wire Rack — I place a wire rack over a baking sheet to put the fried rings on. This lets them drain and stay crispy. If you don’t have a rack, paper towels work, but the rings can get soggy if they sit too long. I prefer the rack.
Cooking Thermometer — Optional, but helpful. I like to keep the oil at 350°F. If you don’t have a thermometer, drop a breadcrumb in. If it sizzles and turns golden in 60 seconds, you’re good.
Tongs — For flipping the rings. I use metal tongs. They give you better control than a fork.
Knife and Cutting Board — For slicing the onions. A sharp knife makes this step much easier. Dull knives make you cry more—learned this the hard way.
Optional but nice:
– Air Fryer — If you want a healthier option, you can air fry these. Spray with oil and cook at 400°F for 10-12 minutes, flipping halfway. They’re not quite as crispy as fried, but they’re lighter.
How to Make It: Step-by-Step
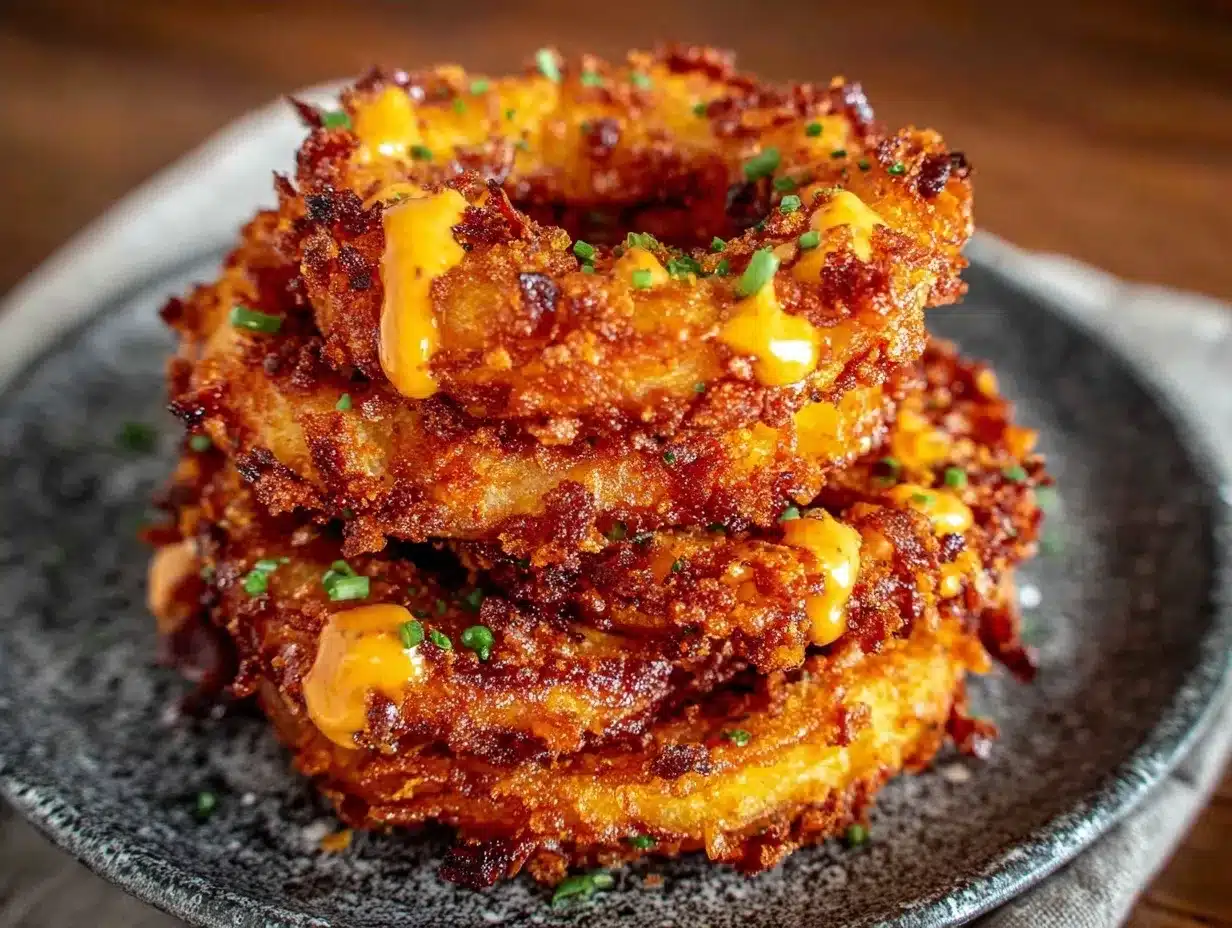
Alright, let’s make this! I’m walking you through exactly how I do it, including the little tricks I’ve picked up.
Step 1: Prep Your Onions (5 minutes)
Peel the onions and cut off the top and bottom. Slice them into half-inch thick rounds. Separate the rings. If you have any small rings that fall apart, save them for snacking or throw them in later. You want big, perfect rings for the tower. Pat them dry with paper towels. Moisture is the enemy of crispy coating.
Step 2: Set Up Your Dredging Station (3 minutes)
Get three shallow bowls. In the first, mix flour with 1 teaspoon salt and ½ teaspoon black pepper. In the second, whisk eggs with 2 tablespoons water until smooth. In the third, spread out your breadcrumbs. I like to mix a little salt and garlic powder into the breadcrumbs for extra flavor.
Step 3: Heat the Oil (5 minutes)
Pour about an inch of oil into your skillet. Heat it over medium-high heat. You want it to reach 350°F. If you don’t have a thermometer, wait until the oil shimmers and a breadcrumb sizzles immediately when dropped in. Don’t let it smoke; that means it’s too hot.
Step 4: Dredge the Rings (10 minutes)
Take an onion ring and dip it in the flour, shaking off any excess. Then dip it in the egg wash, letting the excess drip off. Finally, press it into the breadcrumbs, making sure it’s fully coated. Place it on a clean plate. Repeat with all the rings. Work quickly so the coating doesn’t get soggy.
Step 5: Fry the Rings (10 minutes)
Carefully place a few rings into the hot oil. Don’t overcrowd the pan; do it in batches. Fry for 2-3 minutes per side, or until golden brown and crispy. Use tongs to flip them. Once they’re done, transfer them to the wire rack to drain. Sprinkle with a little extra salt while they’re still hot.
Step 6: Build the Tower (5 minutes)
Once all the rings are fried, start stacking them on a platter. Place the largest rings at the bottom and work your way up. Lean them against each other to create a tower shape. It doesn’t have to be perfect; rustic looks good. Pour the ranch dressing into a small bowl on the side for dipping.
Step 7: Serve
Serve immediately while hot and crispy. Grab a ring, dip it in ranch, and enjoy. I usually make two batches because one isn’t enough for a game day crowd.
Total Time: About 30 minutes (10 minutes prep, 20 minutes cooking)
Expert Tips & Tricks
Here’s everything I’ve learned from making this dozens of times. These tips will save you from my mistakes.
Don’t Overcrowd the Pan
This is the #1 mistake people make. If you put too many rings in the oil, the temperature drops, and the rings absorb oil instead of frying. They’ll be greasy and soggy. Fry in small batches. It’s worth the extra time.
Keep the Oil Hot
Let the oil come back to temperature between batches. If you’re frying continuously, the oil might cool down. Wait 30 seconds between batches to let it heat up again.
Pat the Onions Dry
Wet onions = soggy coating. After slicing, pat them thoroughly with paper towels. This simple step makes a huge difference in crispiness.
Double Dip for Extra Crunch
If you want really thick, crunchy rings, dip them in flour, then egg, then breadcrumbs, then egg again, then breadcrumbs. It’s a bit more work, but the texture is amazing. I do this for my husband; he loves the extra crunch.
Season the Coating
Don’t just salt the finished product. Season the flour and the breadcrumbs. It adds depth of flavor that you can’t get from just the salt at the end.
Common Mistakes (and how to avoid them):
- Mistake: Rings are greasy Fix: Oil wasn’t hot enough. Use a thermometer. Also, drain on a wire rack, not paper towels.
- Mistake: Coating falls off Fix: Onions were too wet. Pat them dry. Also, press the breadcrumbs firmly onto the ring.
- Mistake: Burning Fix: Heat was too high. Lower the heat to medium. Burnt coating tastes bitter.
Pro Tricks I’ve Learned:
– For Restaurant-Quality Finish Add a pinch of cayenne pepper to the breadcrumbs for a little kick. It’s subtle but adds complexity.
– For Better Texture Let the breaded rings sit for 5 minutes before frying. This helps the coating adhere better.
– Make-Ahead Strategy You can bread the rings up to 4 hours ahead and store them in the fridge. Fry them right before serving. This saves time during the game.
Variations & Substitutions
Once you’ve nailed the basic version, here’s how you can mix it up. I’ve tried all of these.
Spicy Jalapeño Version
Add diced jalapeños to the breadcrumbs. Or, fry some jalapeño slices along with the onions. This is for the heat lovers in your group.
Cheesy Crust
Mix grated Parmesan or cheddar cheese into the breadcrumbs. It adds a savory, cheesy crunch. My kids love this version.
Gluten-Free
Use gluten-free flour and gluten-free breadcrumbs. There are great panko-style gluten-free breadcrumbs now. Everything else is naturally gluten-free.
Baked Version
For a lighter option, bake the breaded rings on a wire rack at 400°F for 15-20 minutes, flipping halfway. Spray with oil first. They’re not as crispy as fried, but they’re healthier.
Dip Variations
Ranch is classic, but try blue cheese, garlic aioli, or spicy mustard. I sometimes make a dip combining ranch and blue cheese for a tangy kick.
Serving & Storage
How to Serve:
I usually serve this straight from the skillet at the dinner table—it looks rustic and stays warm. But here are other ways I’ve enjoyed it:
Side Dishes:
– Buffalo wings (obviously)
– Corn on the cob
– Simple green salad with ranch dressing
– Potato salad (classic game day combo)
Toppings Bar:
When I have guests, I put out: extra ranch, blue cheese crumbles, chopped chives, hot sauce. Everyone customizes their bowl.
Wine Pairing:
Not a wine expert, but my wine-snob friend says a crisp Pilsner or a light Lager works great with this. Avoid heavy reds; they clash with the fried food.
Storage Instructions:
Refrigerator:
Store in an airtight container for up to 2 days. The coating will lose some crispiness, but they’re still good.
Reheating:
Best method: Oven or air fryer at 375°F for 5-7 minutes. This restores the crunch.
Microwave method: Avoid this. It makes them soggy and chewy. If you must, heat in 30-second intervals, but expect less-than-ideal texture.
Freezing:
You can freeze the breaded, uncooked rings. Place them on a baking sheet in the freezer, then transfer to a bag. Fry from frozen, adding 2-3 minutes to the cooking time. This is great for meal prepping.
Meal Prep:
Slice and bread the onions the day before. Store in the fridge. Fry them fresh on game day. Takes 10 minutes and tastes way better than reheated.
Nutrition Information
I’m not a nutritionist, but here’s the breakdown if you’re tracking.
Per Serving (based on 10 rings):
- Calories: 320
- Protein: 6g
- Carbs: 35g
- Fiber: 2g
- Sugar: 4g
- Fat: 18g
- Saturated Fat: 3g
- Cholesterol: 45mg
- Sodium: 450mg
What’s Good:
– Plant-based (if you skip the cheese dip)
– Quick source of energy
– Can add vegetables to boost nutrition
What to Know:
– Higher in calories from frying
– Contains gluten and dairy
– Moderate sodium (use low-sodium broth to reduce)
My Take:
“Look, this is game day food. It’s fried onions. It’s not a diet recipe. But it’s way better than takeout, costs less, and I know exactly what’s in it. When I want to make it lighter, I bake them instead of frying. But usually? I just eat a reasonable portion and enjoy it.”
Dietary Notes:
– Contains: gluten, dairy, eggs
– Can be made: vegetarian, gluten-free (with substitutions)
– Not suitable for: vegan (without modifications), dairy-free (without modifications)
Final Thoughts
So that’s my Game Day Crispy Onion Ring Tower! I’ve probably talked your ear off at this point, but when you make a recipe this often, you have a lot to say about it.
This has saved game day dinners more times than I can count. It’s my answer to “what’s for snacks?” when I’m tired, don’t want takeout, and still want something that tastes really good. My kids are happy, my husband’s happy, and I’m happy because I’m not stressed about cooking.
Make it yours! Try different dips, swap in your favorite spices, adjust the heat level. The best recipes are the ones you adapt to your family’s tastes. If you want more easy game day ideas, check out my smoked queso dip with chorizo—it’s another 5pm winner that pairs perfectly with these rings.
If you make this, drop a comment and let me know what you think! I love hearing how recipes turn out in your kitchen. And if something doesn’t work, tell me that too—I’m here to help troubleshoot.
Happy cooking! And I hope your kitchen smells half as good as mine does right now.
Frequently Asked Questions
Q: Can I use sweet onions instead of yellow onions?
A: Absolutely! Sweet onions like Vidalia or Walla Walla are actually better for this recipe because they’re less pungent and sweeter when fried. I prefer them over yellow onions for game day snacks.
Q: Why did my coating fall off?
A: This usually happens if the onions were too wet or if you didn’t press the breadcrumbs firmly enough. Pat the onions dry with paper towels before dredging. Also, make sure the egg wash is thick enough to act as a glue.
Q: Can I make this ahead for a dinner party?
A: Yes! Bread the rings up to 4 hours ahead and store them in the fridge. Fry them right before serving. This saves you time during the party. I do this all the time.
Q: Why did my rings turn out greasy?
A: The oil wasn’t hot enough. If the oil is too cool, the rings absorb it instead of frying. Use a thermometer to keep it at 350°F. Also, don’t overcrowd the pan.
Q: Can I use panko breadcrumbs?
A: Yes, panko is actually the best choice for extra crunch. Regular breadcrumbs work too, but they’re denser. I always use panko for this recipe.
Q: How do I reheat leftovers without it getting dry?
A: Use an oven or air fryer at 375°F for 5-7 minutes. This restores the crunch. Avoid the microwave, as it makes them soggy.
Q: Can I double this recipe?
A: Absolutely! Double everything and use your biggest skillet. The cooking times stay the same. I do this when I’m feeding a crowd. Just make sure you fry in batches to keep the oil temperature up.
Pin This Recipe!
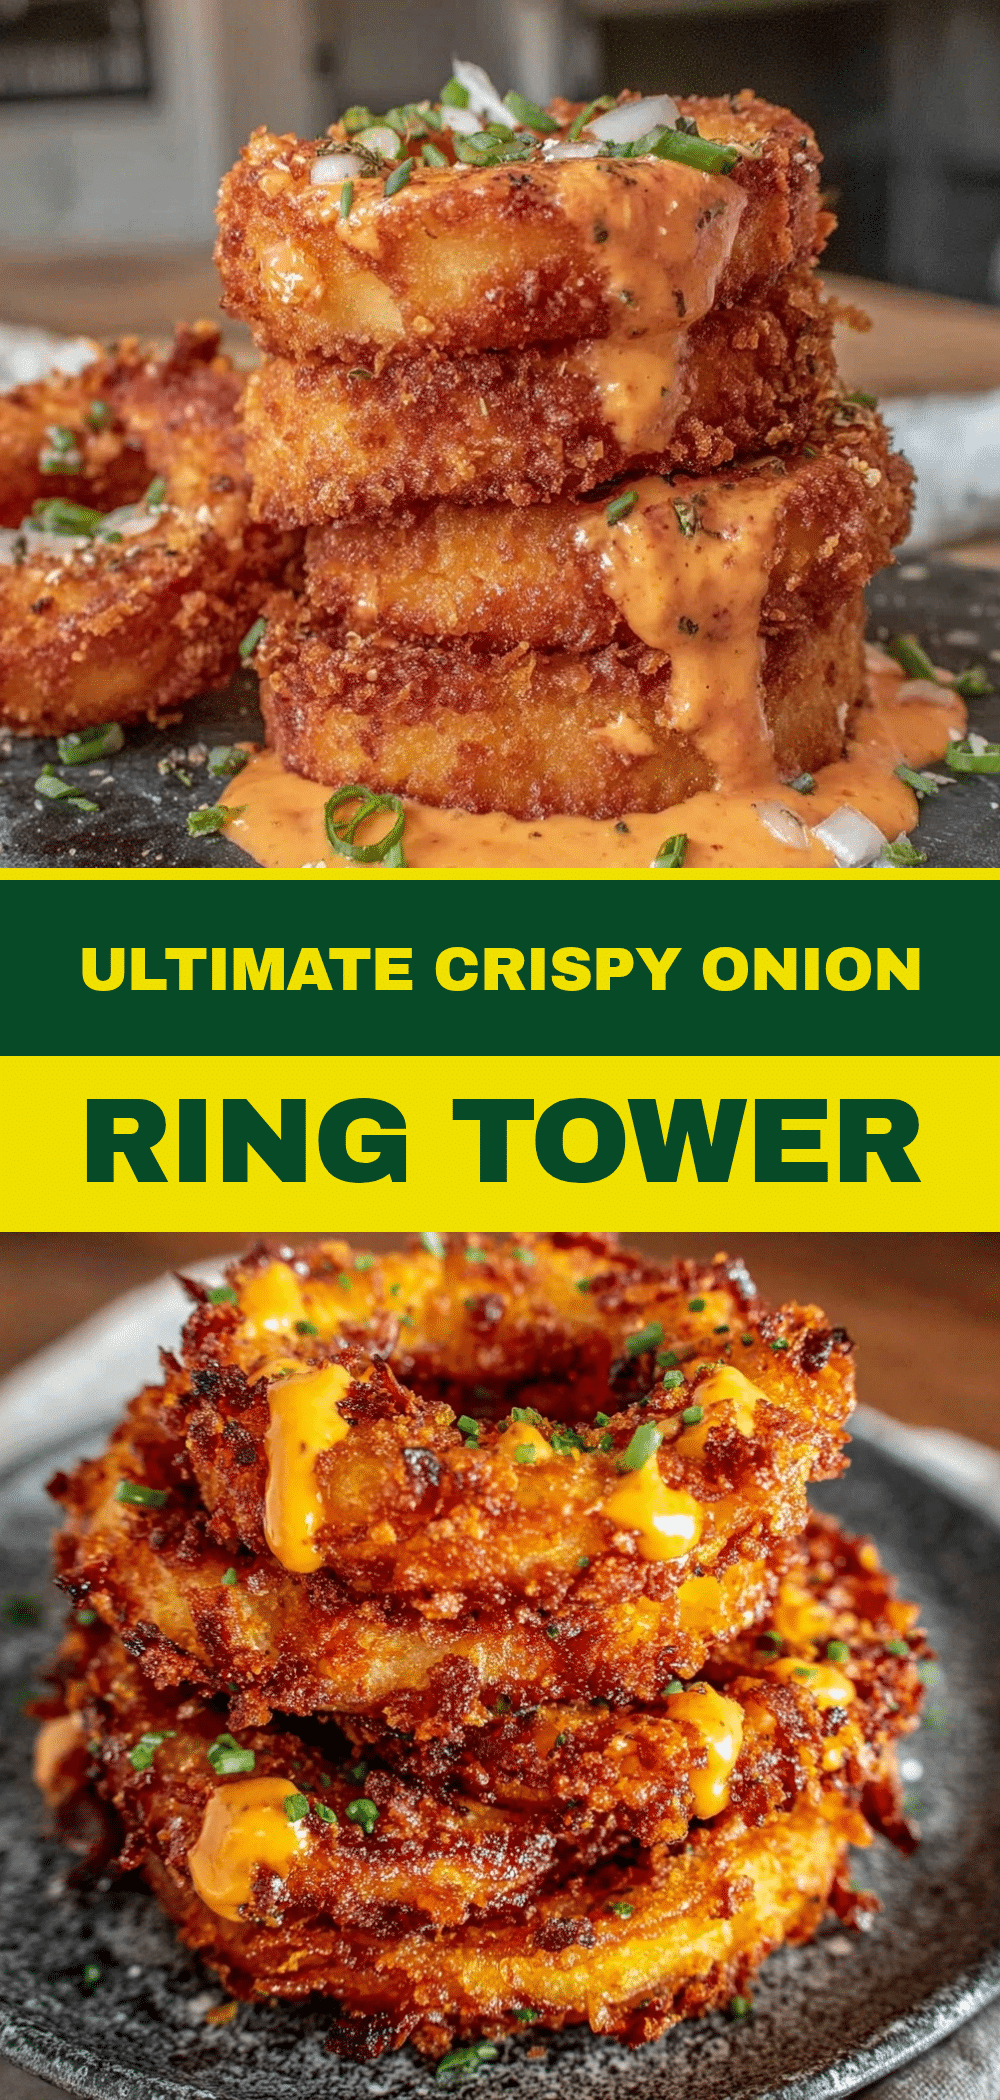
Game Day Crispy Onion Ring Tower: 5-Ingredient Easy Appetizer
- Total Time: 30 minutes
- Yield: 10 servings 1x
Description
A quick, pantry-friendly appetizer featuring crispy fried onion rings stacked into a tower and served with tangy ranch dressing. Perfect for game day or last-minute snacking.
Ingredients
- 2 large yellow onions (or sweet onions like Vidalia)
- 1 cup all-purpose flour
- 2 large eggs
- 2 tablespoons water
- 1.5 cups panko breadcrumbs
- 1 teaspoon salt (divided)
- 0.5 teaspoon black pepper (divided)
- 0.5 teaspoon garlic powder (optional, for breadcrumbs)
- Pinch of cayenne pepper (optional)
- 2 cups vegetable or canola oil (for frying)
- 1 cup ranch dressing (for dipping)
Instructions
- Peel onions and slice into half-inch thick rounds. Separate rings and pat them completely dry with paper towels.
- Set up a dredging station with three shallow bowls: one with flour mixed with 1 tsp salt and 1/2 tsp pepper; one with whisked eggs and water; one with breadcrumbs mixed with salt, garlic powder, and optional cayenne.
- Heat oil in a large skillet (preferably cast iron) over medium-high heat to 350°F.
- Dredge each onion ring in flour, shaking off excess, then dip in egg wash, and finally press into breadcrumbs to coat fully.
- Carefully place rings in hot oil in batches, avoiding overcrowding. Fry for 2-3 minutes per side until golden brown and crispy.
- Transfer fried rings to a wire rack set over a baking sheet to drain. Sprinkle with a little extra salt while hot.
- Stack the rings on a platter to form a tower, starting with larger rings at the bottom.
- Serve immediately with ranch dressing on the side for dipping.
Notes
Pat onions dry thoroughly to ensure crispy coating. Do not overcrowd the pan to maintain oil temperature. For extra crunch, double dip in egg and breadcrumbs. Can be baked at 400°F for 15-20 minutes for a lighter option. Reheat in oven or air fryer at 375°F to restore crispiness.
- Prep Time: 10 minutes
- Cook Time: 20 minutes
- Category: Appetizer
- Cuisine: American
Nutrition
- Serving Size: 1 ring per serving
- Calories: 320
- Sugar: 4
- Sodium: 450
- Fat: 18
- Saturated Fat: 3
- Carbohydrates: 35
- Fiber: 2
- Protein: 6
Keywords: game day snacks, onion rings, crispy appetizer, easy recipe, party food, fried onions, ranch dip, quick dinner