I have to be honest with you. For years, I avoided Korean cooking because I thought it was this intimidating, complicated culinary art form that required a degree in linguistics and a pantry full of ingredients I couldn’t pronounce. I remember standing in the Asian grocery store aisle back in college, staring at bottles of soy sauce, sesame oil, and gochujang paste, feeling completely lost. I bought a jar of kimchi, came home, ate it with a spoon, and decided I was just not cut out for this cuisine.
Fast forward to last month. My partner was craving something spicy, savory, and totally different from our usual pasta nights. I found a recipe for beef bulgogi rice bowls. I prepped the ingredients, panicked for a second when I realized I didn’t have rice vinegar, and then just… threw it together. The smell that hit the kitchen was incredible—sweet, funky, spicy, and deeply savory. We ate those bowls straight out of the skillet, no plates, no forks, just digging in with spoons.
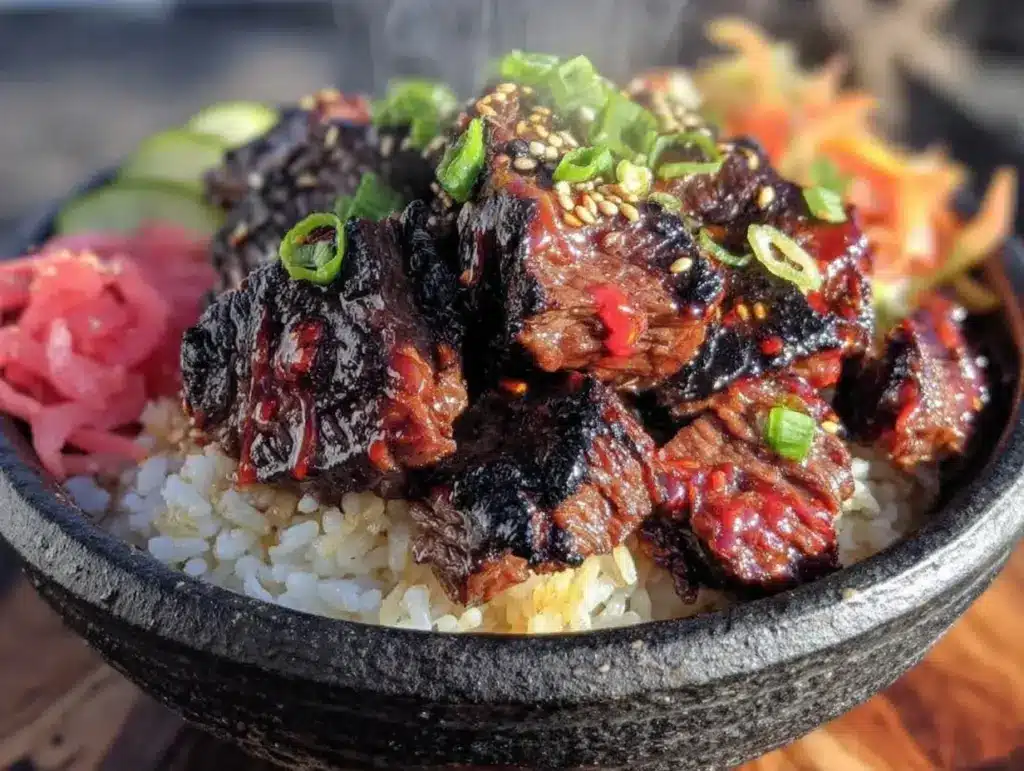
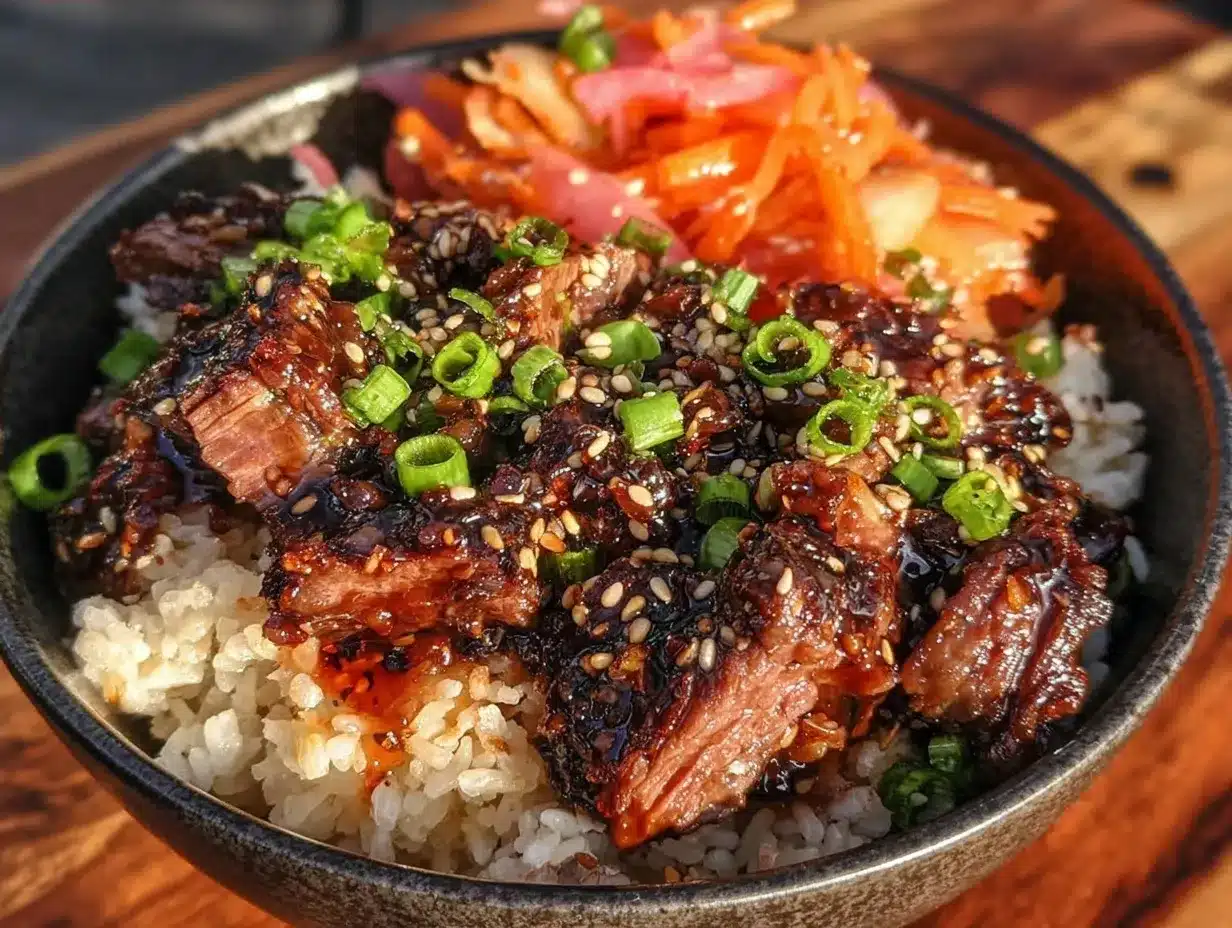
It was so good that I made it three times in a week. And then I realized something important: these Korean Gochujang Beef Bulgogi Rice Bowls with Quick Pickles are actually the easiest thing I cook. They come together in 20 minutes. They are naturally gluten-free and dairy-free (which is huge for my family since we have allergies and sensitivities). And that quick pickle? It’s the game-changer that cuts through the richness of the beef and wakes up your whole palate.
This isn’t about “diet food.” This is about flavor. Real, bold, unapologetic flavor. If you think you need to compromise when you’re eating gluten-free or dairy-free, this bowl is going to change your mind. It’s proof that you can skip the wheat and dairy and still end up with a meal that makes your eyes close in satisfaction. I’ve tested this version with different cuts of beef and different spice levels, and I’m confident this is the one you’ll want on repeat.
Why You’ll Love This Bulgogi Bowl Recipe
There are a lot of reasons this has become our go-to weeknight dinner, but let’s be real about the practical stuff first. This recipe saves me on nights when I’m tired, hungry, and don’t want to deal with a mountain of dishes.
Stupidly Fast — Seriously. If you can slice beef and mix a sauce, you can make this. The beef cooks in about 4 minutes. The rice takes 15-20 minutes but is mostly hands-off. The pickles take 5 minutes to toss together. You’re looking at 30 minutes from start to finish, and 15 of those minutes are just waiting for the rice to boil.
Gluten-Free and Dairy-Free Without the Fuss — Traditional bulgogi uses soy sauce (which has wheat) and sometimes honey or pear for sweetness. My version uses tamari for a rich, savory base that is naturally gluten-free. I skip the dairy entirely because Korean cuisine is naturally dairy-light, so I don’t even miss it. The creaminess comes from the beef juices and the sesame oil, not heavy cream or butter. It’s inherently safe for most dietary restrictions without feeling like a “substitute” recipe.
The Quick Pickle Factor — This is the secret weapon. You might think a quick pickle is just a garnish, but it’s actually essential. The crunch of the radish and cucumber, paired with the tangy vinegar brine, cuts right through the salty, sweet beef. It keeps every bite from getting heavy. I’ve made this bowl with and without the pickle, and the version with the pickle is infinitely better. Trust me on this.
Customizable Heat — Gochujang is Korean chili paste, and it can range from mild to nuclear. I like using a mix of gochujang and a little extra chili flakes for heat, but you control the spice level. If you’re making this for kids, you can easily halve the gochujang. If you like it spicy, go wild.
Pantry Staples — You probably have most of this already. Rice, beef, eggs, garlic, ginger, sesame oil, rice vinegar, and soy sauce (or tamari). The gochujang is the one thing you might need to buy, but it lasts forever in your fridge and you’ll use it for everything from dipping sauces to marinades.
Ingredients You’ll Need
Here’s the best part: this list is short. I’m particular about a few things, mostly for texture and flavor depth, but the substitutions are easy.
For the Beef
Beef Sirloin or Flank Steak (1.5 lbs / 680g) — You want a cut that’s tender but has some bite. Sirloin is my favorite because it’s lean but flavorful. Flank steak works too, but you *must* slice it against the grain, or it’ll be chewy. Ask your butcher to slice it thinly, or freeze it for 20 minutes to make slicing easier at home.
Tamari (3 tablespoons / 45ml) — I use tamari instead of regular soy sauce because it’s naturally gluten-free and has a deeper, richer flavor. If you need to be soy-free, you can use coconut aminos, but the flavor will be slightly different (sweeter, less salty). Just know that regular soy sauce contains wheat, so stick to tamari for this gluten-free recipe.
Dark Brown Sugar (2 tablespoons / 25g) — I prefer dark brown sugar over white because it adds a molasses note that pairs beautifully with the sesame. White sugar works, but it’s just sweet without that depth. This is not a low-sugar recipe, but the sweetness balances the salt and spice perfectly.
Neutral Oil (1 tablespoon / 15ml) — I use avocado oil or canola oil for the marinade. Sesame oil goes in at the end, so don’t use it here—it’ll burn.
Sesame Oil (1 tablespoon / 15ml) — Toasted sesame oil. This is the stuff that smells amazing. Buy the dark, toasted kind. The pale kind is for cooking; the dark kind is for finishing. This is non-negotiable for that authentic bulgogi taste.
Garlic (4 cloves, minced / about 2 tablespoons) — Fresh garlic only. No jarred stuff. The raw bite of fresh garlic is crucial in the marinade.
Fresh Ginger (1 tablespoon, grated / about 15g) — Grate it on a microplane. It melts into the sauce better than chopped ginger. If you’re being lazy, ginger paste from a tube works, but fresh is better.
For the Quick Pickles
Daikon Radish (1 cup, julienned / about 100g) — This is the traditional choice. It’s white, crunchy, and mild. If you can’t find daikon, you can use white radish or even jicama, but daikon is best. You can buy it pre-cut at most Asian markets, which saves time.
English Cucumber (1 small, julienned / about 100g) — English cucumbers have fewer seeds and thinner skins, so they stay crunchy in the vinegar. Regular cucumbers work too, but you might want to peel them first to avoid bitterness.
Rice Vinegar (¼ cup / 60ml) — Unseasoned rice vinegar. Do not use seasoned rice vinegar (the kind with salt and sugar already in it) unless you adjust the added sugar and salt in the recipe. Unseasoned gives you full control.
Sugar (1 tablespoon / 12g) — Just a little to balance the vinegar. White sugar is fine here.
Salt (½ teaspoon / 3g) — Kosher salt works best.
For Serving
Short Grain Rice (2 cups / 400g dry) — Sushi rice or any short-grain white rice. This type is sticky and chewy, which is perfect for holding up to the sauce. Jasmine rice is too fluffy and won’t stick together as well. Do not use brown rice unless you want to change the cooking time and texture significantly.
Large Egg (1 per person) — I like to fry these sunny-side up with crispy edges. The runny yolk acts as a sauce. You can use scrambled eggs, but the fried egg is the classic bulgogi experience.
Green Onions (2 stalks, sliced thinly) — For garnish. Adds a fresh, oniony crunch.
Sesame Seeds (1 tablespoon) — Toasted sesame seeds add a nice nutty finish. If you don’t have them, skip them. It’s not the end of the world.
Equipment Needed
You don’t need fancy gear for this. Here’s what I actually use.
Large Skillet or Wok — I use a 12-inch cast iron skillet. It holds heat well, which is crucial for searing the beef quickly. A non-stick wok works too. You need something wide so the beef cooks in a single layer, not piled up.
Sharp Knife — For slicing the beef and veggies. A dull knife will tear the meat and make it harder to slice thinly. I have a cheap knife from IKEA that’s surprisingly sharp.
Small Bowl — For mixing the marinade.
Medium Bowl — For the quick pickles.
Rice Cooker or Medium Pot — I have a rice cooker, which is a lifesaver. But a pot with a tight lid works perfectly fine. Just don’t lift the lid while it’s cooking.
Small Skillet — For frying the eggs. If you don’t have a second pan, you can fry the eggs in the same skillet you cooked the beef in, right after you pull the beef out. Just wipe it out first.
How to Make It: Step-by-Step
Alright, let’s make this! I’m walking you through exactly how I do it. It’s simple, but there are a few tricks to get it right.
Step 1: Prep the Rice
Start the rice. Rinse it under cold water until the water runs clear. This removes excess starch and prevents it from getting gummy. Add it to your pot with 1.5 cups of water (for 2 cups of rice). Bring to a boil, then reduce heat to low, cover, and simmer for 18 minutes. Turn off the heat and let it sit, covered, for 10 more minutes. Fluff with a fork. This timing is standard, but every stove is different. Check your rice package if you’re unsure.
Step 2: Make the Quick Pickles
While the rice cooks, make the pickles. Slice your daikon radish and cucumber into thin matchsticks. You can use a peeler or a knife. Toss them in a medium bowl with the rice vinegar, sugar, and salt. Mix well and set aside. They don’t need to sit for long—just 10-15 minutes while you cook the beef is enough to get that tangy crunch. They’ll keep in the fridge for a week, so I usually make a double batch.
Step 3: Mix the Marinade
In a small bowl, whisk together the tamari, brown sugar, neutral oil, sesame oil, minced garlic, grated ginger, and gochujang paste. The gochujang is thick, so you might need to whisk it vigorously to get the sugar and oil to dissolve. It should look like a thick, dark red paste. Taste it—it should be sweet, salty, and spicy. If it’s too spicy, add a little more sugar. If it’s too sweet, add a splash more tamari.
Step 4: Marinate the Beef
Slice the beef against the grain. This is crucial. Look for the lines of muscle fiber in the meat and cut perpendicular to them. This shortens the fibers and makes the meat tender. Slice it into thin strips, about ¼-inch thick. Toss the beef in the marinade. You can cook it immediately, but if you have 15 minutes, let it sit in the fridge. It doesn’t need hours like some marinades. 15 minutes is plenty.
Step 5: Cook the Beef
Heat your large skillet over medium-high heat. Add a tiny splash of oil if your pan is dry. Add the beef in a single layer. Don’t crowd the pan! If you have a small pan, cook in two batches. Crowding the pan makes the beef steam instead of sear, and you want that caramelized edge. Cook for 2-3 minutes per side until browned and cooked through. The beef cooks fast, so watch it closely. Once it’s done, remove it from the pan and set aside on a plate. Don’t wash the pan yet—those brown bits are flavor.
Step 6: Fry the Eggs
In a small skillet, heat a little oil over medium heat. Crack the eggs and fry them sunny-side up. I like my edges crispy and the yolk still runny. Season with a pinch of salt and pepper. If you’re making this for a crowd, you can scramble the eggs, but the fried egg is the classic choice.
Step 7: Assemble the Bowls
Place a scoop of hot rice in each bowl. Top with the beef. Add a fried egg. Spoon some of the quick pickles and their brine over the top. Garnish with sliced green onions and sesame seeds. Drizzle with a little extra sesame oil if you like. Serve immediately while the rice is hot and the egg yolk is runny.
Total Time: About 30 minutes (10 minutes active prep, 20 minutes cooking).
Expert Tips & Tricks
Here’s everything I’ve learned from making this dozens of times. These tips will save you from my mistakes.
Slice Against the Grain — I can’t stress this enough. If you slice with the grain, the beef will be chewy and tough. Slice against it, and it’ll be tender and melt-in-your-mouth. Take a second to look at the meat before you cut.
Don’t Overcrowd the Pan — I know it’s tempting to cook all the beef at once, but if you pile it up, it releases moisture and steams. You want a sear. Cook in batches if you have to. It only takes an extra 3 minutes.
Use Toasted Sesame Oil — Make sure you’re using the dark, toasted sesame oil for the marinade and finishing. The light sesame oil is for cooking and has a very mild flavor. The dark kind is what gives bulgogi its signature aroma.
Adjust the Gochujang — Gochujang brands vary in heat. I use a standard brand, but if you’re sensitive to spice, start with 1 tablespoon and add more to taste. You can always add heat, but you can’t take it away.
Save the Pickle Brine — If you have leftover pickles, keep the brine. It’s amazing as a salad dressing base or mixed with water for a refreshing drink. Don’t throw it out!
Common Mistake: Rice is too wet — If your rice is mushy, you used too much water. The ratio is usually 1.5 cups water to 1 cup rice for short-grain. Rinsing the rice well also helps. If it’s still too wet, spread it out on a baking sheet to cool and dry for a few minutes.
Common Mistake: Beef is dry — This happens if you overcook it. Beef sirloin cooks in 4-6 minutes total. As soon as it’s browned and cooked through, take it off the heat. It will continue to cook slightly from residual heat.
Variations & Substitutions
Once you’ve nailed the basic version, here’s how you can mix it up. I’ve tried all of these.
Chicken Bulgogi — You can use chicken thighs instead of beef. Slice them into strips and marinate for 30 minutes. Chicken cooks faster, so watch the pan closely. It’s a lighter option but still delicious.
Pork Bulgogi — Thinly sliced pork belly or pork loin works great. Pork loves the sweet and savory marinade. Just cook until no longer pink.
Tofu Bulgogi — For a vegetarian version, use extra-firm tofu. Press it for 20 minutes to remove water, then slice it into slabs. Marinate for 15 minutes and pan-fry until crispy. It’s surprisingly good.
No Gochujang? — If you can’t find gochujang, you can substitute with 1 tablespoon of chili flakes plus 1 tablespoon of miso paste (check that it’s gluten-free if needed) plus 1 teaspoon of sugar. It won’t be the same, but it’ll give you the heat and umami.
Gluten-Free Tamari — Most tamari is gluten-free, but always check the label. Some brands are brewed with wheat. Look for “Certified Gluten-Free” to be safe.
Dairy-Free Verification — This recipe is naturally dairy-free. Just make sure your gochujang doesn’t have any added dairy (some processed brands might have trace amounts, though it’s rare). Standard gochujang is just chili, rice, soybeans, and salt.
Serving & Storage
How to Serve: I usually serve this straight from the skillet at the dinner table—it looks rustic and stays warm. But here are other ways I’ve enjoyed it:
- Side Dishes: Steamed broccoli with sesame oil, a simple cucumber salad, or even just plain pickled vegetables. I don’t usually serve heavy sides because the bowl is so filling.
- Toppings Bar: When I have guests, I put out extra gochujang, sesame seeds, green onions, and crispy garlic chips. Everyone customizes their bowl.
- Drink Pairing: I like this with a cold beer or a glass of soju if I’m feeling fancy. Non-alcoholic, a sweet iced tea or barley tea works perfectly.
Storage Instructions:
Refrigerator: Store the beef and rice in separate airtight containers for up to 3 days. The pickles will last up to a week. The egg is best made fresh, so I fry it right before serving.
Reheating: Reheat the beef in a skillet over medium heat with a splash of water to keep it moist. Reheat the rice in the microwave with a damp paper towel over it to keep it soft. Do not reheat the egg in the microwave—it will explode. Make a new egg.
Freezing: You can freeze the beef and rice, but the texture of the beef might change slightly. The pickles do not freeze well. I usually freeze the beef in portions for quick meals.
Nutrition Information
I’m not a nutritionist, but here’s the breakdown if you’re tracking. This is per serving (based on 4 servings).
| Nutrient | Amount |
|---|---|
| Calories | 580 |
| Protein | 35g |
| Carbs | 55g |
| Fiber | 3g |
| Sugar | 12g |
| Fat | 22g |
| Sodium | 850mg |
What’s Good: High protein from the beef and egg. The rice provides energy. The pickles add probiotics if you let them ferment a bit longer.
What to Know: Higher in sodium from the tamari and gochujang. If you’re watching salt, use low-sodium tamari and rinse the pickles before adding them. It’s not a “diet” recipe, but it’s balanced and filling.
Final Thoughts
So that’s my go-to Korean Gochujang Beef Bulgogi Rice Bowls with Quick Pickles! I’ve probably talked your ear off at this point, but when you make a recipe this often, you have a lot to say about it.
This has saved weeknight dinners more times than I can count. It’s my answer to “what’s for dinner” when I’m tired, don’t want takeout, and still want something that tastes really good. My kids are happy, my husband’s happy, and I’m happy because I’m not stressed about cooking.
Make it yours! Try different add-ins, swap in your favorite vegetables, adjust the garlic (though more is always better in my opinion). The best recipes are the ones you adapt to your family’s tastes. And remember, being gluten-free or dairy-free doesn’t mean you have to eat boring food. This bowl is proof that you can have it all.
If you make this, drop a comment and let me know what you think! I love hearing how recipes turn out in your kitchen. And if something doesn’t work, tell me that too—I’m here to help troubleshoot.
Happy cooking! And I hope your kitchen smells half as good as mine does right now.
Frequently Asked Questions
Can I use regular soy sauce instead of tamari?
You can, but it will contain gluten. If you’re making this for someone with celiac disease or gluten sensitivity, you must use tamari or coconut aminos. Regular soy sauce is brewed with wheat. For flavor, tamari is actually superior—it’s richer and less salty.
My sauce came out watery—what happened?
Usually means you didn’t sear the beef enough or you added too much liquid to the pan. Make sure your pan is hot before adding the beef, and don’t move it around too much. Let it sear for 2 minutes on each side. The sauce should coat the beef, not pool at the bottom.
Can I make this ahead for a dinner party?
Sort of. Prep the beef and marinade up to 2 days ahead and store in the fridge. Make the pickles ahead. Cook the rice and fry the eggs fresh right before serving. It saves you stress during the party, but the beef and rice are best fresh.
Why did my beef turn out chewy?
You likely sliced with the grain. Look at the lines in the meat and cut perpendicular to them. Also, don’t overcook it. Sirloin cooks in 4-6 minutes. If you cook it longer, it gets tough.
Can I use jasmine rice instead of short-grain rice?
You can, but the texture will be different. Jasmine rice is fluffier and less sticky. Bullogi is traditionally made with short-grain rice because it sticks together and holds the sauce better. If you use jasmine, you might want to add a little more sauce.
How do I reheat leftovers without it getting dry?
Add a splash of water to the beef in a skillet and heat gently. For the rice, microwave it with a damp paper towel over it. This adds moisture back. The pickles can be eaten cold.
Can I double this recipe?
Absolutely! Double everything and use your biggest skillet. The cooking times stay the same, but you might need to cook the beef in two batches to avoid crowding the pan.
Pin This Recipe!
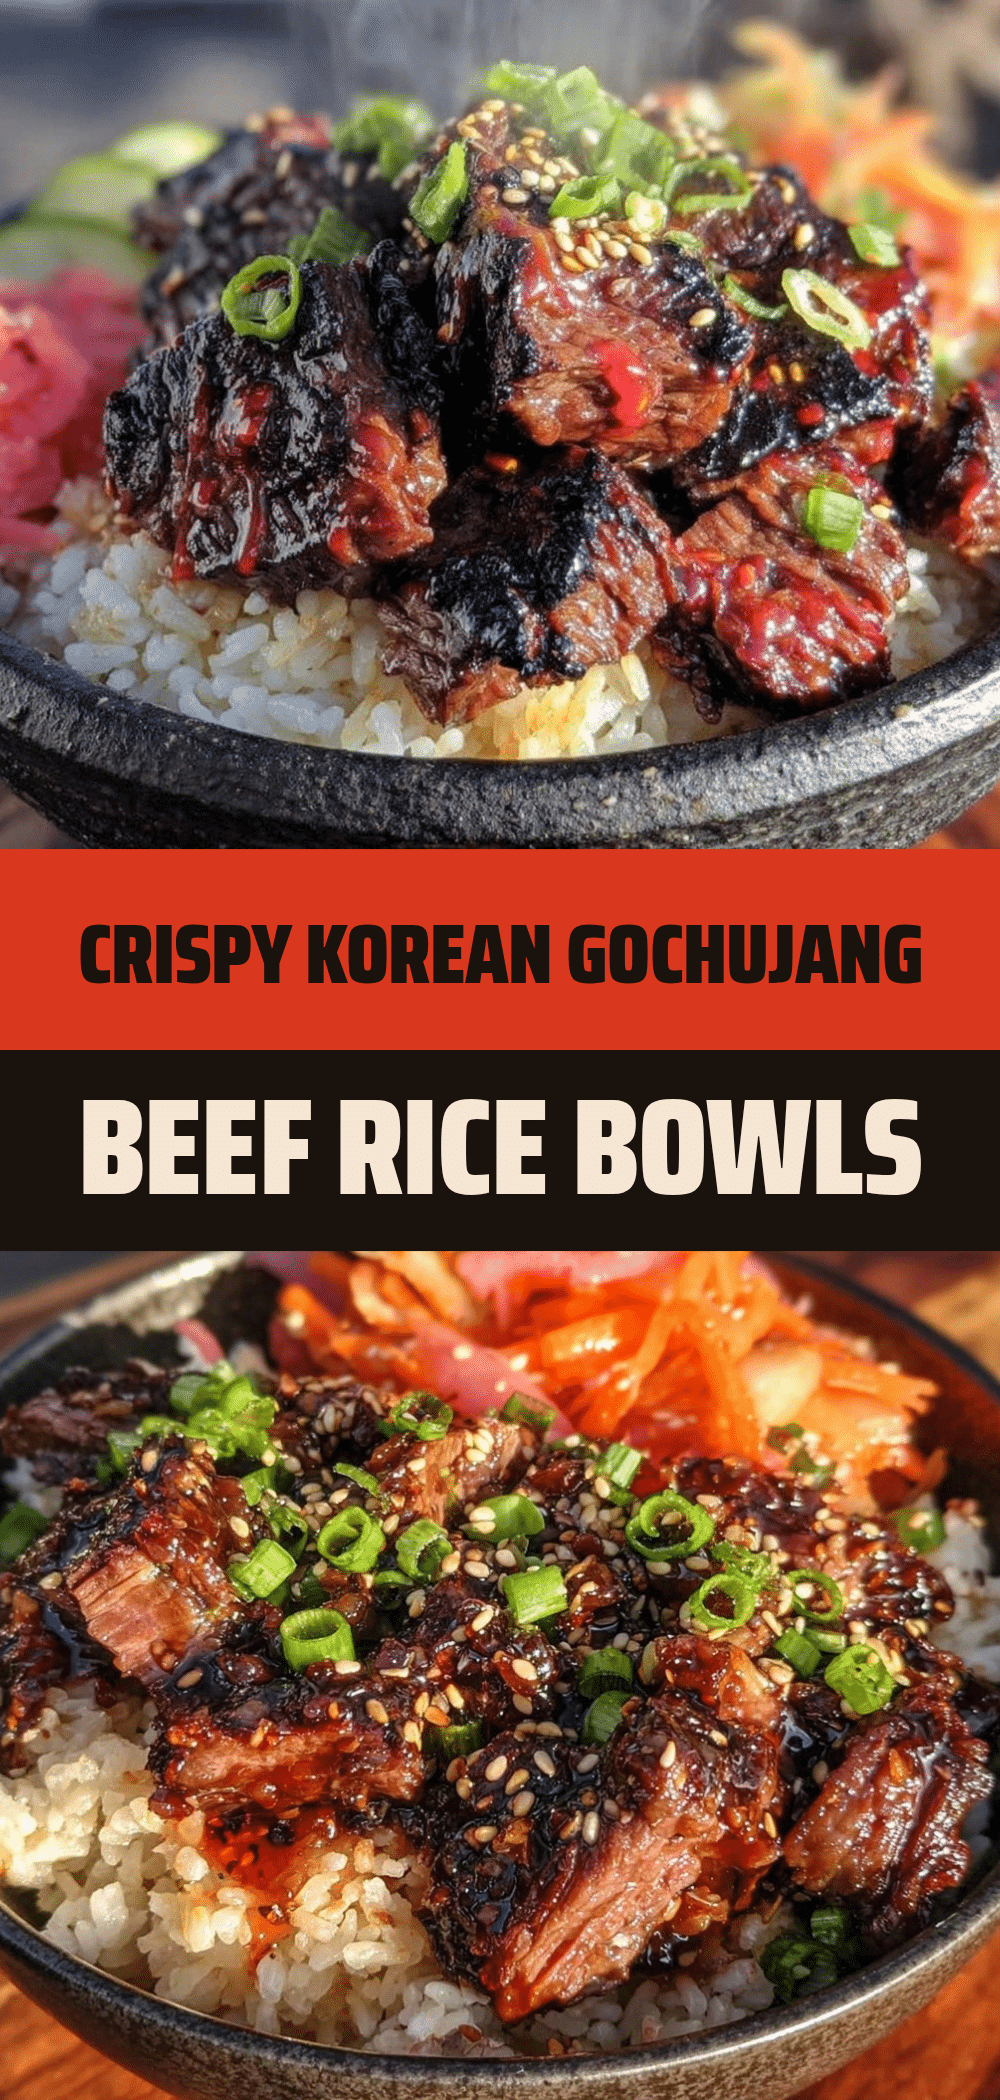
Korean Gochujang Beef Bulgogi Rice Bowls: GF & Dairy-Free
- Total Time: 30 minutes
- Yield: 4 servings 1x
Description
These quick and easy Korean Beef Bulgogi Rice Bowls are naturally gluten-free and dairy-free, featuring tender marinated beef, fluffy short-grain rice, and a tangy quick pickle. Ready in just 30 minutes, this weeknight dinner is bold, savory, and customizable.
Ingredients
- 1.5 lbs Beef Sirloin or Flank Steak, sliced against the grain
- 3 tablespoons Tamari
- 2 tablespoons Dark Brown Sugar
- 1 tablespoon Neutral Oil (avocado or canola)
- 1 tablespoon Toasted Sesame Oil
- 4 cloves Garlic, minced
- 1 tablespoon Fresh Ginger, grated
- 1–2 tablespoons Gochujang paste (adjust for heat)
- 1 cup Daikon Radish, julienned
- 1 small English Cucumber, julienned
- ¼ cup Rice Vinegar (unseasoned)
- 1 tablespoon Sugar
- ½ teaspoon Salt
- 2 cups Short Grain Rice
- 1.5 cups Water (for rice)
- 4 Large Eggs (1 per person)
- 2 stalks Green Onions, sliced thinly
- 1 tablespoon Toasted Sesame Seeds
Instructions
- Rinse the short-grain rice under cold water until clear. Add to a pot with 1.5 cups of water, bring to a boil, then reduce heat to low, cover, and simmer for 18 minutes. Turn off heat and let sit covered for 10 minutes. Fluff with a fork.
- While rice cooks, slice daikon radish and cucumber into thin matchsticks. Toss in a bowl with rice vinegar, sugar, and salt. Set aside to pickle for 10-15 minutes.
- In a small bowl, whisk together tamari, brown sugar, neutral oil, sesame oil, minced garlic, grated ginger, and gochujang paste until smooth.
- Slice beef against the grain into thin strips. Toss beef in the marinade. Let sit for 15 minutes (optional but recommended).
- Heat a large skillet or wok over medium-high heat. Add beef in a single layer (cook in batches if necessary to avoid crowding). Cook for 2-3 minutes per side until browned and cooked through. Remove beef and set aside.
- In a small skillet, fry eggs sunny-side up with crispy edges and runny yolks. Season with salt and pepper.
- Assemble bowls by placing a scoop of hot rice in each bowl. Top with beef, a fried egg, and the quick pickles with their brine. Garnish with green onions and sesame seeds. Serve immediately.
Notes
Slice beef against the grain to ensure tenderness. Do not overcrowd the pan when cooking beef to ensure proper searing rather than steaming. Use dark, toasted sesame oil for authentic flavor. The quick pickles can be made ahead and stored in the fridge for up to a week. Leftover beef and rice can be refrigerated for up to 3 days.
- Prep Time: 10 minutes
- Cook Time: 20 minutes
- Category: Main Course
- Cuisine: Korean
Nutrition
- Serving Size: 1 bowl per person
- Calories: 580
- Sugar: 12
- Sodium: 850
- Fat: 22
- Saturated Fat: 7
- Carbohydrates: 55
- Fiber: 3
- Protein: 35
Keywords: Korean beef, bulgogi, rice bowls, gluten-free, dairy-free, gochujang, quick dinner, weeknight meals, beef bowls, pickled vegetables