There is a specific kind of Tuesday night exhaustion that hits when you’ve been running around all day, the kids are loud, and the fridge is staring back at you with zero inspiration. For a long time, my answer to that exhaustion was takeout. Greasy, salty, convenient takeout. But here’s the thing—I started craving that cheesy, savory burger flavor without the heavy carb crash that left me sluggish for the rest of the evening.
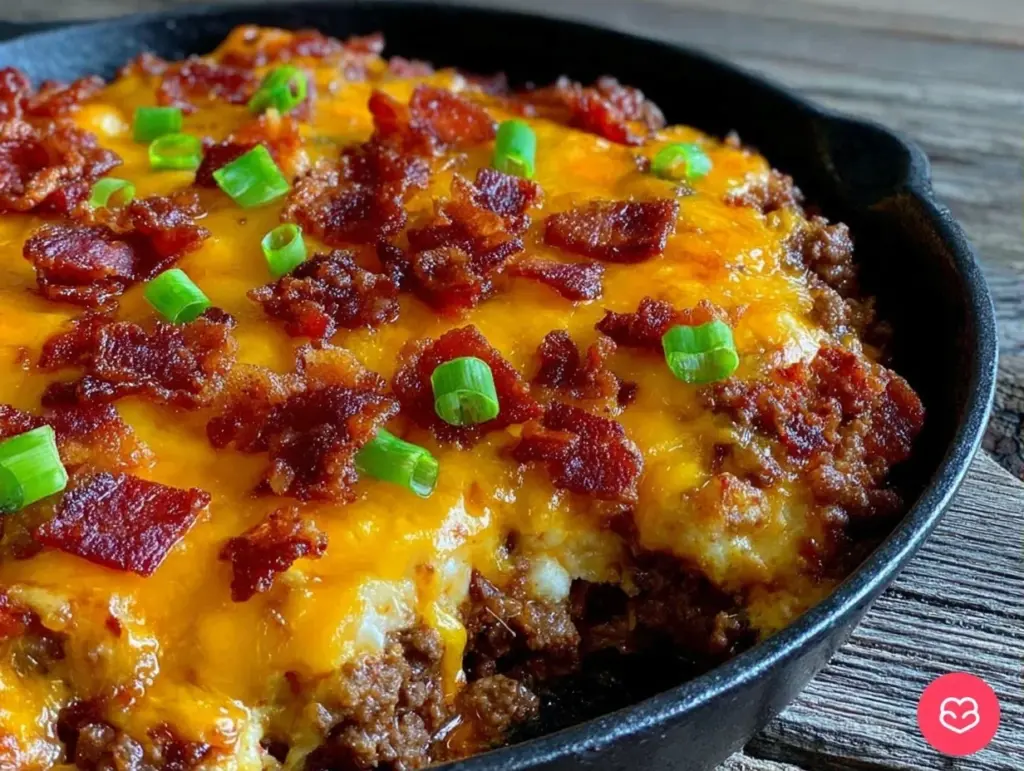
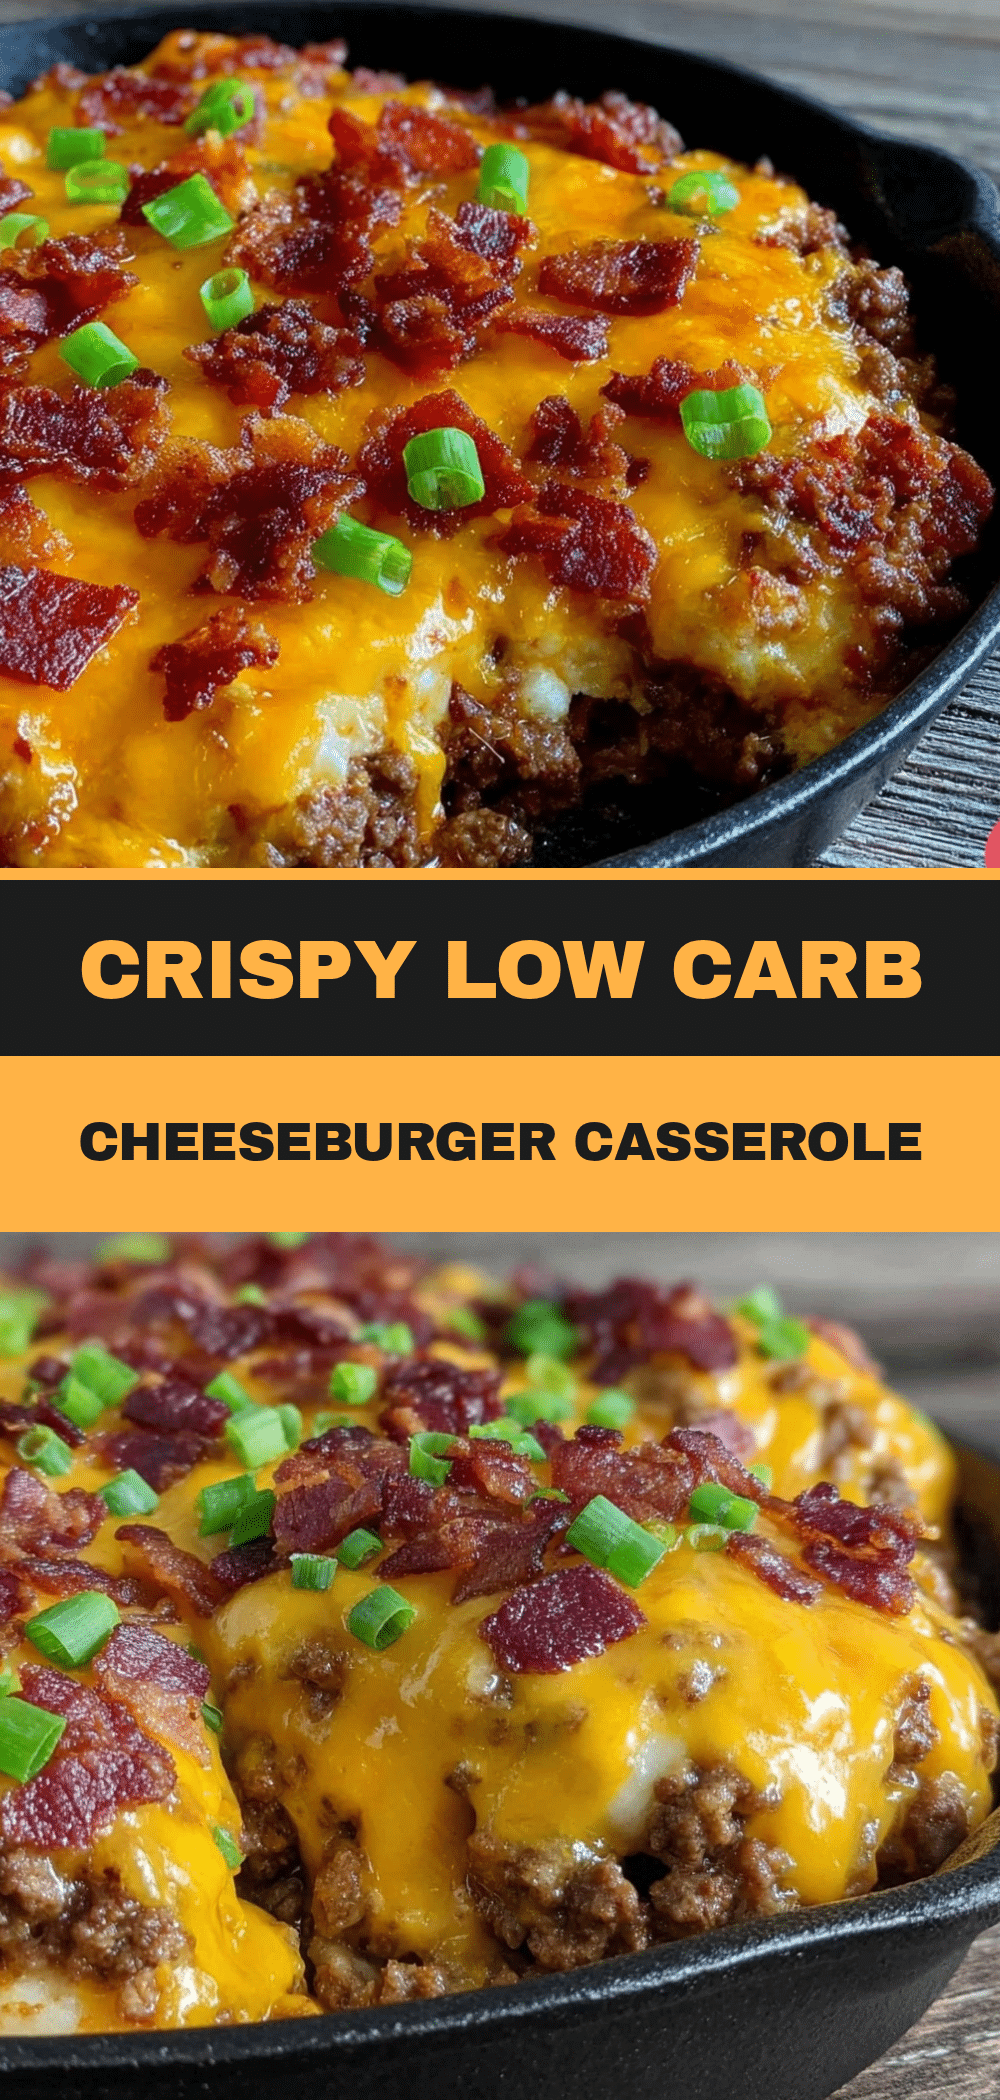
I wanted the comfort of a cheeseburger but the lightness of a fresh salad. I wanted something that felt indulgent but actually aligned with how I’ve been eating lately—more vegetables, less bread, more farmers market hauls. So, I stopped ordering delivery and started experimenting in my kitchen. After a few tries that ended up either too dry or too greasy, I landed on this Low Carb Cheeseburger Casserole. It’s basically a deconstructed burger in a baking dish. Ground beef, sharp cheddar, crispy bacon bits, and a creamy sauce that ties it all together without a single bun in sight.
This recipe has become my secret weapon. It’s stupid simple—literally five main ingredients—and it feeds my family of four with leftovers for lunch. The best part? It tastes like comfort food, but it’s actually packed with protein and veggies. I make this whenever I have a big bunch of fresh green onions or a block of good cheddar sitting on my counter. It’s my way of celebrating what’s fresh right now, even in the middle of a busy week.
If you’re looking for easy, ingredient-led meals that don’t require a degree in culinary arts, this is it. It’s better than takeout because you control the quality of the beef, the sharpness of the cheese, and the crispiness of the bacon. Plus, there’s zero guilt. Just pure, savory goodness.
Why You’ll Love This Low Carb Cheeseburger Casserole
I’ve made this casserole at least a dozen times in the last six months. It’s my go-to when I need dinner to just work. Here’s why it keeps coming back to the top of my rotation:
It’s Actually Low Carb — No buns, no breadcrumbs, no hidden sugars. Just meat, cheese, and veggies. It fits perfectly into a keto or low-carb lifestyle, but honestly, even non-diet folks love it because it’s so satisfying.
Five Ingredients Max — Seriously. Ground beef, cheddar cheese, bacon, green onions, and a creamy sauce base. That’s it. You don’t need a grocery list that’s three pages long. If you have these in your fridge or freezer, you’re good to go.
Better Than Fast Food — I’ve compared this to a cheeseburger from my favorite drive-thru, and this wins on flavor every time. The fresh green onions add a bright, sharp crunch that cuts through the rich cheese and beef in a way pickles just can’t.
Meal Prep Friendly — This tastes even better the next day. The flavors meld together overnight, making it the perfect lunch for work. I make a big batch on Sunday, and I’m set for lunches all week. It reheats beautifully in the microwave.
Family Approved — My picky eaters think it’s just “cheesy beef,” and my health-conscious husband loves that it’s light. It’s a win-win. Everyone leaves the table happy, and I don’t have to stress about sides.
This is my answer to “what’s for dinner?” when I’m tired. No fancy techniques, no weird ingredients, just reliable, delicious food that makes everyone happy. It’s cozy, it’s easy, and it’s ready in under 45 minutes.
Ingredients You’ll Need
Here’s the best part: you probably have most of this already, or it’s super easy to grab from your local market. I love building this around what’s fresh, especially the green onions and the cheese.
Ground Beef (1.5 pounds / 680g) — I use 80/20 fat ratio. Yes, fat. It keeps the casserole juicy. Lean beef makes it dry and crumbly. If you want to be a bit lighter, 90/10 works, but add a splash of olive oil to the pan.
Sharp Cheddar Cheese (2 cups / 200g, shredded) — Buy a block and shred it yourself. Pre-shredded cheese has anti-caking agents that prevent it from melting smoothly. I use a mix of sharp white cheddar for that tangy kick. If you can’t find sharp cheddar, a good aged cheddar works too.
Cooked Bacon (1 cup / 100g, crumbled) — I cook my own bacon for this. It’s crispier and tastes better than the pre-cooked strips. Save the grease! I use a tablespoon of it to sauté the beef for extra flavor. If you’re lazy, pre-cooked works, but rinse it first to remove excess sugar.
Green Onions (1 large bunch / about 150g) — This is the star veggie. I buy a fresh bunch from the farmers market whenever I can. They add a fresh, oniony bite that balances the richness. White parts go in the cooking, green parts go on top as garnish.
Heavy Cream (½ cup / 120ml) — This creates the creamy sauce. You can use half-and-half if you want it lighter, but it won’t be as rich. I also like to add a tablespoon of cream cheese for extra thickness and tang.
Optional Add-ins:
- Avocado — Diced avocado on top adds creaminess and healthy fats. Perfect if you’re serving this warm.
- Tomato — Diced fresh tomato adds brightness. I add this if I have ripe tomatoes from the garden.
- Mustard — A teaspoon of Dijon or yellow mustard in the sauce mimics that classic burger flavor.
Pro Tip: I always keep a block of cheddar and some bacon in the fridge for quick dinners like this. It’s my backup plan for busy nights.
Equipment Needed
You don’t need fancy gadgets for this. Here’s what I actually use:
Large Skillet or Dutch Oven — I use a 12-inch cast iron skillet. It browns the beef beautifully and goes straight into the oven if you want to serve it family-style. A standard 12-inch skillet works fine too.
9×13 Baking Dish — A standard glass or ceramic baking dish. I prefer glass because I can see the browning on the bottom. If you don’t have one, a large oven-safe skillet works.
Colander — For draining the bacon grease if you’re not saving it for cooking the beef. Or just use a slotted spoon.
Grater — Box grater for the cheese. Or a food processor with the shredding disk if you’re in a hurry.
Wooden Spoon — For stirring the beef and sauce. Silicone works too, but I like the feel of wood.
Measuring Cups and Spoons — Basic stuff. I usually eyeball the cheese and onions, but measure the cream for consistency.
How to Make It: Step-by-Step
Alright, let’s make this! I’m walking you through exactly how I do it, including the little tricks I’ve picked up over the years.
Step 1: Prep Your Ingredients (5 minutes)
Before you start cooking, chop your green onions, separate the whites from the greens, and shred your cheese. Crumble your cooked bacon. Having everything ready makes the actual cooking process smooth and stress-free. The beef will cook fast, so don’t wait until it’s browning to chop.
Step 2: Brown the Beef (8 minutes)
Heat your large skillet over medium-high heat. Add the ground beef, breaking it up with a wooden spoon as it cooks. Cook until it’s no longer pink and has some nice brown bits. This browning adds flavor. If you’re using bacon grease, add a tablespoon now. If not, a little olive oil works. Drain excess grease if there’s too much, but leave a little for flavor.
Step 3: Build the Sauce (3 minutes)
Reduce the heat to medium-low. Pour in the heavy cream and stir it into the beef. Add the cream cheese (if using) and stir until melted and combined. Let it simmer for 2-3 minutes until it thickens slightly. Taste and add salt and pepper. If you’re using mustard, add it now.
Step 4: Combine and Assemble (5 minutes)
Stir in half of the shredded cheddar cheese and all of the green onion whites. Mix well until the cheese starts to melt into the sauce. Transfer the mixture to your 9×13 baking dish. Spread it out evenly.
Step 5: Top and Bake (10-15 minutes)
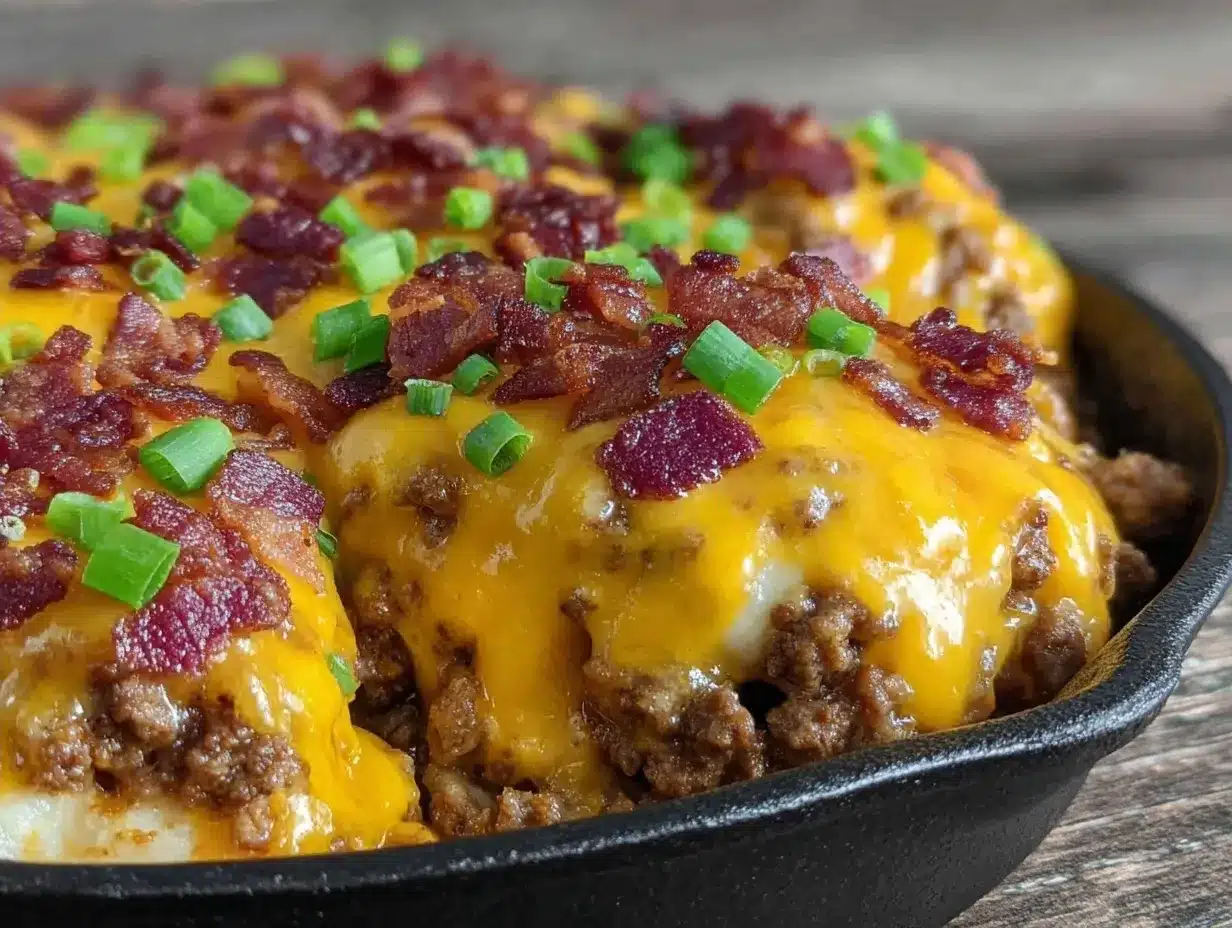
Sprinkle the remaining cheddar cheese over the top. Add the crumbled bacon. Bake at 350°F (175°C) for 10-15 minutes, or until the cheese is bubbly and slightly golden on top. You want that cheese to melt perfectly, not burn.
Step 6: Garnish and Serve
Take it out of the oven and immediately sprinkle with the reserved green onion greens. Let it sit for 5 minutes before serving—it thickens up a bit as it rests. Serve with a side salad or just eat it straight from the dish. I like to add a slice of avocado on top.
Total Time: About 30-35 minutes (10 minutes prep, 20 minutes cooking)
Expert Tips & Tricks
Here’s everything I’ve learned from making this dozens of times. These tips will save you from my mistakes.
Don’t Overcook the Beef — If you cook the beef until it’s dry before adding the sauce, the casserole will be dry. It should be juicy when it goes into the oven. It’ll cook more in the oven.
Shred Your Own Cheese — I know it’s annoying, but pre-shredded cheese doesn’t melt the same. It makes the sauce grainy. Freshly shredded cheese melts into a smooth, creamy sauce. Trust me on this.
Save the Bacon Grease — If you cook your own bacon, don’t throw away the grease! Use a tablespoon of it to cook the beef. It adds a smoky depth that you can’t get from oil.
Let It Rest — This is crucial. When you take it out of the oven, the sauce is very liquid. Let it sit for 5-10 minutes. It will thicken up and become scoopable. If you serve it immediately, it might be soupy.
Customize the Heat — If you like spice, add some diced jalapeños with the green onions or a pinch of cayenne pepper in the sauce. It adds a nice kick that complements the cheese.
Common Mistakes:
- Sauce too thin: Let it simmer longer on the stove before baking, or add a bit more cream cheese.
- Too salty: Taste the beef and sauce before adding extra salt, especially if your bacon is very salty.
- Dry casserole: Don’t overcook the beef, and make sure you’re using enough cream.
Variations & Substitutions
Once you’ve nailed the basic version, here’s how you can mix it up. I’ve tried all of these.
Turkey Version — Use ground turkey instead of beef. It’s lighter and still delicious. Add a bit more salt and pepper since turkey is milder.
Veggie-Loaded — Add diced mushrooms or bell peppers when you cook the beef. They absorb the flavors beautifully. I add these when I have extra veggies in the fridge.
Spicy Kick — Add diced jalapeños or a teaspoon of cayenne pepper. Great for those who like heat.
Gluten-Free — This recipe is naturally gluten-free, so no changes needed. Just check your bacon and cheese labels to be sure.
Dairy-Free — Use dairy-free cheese and coconut cream. It’s different but still tasty. I’ve made this for friends with dairy allergies, and they loved it.
Low-Carb Buns on the Side — If you miss the bun, serve this with keto buns or lettuce wraps. It’s like a burger without the bread.
Serving & Storage
How to Serve: I usually serve this straight from the baking dish at the dinner table. It looks rustic and stays warm. Pair it with a simple green salad with vinaigrette or roasted broccoli. The freshness of the veggies balances the richness of the casserole.
Storage: Store leftovers in an airtight container in the fridge for up to 4 days. The sauce will thicken in the fridge, which is normal.
Reheating: Reheat in the microwave with a splash of milk or cream to bring back the creaminess. Or reheat in a skillet over low heat, stirring frequently. It doesn’t freeze well because the dairy separates. Make it fresh or store in the fridge.
Meal Prep: This is perfect for meal prep. Portion it out into containers for lunch. It tastes even better the next day as the flavors meld together.
Nutrition Information
I’m not a nutritionist, but here’s the breakdown if you’re tracking. This is per serving (based on 6 servings).
- Calories: 450
- Protein: 28g
- Carbs: 4g
- Fiber: 1g
- Sugar: 2g
- Fat: 36g
It’s high in protein and fat, low in carbs. Perfect for keto or low-carb diets. When I want to make it lighter, I use leaner beef and less cheese, but usually, I just enjoy it as is.
Final Thoughts
So that’s my low carb cheeseburger casserole! It’s my go-to for busy weeknights when I want something comforting but healthy. It’s saved me from takeout more times than I can count. Make it yours! Try different cheeses, add more veggies, or adjust the spice level. The best recipes are the ones you adapt to your family’s tastes.
If you make this, drop a comment and let me know what you think! I love hearing how recipes turn out in your kitchen. And if something doesn’t work, tell me that too—I’m here to help troubleshoot.
Happy cooking! And I hope your kitchen smells half as good as mine does right now.
Frequently Asked Questions
Q: Can I use ground turkey instead of beef?
A: Yes! Ground turkey works great and is lighter. Just make sure to add a bit more seasoning since turkey is milder. You might also want to add a tablespoon of olive oil to keep it from drying out.
Q: Why did my sauce turn out watery?
A: This usually happens if you didn’t let the sauce simmer long enough on the stove, or if you didn’t let the casserole rest after baking. Let it sit for 5-10 minutes after taking it out of the oven. It will thicken up significantly.
Q: Can I make this ahead of time?
A: You can prep the ingredients ahead and assemble it in the morning, then bake it when you get home. Or make the casserole, let it cool, cover it, and refrigerate. Bake it covered for 20 minutes, then uncover and bake for 10 more minutes.
Q: What cheese is best for this?
A: Sharp cheddar is the classic choice because of its tangy flavor. You can also use a mix of cheddar and Monterey Jack for extra meltiness. Avoid pre-shredded cheese—it doesn’t melt as smoothly.
Q: Is this recipe gluten-free?
A: Yes, this recipe is naturally gluten-free. Just make sure your bacon and cheese don’t have any added gluten (which is rare, but good to check).
Q: Can I freeze this casserole?
A: I don’t recommend freezing it. The dairy-based sauce can separate and become grainy when thawed. It’s best eaten fresh or stored in the fridge for up to 4 days.
Q: What sides go well with this?
A: A simple green salad with vinaigrette is perfect. Roasted broccoli or asparagus also work well. If you want something heartier, serve it with keto-friendly buns or lettuce wraps.
Pin This Recipe!
Low Carb Cheeseburger Casserole
- Total Time: 30 minutes
- Yield: 6 servings 1x
Description
A simple, five-ingredient low-carb casserole that captures the flavor of a cheeseburger without the bun. Packed with protein and veggies, it’s perfect for busy weeknights and keto diets.
Ingredients
- 1.5 pounds ground beef (80/20 fat ratio)
- 2 cups sharp cheddar cheese, shredded
- 1 cup cooked bacon, crumbled
- 1 large bunch green onions (about 150g), chopped
- 1/2 cup heavy cream
- 1 tablespoon cream cheese (optional)
- 1 tablespoon bacon grease or olive oil
- Salt and pepper to taste
- 1 teaspoon mustard (optional)
Instructions
- Preheat oven to 350°F (175°C).
- Chop green onions, separating whites from greens. Shred cheese and crumble bacon.
- Heat a large skillet over medium-high heat. Add ground beef and cook until browned, breaking it up with a spoon. Drain excess grease if necessary, leaving a little for flavor.
- Reduce heat to medium-low. Stir in heavy cream and cream cheese (if using). Simmer for 2-3 minutes until sauce thickens slightly. Season with salt, pepper, and mustard if using.
- Stir in half of the shredded cheddar and the green onion whites. Transfer mixture to a 9×13 baking dish.
- Top with remaining cheddar cheese and crumbled bacon.
- Bake for 10-15 minutes until cheese is bubbly and golden.
- Remove from oven and let rest for 5 minutes to thicken. Garnish with reserved green onion greens before serving.
Notes
Shred your own cheese for better melting. Let the casserole rest for 5-10 minutes after baking to allow the sauce to thicken. Do not freeze as the dairy sauce may separate.
- Prep Time: 10 minutes
- Cook Time: 20 minutes
- Category: Main Course
- Cuisine: American
Nutrition
- Serving Size: 1 serving
- Calories: 450
- Sugar: 2
- Sodium: 600
- Fat: 36
- Saturated Fat: 18
- Carbohydrates: 4
- Fiber: 1
- Protein: 28
Keywords: low carb, keto, cheeseburger casserole, easy dinner, ground beef, cheddar, bacon, gluten-free, meal prep