I still remember the specific sound of my grandmother’s cast-iron skillet sizzling on the stove. It wasn’t just background noise; it was the dinner bell. In her kitchen, there was no fussing with ten different pots or trying to balance a spreadsheet of ingredients while the kids ran around underfoot. Dinner was simple, hearty, and cooked in one pan. She called it her “Taco Skillet,” though she never actually used the word “taco” much. To her, it was just a way to use up ground beef, stretch it with rice, and feed everyone without spending hours at the counter.
For years, I thought I knew how to make taco night. I bought the packets. I followed the instructions on the box. But honestly? It never tasted like hers. It was too salty, the meat was always dry, and the rice was an afterthought—usually cold and clumpy on the side of the plate. Then, last winter, I was home for a visit, and she handed me the old skillet. “Let me show you,” she said. “The way I always made it.”
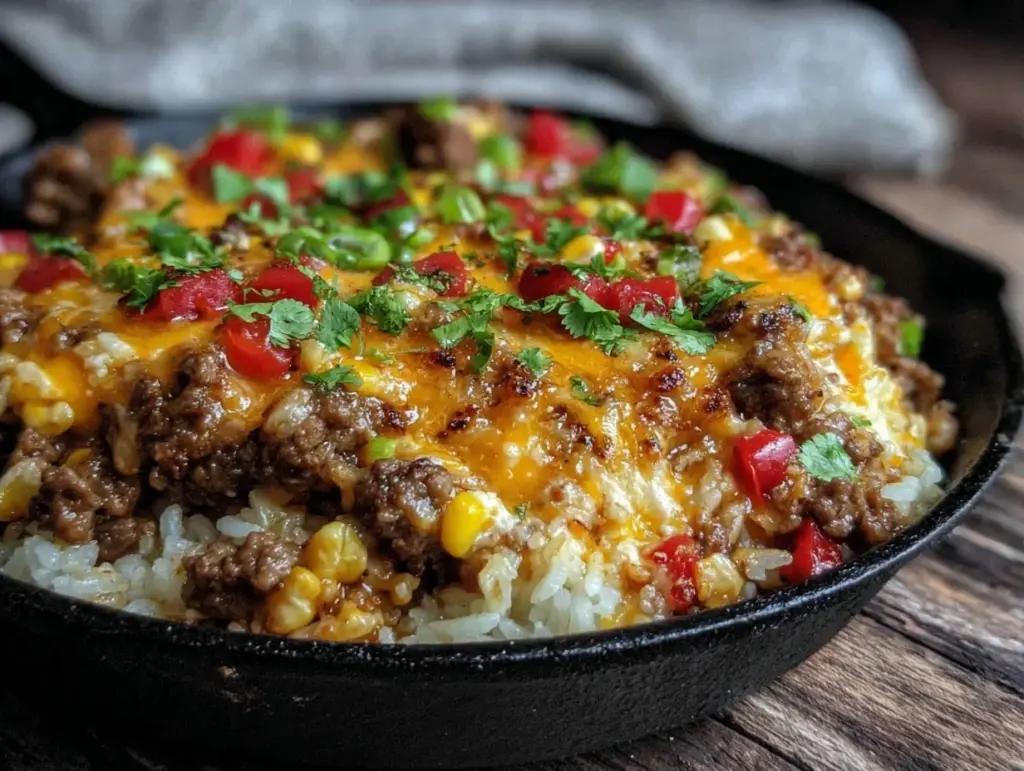
That weekend, I learned that the secret wasn’t in the seasoning packet. It was in the patience. It was in browning the beef properly, toasting the rice before it even touched the liquid, and letting the cheese melt into every nook and cranny. This One-Pan Cheesy Ground Beef Taco Skillet with Fluffy Rice isn’t just a quick weeknight meal. It’s a memory. It’s comfort food that tastes like home, not a fast-food drive-thru. And the best part? You only have one pan to wash. That alone makes it a Sunday dinner staple in my house now.
Why You’ll Love This Recipe
There are a hundred reasons I keep coming back to this skillet, but if I’m being honest, it’s because it solves the biggest problem of modern cooking: the cleanup. But beyond the practicality, here’s why this dish has earned a permanent spot on our table:
- It’s a Complete Meal in One Pan — Seriously. You have your protein, your starch, your vegetables, and your cheese all cooking together. I don’t have to boil rice in one pot, brown meat in another, and heat up salsa in a third. It all happens in this one heavy-bottomed skillet. My husband loves that there’s only one dish to scrub when dinner is done.
- It Tastes Like Slow-Cooked Comfort — Even though it’s on the table in about 35 minutes, it doesn’t taste rushed. The rice absorbs all those spicy, savory beef juices, becoming fluffy and infused with flavor. It has that deep, rich taste of a dish that’s been simmering for hours, but without the wait.
- It Feeds a Crowd (and Pickies) — I’ve served this to my meat-eating dad, my vegetarian niece (who just skips the beef and loves the cheesy rice), and my teenagers who usually complain about everything. Everyone goes back for seconds. The cheese pull is real, and the kids love dipping their spoons in.
- It’s Budget-Friendly — Ground beef and rice are two of the cheapest ingredients in the store. By stretching the beef with rice and beans, you’re feeding four to six people for a fraction of the cost of a family dinner out. I often buy a large family pack of ground beef, brown it all at once, and freeze portions for these skillet nights.
- It’s Forgiving — If you add a little more salsa, or if the rice needs a few extra minutes, it doesn’t ruin the dish. It just gets creamier. I’ve made this recipe at least twenty times in the last year, and it’s never failed me. It’s reliable in a way that fancy recipes often aren’t.
This is my go-to when I want to feel like I’m feeding my family a proper meal without the stress. It’s warm, it’s cheesy, and it smells like my grandmother’s kitchen.
Ingredients You’ll Need
Here’s the thing about this recipe: you don’t need a trip to a specialty store. Most of this is pantry staples. But I am particular about a few things. Quality matters, especially when you’re not hiding behind a dozen different spices.
For the Base
Ground Beef (1.5 pounds / 680g) — I use 80/20 ground chuck. You want a little fat for flavor. Lean beef turns this dry and crumbly. If you prefer turkey, you can use it, but you’ll need to add a little extra olive oil since turkey is so lean.
Yellow Onion (1 large, finely diced / about 250g) — This is your flavor foundation. I dice it small so it melts into the sauce. Sweet onions work too, but yellow gives that classic savory depth. I learned from my grandmother that you can’t rush the onions; they need to soften completely before adding the beef.
Long-Grain White Rice (1 cup / 185g) — Do not use instant rice. Do not use brown rice for this specific method. Long-grain white rice (like Jasmine or Basmati) stays fluffy and doesn’t get mushy. I measure it out in a dry cup before I start cooking. Consistency is key.
Chicken Broth (2 cups / 480ml) — I use low-sodium broth so I can control the saltiness. Homemade broth is best if you have it, but a good quality store-bought carton works perfectly. It provides the liquid for the rice to cook in and carries all the spice flavors.
For the Flavor
Taco Seasoning (2 tablespoons) — I prefer to make my own. It’s just cumin, chili powder, paprika, garlic powder, onion powder, and a pinch of oregano. But if you’re in a pinch, a packet of your favorite brand works. Just know that homemade is brighter and less salty.
Tomato Sauce (1 can, 8 ounces / 225g) — Not salsa. Not crushed tomatoes. Plain tomato sauce. This gives the dish a rich, smooth base. I use a good brand like Muir Glen. It adds body without chunky bits that get lost in the rice.
Salsa (1 cup / 240g) — I use a medium-chunk salsa for texture. If you like it spicy, use a hot salsa. If you’re serving kids, a mild one is better. This adds freshness and brightness that balances the heavy cheese.
Black Beans (1 can, 15 ounces / 425g, drained and rinsed) — These add protein and fiber. I always rinse them thoroughly to remove that tinny taste. If you’re skipping beans, that’s fine, but they really help stretch the meal.
For the Finish
Shredded Cheddar Cheese (2 cups / 200g) — Buy a block and shred it yourself. Pre-shredded cheese is coated in cellulose (anti-caking agent), which prevents it from melting smoothly. You want that gooey, stringy melt, not clumps. I use a mix of sharp cheddar and a little Monterey Jack for creaminess.
Green Onions (4 stalks, sliced) — For garnish. They add a fresh, sharp bite that cuts through the richness of the cheese. I keep a bunch in the fridge just for this.
Sour Cream (optional, for serving) — A dollop on top is non-negotiable for my family. The cool creaminess balances the heat of the spices.
Equipment Needed
You don’t need fancy gadgets for this. Just the basics you probably already have.
12-Inch Cast-Iron Skillet or Dutch Oven — This is the most important tool. I use a well-seasoned cast-iron skillet. It holds heat beautifully and gives the bottom of the rice a slightly crispy texture that’s amazing. If you don’t have cast iron, a heavy-bottomed stainless steel skillet or a Dutch oven works fine. Just make sure it has a lid.
Wooden Spoon — For stirring. Metal spoons can scratch cast iron, and plastic can melt if it touches the hot pan. Wood is safe and sturdy.
Measuring Cups and Spoons — Standard stuff. Dollar store versions work fine.
Colander — For rinsing the beans. Or just use a fine-mesh sieve.
Sharp Knife and Cutting Board — For the onions and green onions. A dull knife makes dicing onions a miserable experience.
How to Make It: Step-by-Step
Alright, let’s make this. I’m walking you through exactly how I do it, including the little tricks I’ve picked up from my grandmother. It’s simple, but there’s a method to the madness.
Step 1: Prep Your Ingredients (5 minutes)
Before you turn on the stove, get everything ready. Dice the onion, slice the green onions, measure the rice, and drain the beans. I know it seems fussy, but once you start cooking, things move fast. Grate your cheese now, too. It’s easier to grate a block while you’re chopping veggies than to do it over the stove with a pot of boiling water.
Step 2: Brown the Beef and Onions (8-10 minutes)
Place your large skillet over medium-high heat. Add a tablespoon of oil if your beef isn’t fatty enough. Add the ground beef and the diced onion. Break the beef up with your wooden spoon as it cooks. You want small crumbles, not big chunks. Cook until the beef is no longer pink and the onions are soft and translucent. This should take about 8 minutes. If there’s a lot of excess grease, drain it off, but leave about a tablespoon for flavor.
Step 3: Toast the Rice (2 minutes)
This is the step most people skip, but it’s crucial. Add the dry rice to the pan with the beef. Stir it constantly for about 2 minutes. You’ll smell the rice starting to toast, and it will turn a slightly opaque, nutty color. This coats the grains in fat, which helps them stay separate and fluffy later. Don’t burn it, just toast it.
Step 4: Add Liquids and Seasoning (2 minutes)
Pour in the chicken broth, tomato sauce, salsa, and taco seasoning. Stir everything together until the rice is submerged and the spices are evenly distributed. Add the rinsed black beans. Taste the liquid—it should be seasoned well. If it tastes bland, add a pinch more salt. The rice will absorb all this liquid, so it needs to be flavorful now.
Step 5: Simmer the Rice (18-20 minutes)
Bring the mixture to a boil. Once it’s bubbling, reduce the heat to low. Cover the skillet with a tight-fitting lid. Let it simmer undisturbed for 18-20 minutes. Do not lift the lid! I know it’s tempting to peek, but every time you let steam out, the rice cooks unevenly. After 18 minutes, check the rice. It should be tender and the liquid should be absorbed. If it’s still crunchy, add a splash more water and cook for 5 more minutes.
Step 6: The Cheese Melt (5 minutes)
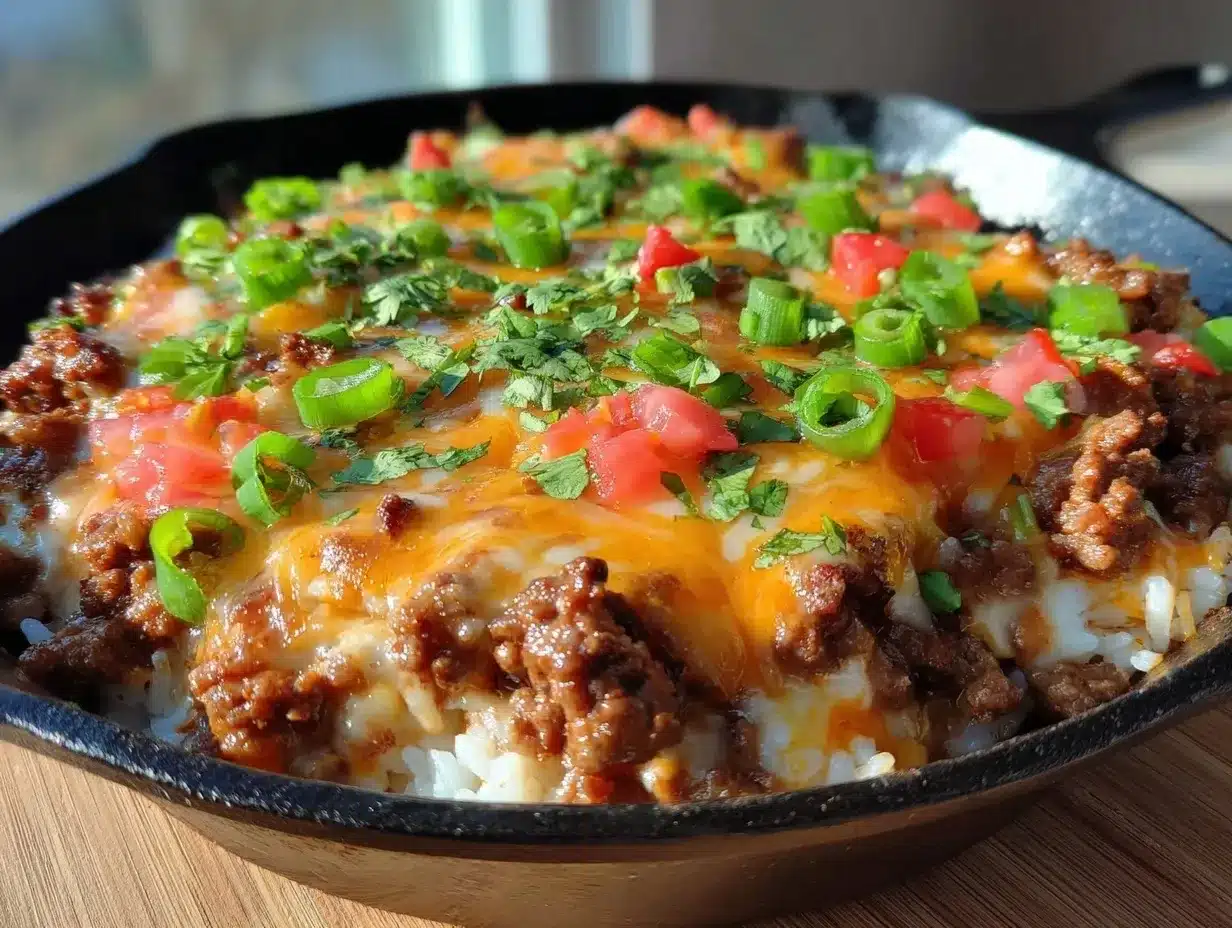
Remove the skillet from the heat. Keep the lid on for one minute to let the residual heat finish the rice. Then, sprinkle the shredded cheese evenly over the top. Replace the lid and let it sit for another 2-3 minutes. The steam will melt the cheese into a gooey blanket. Stir it in gently right before serving, leaving some cheese on top for the visual appeal.
Step 7: Serve
Top with sliced green onions and a dollop of sour cream. Serve immediately while it’s hot and cheesy. It’s best eaten straight from the skillet, passed around the table.
Expert Tips & Tricks
Here’s everything I’ve learned from making this dozens of times. These tips will save you from my mistakes.
Don’t Skip the Toasting
I made this once without toasting the rice, and the result was gummy and sticky. Toasting the grains in the fat before adding liquid is the secret to fluffy rice. It’s a non-negotiable step.
Keep the Lid On
This is steam cooking. If you lift the lid, you lose the steam, and the rice won’t cook properly. Set a timer and trust the process. If you’re worried, set the timer for 18 minutes, then check. It’s usually perfect.
Use Fresh Cheese
Pre-shredded cheese has anti-caking agents. It melts, but it doesn’t melt *smoothly*. You get stringy bits and clumps. Buy a block of cheddar and shred it with a box grater. It takes two minutes and makes a huge difference in texture.
Adjust the Spice
Taco seasoning varies by brand. Some are very salty, some are very spicy. Taste your liquid before you cover the pot. If it tastes bland, the finished dish will be bland. If it tastes too spicy, add a little more broth or tomato sauce.
Let It Rest
After you melt the cheese, let the skillet sit off the heat for 5 minutes before serving. This allows the cheese to set slightly so it doesn’t run off the spoon, and it lets the rice firm up a bit. It’s easier to serve this way.
Variations & Substitutions
Once you’ve nailed the basic version, here’s how you can mix it up. I’ve tried all of these.
Turkey Taco Skillet
Swap the ground beef for ground turkey. Turkey is leaner, so add an extra tablespoon of oil when browning. You might want to add a little extra salt and cumin, as turkey is milder than beef.
Vegetarian Version
Skip the beef and add an extra can of black beans or a can of corn. You can also add diced bell peppers and zucchini when you sauté the onions. The rice and cheese will carry the flavor just as well.
Chicken Version
Use diced cooked chicken breast instead of beef. Add the chicken in the last 5 minutes of simmering just to heat it through. This is lighter but still very satisfying.
Spicy Kick
Add a diced jalapeño when you sauté the onions. Or use a hot salsa instead of mild. For extra heat, stir in a teaspoon of chipotle powder with the taco seasoning.
Add Corn
I love adding a can of drained corn kernels. It adds sweetness and crunch. Add it with the beans.
Dairy-Free
Use a dairy-free cheese shred and skip the sour cream. It won’t melt exactly the same, but it’s still tasty. You can add a dollop of guacamole for creaminess instead.
Serving & Storage
How to Serve:
I usually serve this straight from the skillet at the dinner table—it looks rustic and stays warm. But here are other ways I’ve enjoyed it:
- As a Taco Filling: Scoop the mixture into warm tortillas and top with lettuce, tomato, and sour cream.
- With Cornbread: A side of cornbread is perfect for soaking up the extra sauce. I often make my cheesy jalapeno cornbread muffins to go with this.
- With a Green Salad: A simple side salad with vinaigrette cuts through the richness of the cheese.
Storage Instructions:
Store leftovers in an airtight container in the refrigerator for up to 4 days. The rice will absorb more liquid as it sits, so it will look drier. This is normal.
Reheating:
The best method is in the microwave. Add a splash of water or broth to the rice before heating. Stir halfway through. This adds moisture back in. If you’re reheating in a skillet, add a little water and cover it on low heat. It won’t reheat as evenly as fresh, but it’s still good.
Freezing:
I don’t recommend freezing this. The rice can become mushy when thawed and reheated, and the cheese can separate. It’s best made fresh. But if you must, freeze it in portions for up to 2 months. Thaw in the fridge overnight and reheat gently with added liquid.
Nutrition Information
I’m not a nutritionist, but here’s the breakdown if you’re tracking. Keep in mind this is a hearty meal, so portions matter.
Per Serving (based on 6 servings):
- Calories: 450
- Protein: 25g
- Carbs: 42g
- Fiber: 6g
- Fat: 18g
- Sodium: 680mg (varies based on broth and seasoning)
What’s Good: High in protein from the beef and beans. Good source of fiber. Calcium from the cheese.
What to Know: Higher in sodium due to the broth and cheese. Contains gluten-free ingredients naturally, but check your taco seasoning if you have celiac disease.
Final Thoughts
So that’s my One-Pan Cheesy Ground Beef Taco Skillet with Fluffy Rice. It’s not fancy. It doesn’t require a culinary degree. But it tastes like love. It tastes like my grandmother’s kitchen, where dinner was simple, warm, and shared with the people you care about.
I hope you try it. I hope your family loves it as much as mine does. And I hope you enjoy the peace of mind that comes with knowing there’s only one pan to wash. That, to me, is the real magic of this recipe.
If you make this, let me know how it turns out! I love hearing stories about your kitchen. And if you’re looking for more cozy, family-friendly meals, check out this loaded cheesy hashbrown casserole for a weekend brunch, or this creamy au gratin potatoes for a side dish that pairs perfectly with beef.
Happy cooking!
Frequently Asked Questions
Can I use instant rice?
I don’t recommend it. Instant rice cooks too fast and gets mushy in this method. It also doesn’t hold up well to the simmering time. Long-grain white rice is the best choice for texture. If you’re in a huge pinch, you can use minute rice, but reduce the cooking time to 5 minutes and be careful not to overcook it.
Why is my rice still crunchy?
Usually, this means the rice didn’t get enough liquid or heat. Make sure you brought the mixture to a boil before reducing to a simmer. Also, ensure your lid is tight-fitting so steam doesn’t escape. If it’s still crunchy after 20 minutes, add a splash of water, cover, and cook for 5 more minutes.
Can I make this ahead of time?
It’s best made fresh. The rice continues to absorb liquid even after it’s off the heat, so it can become dry and hard if left out. However, you can prep all the ingredients (brown the beef, chop the onions) ahead of time and store them in the fridge. When you’re ready to eat, just assemble and cook. It saves about 10 minutes of prep time.
Is this recipe gluten-free?
Yes, naturally! Ground beef, rice, beans, and cheese are all gluten-free. Just make sure your taco seasoning and chicken broth are certified gluten-free, as some brands add wheat-based thickeners or soy sauce. I always check my labels.
Can I use ground turkey instead of beef?
Yes, you can. Turkey is leaner, so you might want to add a tablespoon of olive oil when browning it. Turkey has a milder flavor, so you might want to add a little extra cumin or chili powder to boost the taste. It’s a lighter option but still delicious.
What kind of cheese is best?
I like a mix of sharp cheddar and Monterey Jack. The cheddar adds flavor, and the Jack adds creaminess. You can also use a Mexican blend cheese shred. Avoid pre-shredded cheese if you can help it—it doesn’t melt as smoothly.
Pin This Recipe!
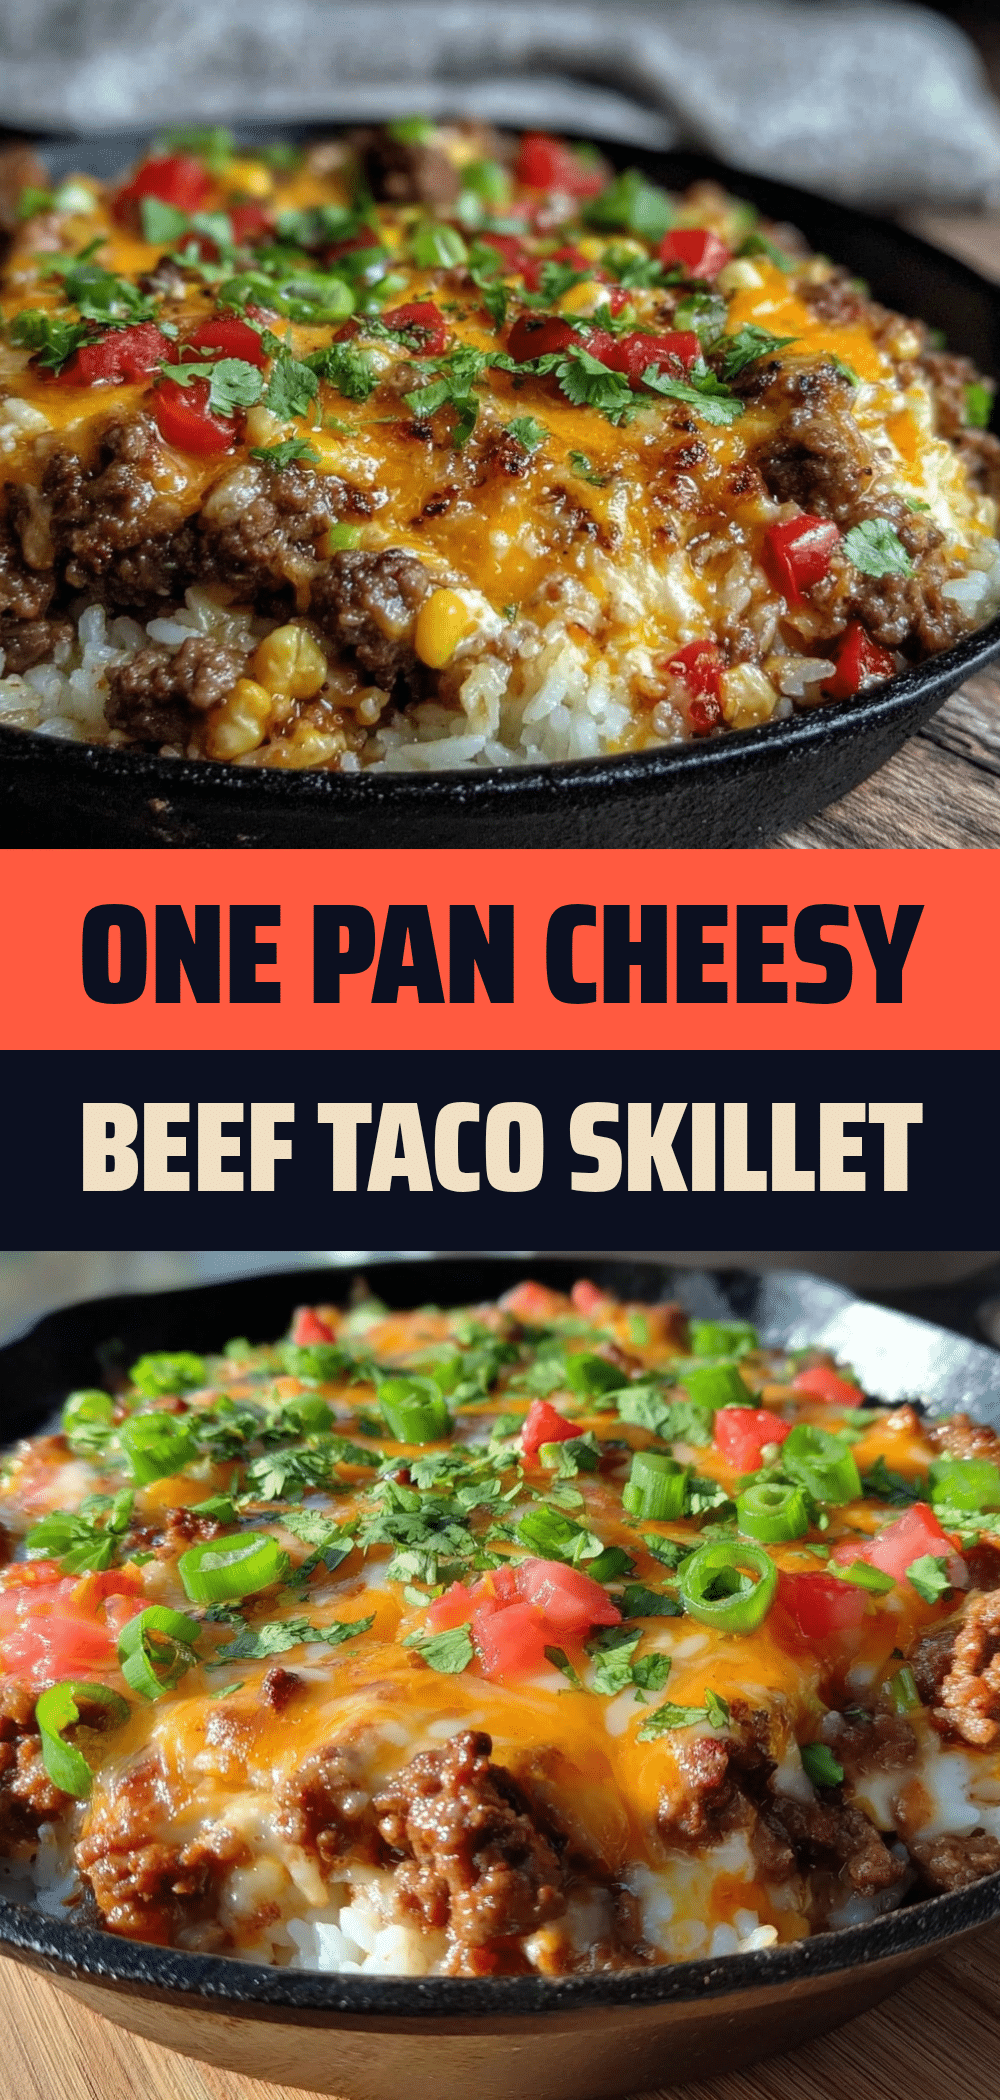

One-Pan Cheesy Ground Beef Taco Skillet: Grandma’s Way
- Total Time: 35 minutes
- Yield: 6 servings 1x
Description
A comforting, one-pan meal featuring browned ground beef, toasted long-grain rice, black beans, and melted cheddar cheese, inspired by traditional family recipes.
Ingredients
- 1.5 pounds (680g) 80/20 ground chuck
- 1 large yellow onion, finely diced
- 1 cup (185g) long-grain white rice
- 2 cups (480ml) low-sodium chicken broth
- 2 tablespoons taco seasoning (homemade or store-bought)
- 1 can (8 ounces / 225g) plain tomato sauce
- 1 cup (240g) medium-chunk salsa
- 1 can (15 ounces / 425g) black beans, drained and rinsed
- 2 cups (200g) shredded cheddar cheese (block shredded)
- 4 stalks green onions, sliced
- Sour cream, optional for serving
- 1 tablespoon olive oil (if beef is not fatty enough)
Instructions
- Prep ingredients: Dice the onion, slice green onions, measure rice, drain beans, and grate cheese.
- Brown the beef and onions: Heat a 12-inch skillet over medium-high heat. Add beef and onion, breaking beef into small crumbles. Cook until beef is no longer pink and onions are soft (about 8 minutes). Drain excess grease if necessary, leaving about 1 tablespoon.
- Toast the rice: Add dry rice to the skillet with the beef. Stir constantly for 2 minutes until rice turns slightly opaque and nutty.
- Add liquids and seasoning: Pour in chicken broth, tomato sauce, salsa, and taco seasoning. Stir to submerge rice and distribute spices. Add rinsed black beans. Taste and adjust salt if needed.
- Simmer the rice: Bring mixture to a boil, then reduce heat to low. Cover with a tight-fitting lid and simmer undisturbed for 18-20 minutes until rice is tender and liquid is absorbed.
- Melt the cheese: Remove skillet from heat. Keep lid on for 1 minute. Sprinkle cheese evenly over the top, replace lid, and let sit for 2-3 minutes until cheese is melted.
- Serve: Top with sliced green onions and sour cream. Let rest for 5 minutes before serving to allow cheese to set slightly.
Notes
Do not skip toasting the rice, as it ensures fluffy grains. Keep the lid on during simmering to trap steam. Use fresh block cheese for better melting. If rice is crunchy, add a splash of water and cook 5 more minutes. Do not freeze as rice may become mushy.
- Prep Time: 5 minutes
- Cook Time: 30 minutes
- Category: Main Course
- Cuisine: Mexican-American
Nutrition
- Serving Size: 1/6 of the skillet
- Calories: 450
- Sodium: 680
- Fat: 18
- Carbohydrates: 42
- Fiber: 6
- Protein: 25
Keywords: one-pan meal, ground beef, taco skillet, comfort food, family dinner, cheesy rice, easy weeknight dinner