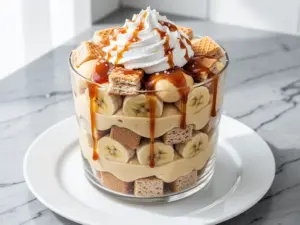
I have to confess something. Last Friday night, I made a mistake. A delicious, creamy, caramel-drenched mistake. I was supposed to be meal-prepping for the week, focusing on those loaded cheesy hashbrown casserole leftovers for lunch, but then I saw the bananas. They were spotted. Brown. Perfectly ripe. And I just couldn’t let them go to waste.
So I threw together what I thought would be a quick, lazy dessert. I grabbed some vanilla wafers, whipped up some cream, drizzled salted caramel over everything, and layered it all in a glass bowl. I didn’t think much of it. I just wanted something sweet before bed.
Then my husband walked in. He sniffed the air. He saw the bowl. He ate a spoonful. And then he looked at me with this expression I’ve only seen twice before—once when he won the lottery scratcher for $20, and once when he found a perfectly grilled cheese sandwich in the back of the pantry. He asked, “Did you make this?”
I said yes. He asked for more. Then he asked for the recipe.
That was three weeks ago. Since then, I’ve made this salted caramel banana pudding trifle at least six times. Six. I’ve tweaked the ratio of caramel to cream. I’ve tried different brands of vanilla wafers. I’ve even argued with my teenager about who gets the bottom layer (hint: the person who does the dishes gets the bottom layer, but everyone else thinks the top is better because it’s pretty). The truth is, this trifle has become our family’s favorite comfort dessert. It’s easier than pie, it’s creamier than mousse, and it tastes like a hug from your grandmother.
Here’s the thing about this recipe: it’s deceptively simple. You don’t need to bake anything. You don’t need to temper eggs. You don’t need to stand over a stove stirring custard for an hour. It’s a no-bake wonder that comes together in about 15 minutes, but it tastes like you spent all day in the kitchen. And honestly? That’s my kind of cooking.
Why You’ll Love This Salted Caramel Banana Pudding Trifle
If you’re skeptical about another banana pudding recipe, let me win you over. I’ve been making desserts since I was a kid, and I’ve tried just about every variation out there. But this salted caramel banana pudding trifle with vanilla wafers hits a different note. It’s not just sweet; it’s complex. It’s not just simple; it’s layered (literally and figuratively).
Here’s why this recipe has taken over our house:
- It’s Actually Fast — Seriously, 15 minutes. That’s how long it takes to chop bananas, mix the cream, and layer it up. I make this on Tuesday nights when I’m exhausted and don’t want to turn on the oven. It’s the ultimate “I need dessert now” solution.
- The Texture is Unreal — You get the crunch of the vanilla wafers, the softness of the bananas, and the light, airy fluff of the whipped cream. Every spoonful has a different texture. It’s not mushy. It’s not stiff. It’s perfect.
- Salted Caramel is the MVP — Plain banana pudding is good. Banana pudding with salted caramel? That’s next-level. The salt cuts through the sweetness of the cream and bananas, making every bite feel balanced and sophisticated. It’s the kind of detail that makes people ask, “What is that secret ingredient?”
- It’s a Crowd-Pleaser — I served this at a potluck last month. You know what happened? The bowl was empty in ten minutes. People were scraping the sides. Even my picky-eater cousin, who usually sticks to plain toast, went back for thirds. It’s versatile enough for a casual weeknight treat or fancy enough for a dinner party dessert.
- Zero Baking Required — No oven, no stove, no mess. This is a no-bake dessert that doesn’t compromise on flavor. If you can layer ingredients in a bowl, you can make this. I’ve taught my 10-year-old to make it, and she’s proud of herself every time.
- Leftovers are Better — I know, I know, usually leftovers are sad. Not this. The wafers soften just enough to become like a cake layer, and the flavors meld together overnight. I actually prefer it the next day. It’s like a banana pudding cheesecake in a bowl.
This is my go-to when I need to impress without trying too hard. It’s reliable, it’s delicious, and it makes everyone happy. Seriously, try it once. If you don’t fall in love, I’ll eat my hat. (And then I’ll bake a hat. Maybe one of these fluffy cinnamon swirl pancakes for breakfast the next day to recover.)
Ingredients You’ll Need
Here’s the best part: you probably have most of this already in your kitchen. This isn’t a recipe that requires a trip to three different specialty stores. It’s pantry-friendly, fridge-staple goodness.
For the Creamy Base:
Heavy whipping cream (2 cups / 480ml) — This is non-negotiable. You need the fat content to whip this up into stiff peaks. Half-and-half won’t work. Whole milk will turn into soup. Get the real deal. Chill your bowl and beaters in the fridge for 15 minutes before whipping—it helps them whip faster and stiffer.
Cream cheese (8 ounces / 225g, softened) — This is the secret weapon. It adds tang and stability to the cream. It keeps the pudding from being too airy or collapsing. Use full-fat brick cream cheese, not the spreadable kind in a tub. That stuff has too much water and air.
Powdered sugar (½ cup / 60g) — It dissolves instantly. No gritty sugar crystals in your dessert. If you don’t have powdered sugar, you can blend granulated sugar in a blender for 30 seconds, but why make extra work?
Vanilla extract (2 teaspoons) — Use real vanilla, not imitation. It makes a huge difference in the flavor profile. I love the smell of vanilla in the kitchen. It’s comforting. It smells like home.
For the Fruit and Crunch:
Ripe bananas (4 large) — Look for bananas with brown spots. They’re sweeter and softer. If they’re green, they’ll be tart and hard. If they’re black mush, they’ll be too wet. Aim for yellow with brown speckles. Slice them just before assembling to prevent browning.
Vanilla wafers (1 package / about 30-40 cookies) — Nilla Wafers are the classic choice. They’re sturdy enough to hold up in the cream but soft enough to melt in your mouth. Don’t use vanilla sandwich cookies; they’re too sweet and the cream filling gets messy. Stick to the thin wafers.
For the Salted Caramel Drizzle:
Salted caramel sauce (1 cup / 240ml) — You can buy this (I like the ones from Trader Joe’s or Ghirardelli), or you can make your own. Making it is easy: melt butter, add brown sugar, cream, and salt. But honestly? Store-bought is fine. I’m not judging. We all have busy nights.
Sea salt flakes (optional, for topping) — A little sprinkle on top adds a nice visual contrast and an extra hit of salt. It makes it look fancy. I use Maldon sea salt because it looks pretty and melts nicely.
Personal Tips:
I always keep a backup bottle of caramel sauce in the pantry. It’s like edible gold. You never know when you’ll want to drizzle it on ice cream, pancakes, or this pudding. Also, if you’re using bananas that are slightly green, toss them in the microwave for 30 seconds to soften them up. It’s a hack, but it works.
Equipment Needed
You don’t need fancy gadgets for this. Here’s what I actually use:
Mixing bowl — A large bowl, at least 4-quart capacity. I use a stainless steel bowl because it’s easy to clean. Glass works too. Just make sure it’s big enough for the cream to whip without splattering.
Electric mixer — Hand mixer or stand mixer. I use a hand mixer because it’s easier to clean. But if you have a stand mixer, use it. It’ll whip the cream in 2 minutes flat. If you’re doing it by hand, prepare for a little arm workout.
Spatula — A silicone spatula is essential for folding the cream gently. You want to keep the air in the mixture. A metal spoon will deflate it. I love my red silicone spatula; it’s flexible and scrapes every bit of cream off the sides.
Serving bowl — A glass trifle bowl is traditional and looks beautiful. But any large glass bowl or even individual mason jars work. I use a 9×13 glass baking dish when I’m feeding a crowd. It’s easier to slice and serve.
Knife and cutting board — For slicing the bananas. A serrated knife works best for bananas because it doesn’t crush them. But a regular chef’s knife works too if you’re gentle.
Measuring cups and spoons — Standard stuff. I have a set from the dollar store that’s held up for years. Doesn’t need to be fancy.
Optional but nice:
- Piping bag — If you want to pipe the cream instead of spreading it, a piping bag makes it look restaurant-quality. But a Ziploc bag with the corner cut off works too.
- Pastry brush — For brushing caramel on the wafers if you want extra caramel flavor. I usually just drizzle it on top.
Tool Tips:
Don’t have an electric mixer? You can whip the cream by hand, but it’ll take 10-15 minutes of vigorous whisking. Your arms will burn. But it’s doable. I’ve done it when the power went out. It’s a workout.
How to Make It: Step-by-Step
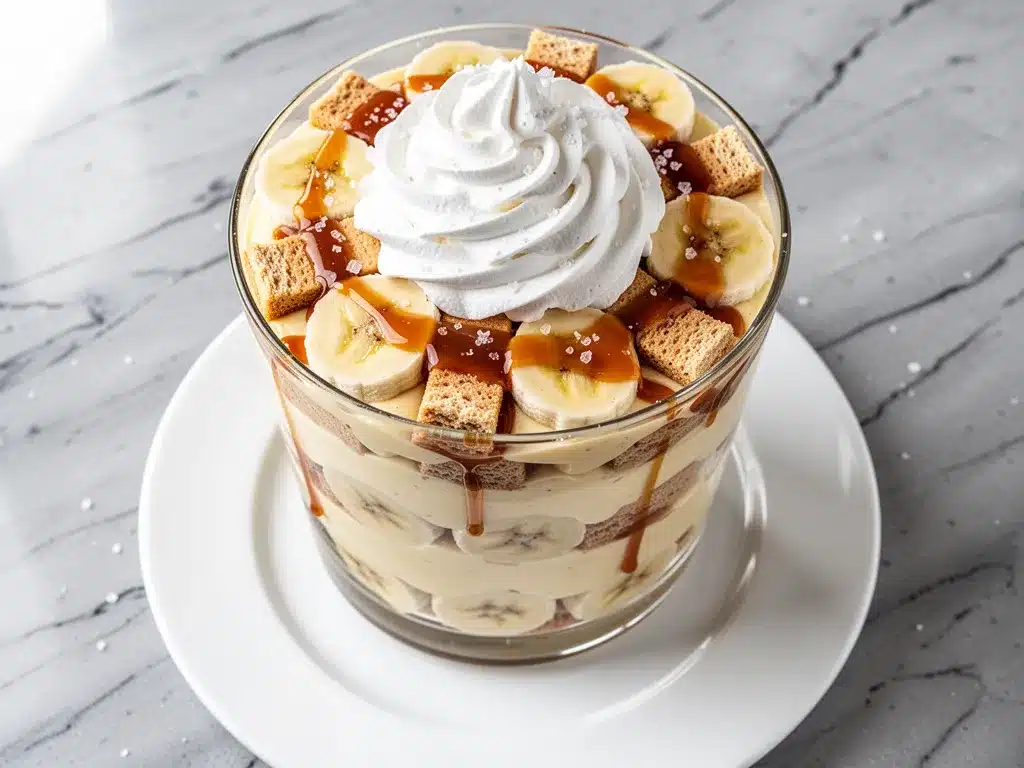
Alright, let’s make this! I’m walking you through exactly how I do it, including the little tricks I’ve picked up.
Step 1: Prep Your Bananas and Wafers (5 minutes)
Slice your bananas into ¼-inch rounds. Don’t make them too thick, or you’ll get huge chunks of banana in every bite. Don’t make them too thin, or they’ll disappear. Aim for coin-sized slices. Arrange them on a plate if you’re not assembling immediately, but try to assemble right away to prevent browning. If you’re worried about browning, toss the slices in a little lemon juice, but it’s not strictly necessary. The caramel covers it up anyway.
Open your package of vanilla wafers. Check for broken ones. You can use the broken ones for the bottom layer or for crumbling on top. Save the perfect ones for the neat layers.
Step 2: Whip the Cream Cheese Mixture (3 minutes)
In your large mixing bowl, combine the softened cream cheese and powdered sugar. Beat on medium speed until smooth and creamy. This takes about 1-2 minutes. Scrape down the sides of the bowl with your spatula. Make sure there are no lumps of cream cheese. You want a silky base.
Step 3: Whip the Heavy Cream (3 minutes)
Add the vanilla extract to the heavy cream. Beat on high speed until stiff peaks form. This means when you lift the beaters, the cream stands up straight and doesn’t droop. Be careful not to over-whip it into butter. Watch it closely. It goes from soft peaks to stiff peaks very quickly. Once it’s stiff, stop.
Step 4: Fold the Mixtures Together (2 minutes)
Add one-third of the whipped cream to the cream cheese mixture. Fold it in gently with your spatula. Then add the rest of the cream and fold until just combined. Don’t overmix. You want to keep the air in the cream. It should be light and fluffy. If you mix too much, it’ll become dense and heavy.
Step 5: Assemble the Trifle (5 minutes)
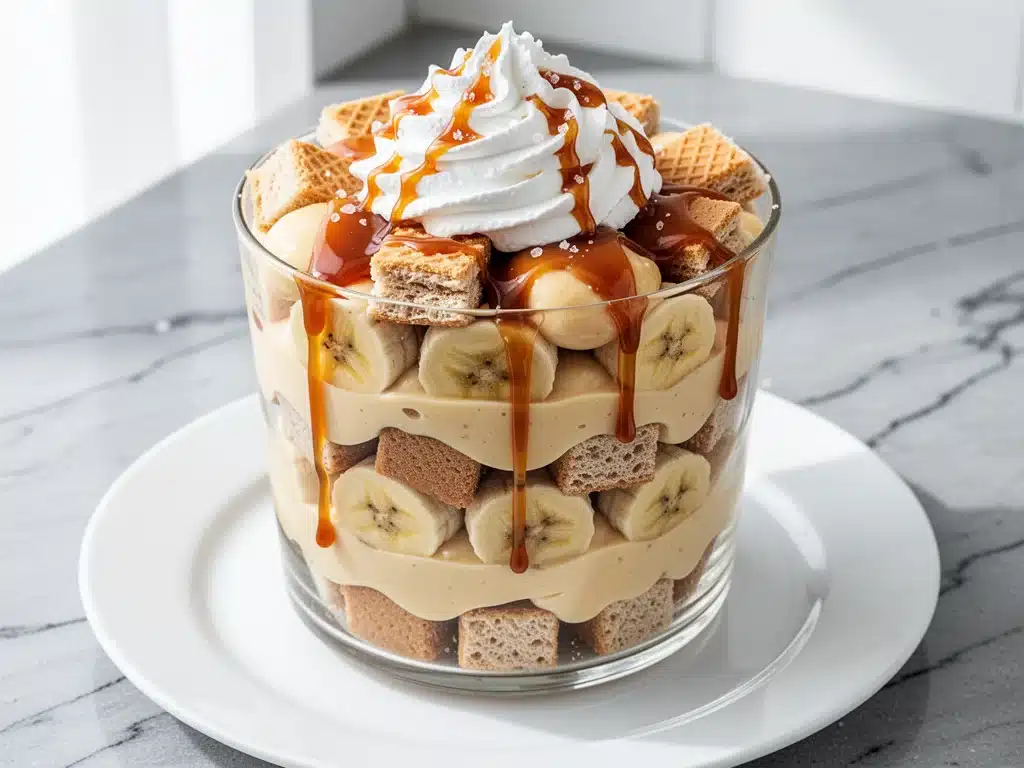
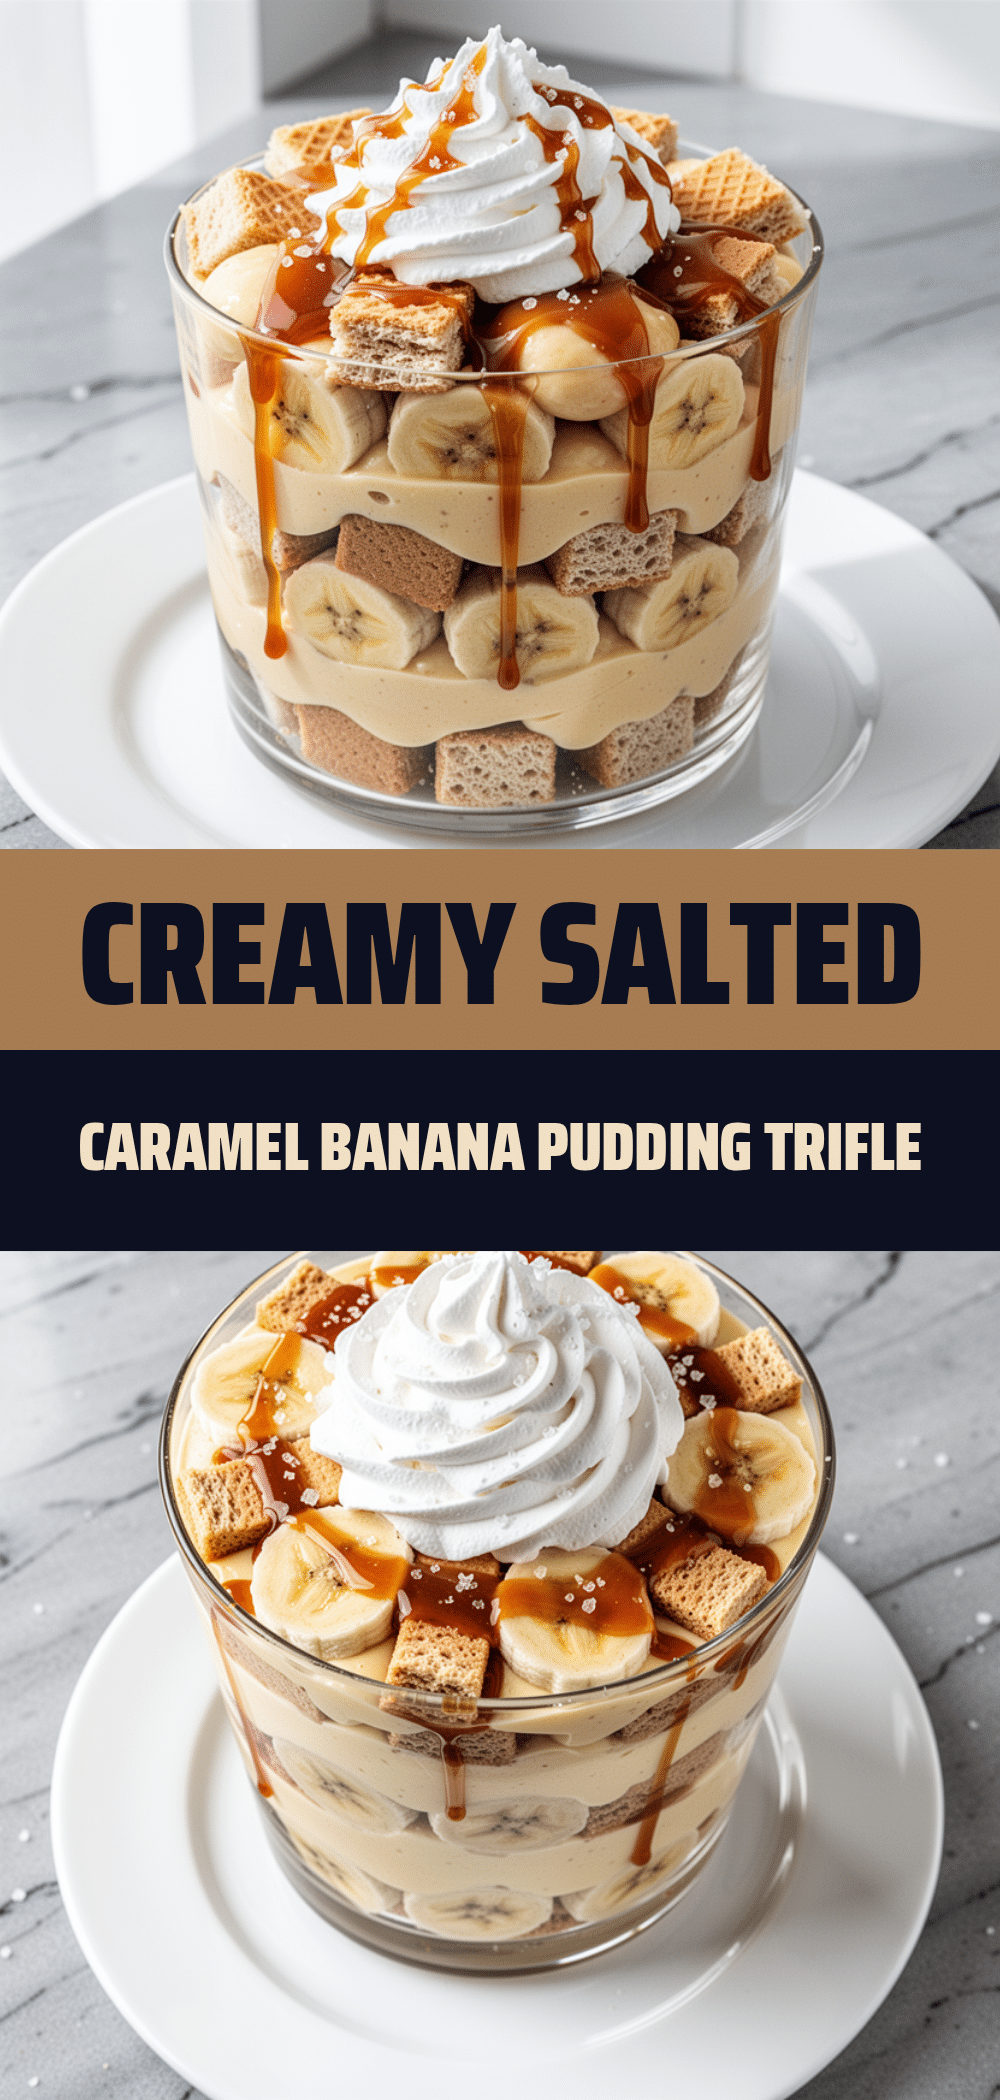
Start with a layer of vanilla wafers at the bottom of your serving bowl. Don’t worry about making it perfect; just cover the bottom. Then add a layer of banana slices. Drizzle some salted caramel over the bananas. Then add a generous layer of the cream mixture. Spread it evenly. Repeat the layers: wafers, bananas, caramel, cream. Do this 2-3 times, ending with a layer of cream on top.
Step 6: The Final Touch (1 minute)
Drizzle the remaining salted caramel over the top. Sprinkle with sea salt flakes if you’re using them. If you have extra vanilla wafers, crush them and sprinkle on top for extra crunch. If you have extra bananas, slice them thinly and arrange on top for decoration.
Refrigerate for at least 1 hour before serving. This lets the flavors meld and the wafers soften. But I know you won’t wait. I never wait. But trust me, it’s worth the 15-minute wait.
Expert Tips & Tricks
Here’s everything I’ve learned from making this dozens of times. These tips will save you from my mistakes.
Chill Everything
I can’t stress this enough. Chill your bowl, your beaters, and your cream. Cold cream whips faster and holds its shape better. If your kitchen is hot, put the bowl in the fridge for 10 minutes before starting. It’s a small step that makes a big difference.
Don’t Skip the Salt
The salted caramel is crucial. But if you’re using unsalted caramel sauce, add a pinch of salt to the cream mixture. It balances the sweetness. Banana and salt are best friends. Don’t underestimate the power of a little salt.
Use Ripe Bananas
Green bananas will be tart and hard. Overripe bananas will be mushy. Aim for the sweet spot: yellow with brown spots. They’re sweet, soft, and flavorful. If you only have green bananas, let them sit on the counter for a day. If you only have black bananas, use them, but reduce the amount of caramel you drizzle, as they’re sweeter.
Fold Gently
When combining the cream cheese and whipped cream, use a folding motion. Cut down the middle, scoop up from the bottom, and turn the bowl. Rotate and repeat. Don’t stir in circles. You’re trying to keep the air bubbles intact. This keeps the pudding light and fluffy.
Layer Generously
Don’t be stingy with the layers. This is a dessert. You want plenty of cream, plenty of bananas, plenty of caramel. If you’re feeding a crowd, double the recipe. I always double. It’s better to have leftovers than to run out.
Common Mistakes (and how to avoid them):
- Mistake: The cream is runny. Fix: Your cream wasn’t cold enough, or you didn’t whip it long enough. Chill the bowl and whip longer.
- Mistake: The bananas are brown. Fix: You sliced them too early. Slice them right before assembling. Or toss them in a little lemon juice.
- Mistake: The wafers are soggy. Fix: You let it sit in the fridge too long. It’s best eaten within 24 hours. After that, the wafers dissolve into the cream.
Pro Tricks I’ve Learned:
- For Extra Flavor — Add a teaspoon of almond extract to the cream. It pairs beautifully with banana. It’s a subtle change, but it adds depth.
- For Better Presentation — Use a clear glass bowl. Everyone loves seeing the layers. It’s Instagram-worthy. I’ve gotten so many likes on Pinterest for this.
- For Make-Ahead — You can assemble this the night before. Just add the caramel drizzle and sea salt right before serving to keep it crunchy.
Variations & Substitutions
Once you’ve nailed the basic version, here’s how you can mix it up. I’ve tried all of these.
Chocolate Lovers Version
Add a layer of chocolate pudding between the cream and bananas. Or drizzle chocolate sauce instead of caramel. It’s like a banana split in a bowl. My kids love this version.
Strawberry Banana Version
Swap half the bananas for sliced strawberries. The red and yellow colors are pretty. The flavor is bright and tangy. It’s like a summer salad dessert.
Coconut Version
Use coconut cream instead of heavy cream. Add shredded coconut on top. It’s tropical and refreshing. Great for hot weather.
Gluten-Free
Use gluten-free vanilla wafers. Most brands work fine. I’ve tried Kinnickinnic and they hold up well. Everything else is naturally gluten-free.
Dairy-Free
Use coconut cream and dairy-free cream cheese. It’s not as rich, but it’s still tasty. I make this for my dairy-free friend, and she loves it.
Lower-Sugar
Use unsweetened caramel sauce and reduce the powdered sugar in the cream. It’s less sweet, but still good. I make this when I’m watching my sugar intake.
Serving & Storage
How to Serve:
I usually serve this straight from the fridge in a glass bowl. It looks rustic and stays cold. But here are other ways I’ve enjoyed it:
- Individual Glasses — Layer it in mason jars or wine glasses. It’s cute and portion-controlled.
- With Whipped Cream — Add an extra dollop of whipped cream on top for extra richness.
- With Nuts — Sprinkle chopped pecans or walnuts on top for crunch. It adds a nice contrast to the soft texture.
Storage Instructions:
Refrigerator:
Store in an airtight container or covered with plastic wrap for up to 2 days. The wafers will continue to soften, which is good. But after 2 days, they might get too soggy. Eat it while it’s good.
Reheating:
Do not reheat this. It’s a cold dessert. Serve it cold. If it’s too cold, let it sit at room temperature for 10 minutes. But don’t microwave it. The cream will separate.
Freezing:
Don’t freeze this. The cream will separate and become grainy when thawed. The bananas will turn mushy. It’s best fresh or refrigerated.
Pro tip:
If you’re making this for a party, assemble it 4 hours before. It’ll be perfectly set and flavorful. But add the caramel drizzle right before serving to keep it shiny and fresh.
Nutrition Information
I’m not a nutritionist, but here’s the breakdown if you’re tracking.
Per Serving (based on 8 servings):
- Calories: 380
- Protein: 4g
- Carbs: 45g
- Fiber: 2g
- Sugar: 32g
- Fat: 20g
- Saturated Fat: 12g
- Cholesterol: 60mg
- Sodium: 220mg
What’s Good:
- Bananas provide potassium and vitamin B6
- Cream cheese provides calcium
- It’s a satisfying dessert that feels indulgent
What to Know:
- High in sugar from caramel and powdered sugar
- High in fat from cream and cream cheese
- Contains dairy and gluten
My Take:
Look, this is dessert. It’s not a health food. It’s sweet, creamy, and delicious. Enjoy it in moderation. Pair it with a cup of coffee or tea. Or share it with friends. It’s meant to be enjoyed, not feared.
Final Thoughts
So that’s my salted caramel banana pudding trifle! I’ve probably talked your ear off at this point, but when you make a recipe this often, you have a lot to say about it.
This has saved my dessert game more times than I can count. It’s my answer to “what’s for dessert” when I’m tired, don’t want to bake, and still want something that tastes really good. My kids are happy, my husband’s happy, and I’m happy because I’m not stressed about cooking.
Make it yours! Try different add-ins, swap in your favorite fruits, adjust the caramel. The best recipes are the ones you adapt to your family’s tastes. If you want to try other easy desserts, check out these no-bake chocolate peanut butter oat bars for a different kind of sweet treat.
If you make this, drop a comment and let me know what you think! I love hearing how recipes turn out in your kitchen. And if something doesn’t work, tell me that too—I’m here to help troubleshoot.
Happy cooking! And I hope your kitchen smells half as good as mine does right now.
Frequently Asked Questions
Can I use whipped topping instead of whipped cream?
You can, but the texture will be different. Whipped topping is lighter and less rich. It won’t hold up as well in the layers. I prefer real whipped cream for the richness. But if you’re out of cream, Cool Whip works in a pinch. It’s not as good, but it’s still tasty.
Why did my cream separate?
Usually means the cream was too warm, or you over-whipped it. If you over-whip it, it becomes buttery and grainy. If it’s too warm, it won’t whip. Chill your bowl and cream next time. And stop whipping when you see stiff peaks.
Can I make this ahead for a party?
Yes! Assemble it up to 4 hours ahead. Store it in the fridge. Add the caramel drizzle and sea salt right before serving. It’ll be perfectly set and flavorful. I do this all the time for potlucks.
Why did my bananas turn brown?
Bananas oxidize when exposed to air. Slice them right before assembling. If you’re prepping ahead, toss them in a little lemon juice. Or cover them with plastic wrap directly on the surface. The caramel also helps hide any browning.
Can I use frozen bananas?
No. Frozen bananas are mushy when thawed. They’ll make the pudding watery. Use fresh, ripe bananas. If you have overripe bananas, freeze them for smoothies, not for this recipe.
How long does this last in the fridge?
Up to 2 days. After that, the wafers get too soggy, and the bananas get too soft. Eat it while it’s good. It’s best fresh.
Can I double this recipe?
Absolutely! Double everything and use a larger bowl. The cooking times stay the same. I do this when I’m feeding a crowd. Just make sure your bowl is big enough for all the layers.
Pin This Recipe!
Salted Caramel Banana Pudding Trifle
- Total Time: 15 minutes
- Yield: 8 servings 1x
Description
A no-bake, creamy dessert featuring layers of vanilla wafers, ripe bananas, and a rich whipped cream cheese mixture, all drizzled with salted caramel sauce.
Ingredients
- 2 cups heavy whipping cream
- 8 ounces cream cheese (softened, full-fat brick)
- 1/2 cup powdered sugar
- 2 teaspoons vanilla extract
- 4 large ripe bananas
- 1 package vanilla wafers (about 30–40 cookies)
- 1 cup salted caramel sauce
- Sea salt flakes (optional, for topping)
Instructions
- Slice bananas into 1/4-inch rounds.
- In a large mixing bowl, beat softened cream cheese and powdered sugar on medium speed until smooth and creamy.
- In a separate chilled bowl, whip heavy cream with vanilla extract on high speed until stiff peaks form.
- Gently fold one-third of the whipped cream into the cream cheese mixture, then fold in the remaining cream until just combined.
- Assemble the trifle by layering vanilla wafers, banana slices, salted caramel, and cream mixture in a serving bowl. Repeat layers 2-3 times, ending with cream.
- Drizzle remaining salted caramel over the top and sprinkle with sea salt flakes if desired.
- Refrigerate for at least 1 hour before serving to allow flavors to meld and wafers to soften.
Notes
Chill your bowl and beaters for 15 minutes before whipping the cream for better volume. Use ripe bananas with brown spots for best flavor. Do not freeze this dessert as the cream will separate. Best eaten within 24 hours to prevent wafers from becoming too soggy.
- Prep Time: 15 minutes
- Cook Time: 0 minutes
- Category: Dessert
- Cuisine: American
Nutrition
- Serving Size: 1 serving
- Calories: 380
- Sugar: 32
- Sodium: 220
- Fat: 20
- Saturated Fat: 12
- Carbohydrates: 45
- Fiber: 2
- Protein: 4
Keywords: banana pudding, salted caramel, trifle, no-bake dessert, easy dessert, vanilla wafers, cream cheese frosting