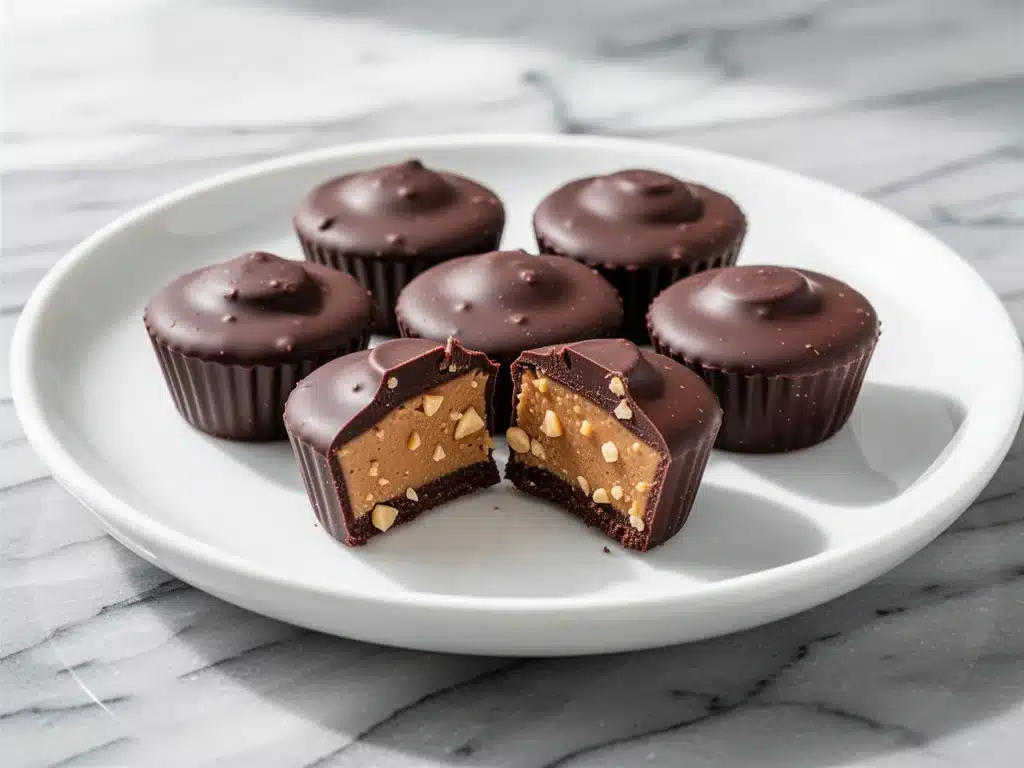
I have a confession to make. Last Tuesday, at 8:45 PM, I was standing in my kitchen with my three kids staring at me like I was a vending machine that had just eaten their allowance. We had just finished dinner, the dishes were done, and suddenly, the sugar craving hit. Not a “just one cookie” kind of hit, but a full-blown, “I need something sweet and salty and chocolatey immediately” emergency. My pantry was bare of anything decent. I had some stale crackers, a jar of pickles, and a sad-looking bag of dark chocolate chips that had been sitting since Halloween.
Instead of ordering takeout or letting them raid the candy bowl, I decided to whip up what I now call my “emergency” sugar-free dark chocolate peanut butter cups. It took ten minutes. Literally. And when I pulled those little cups out of the freezer, the look on my kids’ faces changed from disappointment to pure delight. My daughter even asked if I could make them “every single day for the rest of my life.” (Spoiler: I said no, but they’re on the regular rotation now.)
Here’s the thing about these cups: they aren’t just a healthy alternative. They’re actually better than the store-bought kind. I’ve tried the fancy sugar-free brands at the grocery store, and they often have that weird, artificial aftertaste or a texture that’s more like wax than chocolate. These homemade versions? They’re rich, creamy, and snap perfectly when you bite into them. Plus, because they’re sugar-free, I don’t feel like a villain when my husband sneaks one after dinner while I’m watching TV.
I’ve made these dozens of times—sometimes for quick weeknight desserts, sometimes for after-school snacks, and occasionally as last-minute hostess gifts. Each time, I’ve tweaked the ratio of chocolate to peanut butter until it was absolutely perfect. This recipe is my go-to when I need a treat that satisfies the sweet tooth without the sugar crash. It’s simple, it’s fast, and it uses ingredients you probably already have hiding in your pantry or fridge.
Why You’ll Love This Sugar-Free Dark Chocolate Peanut Butter Cups Recipe
There are about a dozen reasons I keep making these cups, but let’s be real—you probably already love peanut butter and chocolate. The question is, why make them at home instead of buying them? Here’s why this sugar-free dark chocolate peanut butter cups recipe has completely changed our dessert game.
- Stupid Simple — Seriously, if you can melt chocolate and spoon peanut butter, you can make this. I’ve made these while balancing a toddler on my hip. There’s no baking, no complex techniques, and no mess. It’s basically a five-minute assembly job.
- Lightning Fast — From start to finish, including the chilling time, you’re looking at about 20 minutes. But the actual active work is less than 5 minutes. I make these on weeknights when I get home exhausted and don’t want to turn the oven on.
- Sugar-Free & Low-Carb — This is huge for us. I’m trying to cut back on processed sugars, but I still want chocolate. These cups use high-quality dark chocolate and natural peanut butter, so they’re keto-friendly, diabetic-friendly, and just generally guilt-free. My keto-loving brother requests these constantly.
- Pantry-Friendly — You don’t need to run to the store for weird ingredients. Just dark chocolate, peanut butter, and a pinch of salt. That’s it. I keep the key items stocked specifically so I can make these on a whim.
- Makes Amazing Leftovers — These actually taste better after they’ve chilled in the fridge for a day or two. The flavors meld together, and the chocolate sets even firmer. I deliberately make a double batch because they disappear so fast.
- Budget-Smart — Buying sugar-free branded peanut butter cups is expensive. Like, $8 for a tiny bag expensive. Making them at home costs maybe $3 for a batch that yields 12-15 cups. That’s less than a single candy bar at the gas station.
This is my go-to when I need dinner to just work. No complicated techniques, no weird ingredients, just reliable, delicious food that makes everyone happy. And honestly? It feels like a win when you feed your family something sweet that you know is good for them.
Ingredients You’ll Need
Here’s the best part: you probably have most of this already. This sugar-free dark chocolate peanut butter cups recipe relies on three main components, and I’m particular about the quality of each because it makes a massive difference in the final taste.
For the Peanut Butter Center
Natural Peanut Butter (½ cup / 120g) — This is the star. I use a brand that is just peanuts and maybe a tiny bit of salt. No added sugar or hydrogenated oils. If your natural peanut butter is very runny, you might need to add a teaspoon of coconut oil to help it hold its shape. I always buy Justin’s or a store-brand organic natural peanut butter.
Sugar-Free Syrup (2 tablespoons) — I use a zero-calorie syrup like Lakanto Monkfruit or Swerve Brown Sugar Syrup. This gives the peanut butter that sweet, caramel-like flavor without the sugar. If you don’t have syrup, you can use powdered erythritol mixed with a tiny bit of water, but the syrup is easier to mix in smoothly.
Vanilla Extract (½ teaspoon) — Just a splash to round out the flavors. Don’t skip it; it makes the peanut butter taste more “dessert-like.”
Salt (½ teaspoon) — Essential. The salt cuts through the richness of the chocolate and peanut butter. I use sea salt flakes if I have them, but regular kosher salt works fine too.
For the Chocolate Shell
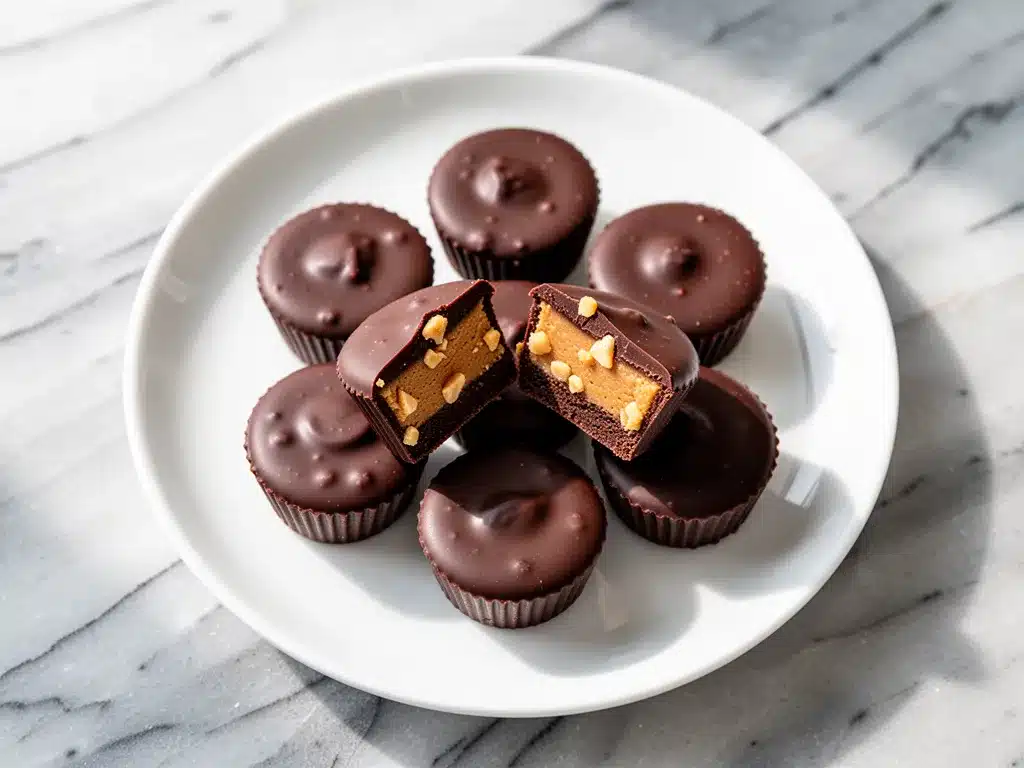
Dark Chocolate Chips (1 cup / 170g) — This is where you need to be careful. Look for chocolate chips labeled “sugar-free” or “keto.” Brands like Lily’s or Ghirardelli Sugar-Free are great because they melt smoothly. Regular dark chocolate chips (even 70% cocoa) usually have sugar in them, so check the label. If you can’t find sugar-free chips, you can use chopped sugar-free chocolate bars, which often melt better than chips.
Coconut Oil (1 tablespoon) — This is the secret weapon. Adding a little coconut oil to the melted chocolate makes it thinner, easier to work with, and gives the final shell a nice snap. It also prevents the chocolate from seizing up. I use refined coconut oil so it doesn’t taste like coconut.
Optional: Sea Salt Flakes — For sprinkling on top. This adds a fancy touch and enhances the flavor.
What About Substitutions?
If you’re allergic to peanuts, you can absolutely use sunflower seed butter or almond butter. Sunflower seed butter can sometimes turn green when mixed with chocolate (it’s a chemical reaction, totally safe), so you might want to use a different nut butter if you’re serving these to guests who might notice. Almond butter works beautifully and keeps the same texture.
Equipment Needed
You don’t need fancy equipment for this. Here’s what I actually use, and what you can swap if you don’t have it.
Muffin Tin — A standard 12-cup muffin tin is perfect. I use mine, which is non-stick and well-loved. If you don’t have a muffin tin, you can use a silicone mold, but a metal tin gives better structure.
Silicone Muffin Liners — These are my best friend for this recipe. They make removal incredibly easy. If you don’t have them, you can use paper liners, but the chocolate sometimes sticks to paper. I’ve tried foil cups too, and they work okay, but silicone is the easiest.
Microwave-Safe Bowl — For melting the chocolate. I use a large glass bowl because it’s easy to clean. A microwave-safe ceramic bowl works too.
Small Spoon or Teaspoon — For dolloping the peanut butter. I use a regular teaspoon for the peanut butter and a smaller measuring spoon for the chocolate if I need precision.
Whisk or Small Spatula — To mix the peanut butter filling. A small whisk works great to get it smooth.
Freezer — Obviously! You need a freezer to set the chocolate. If your freezer is messy, make sure you have a flat shelf where these won’t get knocked over.
How to Make It: Step-by-Step
Alright, let’s make this! I’m walking you through exactly how I do it, including the little tricks I’ve picked up over time. This process is so simple, but there are a few key steps to get that perfect snap and creamy center.
Step 1: Prep Your Muffin Tin (2 minutes)
Line your muffin tin with silicone liners. If you’re using paper liners, grease them lightly with coconut oil spray to help the chocolate release later. Set the tin aside on a flat surface in the freezer. Chilling the liners first helps the chocolate set faster once you pour it in.
Step 2: Make the Peanut Butter Filling (3 minutes)
In a small bowl, combine the natural peanut butter, sugar-free syrup, vanilla extract, and salt. Whisk them together until smooth and creamy. If your peanut butter is very stiff, you can microwave it for 10 seconds to soften it up first. You want a smooth, spreadable consistency. If it’s too thick, add a tiny bit more syrup. If it’s too runny, add a pinch more salt or a teaspoon of coconut oil.
Step 3: Add the Peanut Butter Layer (2 minutes)
Take the muffin tin out of the freezer. Using a teaspoon, scoop about 1 teaspoon of the peanut butter mixture into each liner. Use the back of the spoon to flatten it slightly into a disc shape. Try to keep the edges slightly higher than the center, like a little cup. This helps hold the chocolate later. Put the tin back in the freezer for 5 minutes to firm up the peanut butter layer.
Step 4: Melt the Chocolate (2 minutes)
While the peanut butter is chilling, melt the dark chocolate chips and coconut oil. I do this in the microwave in 30-second intervals. Stir well between each interval. This is crucial—don’t just let it sit and melt. Stirring ensures even melting and prevents burning. By the time you’ve done two or three intervals, the chocolate should be smooth and glossy. If there are still chunks, do one more 15-second interval.
Step 5: Pour the Chocolate (3 minutes)
Take the muffin tin out of the freezer again. Spoon about 1-2 teaspoons of melted chocolate over each peanut butter disc. You want to cover the peanut butter completely but not fill the liner to the brim. The chocolate will spread out to form the bottom and sides of the cup. If you notice any holes where the peanut butter is showing through, just dab a tiny bit more chocolate on top.
Step 6: Chill and Set (10-15 minutes)
Return the tin to the freezer. Let them sit for at least 10-15 minutes, or until the chocolate is completely hard. You can tell they’re ready by gently tapping the top of the chocolate—it should feel solid, not tacky. If you pull one out too early, the chocolate will be soft and messy. Patience pays off here.
Step 7: Remove and Serve
Once set, gently peel the silicone liners off the cups. They should pop right out. If you’re using paper liners, you might need to gently peel the paper away from the sides. Store them in an airtight container in the fridge or freezer. Sprinkle with a tiny pinch of sea salt flakes if you want that fancy touch.
Total Time: About 20 minutes (5 minutes active, 15 minutes chilling)
Expert Tips & Tricks
Here’s everything I’ve learned from making these dozens of times. These tips will save you from my mistakes and ensure your sugar-free dark chocolate peanut butter cups turn out perfectly every time.
Use High-Quality Chocolate
This cannot be stressed enough. Since there’s no sugar to mask the flavor, the chocolate needs to be good. I’ve tried cheap sugar-free chips, and they taste waxy. Lily’s brand is my go-to because it melts smoothly and has a rich cocoa flavor. If you can find sugar-free chocolate bars (like Guittard or Ghirardelli), chop them up yourself. They often melt better than chips.
Don’t Skip the Salt
Salt is your best friend in sugar-free baking. Without sugar to provide flavor complexity, the salt brings out the chocolate and peanut butter flavors. I always add salt to the peanut butter mixture, and I sprinkle a little on top after the chocolate sets. It makes a huge difference.
Control the Chocolate Consistency
If your chocolate is too thick, it won’t coat the peanut butter evenly. The tablespoon of coconut oil is essential for thinning it out. If your chocolate is too thin, it might drip over the edges. If that happens, just use a paper towel to wipe the edges of the liner before chilling.
Chill the Peanut Butter First
Don’t skip the 5-minute chill for the peanut butter layer. If you pour chocolate over soft peanut butter, it will sink and mix together, giving you a muddy cup instead of distinct layers. Firming up the peanut butter first keeps the layers separate and visually appealing.
Store Properly
These cups are best stored in the fridge or freezer. Room temperature might cause the chocolate to sweat or the peanut butter to soften too much. I keep them in the freezer in a single layer, separated by parchment paper, so they don’t stick together.
Variations & Substitutions
Once you’ve nailed the basic version, here’s how you can mix it up. I’ve tried all of these variations, and they’re all delicious.
Almond Butter Cups
Swap the peanut butter for almond butter. This gives a more sophisticated, nutty flavor. Almond butter is naturally thicker, so you might need a touch more syrup to get it spoonable.
Sunflower Seed Butter Cups
Perfect for nut-free schools or allergies. Sunflower seed butter has a milder flavor and pairs well with dark chocolate. Just be aware it can turn green in the chocolate (safe but weird-looking), so maybe skip the visual appeal and focus on the taste!
Sea Salt Caramel Style
Add a tiny drizzle of sugar-free caramel syrup on top of the peanut butter layer before adding the chocolate. This adds a gooey, caramel-like texture that mimics the classic candy bar.
Crunchy Version
Mix 2 tablespoons of crushed sugar-free keto granola or crushed nuts into the peanut butter mixture. This adds a nice crunch that contrasts with the smooth chocolate.
Mini Cups
Use a mini muffin tin and reduce the ingredients by half. These are perfect for portion control or for packing in lunchboxes. They’re also great for holiday gifts.
Serving & Storage
How to Serve:
I usually serve these straight out of the fridge or freezer. They’re best when the chocolate is cold and snap-y. I like to pair them with a hot cup of black coffee or unsweetened tea. The bitterness of the coffee complements the dark chocolate perfectly.
Storage Instructions:
Refrigerator: Store in an airtight container for up to 2 weeks. They’ll stay firm and delicious.
Freezer: These freeze beautifully for up to 3 months. Place them in a freezer-safe bag, separating layers with parchment paper. Thaw in the fridge for 10 minutes before eating if you prefer them less hard.
Room Temperature: I don’t recommend storing these at room temperature for more than a few hours, as the peanut butter can soften and the chocolate might melt.
Pro Tip: If you’re making these for a party, make them a day ahead. They taste even better the next day as the flavors have time to meld.
Nutrition Information
I’m not a nutritionist, but here’s the breakdown if you’re tracking macros. These values are approximate and will vary based on the specific brands of chocolate and peanut butter you use.
| Nutrient | Per Cup (approx.) |
|---|---|
| Calories | 90 |
| Total Fat | 7g |
| Saturated Fat | 3g |
| Protein | 3g |
| Total Carbs | 4g |
| Fiber | 2g |
| Sugars | 0g |
| Sugar Alcohols | 2g |
| Net Carbs | 2g |
What’s Good: High in healthy fats from the peanut butter, low in net carbs, and no added sugar. Great for keto or low-carb diets.
What to Know: Calorie-dense due to the nuts and chocolate. Enjoy in moderation, even though they’re sugar-free. They’re still a treat!
Final Thoughts
So that’s my go-to sugar-free dark chocolate peanut butter cups! I’ve probably talked your ear off at this point, but when you make a recipe this often, you have a lot to say about it. These cups have saved our dessert routine more times than I can count. They’re my answer to “what’s for dessert” when we want something sweet but I don’t want to bake a whole cake or buy processed candy.
My kids are happy, my husband is happy, and I’m happy because I know exactly what’s in them. No weird additives, no hidden sugars, just real food. Make it yours! Try different nut butters, add some sprinkles, or adjust the sweetness to your taste. The best recipes are the ones you adapt to your family’s tastes.
If you make this, drop a comment and let me know what you think! I love hearing how recipes turn out in your kitchen. And if something doesn’t work, tell me that too—I’m here to help troubleshoot. Happy cooking! And I hope your kitchen smells half as good as mine does right now (with melted chocolate, anyway).
Frequently Asked Questions
Q: Can I use regular peanut butter instead of natural?
A: You can, but regular peanut butter (like Jif or Skippy) has added sugar and oils that might change the texture and make the cups softer. Natural peanut butter is thicker and holds its shape better. If you use regular, you might need to add a bit more coconut oil to the chocolate to compensate for the extra oil in the peanut butter.
Q: Why is my chocolate grainy or thick?
A: This usually happens if the chocolate is overheated. Melt it slowly in short intervals and stir constantly. If it’s still too thick, add another half-teaspoon of coconut oil. Also, make sure there’s no water in the bowl—water causes chocolate to seize up instantly.
Q: Can I use stevia instead of syrup?
A: Yes, but liquid stevia is very potent. Start with just a few drops and taste as you go. Powdered erythritol or monk fruit sweetener works better because it dissolves more evenly into the peanut butter. I find the syrup gives the best consistency.
Q: How do I store these if I don’t have a freezer?
A: You’ll need to keep them in the fridge. They will still set, but they’ll be softer. If your fridge is warm, they might melt. An airtight container in the coldest part of your fridge is best.
Q: Can I make these ahead for a party?
A: Absolutely! Make them 1-2 days ahead and store them in the fridge. They’ll hold their shape perfectly. Just bring them out 10 minutes before serving so the chocolate isn’t too hard to bite through.
Q: Are these truly sugar-free?
A: Yes, as long as you use sugar-free chocolate and sugar-free syrup. Check the labels carefully. Some “dark chocolate” chips still have sugar. Also, some natural peanut butters have a tiny amount of sugar from the peanuts themselves, but it’s negligible (less than 1g per serving).
Pin This Recipe!
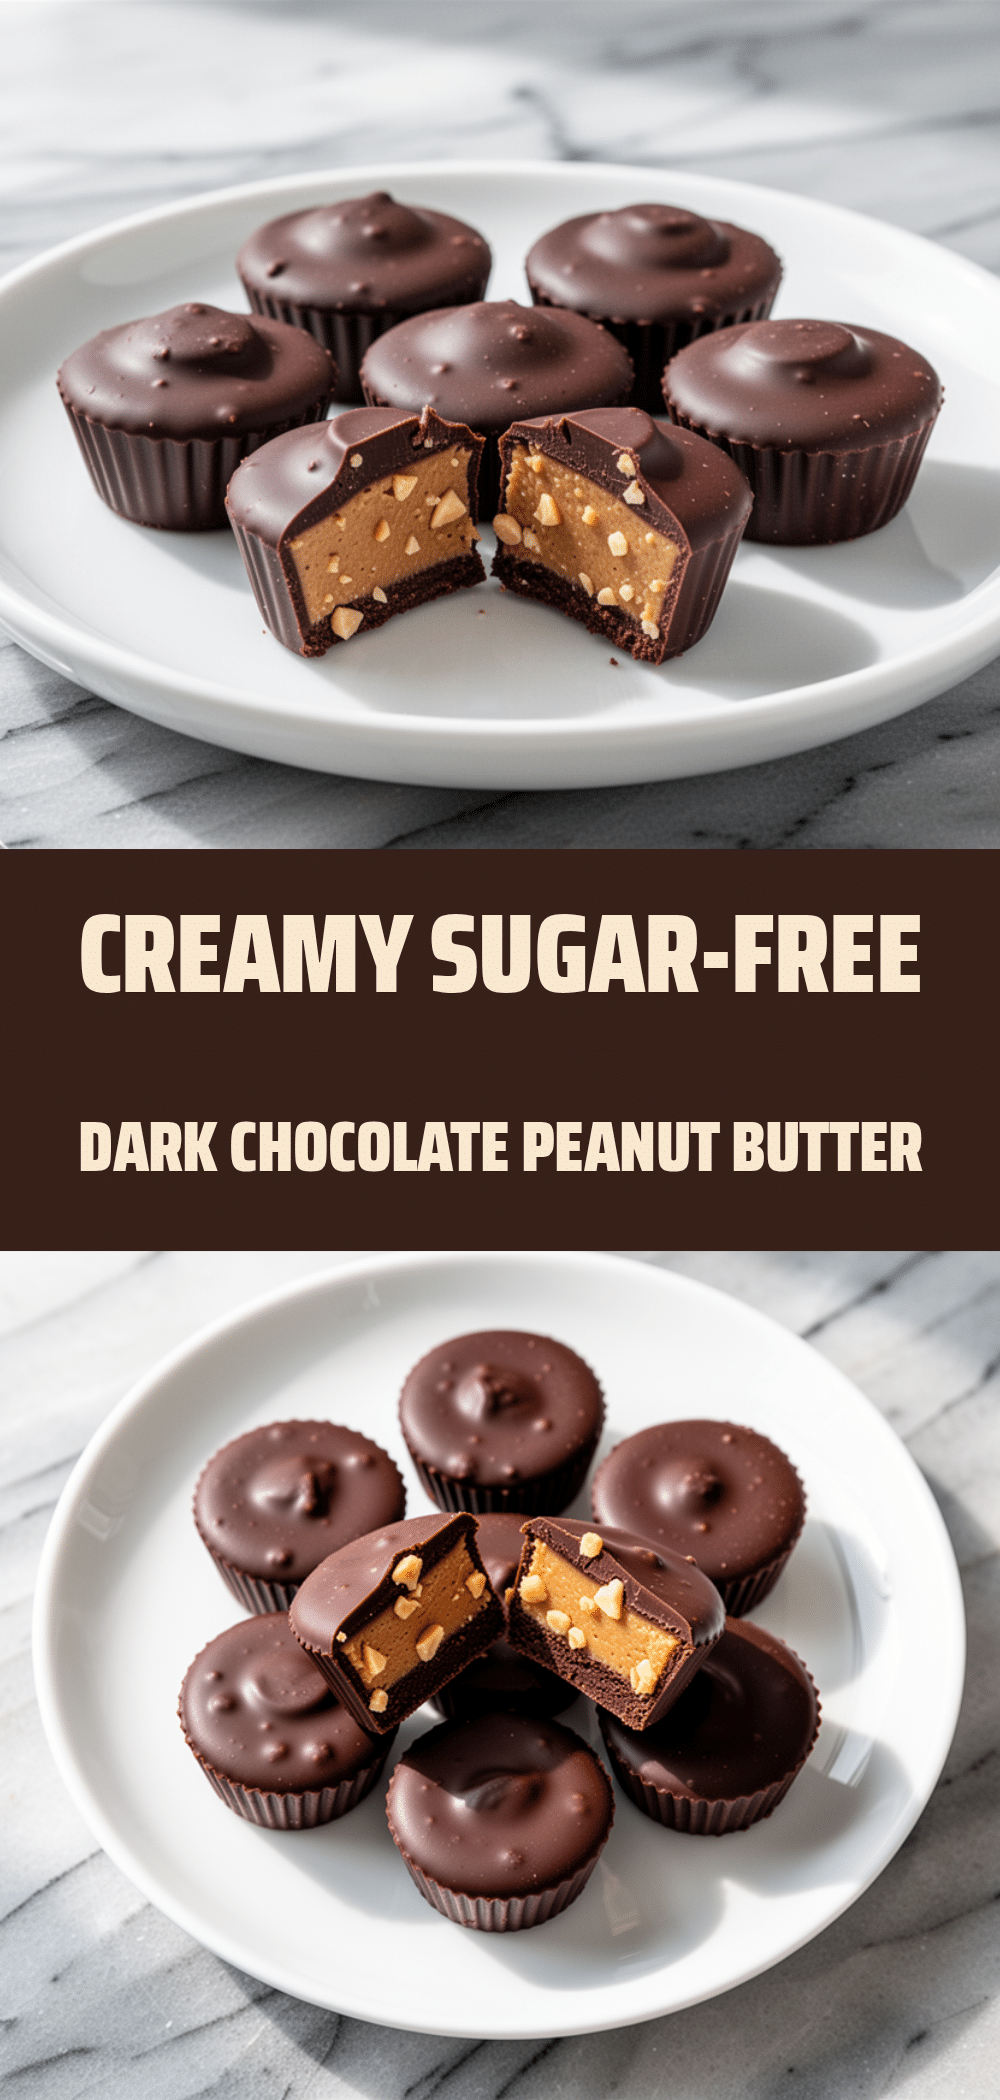
Sugar-Free Dark Chocolate Peanut Butter Cups
- Total Time: 20 minutes
- Yield: 12 servings 1x
Description
A quick, 5-minute active time healthy treat featuring a creamy natural peanut butter center coated in rich, sugar-free dark chocolate. These keto-friendly cups are perfect for satisfying sweet cravings without the sugar crash.
Ingredients
- 1/2 cup (120g) natural peanut butter (no added sugar or oils)
- 2 tablespoons sugar-free syrup (e.g., Lakanto Monkfruit or Swerve Brown Sugar Syrup)
- 1/2 teaspoon vanilla extract
- 1/2 teaspoon salt (sea salt flakes or kosher salt)
- 1 cup (170g) sugar-free dark chocolate chips (e.g., Lily’s or Ghirardelli)
- 1 tablespoon refined coconut oil
- Optional: Sea salt flakes for sprinkling on top
Instructions
- Line a standard 12-cup muffin tin with silicone muffin liners (or paper liners greased with coconut oil spray). Place the tin in the freezer for a few minutes to chill.
- In a small bowl, whisk together the natural peanut butter, sugar-free syrup, vanilla extract, and salt until smooth and creamy. If the peanut butter is stiff, microwave for 10 seconds to soften.
- Scoop about 1 teaspoon of the peanut butter mixture into each liner. Flatten into a disc shape, keeping edges slightly higher than the center to form a cup. Return the tin to the freezer for 5 minutes to firm up.
- While the peanut butter chills, melt the dark chocolate chips and coconut oil in a microwave-safe bowl. Heat in 30-second intervals, stirring well between each interval, until smooth and glossy.
- Remove the tin from the freezer. Spoon 1-2 teaspoons of melted chocolate over each peanut butter disc, ensuring it is completely covered. If any holes appear, dab a little more chocolate on top.
- Return the tin to the freezer for 10-15 minutes, or until the chocolate is completely hard and solid.
- Gently peel the liners off the cups to remove them. Store in an airtight container in the fridge or freezer. Sprinkle with optional sea salt flakes before serving.
Notes
Use high-quality sugar-free chocolate chips for the best flavor and texture. Natural peanut butter is recommended to avoid added sugars and oils. If using regular peanut butter, the texture may be softer. Store in the freezer for up to 3 months or in the fridge for up to 2 weeks. Do not store at room temperature as the chocolate may melt.
- Prep Time: 5 minutes
- Cook Time: 0 minutes
- Category: Dessert
- Cuisine: American
Nutrition
- Serving Size: 1 cup
- Calories: 90
- Fat: 7
- Saturated Fat: 3
- Carbohydrates: 4
- Fiber: 2
- Protein: 3
Keywords: sugar-free, keto, low-carb, peanut butter cups, dark chocolate, healthy dessert, gluten-free, dairy-free, quick recipe, 5-minute treat