My grandmother’s kitchen always smelled like cinnamon and brown sugar on Sunday mornings, but in October, that scent shifted. It became earthier, warmer, infused with the woodsmoke from the fireplace and the sweet, caramelized aroma of roasting squash. I can still hear the timer going off while she hummed old songs, watching the kitchen window fog up against the chill outside.
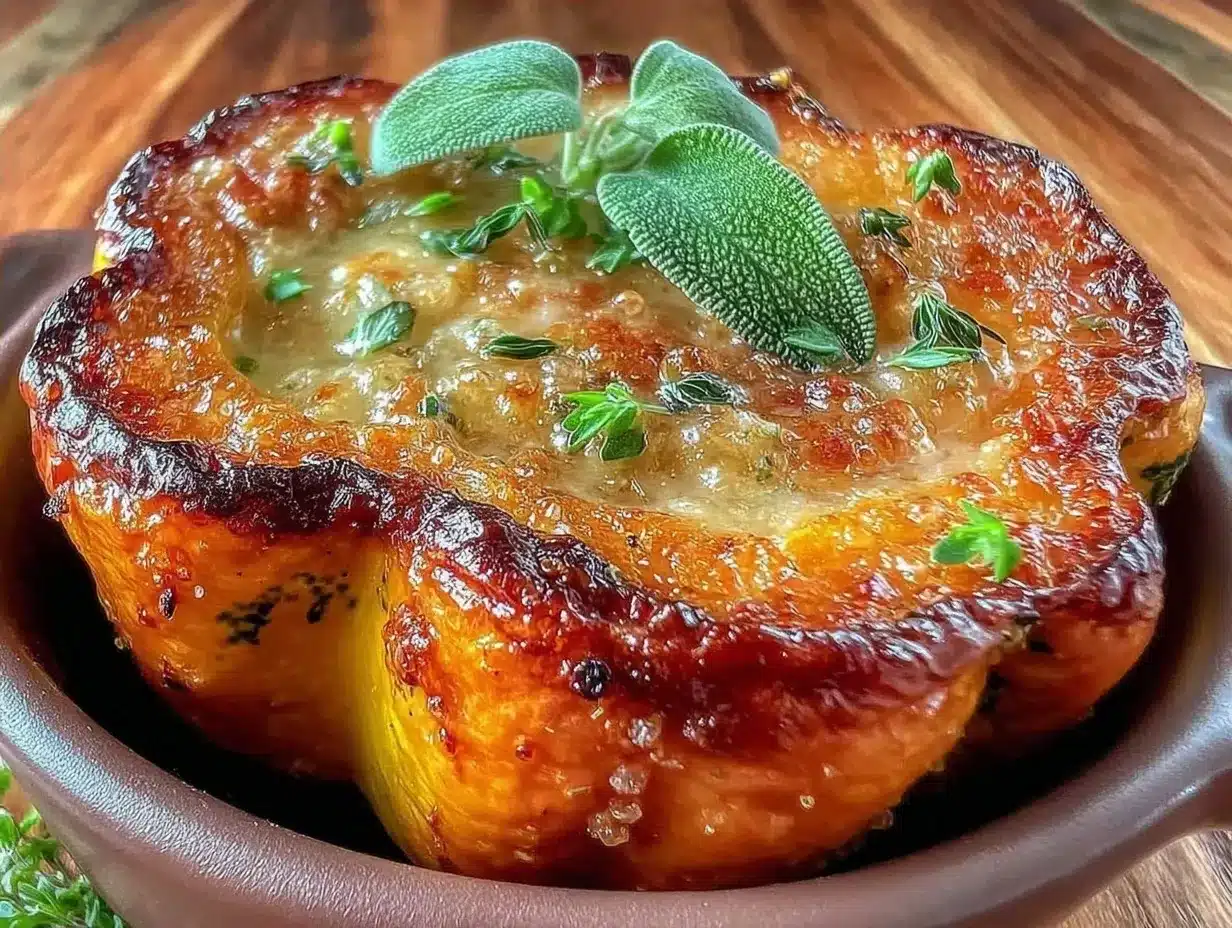
I’ve made this autumn brown sugar roasted acorn squash with sage butter recipe more times than I can count, usually around Thanksgiving or whenever the first real frost hits. It’s not just a side dish for me; it’s a time machine. Every time I roast these halves until the edges crisp up and the flesh turns tender and golden, I’m back at that old wooden table, waiting for my grandmother to slice into it with her heavy knife.
There’s a specific way to do this. It’s not the fastest way, and it doesn’t use a microwave or a pressure cooker. It’s the slow, patient way that rewards you with deep, complex flavor. This is the autumn brown sugar roasted acorn squash with sage butter your family will crave—not because it’s complicated, but because it tastes like home. Like comfort. Like the season itself, distilled onto a plate.
I learned this technique working alongside my grandmother, watching her brush the butter over the squash with a pastry brush, careful not to miss any spots. She told me once that “good things take time, especially the things that matter.” She was right. This recipe has become the anchor of our fall gatherings, sitting proudly next to the flaky salted caramel apple hand pies and the creamy au gratin potatoes on our holiday table. It’s simple, but it’s done with intention.
Why You’ll Love This Recipe
This recipe has completely changed how my family views vegetable sides. We used to push the squash around our plates, but now? It’s the first thing gone. I’ve served this to everyone from picky teenagers to food-snob relatives who claim they “don’t really like vegetables,” and everyone asks for seconds. There are about ten reasons I keep making this, but here are the big ones.
The Sage Butter is Life-Changing
Seriously, if you’ve never paired brown butter with fresh sage, you are missing out. The nuttiness of the brown butter amplifies the earthy sweetness of the squash, and the sage adds a fragrant, herbal note that feels elegant without being pretentious. I’ve walked my teenage son through making the sage butter over FaceTime, and even he was impressed by how easy it was.
Stupid Simple
There’s no fancy rolling or complex techniques here. You cut the squash, scoop the seeds, drizzle the butter, and roast. That’s it. I make this on weeknights when I’m tired, and on holidays when I’m stressed. It’s reliable. It just works.
Pantry-Friendly
You probably have most of this already. Acorn squash, butter, brown sugar, sage, salt, pepper. If you have those, you can make this. I keep a bag of fresh sage in my crisper drawer specifically so I can make this on a whim when the weather turns crisp.
Makes Amazing Leftovers
Actually tastes better the next day. The flavors meld together overnight. I deliberately make extra for lunch throughout the week, scooping it out of the skin with a spoon. It’s sweet, savory, and incredibly satisfying.
This is my go-to when I need dinner to just work. No complicated techniques, no weird ingredients, just reliable, delicious food that makes everyone happy. It’s the kind of dish that brings people together.
Ingredients You’ll Need
Here’s the best part: you probably have most of this already. I’m particular about three ingredients here, and I’ll tell you exactly why. This looks like a short list, but that’s the beauty of it. When you keep it simple, the quality of each ingredient shines.
For the Squash
Acorn Squash (2 medium, about 2-3 lbs each) — Look for squash that feel heavy for their size. That means dense, moist flesh. The skin should be a deep green with some orange patches. Avoid ones that are soft or have bruises. I buy local at the farmers market when I can, but the big grocery stores work fine in a pinch.
Unsalted Butter (6 tablespoons) — This is for the sage butter. I use high-quality European-style butter if I can find it because it has a richer flavor, but regular unsalted works great too. The key is that it’s unsalted so you can control the seasoning.
Brown Sugar (3 tablespoons) — This is the sweetener. I use light or dark brown sugar; dark gives a deeper molasses note, which I prefer. It caramelizes in the oven, creating those sticky, delicious bits around the edges.
Fresh Sage Leaves (10-12 large leaves) — Fresh is non-negotiable here. Dried sage tastes dusty and bitter. You want those vibrant green leaves that smell incredible when you crush them. If you can’t find fresh, you might want to check out a pumpkin cinnamon rolls recipe instead, which doesn’t rely on fresh herbs as much.
Salt and Black Pepper — Kosher salt is best for sprinkling. I use a good amount of salt because the squash needs it to bring out its sweetness. Freshly cracked black pepper adds a little heat.
Optional Add-ins
Walnuts or Pecans (½ cup, chopped) — I like to sprinkle toasted nuts on top for crunch. It adds texture and richness. Walnuts pair especially well with the sage.
Maple Syrup (1 tablespoon) — If you want extra sweetness, a drizzle of pure maple syrup goes on right after roasting. It’s optional, but my husband loves it.
Cranberries (¼ cup dried) — For a tart contrast. I sprinkle these on in the last 10 minutes of roasting so they plump up but don’t burn.
Personal tips: I always buy whole squash and cut it myself. Pre-cut squash in the store often dries out quickly. If you must buy pre-cut, use it the same day. Also, save the seeds! Roast them with a little salt and oil for a snack. They’re delicious.
Equipment Needed
You don’t need fancy equipment for this. Here’s what I actually use.
Sharp Chef’s Knife — This is the most important tool. Acorn squash can be tough to cut. A sharp, heavy knife is essential. I learned this the hard way with a dull knife that slipped. Be careful, and use a rock-solid cutting board.
Large Baking Sheet — I use a half-sheet pan. Make sure it’s big enough to hold both squash halves cut-side up without overlapping. If you have small squash, you can fit four halves. If you have large ones, you might need two pans.
Pastry Brush — For brushing the sage butter over the squash. Silicone brushes are easier to clean than bristle brushes, but both work.
Measuring Spoons — For the brown sugar and butter. Standard stuff.
Small Saucepan — For browning the butter. Any small pan works. I use a 6-inch skillet.
Wooden Spoon — For stirring the butter and sage.
Optional but nice: Microplane — For grating fresh nutmeg if you want to add a hint of spice. I sometimes add a pinch, but it’s not traditional in my grandmother’s recipe.
Tool tips: Don’t have a saucepan? You can melt the butter in the microwave, but you won’t get the nutty brown butter flavor that makes this recipe special. Take the time to brown it in a pan. It’s worth it.
How to Make It: Step-by-Step
Alright, let’s make this! I’m walking you through exactly how I do it, including the little tricks I’ve picked up over the years.
Step 1: Prep the Squash (10 minutes)
Preheat your oven to 400°F (200°C). Line a large baking sheet with parchment paper or aluminum foil for easy cleanup. Wash the squash thoroughly. Now, the tricky part: cutting it. Place the squash on a stable cutting board. With your sharp knife, carefully cut the squash in half from stem to base. Use a rocking motion with the knife, applying gentle pressure. If it’s really tough, microwave it for 1-2 minutes to soften it slightly. Once cut, use a sturdy spoon to scoop out the seeds and stringy pulp. Save the seeds if you want to roast them later.
Step 2: Make the Sage Butter (5 minutes)
While the oven heats, make the sage butter. In a small saucepan over medium heat, melt the butter. Let it bubble and foam. You’ll hear it crackle. Watch it closely. The butter will turn from yellow to a light golden brown, and you’ll smell a nutty, toasted aroma. This takes about 3-4 minutes. Immediately remove from heat and add the sage leaves. They will sizzle and crisp up. Let it cool for a minute.
Step 3: Season the Squash (2 minutes)
Place the squash halves cut-side up on the prepared baking sheet. Sprinkle the brown sugar evenly over the flesh of each half. Then, drizzle the warm sage butter generously over the sugar. Make sure you get some into the nooks and crannies. Season with salt and pepper. The salt will help draw out moisture and concentrate the flavor.
Step 4: Roast (45-55 minutes)
Place the baking sheet in the preheated oven. Roast for 45-55 minutes. The squash is done when the flesh is tender all the way through (you should be able to pierce it easily with a fork) and the edges are caramelized and slightly crispy. The sugar will bubble and turn golden brown. If you want more crispiness, you can broil for the last 2-3 minutes, but watch it like a hawk—it burns fast.
Step 5: Serve
Remove from the oven and let cool for 5 minutes. The caramelized sugar will be hot! Serve immediately, spooning some of the pan juices over the top. Garnish with chopped walnuts or dried cranberries if you like. This pairs beautifully with a maple-glazed roasted sweet potatoes if you’re serving a larger meal.
Total Time: About 1 hour (15 minutes active, 45 minutes roasting).
Built-in troubleshooting: If the squash is still hard, give it 10 more minutes. If the sugar burns, reduce the oven temp to 375°F next time. If the butter isn’t browning, the heat was too low. Keep an eye on the color, not just the time.
Expert Tips & Tricks
Here’s everything I’ve learned from making this dozens of times. These tips will save you from my mistakes.
Don’t Skip the Brown Butter
This is the #1 tip. Regular melted butter is fine, but brown butter adds a depth of flavor that transforms this dish. The nutsy, toasted notes complement the sage and squash perfectly. I learned this by accident one year when I forgot to take the butter off the heat. Now I always brown it. It’s worth the extra minute.
Cut Side Down for Pre-Cooking
If your squash is particularly large or hard, place the halves cut-side down on the baking sheet and roast for 10 minutes before adding the butter and sugar. This softens the flesh so it cooks evenly. Then flip, add toppings, and continue roasting.
Use Fresh Sage
Fresh sage is essential. Dried sage has a different, more pungent flavor that doesn’t pair as well with the sweet brown sugar. If you can’t find fresh, you might want to try a pumpkin bread recipe instead, which uses spices that are more shelf-stable.
Don’t Overcrowd the Pan
Make sure the squash halves have space around them. If they’re touching, they’ll steam instead of roast. You want caramelization, not steaming. Use two pans if necessary.
Common Mistakes (and how to avoid them)
Mistake: Squash is watery. Fix: Make sure you scoop out all the seeds and stringy bits. Those hold moisture. Also, don’t cover the squash while roasting.
Mistake: Sugar burns. Fix: Brown sugar burns easily. Keep an eye on the oven around the 40-minute mark. If it’s getting too dark, tent with foil.
Mistake: Sage turns bitter. Fix: Don’t leave the sage in the butter too long after browning. Remove from heat immediately and add the sage. The residual heat will cook it.
Variations & Substitutions
Once you’ve nailed the basic version, here’s how you can mix it up. I’ve tried all of these.
Maple Glazed Version
Replace the brown sugar with pure maple syrup. Drizzle it over the squash after roasting for a brighter, more floral sweetness. This is my favorite for breakfast.
Herb Garden Version
Add rosemary and thyme to the sage butter. These herbs also pair well with squash and add a different aromatic profile. Great for a more savory side dish.
Spicy Kick
Add a pinch of cayenne pepper or red pepper flakes to the brown sugar. The heat contrasts nicely with the sweetness. My nephew loves this version.
Dietary Modifications
Vegan: Use vegan butter or coconut oil. The flavor will be slightly different, but still delicious.
Gluten-Free: This recipe is naturally gluten-free, so no changes needed.
Lower Sugar: Reduce the brown sugar to 1 tablespoon. The squash is naturally sweet, so you don’t need much.
Serving & Storage
I usually serve this straight from the baking dish at the dinner table—it looks rustic and stays warm. But here are other ways I’ve enjoyed it:
Side Dishes: It pairs well with roasted chicken, pork chops, or soft garlic knots. For a full holiday spread, serve it alongside tangy broccoli bacon salad for a mix of warm and cold sides.
Toppings Bar: When I have guests, I put out: extra sage leaves, chopped walnuts, dried cranberries, and flaky sea salt. Everyone customizes their plate.
Storage Instructions:
Refrigerator: Store leftovers in an airtight container for up to 4 days. The squash will soften further in the fridge.
Reheating: Best method: Reheat in the oven at 350°F for 10-15 minutes to restore the crispness. Microwave works too but will make the squash soft. I prefer the oven.
Freezing: Honestly, this doesn’t freeze well because the texture changes. The squash can become mushy. Make it fresh or store in the fridge for up to 4 days.
Nutrition Information
I’m not a nutritionist, but here’s the breakdown if you’re tracking.
Per Serving (based on 4 halves):
- Calories: 220
- Protein: 2g
- Carbs: 32g
- Fiber: 4g
- Sugar: 18g
- Fat: 10g
- Saturated Fat: 6g
- Sodium: 150mg
What’s Good: High in fiber and Vitamin A from the squash. The sage adds antioxidants. It’s a nutrient-dense side dish.
What to Know: Higher in sugar from the brown sugar, but it’s natural sugar from a vegetable. Contains dairy.
My Take: Look, this is comfort food. It’s sweet and savory and delicious. It’s not a diet recipe, but it’s a wholesome one. When I want to make it lighter, I reduce the sugar and butter. But usually? I just enjoy it.
Final Thoughts
So that’s my autumn brown sugar roasted acorn squash with sage butter! I’ve probably talked your ear off at this point, but when you make a recipe this often, you have a lot to say about it. This has saved weeknight dinners more times than I can count. It’s my answer to “what’s for dinner” when I’m tired, don’t want takeout, and still want something that tastes really good. My kids are happy, my husband’s happy, and I’m happy because I’m not stressed about cooking.
Make it yours! Try different add-ins, swap in your favorite herbs, adjust the sweetness. The best recipes are the ones you adapt to your family’s tastes. If you make this, drop a comment and let me know what you think! I love hearing how recipes turn out in your kitchen. And if something doesn’t work, tell me that too—I’m here to help troubleshoot.
Happy cooking! And I hope your kitchen smells half as good as mine does right now.
Frequently Asked Questions
Can I use butternut squash instead?
You can, but the texture and flavor are different. Butternut squash is sweeter and smoother. For this recipe, acorn squash’s nutty flavor and firmer texture are best. If you use butternut, reduce the roasting time by 10-15 minutes.
Why did my squash turn out watery?
Usually means you didn’t scoop out all the seeds and stringy bits, or you covered it while roasting. Make sure to clean it thoroughly and roast it uncovered to let the moisture escape.
Can I make this ahead for a dinner party?
Sort of. You can prep the squash halves and make the sage butter ahead. Store them separately in the fridge. When ready to serve, assemble and roast. It’s best served hot, so don’t roast it too early.
Can I use dried sage?
You can, but fresh sage tastes so much better. Dried sage is more potent and can taste bitter if not used carefully. If you must use dried, use half the amount and add it to the butter before browning.
How do I reheat leftovers without it getting dry?
Add a splash of water to the baking dish and cover with foil when reheating in the oven. This creates steam and keeps the squash moist. Microwave with a damp paper towel over the top.
Can I double this recipe?
Absolutely! Double everything and use two baking sheets. Make sure the oven has space for both. The cooking times stay the same. I do this when I’m feeding a crowd.
What wine pairs well with this?
A crisp white wine like Pinot Grigio or a dry Riesling works great. The acidity cuts through the sweetness and richness. For red, try a light Pinot Noir.
Pin This Recipe!
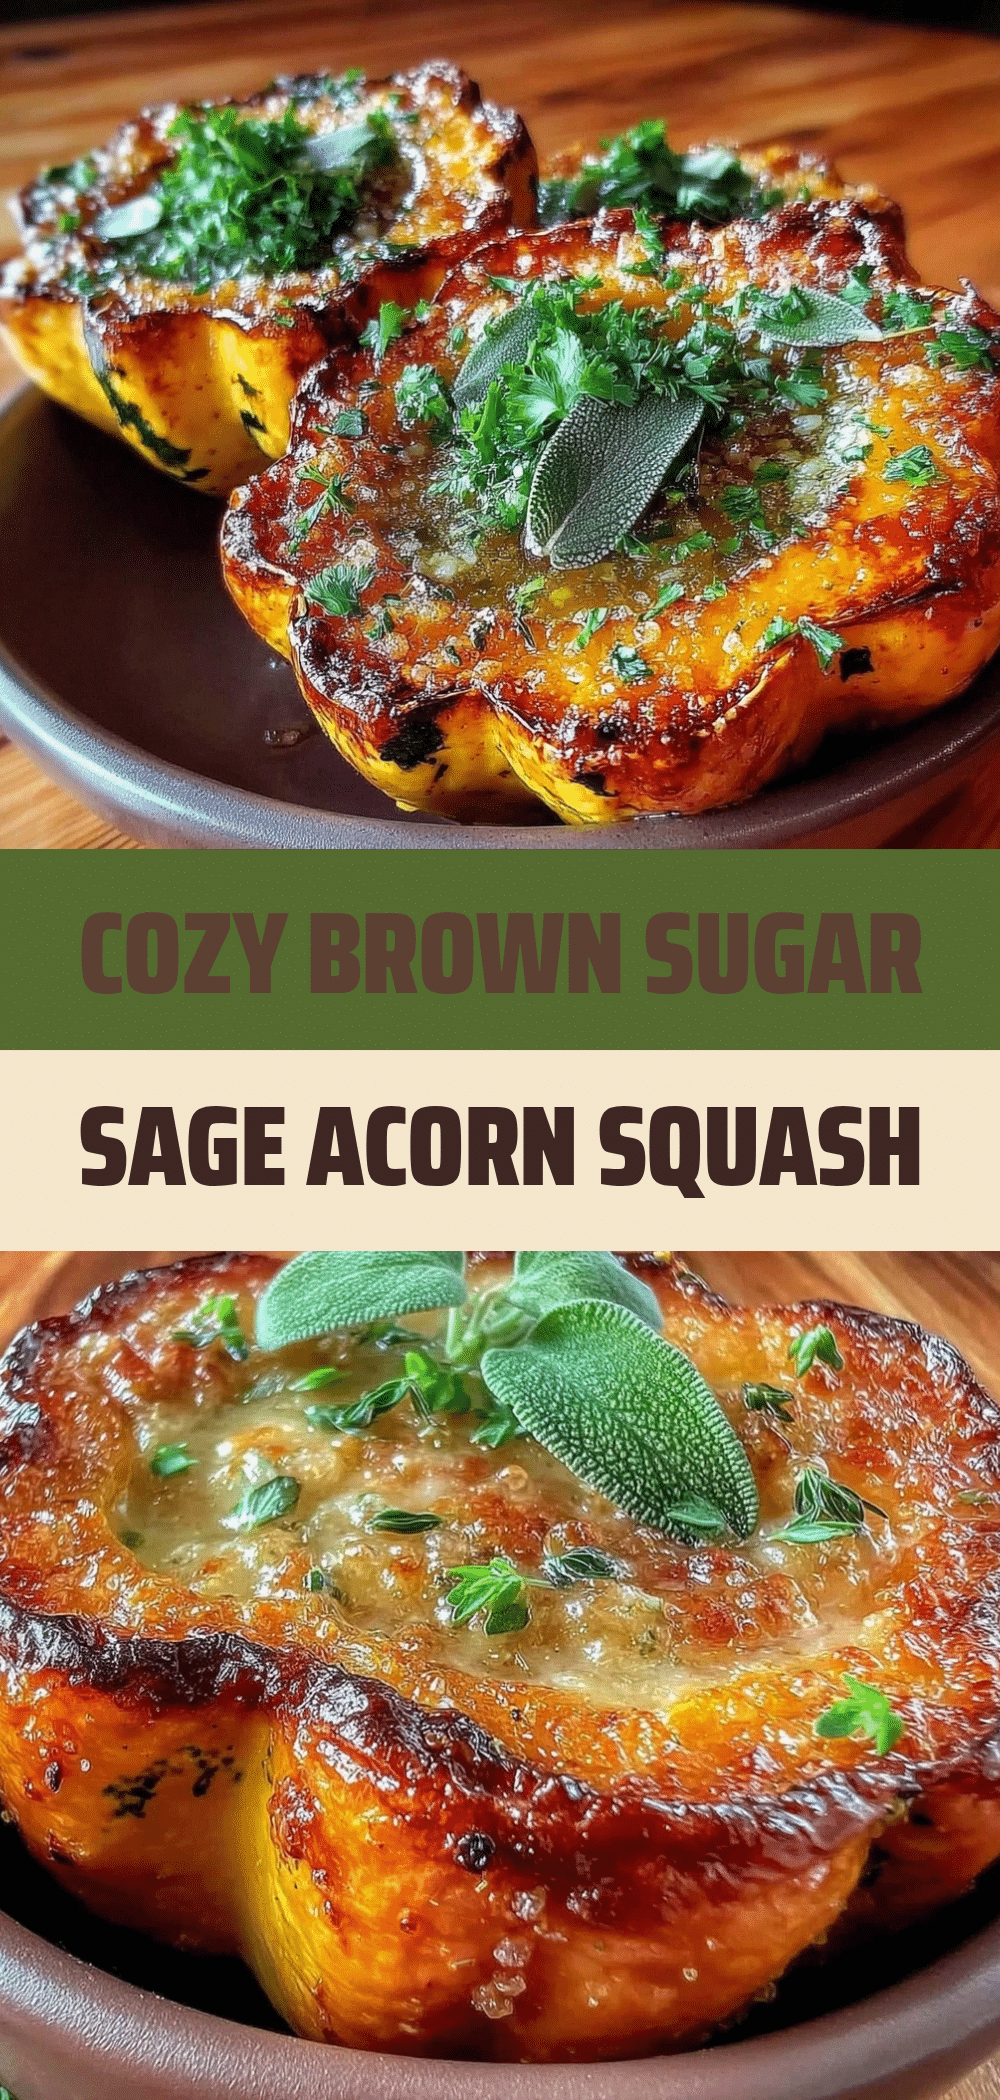

Autumn Brown Sugar Roasted Acorn Squash: Grandma’s Sage Butter Way
- Total Time: 1 hour
- Yield: 4 servings 1x
Description
A comforting side dish featuring acorn squash roasted with brown sugar and nutty brown butter infused with fresh sage. This simple, pantry-friendly recipe delivers deep, caramelized flavors perfect for fall gatherings.
Ingredients
- 2 medium acorn squash (about 2–3 lbs each)
- 6 tablespoons unsalted butter
- 3 tablespoons brown sugar (light or dark)
- 10–12 large fresh sage leaves
- Kosher salt
- Freshly cracked black pepper
- Optional: ½ cup chopped walnuts or pecans
- Optional: 1 tablespoon pure maple syrup
- Optional: ¼ cup dried cranberries
Instructions
- Preheat oven to 400°F (200°C). Line a large baking sheet with parchment paper or foil.
- Wash the squash. Carefully cut each squash in half from stem to base. Scoop out seeds and stringy pulp with a spoon.
- In a small saucepan over medium heat, melt the butter. Cook until it turns light golden brown and smells nutty (about 3-4 minutes).
- Remove butter from heat and immediately add fresh sage leaves. Let cool for a minute.
- Place squash halves cut-side up on the prepared baking sheet.
- Sprinkle brown sugar evenly over the flesh of each half.
- Drizzle the warm sage butter generously over the sugar and squash. Season with salt and pepper.
- Roast for 45-55 minutes, or until the flesh is tender and edges are caramelized.
- Optional: Broil for the last 2-3 minutes for extra crispiness, watching closely to prevent burning.
- Let cool for 5 minutes before serving. Spoon pan juices over the top and garnish with optional toppings.
Notes
Ensure squash is heavy for its size with deep green skin. Use fresh sage for best flavor; dried sage can be bitter. Brown butter is essential for the nutty flavor profile. If squash is hard, microwave for 1-2 minutes to soften before cutting. Do not overcrowd the pan to ensure caramelization rather than steaming. Leftovers store in the fridge for up to 4 days but do not freeze well.
- Prep Time: 15 minutes
- Cook Time: 45-55 minutes
- Category: Side Dish
- Cuisine: American
Nutrition
- Serving Size: 1 squash half
- Calories: 220
- Sugar: 18
- Sodium: 150
- Fat: 10
- Saturated Fat: 6
- Carbohydrates: 32
- Fiber: 4
- Protein: 2
Keywords: acorn squash, roasted squash, sage butter, brown sugar, fall recipes, Thanksgiving side dish, vegetarian, gluten-free, easy dinner