I have a confession to make: I used to be one of those people who bought iced coffee from the big chain store every single morning. You know the one. The one where you spend $7 on a drink that’s mostly ice and half a cup of coffee. I did it for years. I told myself it was a treat, a little reward for waking up before noon. But then I looked at my bank account and realized I was spending a fortune on sugar water with a caffeine kick.
Then, during a particularly lazy weekend in the kitchen, I decided to stop ordering and start making it. I had some leftover espresso from my French press, a bottle of oat milk I’d bought for baking (more on that later), and a jar of brown sugar sitting right next to the stove. I threw it all into a shaker with ice and shook it like I was trying to escape a zombie apocalypse. When I poured it out, I was surprised. It wasn’t just good. It was better than the $7 version. It was creamy, sweet, and had this incredible frothy top that felt like cheating.
That was two years ago. Since then, I’ve made this iced brown sugar oat milk shaken espresso probably 300 times. It’s my morning ritual. It’s my afternoon pick-me-up. It’s the drink I make when I have guests and want to look like I know what I’m doing (spoiler: I just shake it in a mason jar). If you’re tired of overpriced coffee shop runs and want a drink that’s actually good for you (in moderation, obviously), you need to try this. It’s simple, it’s fast, and it’s going to become your new favorite thing.
Why You’ll Love This Recipe
Look, I get it. Making coffee at home can feel like a chore. You have to grind beans, heat water, wait for it to drip or press. This recipe flips that script entirely. Here’s why this iced brown sugar oat milk shaken espresso has completely taken over my mornings:
- Stupid Simple — Seriously, if you can boil water and shake a jar, you can make this. There’s no fancy machine required. I’ve made this while half-asleep, and it still turned out perfect. No barista degree needed.
- Ready in 5 Minutes — From boiling water to pouring your drink, it takes less time than it takes to put on pants. I make this on mornings when I’m rushing to get the kids to school and I still want to feel like a functioning adult.
- Actually Healthy-ish — Unlike the syrups loaded with high-fructose corn syrup at the coffee shops, this uses real brown sugar and unsweetened oat milk. You control the sweetness. You can make it lighter or richer depending on your mood. It’s coffee, but the good kind.
- Creamy Without the Dairy Worry — Oat milk is the secret weapon here. It froths beautifully and adds this creamy, neutral flavor that lets the coffee shine. It’s perfect if you’re lactose intolerant, vegan, or just prefer a lighter feel than heavy cream.
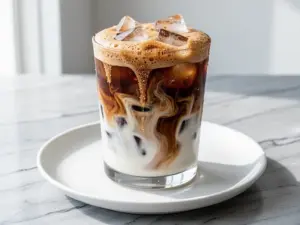
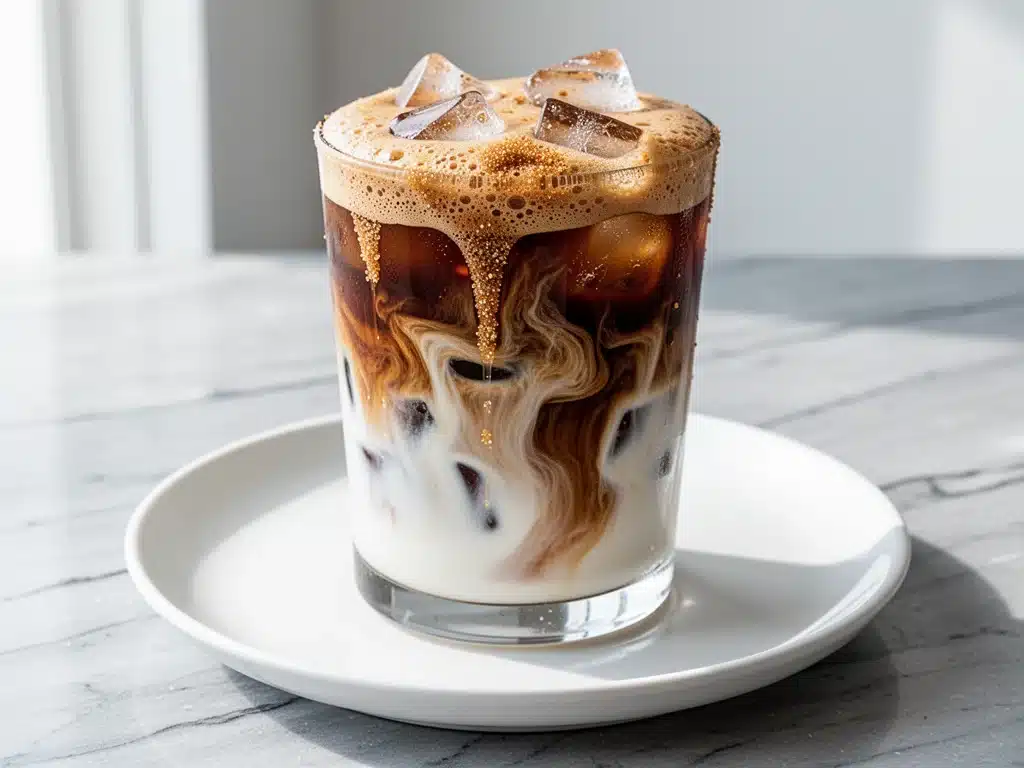
- Restaurant Quality at Home — That shaken foam? That’s the magic. Shaking the espresso with sugar and ice creates a micro-foam that makes the drink feel luxurious. It looks like something from a trendy cafe, but it costs pennies to make.
- Customizable — Want it sweeter? Add more sugar. Want it stronger? Use double espresso. Want to add vanilla? Go for it. This recipe is a canvas for your caffeine cravings.
This is my go-to when I need a boost but don’t want the sugar crash. No complicated techniques, no weird ingredients, just reliable, delicious coffee that makes everyone happy. Even my husband, who usually drinks black coffee, asks for this on weekends.
Ingredients You’ll Need
Here’s the best part: you probably have most of this already in your kitchen. This isn’t a recipe where you need to go to three different stores. It’s pantry-friendly and simple. I’m particular about three ingredients here, and I’ll tell you exactly why.
For the Espresso Base
Espresso (2 shots / about 2 ounces / 60ml) — This is the heart of the drink. You can use a coffee maker, but strong brewed coffee works in a pinch. I prefer espresso because it’s concentrated and bold. If you use regular coffee, use double the amount. Freshly brewed is best—old, cold coffee tastes flat.
Brown Sugar (1 to 2 tablespoons) — This is non-negotiable. Regular white sugar doesn’t give you that molasses depth. Brown sugar adds a caramel note that pairs perfectly with the oat milk. I use light brown sugar for a milder taste, but dark brown is great if you like a deeper flavor. Adjust based on how sweet you like it.
For the Creamy Top

Oat Milk (1 cup / 240ml) — Not all oat milks are created equal. I recommend using a barista-style oat milk if you can find it (like Oatly Barista or Califia). These have added fats that help them froth and hold up to hot espresso without curdling. If you use regular oat milk, it still works, but the foam won’t be as thick. Whole oat milk is creamier than the low-fat versions.
Ice Cubes (1 cup) — Just good old-fashioned ice. I use large cubes if I have them because they melt slower, but standard cubes work fine. The ice is crucial for the shaking process—it chills the espresso instantly and helps create that foam.
Optional Add-ins
Vanilla Extract (½ teaspoon) — A few drops of vanilla extract adds a nice aromatic layer. I always have this in my pantry. It makes the drink taste like a vanilla latte without the extra syrup.
Cinnamon (Pinch) — A tiny sprinkle on top adds warmth. Great for fall mornings.
Whipped Cream — If you’re feeling fancy, top it with a dollop of whipped cream. I do this when I’m treating myself to a slow weekend morning.
Personal Tips:
- Brand Recommendations: I stick with Oatly Barista Oat Milk for the best foam. For espresso, I use Lavazza or Illy beans ground fine.
- Shopping Shortcuts: If you don’t have an espresso machine, brew a strong cup of coffee using a French press or AeroPress. Just make sure it’s hot and concentrated.
- Substitutions: Can’t find oat milk? Almond milk works but is thinner. Coconut milk is good but adds a coconut flavor. Dairy milk works too, but it doesn’t froth as well as oat milk.
- Storage: Brown sugar hardens if left out. Keep it in an airtight container. Oat milk should be shaken before use, especially if it’s been in the fridge.
Equipment Needed
You don’t need fancy equipment for this. Here’s what I actually use. If you don’t have all of this, don’t worry—I’ve included alternatives.
Cocktail Shaker or Mason Jar — This is the most important tool. A metal cocktail shaker works great because it’s sturdy and seals well. But I actually prefer a large mason jar with a tight-fitting lid. I have a 32-ounce jar that I use for everything. Just make sure the lid is secure, or you’ll have coffee all over your counter.
Espresso Machine or Coffee Maker — Obviously, you need a way to make coffee. An espresso machine is ideal, but a strong drip coffee maker or French press works. The key is strength. Weak coffee will taste watery when mixed with ice and milk.
Measuring Spoons — For the brown sugar and any add-ins. I keep a set on my counter for easy access.
Long Spoon or Stirrer — To dissolve the sugar in the hot espresso before shaking. A regular teaspoon works fine.
Tall Glass — To serve the drink. I like a tall glass because it looks nice and holds all the foam.
Optional but nice:
- Julep Strainer — If you’re using a cocktail shaker, this helps strain the ice when pouring. But if you’re using a mason jar, you can just pour it carefully or use a spoon to hold back the ice.
- Thermometer — Not necessary, but helpful if you’re worried about the milk curdling. If your espresso is boiling hot, let it sit for 30 seconds before adding the oat milk.
Tool Tips:
- Don’t have a shaker? A mason jar is perfect. I use mine for everything from smoothies to shaking this drink. Just make sure the lid is tight.
- I’m obsessed with my mason jar collection — They’re cheap, durable, and versatile. I keep a few in the cupboard specifically for drinks like this.
How to Make It: Step-by-Step
Alright, let’s make this! I’m walking you through exactly how I do it, including the little tricks I’ve picked up over hundreds of tries.
Step 1: Brew Your Espresso (5 minutes)
Start by brewing your espresso or strong coffee. You need about 2 ounces of espresso. If you’re using a coffee maker, brew a small, strong cup. The coffee needs to be hot when you start, so brew it right before you assemble the drink. Pour the hot espresso into your shaker or mason jar. If you’re using a French press, just scoop out about 2 ounces of the concentrated coffee.
Step 2: Dissolve the Brown Sugar (1 minute)
While the espresso is still hot, add your brown sugar. I start with 1 tablespoon for a light sweetness, but I usually go with 2 tablespoons because I have a sweet tooth. Stir it well with a spoon until the sugar is completely dissolved. You don’t want gritty sugar in your drink. The hot espresso helps this happen quickly. If you’re adding vanilla extract, do it now.
Step 3: Add Ice and Oat Milk (1 minute)
Once the sugar is dissolved, add your ice cubes and oat milk to the shaker. I use about 1 cup of ice and 1 cup of oat milk. Make sure the lid is tightly secured. If you’re using a mason jar, press the lid down firmly. If you’re using a cocktail shaker, lock the top in place. This step is crucial—any leaks here will make a mess.
Step 4: Shake Vigorously (15-30 seconds)
This is the fun part. Shake the mixture hard. I mean, really shake it. I shake it for about 15-30 seconds until the outside of the jar feels cold and the espresso looks frothy. You’ll see the liquid turn a lighter, creamy color. This shaking action chills the coffee instantly and creates that signature foam. Don’t skip this step—it’s what makes the drink special. If you just stir it, it won’t have the same texture.
Step 5: Prepare Your Glass (1 minute)
While you’re shaking, grab your tall glass. You can fill it with fresh ice if you want it extra cold, but it’s not necessary since the drink is already chilled. I usually skip extra ice in the glass because the drink is cold enough. If you do add ice, make sure it’s clean and fresh.
Step 6: Strain and Pour (1 minute)
Open the shaker or jar carefully. If you’re using a cocktail shaker, place a julep strainer over the top and pour the drink into your glass. The foam should rise to the top, creating a nice layer. If you’re using a mason jar, pour it slowly, tilting the jar to let the foam come out last. You want that creamy top to stay intact. Pour the liquid first, then let the foam spill over.
Step 7: Garnish and Serve (1 minute)
Top with a sprinkle of cinnamon or a dollop of whipped cream if you’re feeling fancy. Drink immediately while it’s cold and frothy. This drink doesn’t sit well—it gets watery as the ice melts, so enjoy it fresh.
Total Time: About 5 minutes (2 minutes active, 3 minutes mostly hands-off)
Built-in Troubleshooting:
- Sauce too thick? Not applicable here, but if the drink is too strong, add a splash more oat milk.
- Sauce broke? If the oat milk curdles, it’s because the espresso was too hot. Let the espresso cool for 30 seconds before adding milk.
- No foam? You didn’t shake it hard enough or long enough. Shake for a full 30 seconds.
Expert Tips & Tricks
Here’s everything I’ve learned from making this dozens of times. These tips will save you from my mistakes.
Use Barista-Style Oat Milk
This is the #1 tip. Regular oat milk doesn’t froth as well. Barista-style oat milk has added oils that help it create a stable foam. I tried regular oat milk once, and the drink was just… okay. With barista oat milk, it’s amazing. It’s worth the extra dollar.
Don’t Skimp on the Shake
I used to shake for 10 seconds, thinking that was enough. It’s not. Shake for at least 15-30 seconds. You want the mixture to be well-chilled and aerated. If you don’t shake it enough, you’ll just have iced coffee with sugar, not a shaken espresso.
Dissolve Sugar Completely
If you don’t dissolve the sugar in the hot espresso, you’ll get gritty sips at the bottom. Stir it well before adding ice and milk. If the sugar doesn’t dissolve, put the espresso back on the stove for 10 seconds to warm it up more.
Keep It Cold
This drink is best when served immediately. If you let it sit, the ice melts and dilutes the flavor. Make it right before you drink it. If you’re making it for guests, make them individually rather than in bulk.
Common Mistakes (and how to avoid them):
- Mistake: Drink is too sweet Fix: Start with 1 tablespoon of sugar. You can always add more, but you can’t take it away.
- Mistake: Drink is too weak Fix: Use double espresso or strong brewed coffee. Weak coffee tastes watery with milk.
- Mistake: Oat milk curdles Fix: Let the espresso cool for 30 seconds before adding milk. Hot coffee can curdle plant-based milks.
Pro Tricks I’ve Learned:
- For Extra Creaminess Add a splash of heavy cream or half-and-half to the oat milk. It makes the drink richer.
- For Better Flavor Toast the brown sugar in a dry pan for 30 seconds before dissolving it. It brings out the caramel notes.
- For Presentation Use a clear glass so you can see the layers. It looks beautiful for photos.
Variations & Substitutions
Once you’ve nailed the basic version, here’s how you can mix it up. I’ve tried all of these.
Vanilla Shaken Espresso
Add ½ teaspoon of vanilla extract to the hot espresso before shaking. It adds a nice aromatic flavor that pairs well with the brown sugar. This is my go-to for weekend mornings.
Caramel Shaken Espresso
Use caramel syrup instead of brown sugar. Or drizzle caramel sauce on the inside of the glass before pouring. It’s sweeter and more indulgent.
Cinnamon Shaken Espresso
Add a pinch of cinnamon to the espresso before shaking. Or sprinkle it on top. Great for fall weather.
Mocha Shaken Espresso
Add 1 tablespoon of chocolate syrup or cocoa powder to the espresso. It’s like an iced mocha but with more coffee flavor.
Dietary Modifications:
- Sugar-Free Use a sugar-free brown sugar alternative or stevia. It won’t have the same depth, but it works.
- Dairy-Free This recipe is already dairy-free if you use oat milk. It’s naturally vegan.
- Low-Carb Use almond milk instead of oat milk and sugar substitute. It’s lighter but still tasty.
- Decaf Use decaf espresso beans. Same process, just no caffeine.
Different Flavors:
- Lavender Add a few drops of lavender extract. It’s floral and unique.
- Maple Use maple syrup instead of brown sugar. Adds a rustic flavor.
- Coconut Use coconut milk instead of oat milk. Adds a tropical twist.
Serving & Storage
How to Serve:
I usually serve this straight from the shaker into a tall glass. It looks rustic and stays cold. But here are other ways I’ve enjoyed it:
- With Pastries Pair it with a crispy buttermilk waffle for a complete breakfast.
- With Muffins I love having this with a maple banana nut muffin on lazy mornings.
- With Pancakes It’s the perfect drink to go with fluffy cinnamon swirl pancakes.
Toppings Bar:
When I have guests, I put out: cinnamon sticks, whipped cream, extra brown sugar, vanilla extract. Everyone customizes their drink.
Storage Instructions:
Refrigerator: Do not store this drink. It’s best made fresh. If you must store it, keep the espresso and oat milk separate. Mix them just before drinking.
Reheating: Never reheat this drink. It’s an iced beverage. Reheating will ruin the texture and flavor.
Freezing: You can freeze the espresso shots in ice cube trays. Then, when you want a drink, just shake the coffee cubes with oat milk and sugar. It’s a great trick for busy mornings.
Pro tip: If you’re meal-prepping, brew a large batch of espresso and store it in the fridge. When you want a drink, just take a portion, add sugar, ice, and oat milk, and shake it. It saves time.
Nutrition Information
I’m not a nutritionist, but here’s the breakdown if you’re tracking. This is an approximate value per serving (1 drink).
- Calories: 120
- Protein: 2g
- Carbs: 18g
- Fiber: 1g
- Sugar: 16g
- Fat: 4g
- Sodium: 70mg
What’s Good:
- Low in calories compared to coffee shop drinks
- Contains some calcium from oat milk
- Quick energy boost from caffeine
What to Know:
- Higher in sugar from brown sugar
- Contains caffeine
- Can be modified to be lower sugar
My Take:
Look, this is a treat. It has sugar and caffeine. It’s not a health food. But it’s way better than a sugary syrup drink from the coffee shop, and it’s cheaper. When I want to make it lighter, I use less sugar and unsweetened oat milk. But usually? I just enjoy it and move on with my day.
Final Thoughts
So that’s my go-to iced brown sugar oat milk shaken espresso! I’ve probably talked your ear off at this point, but when you make a recipe this often, you have a lot to say about it.
This has saved me so much money and time. It’s my answer to “what’s for breakfast” when I’m tired, don’t want to cook, and still want something that tastes really good. My family is happy, I’m happy, and I’m happy because I’m not stressed about making coffee.
Make it yours! Try different add-ins, swap in your favorite milk, adjust the sugar. The best recipes are the ones you adapt to your tastes.
If you make this, drop a comment and let me know what you think! I love hearing how recipes turn out in your kitchen. And if something doesn’t work, tell me that too—I’m here to help troubleshoot.
Happy drinking! And I hope your kitchen smells half as good as mine does right now.
Frequently Asked Questions
Q: Can I use regular milk instead of oat milk?
A: You can, but the foam won’t be as thick. Oat milk has a natural creaminess and fat content that helps it froth. If you use dairy milk, use whole milk for the best results. Almond milk is too thin and won’t foam well. If you’re vegan, oat milk is your best bet for that coffee shop texture.
Q: My drink didn’t foam—what happened?
A: Usually means you didn’t shake it hard enough or long enough. Shake for at least 15-30 seconds. Also, make sure you’re using barista-style oat milk. Regular oat milk doesn’t froth as well. If you’re using a mason jar, make sure the lid is tight so you can shake vigorously.
Q: Can I make this ahead for a coffee date?
A: Sort of. You can brew the espresso and store it in the fridge. But don’t mix it with milk and ice until you’re ready to serve. The foam will disappear if you let it sit. Make the drink fresh for the best texture.
Q: Why did my oat milk curdle?
A: The espresso was too hot. Plant-based milks can curdle when exposed to boiling liquids. Let the espresso cool for 30-60 seconds before adding the oat milk. If it’s still curdling, try using a different brand of oat milk.
Q: Can I use cold brew instead of espresso?
A: Yes, but the flavor will be different. Cold brew is smoother and less acidic. It works, but it won’t have the same bold kick as espresso. If you use cold brew, you might want to add a bit more sugar to balance the flavor.
Q: How do I clean the shaker?
A: Rinse it immediately after use. Sugar and milk can stick to the sides. Wash with warm soapy water. If you have a cocktail shaker, make sure to clean the strainer holes. A mason jar is easy to clean—just toss it in the dishwasher.
Q: Can I double this recipe?
A: Absolutely! Just use a larger shaker or jar. The process is the same. I do this when I’m making drinks for guests. Just make sure you have enough ice and milk.
Pin This Recipe!
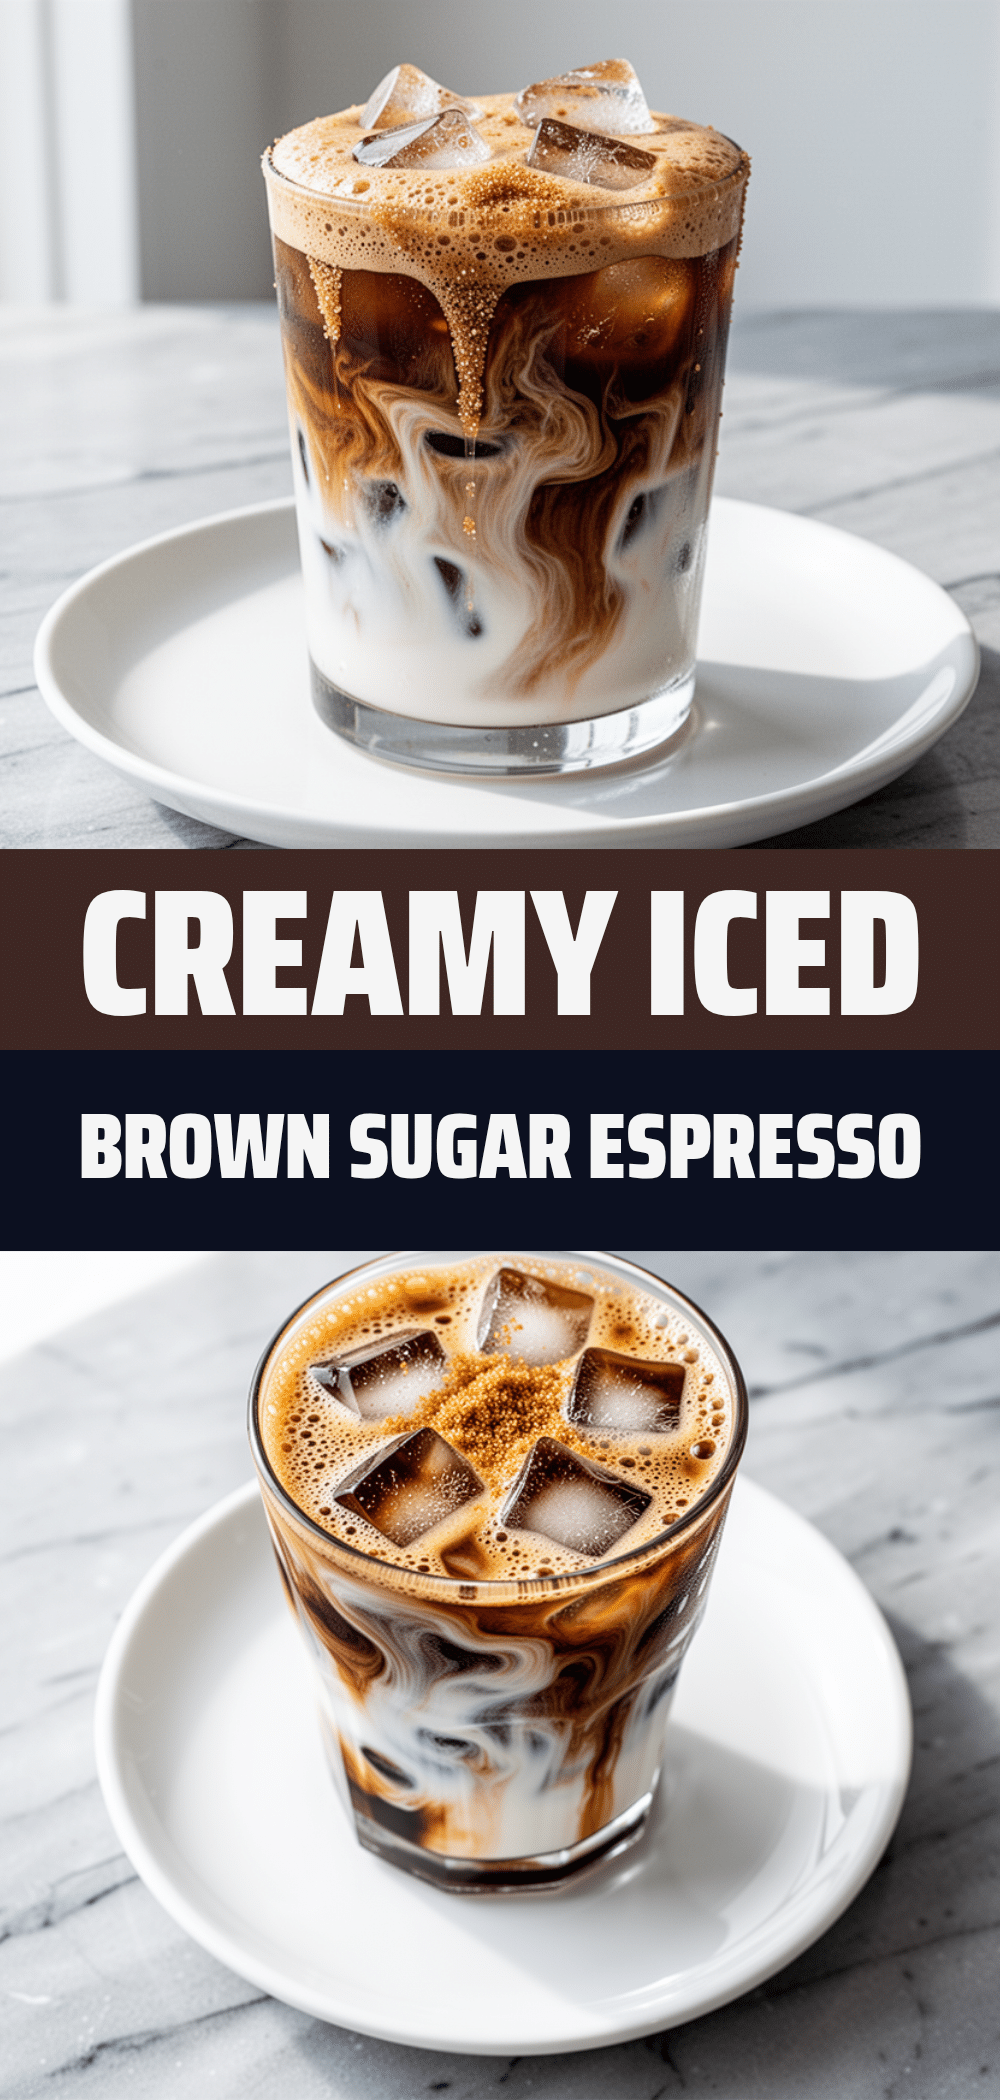

Iced Brown Sugar Oat Milk Shaken Espresso
- Total Time: 5 minutes
- Yield: 1 serving 1x
Description
A creamy, frothy iced coffee made by shaking hot espresso with brown sugar and oat milk. This homemade version is faster, cheaper, and tastier than coffee shop drinks.
Ingredients
- 2 shots espresso (about 2 ounces / 60ml)
- 1 to 2 tablespoons brown sugar
- 1 cup oat milk (barista-style recommended)
- 1 cup ice cubes
- Optional: ½ teaspoon vanilla extract
- Optional: Pinch of cinnamon
- Optional: Whipped cream for topping
Instructions
- Brew 2 shots of espresso or strong coffee. Pour the hot espresso into a cocktail shaker or mason jar.
- Add brown sugar to the hot espresso and stir until completely dissolved. Add vanilla extract here if using.
- Add ice cubes and oat milk to the shaker. Ensure the lid is tightly secured.
- Shake vigorously for 15-30 seconds until the mixture is chilled and frothy.
- Prepare a tall glass with fresh ice if desired.
- Strain the shaken mixture into the glass, allowing the foam to rise to the top.
- Garnish with cinnamon or whipped cream if desired. Serve immediately.
Notes
Use barista-style oat milk for the best foam. Let espresso cool for 30 seconds before adding milk to prevent curdling. Do not store mixed drink; make fresh. Can freeze espresso shots in ice cube trays for meal prep.
- Prep Time: 2 minutes
- Cook Time: 3 minutes
- Category: Beverage
- Cuisine: American
Nutrition
- Serving Size: 1 tall glass
- Calories: 120
- Sugar: 16
- Sodium: 70
- Fat: 4
- Carbohydrates: 18
- Fiber: 1
- Protein: 2
Keywords: iced coffee, shaken espresso, oat milk coffee, brown sugar latte, dairy-free coffee, homemade iced coffee, vegan coffee recipe