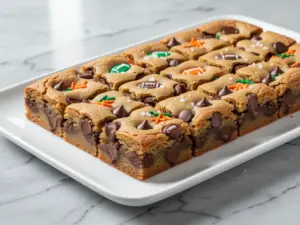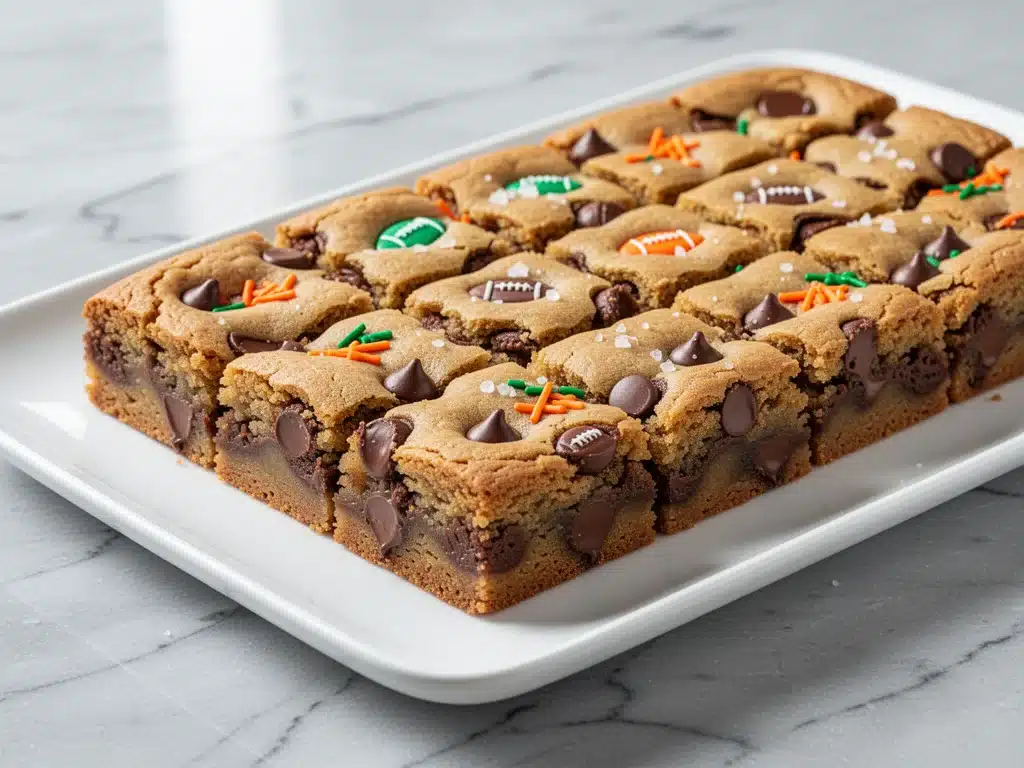
There is a specific kind of chaos that happens in my house during football season. It starts with the pre-game hype, moves to the tense silence of the fourth quarter, and ends with the inevitable crash of sugar and adrenaline. I’ve tried everything to keep the energy up and the stomachs full: dips, wings, even those weird loaded nacho fries that leave grease on the remote. But nothing, and I mean nothing, beats the sight of a pan of warm, gooey chocolate chip cookie bars being passed around the couch.
Last Sunday, during a particularly nail-biting playoff game, I realized something important. We were running low on snacks. The usual suspects were gone. I had a bag of chocolate chips, some butter, and flour. Instead of ordering overpriced delivery or settling for stale store-bought cookies, I whipped up a batch of these football season chocolate chip cookie bars. They came out of the oven right as the winning touchdown happened. My family didn’t even celebrate the game; they celebrated the dessert. That’s when I knew I had found the perfect balance of game-day fuel and pure indulgence.
These aren’t just regular cookies flattened into a pan. These are dense, chewy, buttery squares loaded with melty chocolate. They’re easier to make than no-bake chocolate peanut butter oat bars because you actually get that warm, fresh-baked aroma filling your house while the game is on. Plus, they’re cut into neat squares, which makes them way less messy than round cookies when you’re holding a beer or a bowl of dip. I’ve made these for every Sunday this season, and they’ve become as essential as the halftime show (even if the show itself is kind of questionable).
What I love most about these football season chocolate chip cookie bars is that they’re forgiving. You don’t need to be a pastry chef. You don’t need fancy equipment. You just need to want something sweet that brings people together. Whether you’re hosting a super bowl party or just watching the game with your partner, these bars are the answer. I’ve tweaked the recipe over the last few months to get the texture just right—crispy edges, soft center, and enough chocolate to make you forget about the score. Let’s get into why these are the best thing you’ll bake all season.
Why You’ll Love This Recipe
Look, I get it. Baking during football season feels like a lot. You’re trying to watch the game, manage the snacks, and maybe still have time to do laundry. But these cookie bars change the game. They’re not just a dessert; they’re a strategic move for a happy house. Here’s why I keep coming back to this recipe week after week:
- Zero Stress Baking — Seriously, if you can mix ingredients in a bowl, you can make this. I’ve made these while on a video call with my mom, and I didn’t burn the house down. The bars bake in a single pan, so there’s no waiting around for multiple batches of cookies. You mix, you pour, you bake. Done.
- Game-Day Friendly Format — Round cookies are awkward to serve at a party. They roll away. They crumble. Square bars? They stay put. You cut them into neat grids, and everyone grabs one without making a mess. It’s practical perfection for a crowded living room.
- Better Than Takeout — I’m not exaggerating when I say these taste better than the cookie cakes you get at the bakery. They’re fresher, richer, and they smell amazing. I’ve had friends say they’d rather skip the main course for these bars. That’s high praise.
- Make-Ahead Magic — This is huge for game day. You can bake these the night before. In fact, they taste even better the next day because the flavors have time to meld. I usually bake them Saturday afternoon, let them cool, cover them, and then they’re ready for Sunday’s kickoff. No morning-of panic.
- Customizable for Any Team — Okay, maybe not literally any team, but you can change the mix-ins. Swap chocolate chips for white chocolate and cranberries for a festive vibe. Or add chopped nuts if your crowd is fancy. They’re a blank canvas for your cravings.
This recipe has saved me more times than I can count. It’s my go-to when I need to impress guests without spending hours in the kitchen. My husband claims these are the reason I’m still married, which is a bold statement, but I’ll take it. These bars are reliable, delicious, and totally worth the five minutes of cleanup.
Ingredients You’ll Need
Here’s the best part: you probably have most of these ingredients already. I’m not asking you to run to the store for anything obscure. This is pantry-friendly baking at its finest. I’m particular about a few things here, though, so pay attention to the details.
For the Dough
Unsalted Butter (1 cup / 226g) — This is the base of your flavor. Use real butter, not margarine. Margarine has too much water and can make the bars greasy. I take my butter out of the fridge 30 minutes before baking so it’s soft but not melted. If you’re in a rush, you can microwave it in 5-second bursts, but don’t melt it into soup.
Granulated Sugar (1 cup / 200g) — This gives you that crisp edge. I use regular white sugar. Don’t swap this for brown sugar if you want the classic cookie bar texture. Brown sugar makes it chewier and darker, which is nice, but this recipe is designed for that golden, crispy contrast.
Packed Brown Sugar (1 cup / 220g) — This is where the chew comes from. Make sure you pack it tightly into the measuring cup. Light brown sugar works fine, but dark brown has a deeper molasses flavor that I love in these bars.
Eggs (2 large) — Room temperature eggs mix better into the dough. I usually take them out of the fridge while the butter is softening. Don’t skip this; cold eggs can seize up your butter mixture.
Vanilla Extract (2 teaspoons) — Use real vanilla, not imitation. I know it’s pricier, but the flavor difference is huge in a recipe with so few ingredients. I use pure extract from a dark bottle.
All-Purpose Flour (2 ½ cups / 315g) — Spoon the flour into your measuring cup and level it off. Don’t scoop directly from the bag, or you’ll pack it down and end up with dry, cakey bars. I use Gold Medal flour, but any standard brand works.
Baking Powder (1 teaspoon) — This gives the bars a little lift so they aren’t dense as a rock. Check your expiration date; old baking powder won’t work.
Salt (1 teaspoon) — Even though you’re using unsalted butter, you need salt to balance the sweetness. It makes the chocolate taste more chocolatey.
The Mix-Ins
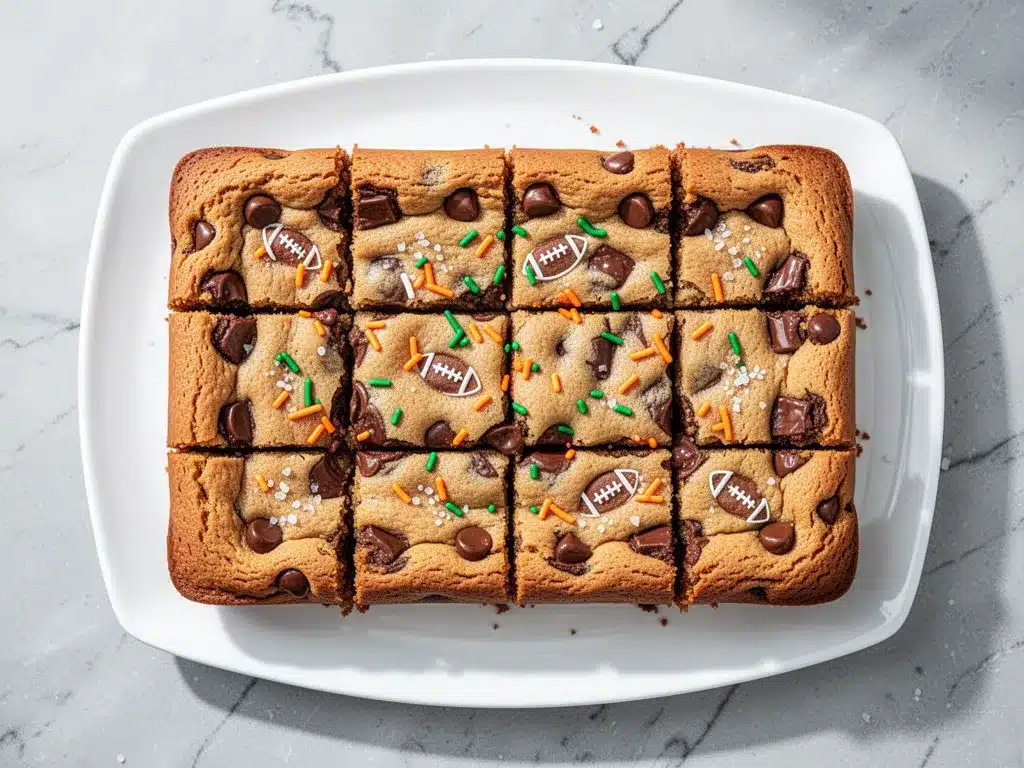
Chocolate Chips (2 cups / 340g) — This is non-negotiable. I use semi-sweet chocolate chips. I love Ghirardelli or Nestlé Toll House. You can use chunks for a more rustic look, but chips melt evenly. If you want extra richness, swap half the chips for chopped dark chocolate bars.
Optional: Sea Salt Flakes — For the top. A sprinkle of flaky salt right after they come out of the oven elevates the whole thing. It’s like those fancy bakery cookies, but easier.
Pro Tip: I keep a bag of chocolate chips and a block of butter in my pantry at all times. When I see a game on, I know I can throw these together in 10 minutes. If you don’t have these staples, stock up now.
Equipment Needed
You don’t need fancy equipment for this. Here’s what I actually use. Keep it simple so you’re not spending more time washing dishes than baking.
9×13 Inch Baking Pan — This is the standard size. I use a metal pan because it conducts heat evenly. Glass pans can sometimes bake the edges too fast, so metal is safer. Grease it well with butter or non-stick spray.
Large Mixing Bowl — A bowl big enough to hold all the ingredients without spilling. I use a 6-quart stainless steel bowl. It’s heavy and doesn’t slide around.
Hand Mixer or Wooden Spoon — I prefer a wooden spoon for the final mix to avoid overworking the flour. But an electric mixer on low speed works fine for creaming the butter and sugars. Just don’t go overboard.
Spatula — A silicone spatula is great for scraping the bowl and spreading the dough evenly in the pan. I use a flexible one because it gets into the corners.
Cooling Rack — You need to let the bars cool before cutting them. If you cut them hot, they’ll fall apart. A wire rack lets air circulate so the bottom doesn’t get soggy.
Knife or Pizza Cutter — For cutting the bars. A sharp knife works, but a pizza cutter is faster and cleaner. I use a pizza cutter for all my bar cookies.
Parchment Paper — I line my pan with parchment paper, leaving an overhang on the sides. This makes it easy to lift the whole batch out of the pan if I want to store them or move them. It also means zero cleanup for the pan.
How to Make It: Step-by-Step
Alright, let’s make this! I’m walking you through exactly how I do it, including the little tricks I’ve picked up over the years. This process is straightforward, but attention to detail makes the difference between good and great.
Step 1: Prep Your Pan and Oven (2 minutes)
Preheat your oven to 350°F (175°C). Line your 9×13 inch baking pan with parchment paper. Leave a little overhang on the long sides so you can lift the bars out later. Grease the parchment lightly with butter or cooking spray. This step is crucial so nothing sticks.
Step 2: Cream the Butter and Sugars (3-4 minutes)
In your large mixing bowl, combine the softened unsalted butter, granulated sugar, and packed brown sugar. Using a hand mixer on medium speed, beat this mixture until it’s light and fluffy. This takes about 3 minutes. You want the mixture to look pale and airy. This step incorporates air, which helps the bars rise slightly and get that tender crumb. If you skip this, the bars will be dense and flat.
Step 3: Add Eggs and Vanilla (1 minute)
Add the eggs one at a time, beating well after each addition. Then add the vanilla extract. Mix until just combined. Don’t overmix here. You want the eggs fully incorporated, but you don’t need to beat it into submission. The mixture should look smooth and creamy.
Step 4: Mix Dry Ingredients (2 minutes)
In a separate medium bowl, whisk together the all-purpose flour, baking powder, and salt. This ensures the baking powder is evenly distributed so you don’t get bitter spots. Then, gradually add the dry ingredients to the wet mixture. Use your mixer on low speed, or switch to a wooden spoon. Mix until the flour *just* disappears. It’s okay if there are a few tiny streaks of flour left. Overmixing develops gluten, which makes cookies tough. We want tender bars, not bread.
Step 5: Fold in the Chocolate Chips (1 minute)
Pour in the chocolate chips. Use your spatula to fold them into the dough. Make sure they’re evenly distributed. If you want a more elegant look, you can reserve half the chips to sprinkle on top later.
Step 6: Spread and Bake (25-30 minutes)
Transfer the dough to your prepared pan. Use your spatula or greased hands to press the dough into an even layer. Don’t worry about making it perfectly smooth; the bars will settle. Bake in the preheated oven for 25-30 minutes. The edges should be golden brown, and the center should look set but still slightly soft. If you insert a toothpick, it should come out with a few moist crumbs, not wet batter. If it’s clean, you might have overbaked them.
Step 7: Cool and Cut (30 minutes)
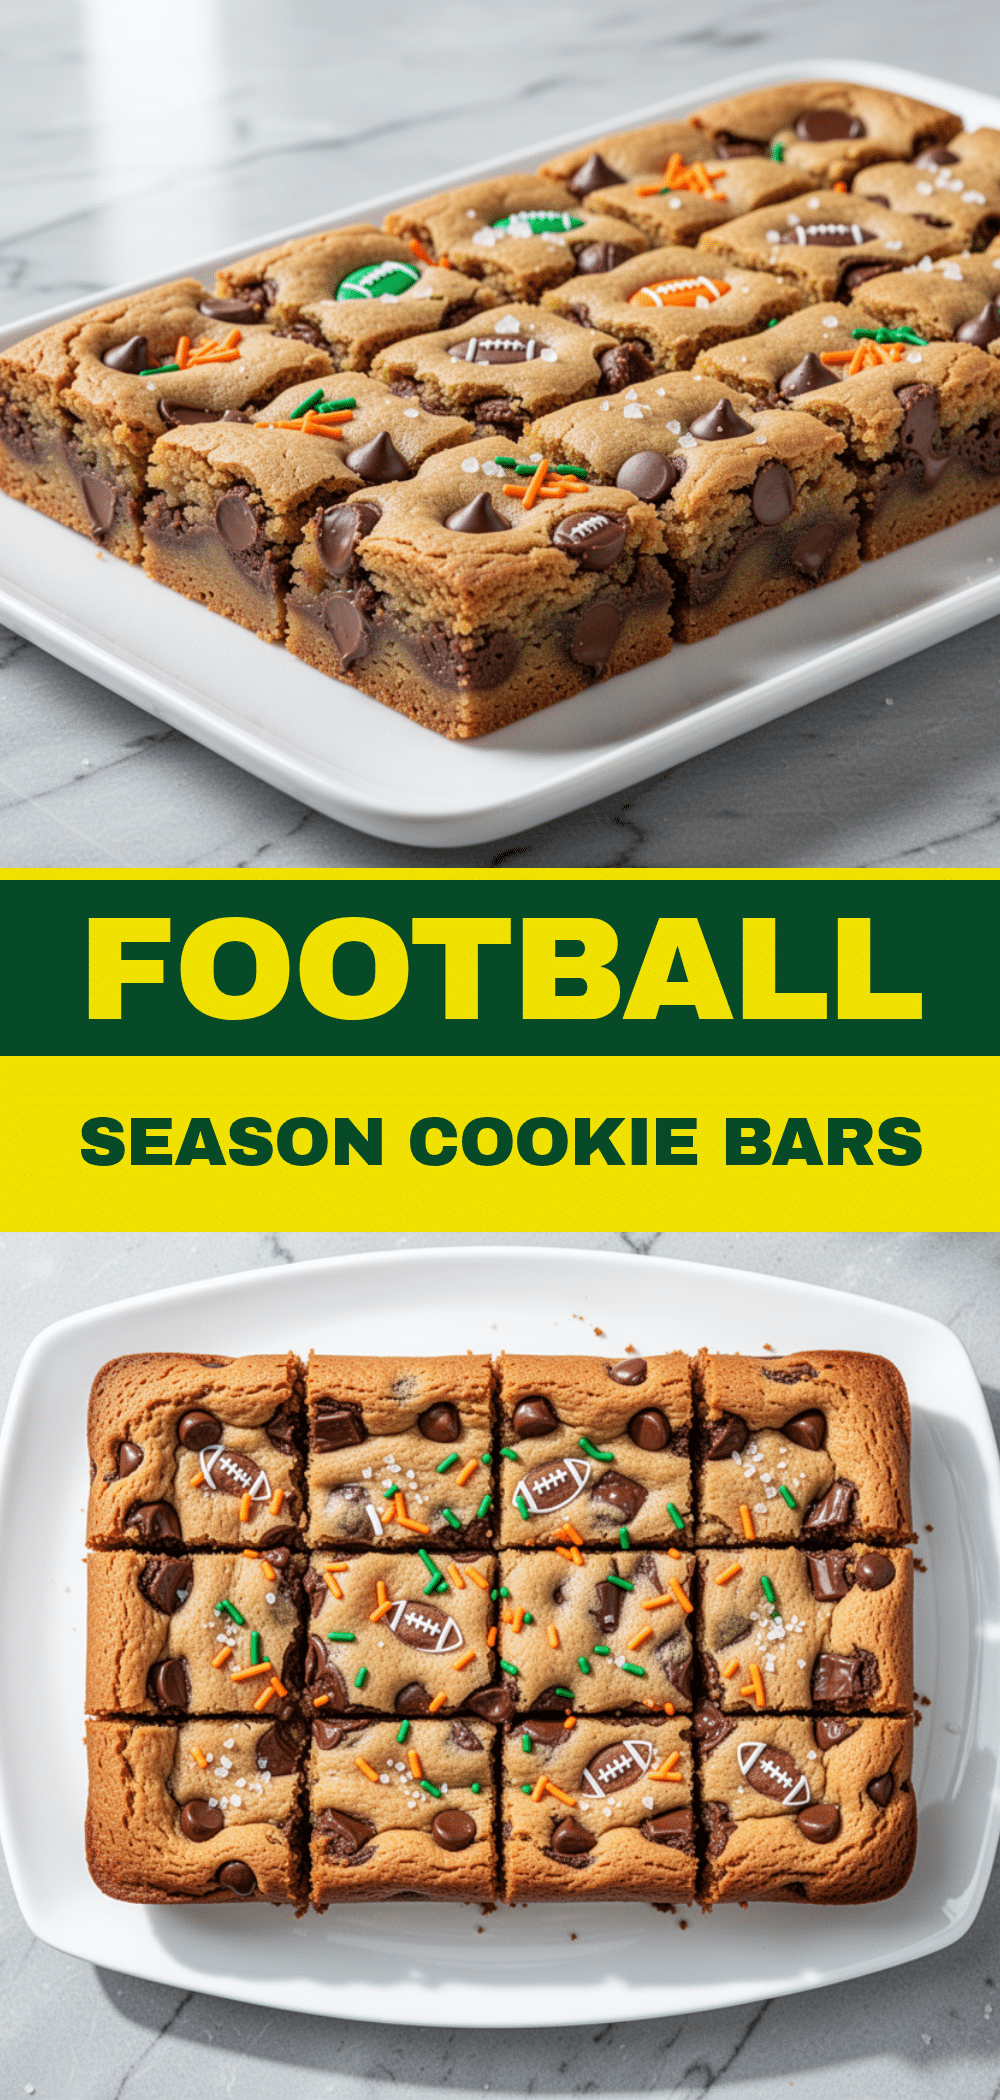
Remove the pan from the oven. If you’re using sea salt flakes, sprinkle them over the hot bars now. Let the bars cool completely in the pan on a wire rack. This takes about 30 minutes. If you try to cut them warm, they’ll be a mess. Once cool, use the parchment overhang to lift the bars out of the pan. Cut into squares or rectangles. I like 12 or 16 pieces, depending on how hungry my guests are.
Total Time: About 45 minutes (10 minutes prep, 30 minutes bake, 30 minutes cool). Yes, the cooling time is long, but it’s mostly passive. You can go watch the second half of the game during this time.
Expert Tips & Tricks
Here’s everything I’ve learned from making these dozens of times. These tips will save you from my mistakes.
Don’t Overbake — This is the #1 mistake. Cookie bars continue to cook even after you take them out of the oven because of the residual heat. Pull them when the center looks just barely set. They will firm up as they cool. Overbaked bars are dry and crumbly. Underbaked bars are gooey and delicious, but you don’t want them raw.
Softened Butter is Key — Your butter should be soft enough to leave an indent when you press it, but not so soft that it’s oily. If it’s melted, your bars will spread too much and become greasy. If it’s too hard, you won’t get that creamy texture. Room temperature is the sweet spot.
Measure Flour Correctly — I mentioned this earlier, but it bears repeating. Scooping flour packs it down, leading to dry bars. Spoon flour into the measuring cup and level it off with a knife. This simple habit makes a huge difference.
Use Good Chocolate — Since chocolate is a main ingredient, don’t use the cheapest chips you can find. They often have wax and don’t melt as smoothly. Ghirardelli, Lindt, or even Trader Joe’s semi-sweet chips work great. If you have time, chop up a chocolate bar for a more professional look.
Storage is Easy — These bars keep well at room temperature for up to 5 days. Just store them in an airtight container. If your house is hot, you might want to refrigerate them, but they’ll harden a bit. I usually keep them on the counter for game day.
Pro Trick: The Cold Cut — If you want perfectly clean cuts, put the pan in the fridge for 15 minutes before cutting. The dough firms up, and your knife glides through without squishing the bars.
Variations & Substitutions
Once you’ve nailed the basic version, here’s how you can mix it up. I’ve tried all of these, and they’re all winners.
Double Chocolate — Add ¼ cup cocoa powder to the dry ingredients. Swap the chocolate chips for white chocolate chips for a marbled effect. This is rich and decadent.
Chewy Brownie Style — Swap the granulated sugar for all brown sugar. Add ¼ cup cocoa powder. This makes the bars denser and more fudgy, like a brownie-cookie hybrid.
Nutty Delight — Add 1 cup of chopped walnuts or pecans to the dough. Toast the nuts first for extra flavor. This adds crunch and breaks up the sweetness.
Red, White, and Blue — For a patriotic theme, use white chocolate chips and fresh blueberries. The blueberries burst and create little pockets of juice. It’s fresh and festive.
Maple Pecan — Swap ¼ cup of the brown sugar for maple syrup. Add 1 cup chopped pecans. This tastes like a maple bar cookie. My sister loves this variation.
Gluten-Free — Use a 1-to-1 gluten-free flour blend. Most brands work well in this recipe. Just make sure the blend includes xanthan gum, or add ½ teaspoon yourself.
Dairy-Free — Use a plant-based butter stick (not tub margarine) and dairy-free chocolate chips. The texture might be slightly different, but it’s still delicious. I’ve used Miyoko’s butter for this, and it works great.
Serving & Storage
How to Serve: I usually serve these at room temperature. They’re best when they’re soft and chewy. For a fancy touch, serve them with a scoop of vanilla ice cream or a dollop of whipped cream. It’s like a warm cookie sundae. I also like to pair them with coffee or milk. For game day, I just put them on a platter with napkins and let people grab as many as they want.
Side Dishes: These are a dessert, so they don’t need a side. But if you’re making a full spread, they pair well with savory snacks like smoky chipotle queso dip or hot cheesy spinach bacon dip. The sweet and salty combo is unbeatable.
Storage Instructions:
Refrigerator: Store in an airtight container for up to 1 week. They actually stay chewier in the fridge. Just let them come to room temperature before eating for the best texture.
Freezer: Yes, you can freeze these! Wrap the whole pan in plastic wrap and then foil. Or freeze individual bars in freezer bags. They last for up to 3 months. Thaw at room temperature for an hour. They taste almost as good as fresh.
Reheating: If you want warm bars, microwave a single bar for 15-20 seconds. It gets gooey and perfect. Don’t overheat it, or it’ll get hard.
Pro Tip: If you’re making these for a party, make two pans. You’ll run out faster than you think. Trust me.
Nutrition Information
I’m not a nutritionist, but here’s the breakdown if you’re tracking. These are indulgent bars, so enjoy them in moderation.
Per Serving (based on 16 bars):
- Calories: 280
- Protein: 3g
- Carbs: 38g
- Fiber: 1g
- Sugar: 24g
- Fat: 14g
- Saturated Fat: 8g
- Cholesterol: 35mg
- Sodium: 150mg
What’s Good: They’re made with real ingredients, no preservatives. You know exactly what’s in them.
What to Know: High in sugar and saturated fat because of the butter and chocolate. This is a treat, not a health food. But homemade treats are often better than store-bought because you control the quality.
My Take: I don’t stress about the calories for a special treat like this. It’s about the joy of sharing food with family. If you want to lighten it up, use half the chocolate chips or swap some for nuts. But usually? I just eat one or two and enjoy it.
Final Thoughts
So that’s my go-to football season chocolate chip cookie bars! I’ve probably talked your ear off at this point, but when you make a recipe this often, you have a lot to say about it. These bars have saved me more game days than I can count. They’re my answer to “what’s for dessert” when I’m tired, don’t want takeout, and still want something that tastes really good. My kids are happy, my husband’s happy, and I’m happy because I’m not stressed about cooking.
Make it yours! Try different mix-ins, swap in your favorite chocolate, or adjust the sugar. The best recipes are the ones you adapt to your family’s tastes. If you make this, drop a comment and let me know what you think! I love hearing how recipes turn out in your kitchen. And if something doesn’t work, tell me that too—I’m here to help troubleshoot.
Happy baking! And I hope your kitchen smells half as good as mine does right now.
Frequently Asked Questions
Can I use melted butter instead of softened butter?
You can, but the texture will be different. Melted butter makes the bars denser and chewier, almost like a brownie. If you use melted butter, let it cool slightly before mixing with the sugar so you don’t cook the eggs. I prefer softened butter for that classic cookie bar texture, but melted works if you’re in a rush.
Why did my bars turn out dry?
This usually happens if you overbake them or pack too much flour into your measuring cup. Make sure you’re spooning and leveling your flour, not scooping. Also, pull the bars from the oven when the center still looks slightly underdone. They will continue to cook on the hot pan. Overbaking is the most common cause of dry bars.
Can I make these ahead for a party?
Absolutely! In fact, they taste better the next day. Bake them the night before, let them cool completely, and store them in an airtight container at room temperature. They’ll stay fresh for up to 5 days. You can also freeze them for up to 3 months. Just thaw before serving.
Can I use milk chocolate chips instead of semi-sweet?
Yes, you can. Milk chocolate is sweeter and melts differently. If you use milk chocolate, you might want to reduce the granulated sugar by ¼ cup to balance the sweetness. I prefer semi-sweet because it balances the buttery dough better, but milk chocolate is great if you have kids or prefer sweeter cookies.
How do I store leftovers?
Store them in an airtight container at room temperature for up to 5 days. If your house is hot or humid, refrigerate them. They’ll last up to 2 weeks in the fridge. For longer storage, freeze them. Wrap the pan tightly in plastic wrap and foil, or freeze individual bars in freezer bags.
Can I double this recipe?
Yes, but you’ll need a larger pan. A 9×13 pan is the limit for this amount of dough. If you double it, use two 9×13 pans or a 9×13 and a 9×9 pan. The baking time might be slightly less for the smaller pan, so check it a few minutes early. I usually just make one batch because it’s enough for most game days.
What if I don’t have a hand mixer?
You can use a wooden spoon or a sturdy spatula. It will take a bit more effort to cream the butter and sugars, but it works fine. Just make sure the butter is soft enough to mix easily. You’ll need to mix for about 5-7 minutes by hand to get that fluffy texture. Don’t rush it.
Pin This Recipe!
Football Season Chocolate Chip Cookie Bars
- Total Time: 45 minutes
- Yield: 16 servings 1x
Description
Dense, chewy, and buttery chocolate chip cookie bars that are perfect for game day. Easy to make, forgiving for beginners, and customizable with various mix-ins.
Ingredients
- 1 cup (226g) unsalted butter, softened
- 1 cup (200g) granulated sugar
- 1 cup (220g) packed brown sugar
- 2 large eggs, room temperature
- 2 teaspoons vanilla extract
- 2 ½ cups (315g) all-purpose flour
- 1 teaspoon baking powder
- 1 teaspoon salt
- 2 cups (340g) semi-sweet chocolate chips
- Sea salt flakes (optional, for topping)
Instructions
- Preheat oven to 350°F (175°C). Line a 9×13 inch baking pan with parchment paper, leaving an overhang on the sides, and grease lightly.
- In a large mixing bowl, cream together the softened butter, granulated sugar, and brown sugar until light and fluffy (about 3 minutes).
- Add eggs one at a time, beating well after each addition, then mix in the vanilla extract until combined.
- In a separate bowl, whisk together the flour, baking powder, and salt.
- Gradually add the dry ingredients to the wet mixture, mixing on low speed or with a wooden spoon until just combined. Do not overmix.
- Fold in the chocolate chips with a spatula until evenly distributed.
- Spread the dough evenly into the prepared pan.
- Bake for 25-30 minutes, or until edges are golden brown and the center looks set but slightly soft.
- Remove from oven and sprinkle with sea salt flakes if using.
- Let cool completely in the pan on a wire rack (about 30 minutes) before cutting into squares.
Notes
For best results, use softened butter, not melted. Measure flour by spooning it into the cup and leveling it off to avoid dry bars. Bars continue to cook after removal from the oven, so pull them when the center looks slightly underdone. For clean cuts, chill the pan in the fridge for 15 minutes before slicing.
- Prep Time: 10 minutes
- Cook Time: 30 minutes
- Category: Dessert
- Cuisine: American
Nutrition
- Serving Size: 1 bar
- Calories: 280
- Sugar: 24
- Sodium: 150
- Fat: 14
- Saturated Fat: 8
- Carbohydrates: 38
- Fiber: 1
- Protein: 3
Keywords: chocolate chip cookie bars, football season snacks, game day dessert, easy baking, 5-ingredient cookies, chewy cookie bars