There is a specific kind of magic that happens when a campfire meets a chocolate bar, and I’ve spent the last few years trying to bottle that lightning without ever leaving my kitchen. It started three summers ago, during a heatwave that made the thought of turning on the oven feel like a personal attack. My kids were begging for s’mores, but the idea of hauling a bag of marshmallows and a box of graham crackers out to the backyard in 95-degree humidity sounded like a nightmare. So, I did what any desperate parent would do: I improvised.
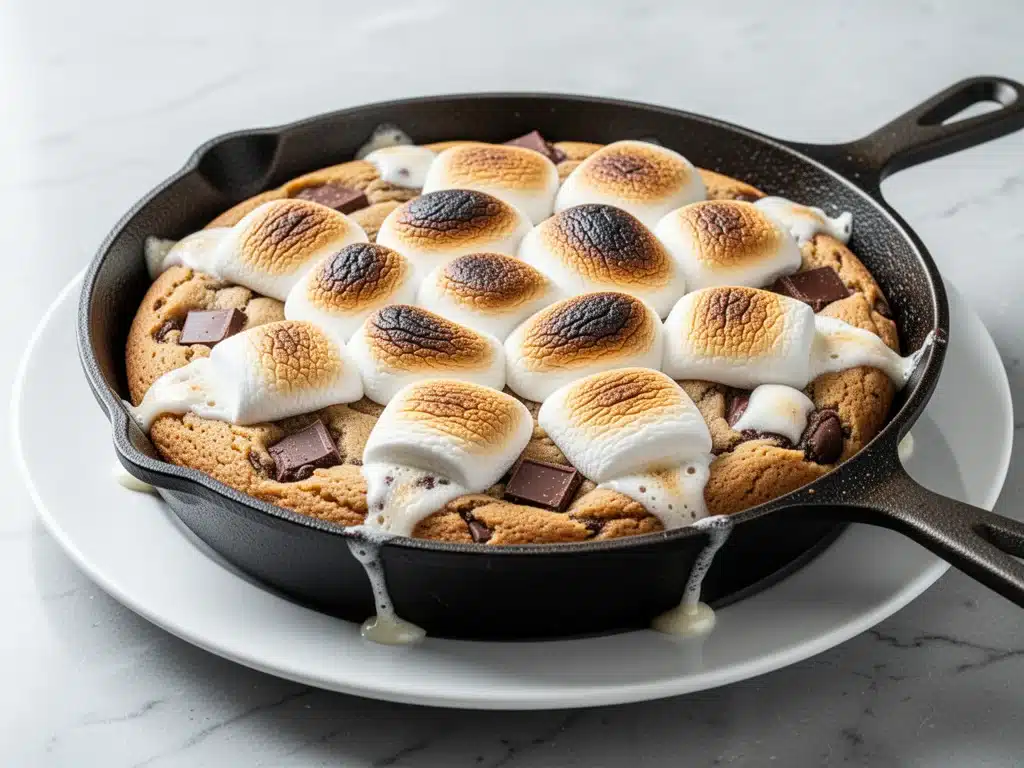
I threw together a thick, gooey chocolate cookie dough in a cast-iron skillet, topped it with a mountain of marshmallows, and popped it under the broiler. What emerged wasn’t just a dessert; it was a warm, melty, nostalgic hug that tasted like summer evenings spent around a fire, but without the bug spray or the charcoal stains. That accidental creation became the gooey s’mores cookie skillet you’re about to make. It’s become our family’s go-to for lazy Friday nights, last-minute dinner guests, and those moments when we need something sweet that feels like an event.
I’ve tested this recipe dozens of times—sometimes with chocolate chips, sometimes with chunks, sometimes with different types of marshmallows. The version I’m sharing with you today is the winner. It’s got that perfect chewy-crispy edge from the skillet, a center that’s soft and fudgy, and a top layer of marshmallows that are golden, toasted, and impossibly stretchy. If you’ve ever dreamed of campfire vibes without the hassle, this dessert is your answer. It’s the ultimate comfort food for anyone who loves simple homemade desserts that deliver maximum flavor with minimal fuss.
Why You’ll Love This Recipe
This isn’t just another cookie recipe. It’s a mood. It’s a vibe. And it’s surprisingly versatile enough to fit into almost any occasion. Here’s why this gooey s’mores cookie skillet has earned a permanent spot in my weekly rotation:
- Zero Setup Stress — Seriously, if you can mix batter and scoop marshmallows, you can make this. There’s no complicated technique here. I’ve made this while helping my kids with their homework, and it still turned out perfect.
- Instant Crowd-Pleaser — I served this at a last-minute potluck and watched people line up for seconds. Kids love the marshmallows; adults love the chocolate. It’s a win-win that works every single time.
- Super Fast — From start to finish, you’re looking at about 30 minutes. That’s faster than ordering delivery, and it tastes way better because it’s warm and fresh. I make this on weeknights when I want a treat but don’t have hours to spare.
- Pantry-Friendly — You probably have most of these ingredients already. Graham crackers, chocolate, marshmallows, butter, sugar, flour. It’s basic baking stuff, which means you can pull this together on a whim.
- Perfect for Sharing — Because it’s baked in a skillet, it’s naturally communal. Everyone digs in with a spoon or fork, right from the pan. It feels rustic and cozy, unlike those fancy plated desserts that feel too stiff for a casual night in.
- Customizable AF — Hate marshmallows? Swap them for peanut butter cups. Love crunch? Add toasted pecans. This recipe is a blank canvas for your sweet tooth.
Real talk: this is my go-to when I need dessert to just work. No fancy plating, no stress, just reliable, delicious food that makes everyone happy. It’s the kind of recipe that reminds you why you love baking in the first place.
Ingredients You’ll Need
Here’s the best part: you probably have most of this already. This gooey s’mores cookie skillet relies on simple, high-quality ingredients that play nice together. I’m particular about a few things here, so let’s break down what you need and why.
For the Cookie Base
Unsalted butter (½ cup / 115g, softened) — This gives the cookie its richness. Make sure it’s softened to room temperature so it creams properly with the sugar. If you’re in a rush, microwave it in 5-second bursts, but don’t melt it into liquid.
Granulated sugar (½ cup / 100g) — This provides the crisp edges. I use white sugar for that classic s’more crunch. Some people add brown sugar for chewiness, but I prefer the crispier texture here.
Light brown sugar (½ cup / 110g) — This adds moisture and that deep, molasses-like flavor that pairs so well with chocolate. Don’t skip this; it’s what makes the center gooey.
One large egg — Just one. Don’t overdo it. This binds the dough without making it cakey.
Vanilla extract (1 teaspoon) — Pure vanilla, please. I don’t use imitation stuff. It’s the backbone of the flavor.
All-purpose flour (1 ½ cups / 190g) — Standard flour works best. Don’t use self-rising unless you adjust the salt. Spoon it into the cup and level it off—don’t pack it down.
Baking powder (½ teaspoon) — Just a little lift. We want this dense and fudgy, not fluffy like a cake.
Salt (½ teaspoon) — Crucial for balancing the sweetness. Use kosher salt if you have it.
For the S’mores Topping
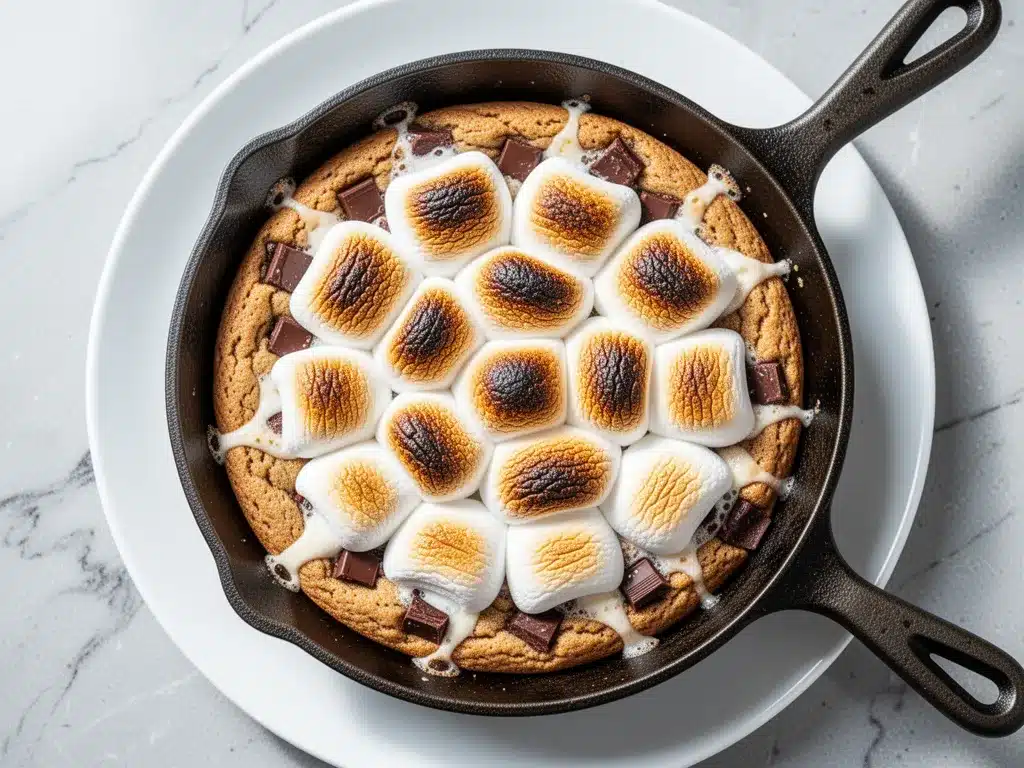
Semi-sweet chocolate chips (1 cup / 170g) — Or chopped chocolate bar. I like using high-quality baking chocolate chopped into chunks for bigger melty pockets.
Mini marshmallows (2 cups / 120g) — Yes, mini. They cover the surface evenly and toast faster. You can use large ones, but you’ll need more, and they take longer to brown.
Graham cracker crumbs (½ cup / 50g) — Crushed graham crackers add that authentic campfire crunch. I buy the crackers and crush them in a bag with a rolling pin, but store-bought crumbs work fine.
Optional: Toasted pecans or walnuts (½ cup) — If you like a nutty crunch, this is the place to add it. I usually skip them for the kids, but the adults love them.
Equipment Needed
You don’t need fancy equipment for this. Here’s what I actually use:
8-inch cast-iron skillet — I love cast iron because it heats evenly and gives those beautiful crispy edges. If you don’t have one, a 9-inch oven-safe skillet or even a deep-dish pie plate works. Just make sure it can go under the broiler.
Mixing bowl — Any medium-sized bowl works. I use a glass one so I can see everything.
Whisk or electric mixer — For creaming the butter and sugars. Hand-whisking takes a little elbow grease but works fine.
Parchment paper — Not strictly necessary, but it makes cleanup easier. I line the skillet with a little parchment or just grease it well with butter.
Broiler — Your oven’s broiler is your friend here. It’s what toasts the marshmallows quickly without overcooking the cookie underneath. If you don’t have a broiler, you can use the top rack of a conventional oven, but keep a close eye on it.
Small rolling pin or bag — For crushing the graham crackers if you’re doing it from scratch. I keep a heavy-duty ziplock bag and a rolling pin handy for this.
How to Make It: Step-by-Step
Alright, let’s make this! I’m walking you through exactly how I do it, including the little tricks I’ve picked up over time. This process is straightforward, but timing is everything.
Step 1: Prep Your Oven and Skillet (5 minutes)
Preheat your oven to 350°F (175°C). If you’re using a cast-iron skillet, make sure it’s clean and dry. Lightly grease it with butter or cooking spray. I like to line the bottom with a small piece of parchment paper to prevent sticking, but it’s not a dealbreaker if you skip it.
Step 2: Cream the Butter and Sugars (2-3 minutes)
In your mixing bowl, combine the softened butter, granulated sugar, and brown sugar. Beat them together until the mixture is light, fluffy, and pale in color. This step takes about 2-3 minutes with a hand mixer, or a good 5 minutes of arm work with a whisk. Don’t rush this—it’s what creates the texture.
Step 3: Add Wet Ingredients (1 minute)
Crack in the egg and add the vanilla extract. Mix until just combined. You don’t want to overmix here; just get it incorporated. The mixture might look a little curdled at first, but that’s normal. It’ll smooth out once you add the dry ingredients.
Step 4: Mix in Dry Ingredients (1-2 minutes)
Add the flour, baking powder, and salt. Stir gently until the flour disappears. The dough will be thick and sticky. This is good! It should hold together when you pinch it. If it’s too dry, add a teaspoon of milk. If it’s too wet, add a tablespoon of flour.
Step 5: Press Dough into Skillet (2 minutes)
Transfer the dough to your prepared skillet. Press it down evenly with your hands or the back of a spoon. It should cover the bottom in a uniform layer. Don’t make the edges too thin, or they’ll burn. Aim for about ½-inch thickness.
Step 6: Add Chocolate and Bake (12-15 minutes)
Scatter the chocolate chips (or chunks) evenly over the dough. Bake in the preheated oven for 12-15 minutes. The cookie should be set around the edges but still slightly soft in the center. It will continue to cook as it cools. Remove from the oven.
Step 7: Toast the Marshmallows (2-3 minutes)
This is the fun part. Turn on your broiler. Sprinkle the mini marshmallows evenly over the hot cookie. Slide the skillet under the broiler for 1-3 minutes. Watch it like a hawk! You want the marshmallows golden brown and puffy, not blackened. My broiler runs hot, so I check it at 1 minute. Once they’re toasted, remove the skillet immediately.
Step 8: Add Graham Cracker Crunch (1 minute)
While the marshmallows are toasting, crush your graham crackers. As soon as the skillet comes out of the oven, sprinkle the crumbs evenly over the hot marshmallows. The residual heat will help them stick slightly. If you’re adding nuts, do it now too.
Step 9: Cool and Serve
Let the skillet cool for 5-10 minutes before digging in. This allows the chocolate to set slightly so you get those amazing gooey pulls. Serve warm with a scoop of vanilla ice cream if you’re feeling fancy.
Total Time: About 30 minutes (10 minutes prep, 20 minutes cooking)
Expert Tips & Tricks
Here’s everything I’ve learned from making this dozens of times. These tips will save you from my mistakes.
Don’t Overbake the Base
The cookie base should look slightly underdone when you take it out. It will finish cooking on the hot skillet. If you bake it until it’s fully firm, the final product will be dry and crumbly instead of gooey and fudgy. Trust me, a soft center is the goal.
Watch the Broiler Like a Hawk
Marshmallows go from golden to charcoal in seconds. Every oven is different. If yours runs hot, start checking at 30 seconds. If you’re nervous, you can use the top rack of a conventional oven at 400°F, but it takes longer and doesn’t toast as evenly. Broiler is best.
Use Room Temperature Butter
I can’t stress this enough. Cold butter won’t cream properly with the sugar, and you’ll end up with dense, greasy cookies. Softened butter creates air pockets that give the cookie its structure. If you forget to plan ahead, microwave your butter in 5-second intervals until it’s soft to the touch.
Grate Your Chocolate
For even better melt, grate your chocolate bar instead of using chips. Chips have stabilizers that keep them from melting completely. Freshly grated chocolate spreads into those beautiful, gooey pools that make this dessert so irresistible. It takes 2 minutes extra but is worth it.
Let It Cool Slightly
I know it’s tempting to dig in immediately, but let the skillet rest for 5 minutes. The chocolate needs a moment to set. If you eat it straight out of the oven, it’s just hot goo. Wait 5 minutes, and you get that perfect chewy-gooey texture.
Common Mistakes (and how to avoid them)
- Mistake: Marshmallows burn. Fix: Lower the broiler rack position or reduce time. Keep the oven door slightly ajar if your broiler cycles on and off unpredictably.
- Mistake: Cookie is too cakey. Fix: You used too much flour or overmixed the batter. Measure flour correctly and mix until just combined.
- Mistake: Skillet sticks. Fix: Grease the skillet well. Cast iron needs seasoning, but a little butter goes a long way.
Variations & Substitutions
Once you’ve nailed the basic version, here’s how you can mix it up. I’ve tried all of these, and they’re all winners.
Chocolate Peanut Butter S’mores
Swap the chocolate chips for peanut butter chips. Or, drizzle peanut butter over the cookie before adding marshmallows. This is my husband’s favorite variation. It’s rich, salty, and sweet.
White Chocolate and Raspberry
Use white chocolate chips and sprinkle fresh raspberries on top after toasting. The tartness cuts through the sweetness beautifully. It’s like a dessert pizza.
Nutty Crunch
Add ½ cup of toasted pecans or walnuts with the graham cracker crumbs. The nuts add a wonderful earthiness that balances the sugar. I usually toast them in a dry pan for 2 minutes before adding.
Mini Skillet Version
Divide the dough into 4 small ramekins or mini skillets. Bake for 10-12 minutes. These are perfect for individual servings and look adorable on a dinner table. Great for date night.
Dietary Modifications
Gluten-Free: Use a 1:1 gluten-free flour blend. The texture will be slightly more tender, but it works great.
Dairy-Free: Use dairy-free butter and dairy-free chocolate chips. Marshmallows are often dairy-free, but check the label. Some brands use gelatin, which is fine for vegetarians, but not vegans.
Vegan: Use vegan butter, vegan chocolate, and vegan marshmallows (like Dandies). The result is surprisingly close to the original.
Serving & Storage
I usually serve this straight from the skillet at the dinner table—it looks rustic and stays warm. But here are other ways I’ve enjoyed it:
How to Serve
Classic: Warm skillet with a scoop of vanilla ice cream on the side. The cold ice cream contrasts with the hot cookie. Perfection.
Breakfast for Dessert: Top with whipped cream and a drizzle of caramel sauce. It’s indulgent but feels like a treat.
Party Style: Set out small skillets with different toppings: one with nuts, one with extra chocolate, one with mint chips. Let everyone customize their own.
Storage Instructions
Refrigerator: Store leftovers in an airtight container for up to 3 days. The marshmallows will harden in the fridge, which is normal. Let them come to room temperature before eating, or microwave for 10 seconds to soften.
Reheating: Best method: Microwave for 15-20 seconds to soften the marshmallows. Or, pop it under the broiler for 30 seconds to re-toast. Avoid the oven, as it can dry out the cookie.
Freezing: This doesn’t freeze well. The marshmallows become rubbery when thawed. I recommend making it fresh, or freezing the unbaked dough. Drop dough balls on a sheet pan, freeze, then transfer to a bag. Bake from frozen, adding 2-3 minutes to the cook time.
Pro tip: If you’re meal-prepping, make the cookie base ahead and store it in the fridge. When you’re ready to eat, just add the marshmallows and toast. It saves time and keeps the texture fresh.
Nutrition Information
I’m not a nutritionist, but here’s the breakdown if you’re tracking. This is a rich, indulgent dessert, so portion control is key.
Per Serving (based on 8 servings):
- Calories: 380
- Protein: 4g
- Carbs: 52g
- Fiber: 1g
- Sugar: 36g
- Fat: 18g
- Saturated Fat: 10g
- Cholesterol: 35mg
- Sodium: 180mg
What’s Good:
- Provides quick energy from carbs
- Satisfies sweet cravings effectively
- Can be made with healthier swaps (nuts, dark chocolate)
What to Know:
- High in sugar and saturated fat due to marshmallows and chocolate
- Contains gluten and dairy in the standard version
- Best enjoyed as an occasional treat, not a daily staple
My Take:
Look, this is comfort food with sugar and chocolate. It’s not a health food. But it’s way better than store-bought candy, costs less, and lets you control the ingredients. When I want to make it lighter, I reduce the sugar and use dark chocolate. But usually? I just eat a reasonable portion and enjoy every bite.
Final Thoughts
So that’s my go-to gooey s’mores cookie skillet! I’ve probably talked your ear off at this point, but when you make a recipe this often, you have a lot to say about it.
This has saved lazy nights more times than I can count. It’s my answer to “what’s for dessert” when I’m tired, don’t want to bake a whole cake, and still want something that tastes like a treat. My kids are happy, my husband’s happy, and I’m happy because I’m not stressed about cooking.
Make it yours! Try different add-ins, swap in your favorite chocolates, adjust the marshmallow amount. The best recipes are the ones you adapt to your family’s tastes. If you make this, drop a comment and let me know what you think! I love hearing how recipes turn out in your kitchen. And if something doesn’t work, tell me that too—I’m here to help troubleshoot.
Happy baking! And I hope your kitchen smells half as good as mine does right now.
Frequently Asked Questions
Can I use large marshmallows instead of mini?
You can, but you’ll need more of them to cover the surface evenly. Mini marshmallows toast faster and create a more uniform layer. If you use large ones, cut them in half or quarter them so they brown at the same rate. It takes a bit longer under the broiler, so watch closely.
Why did my marshmallows burn?
Broilers vary wildly in intensity. If yours runs hot, start checking at 30 seconds. Also, make sure your skillet is on the top rack, close to the heating element. If you’re nervous, use the top rack of a conventional oven at 400°F for 5-7 minutes. It won’t get as puffy, but it’s safer.
Can I make this ahead of time?
You can prep the cookie dough ahead and store it in the fridge for up to 2 days. When you’re ready to eat, press it into the skillet, add the chocolate, bake, then toast the marshmallows. Don’t toast the marshmallows ahead, as they’ll deflate and get sticky.
Can I use a different type of skillet?
Yes, as long as it’s oven-safe. Cast iron is best for even heating and crispy edges, but a ceramic pie plate or a glass baking dish works too. Just keep an eye on the baking time, as glass heats slower.
Can I freeze the unbaked dough?
Absolutely! Press the dough into the skillet, wrap tightly in plastic wrap, and freeze for up to 3 months. Thaw in the fridge overnight before baking. You may need to add 2-3 minutes to the bake time if the dough is cold.
Is there a gluten-free option?
Yes! Use a 1:1 gluten-free flour blend for the cookie base. Make sure your chocolate chips and marshmallows are certified gluten-free, as some brands contain wheat starch. The texture will be slightly more tender but still delicious.
Can I add nuts?
Definitely! Toasted pecans, walnuts, or almonds add a great crunch. I usually add them with the graham cracker crumbs. Just make sure they’re finely chopped so they distribute evenly.
Pin This Recipe!
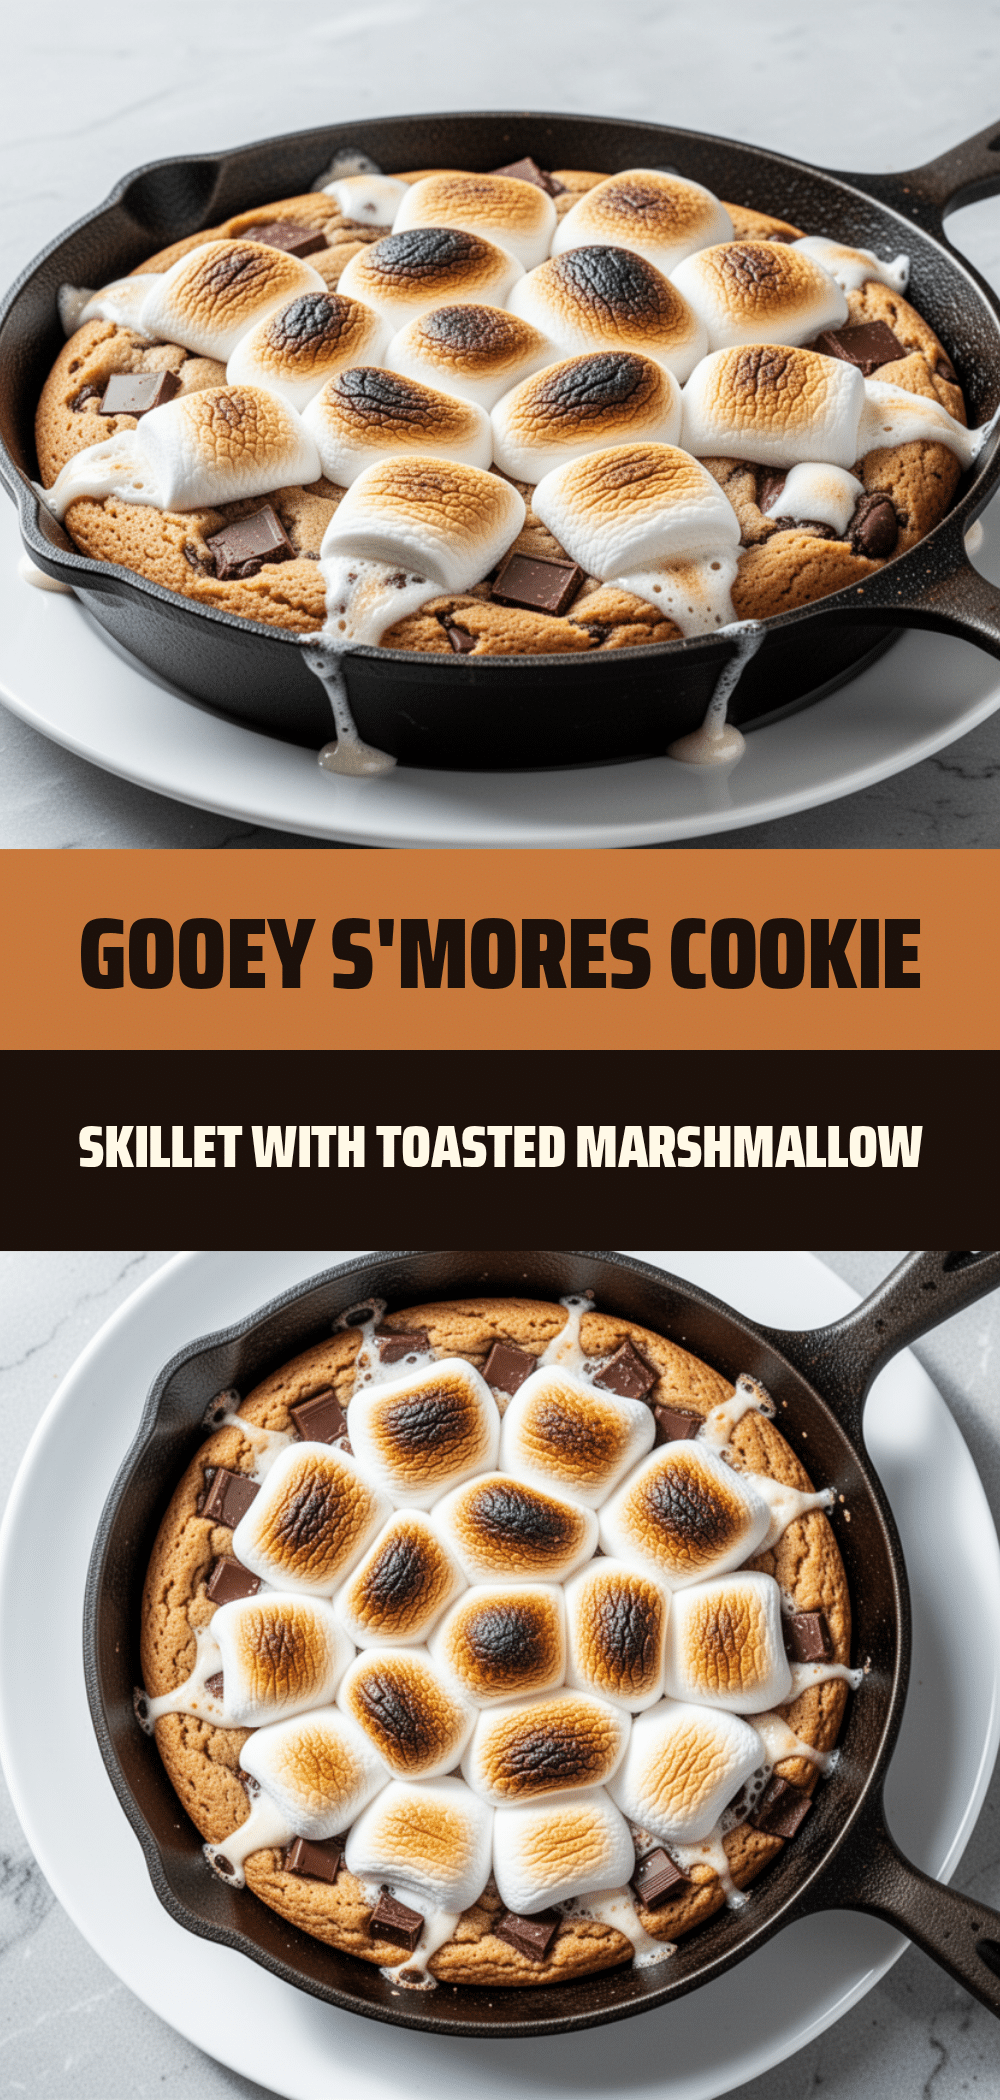
Gooey Smores Cookie Skillet: Easy Toasted Marshmallow Dessert
- Total Time: 30 minutes
- Yield: 8 servings 1x
Description
A warm, melty, and nostalgic dessert that combines a chewy chocolate cookie base with toasted marshmallows and graham cracker crumbs, baked in a skillet for easy sharing.
Ingredients
- 1/2 cup (115g) unsalted butter, softened
- 1/2 cup (100g) granulated sugar
- 1/2 cup (110g) light brown sugar
- 1 large egg
- 1 teaspoon vanilla extract
- 1 1/2 cups (190g) all-purpose flour
- 1/2 teaspoon baking powder
- 1/2 teaspoon salt
- 1 cup (170g) semi-sweet chocolate chips or chopped chocolate
- 2 cups (120g) mini marshmallows
- 1/2 cup (50g) graham cracker crumbs
- 1/2 cup toasted pecans or walnuts (optional)
Instructions
- Preheat oven to 350°F (175°C). Lightly grease an 8-inch cast-iron skillet and line with parchment paper if desired.
- In a mixing bowl, cream together the softened butter, granulated sugar, and brown sugar until light and fluffy (2-3 minutes).
- Add the egg and vanilla extract, mixing until just combined.
- Stir in the flour, baking powder, and salt until the dough is thick and sticky.
- Press the dough evenly into the prepared skillet, aiming for about 1/2-inch thickness.
- Scatter chocolate chips over the dough and bake for 12-15 minutes until edges are set but center is soft.
- Turn on the broiler. Sprinkle mini marshmallows evenly over the hot cookie.
- Broil for 1-3 minutes, watching closely, until marshmallows are golden brown and puffy.
- Immediately sprinkle graham cracker crumbs (and nuts, if using) over the hot marshmallows.
- Let cool for 5-10 minutes before serving warm.
Notes
Ensure butter is softened to room temperature for proper creaming. Watch the broiler closely as marshmallows can burn quickly. For a gluten-free version, use a 1:1 gluten-free flour blend. For dairy-free, use dairy-free butter and chocolate. For vegan, use vegan butter, chocolate, and marshmallows.
- Prep Time: 10 minutes
- Cook Time: 20 minutes
- Category: Dessert
- Cuisine: American
Nutrition
- Serving Size: 1/8 of the skillet
- Calories: 380
- Sugar: 36
- Sodium: 180
- Fat: 18
- Saturated Fat: 10
- Carbohydrates: 52
- Fiber: 1
- Protein: 4
Keywords: s'mores, cookie skillet, marshmallow dessert, cast iron dessert, easy dessert, family friendly, comfort food